Using a Curves Adjustment Layer with the Blend Mode set to Screen to correct exposure in Photoshop.
In general, where images are too dark, this is referred to as underexposed. Conversely, images that are too light are overexposed. Photos taken on sunny days are prone to being overexposed.

An animated gif to illustrate a correct exposure, an underexposed shot and an overexposed one.
In an ideal situation, the aim is to try and get the correct exposure in-camera. In doing so, less time will be spent in front of your computer post-processing.
In this article, I will describe how to easily correct photos that are underexposed (photos that are too dark) and overexposed (photos that too light) using Adjustment Layers and Blend Modes in Photoshop. I will then describe how the Dodge and Burn tools work to target specific areas to brighten or darken your image.
The following techniques are not new, but have been around for quite some time in Photoshop. The methods are still very effective, quick and easy to do.
- Overexposed photos – Blend Mode: Screen with Curves Adjustment Layer.
- Underexposed photos – Blend Mode: Multiply with Curves Adjustment layer.
- Dodge & Burn tools – New Layer above the image filled with 50% gray – Blend Mode: Overlay/Softlight.
Read: The First 3 Photoshop Blend Modes You Need to Understand
All of the images I used in this article are the jpegs straight out of the camera, completely unedited. I want to demonstrate how effective these techniques are when applied.
Correcting Overexposed Images
A typical washed-out look from an overexposed photo.
As you can see, from the first overexposed shot. The subject has that washed-out look. The subject is overexposed by a stop and a half. I applied a Curves Adjustment Layer and changed the Blend Mode to Multiply. Straight away, the contrast of the image has dramatically increased.
The result is quite dramatic when the Curves Adjustment Layer (with Multiply blend mode) has been applied, but there is a noticeable change in color shift.
The Multiply Blend Mode can cause a shift in color, but this is easily remedied. To adjust the color balance, go to the Properties panel (CS6) and choose the channel you want by clicking on the menu left of the Auto button. In this case, the color was too cool, so I adjusted the three channels (Red, Green and Blue) to get the result I wanted.

The color balance has now been modified by adjusting the red, green and blue channels in the the properties panel for the Curves layer.
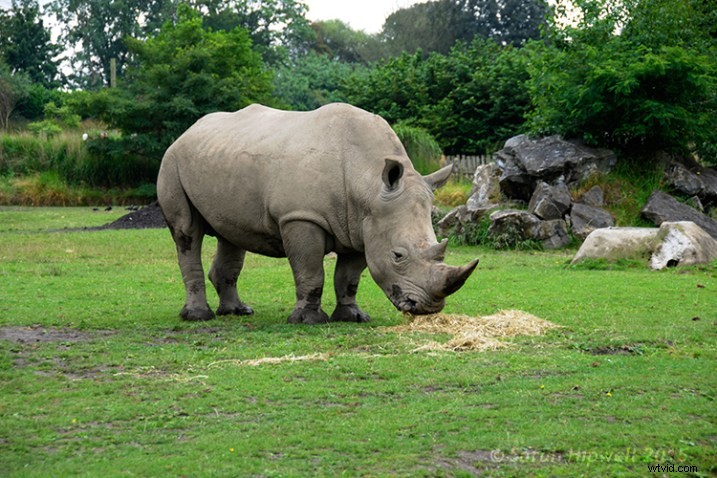
In the image of the Rhino below, when I applied the adjustment layer and changed the Blend Mode to Multiply, the effect caused a color shift to green, and the intensity of the effect was too dramatic. I adjusted the color balance by choosing the green and red channels in the Properties panel. I then reduced the Opacity to 55% of the layer to further fine-tune the image.
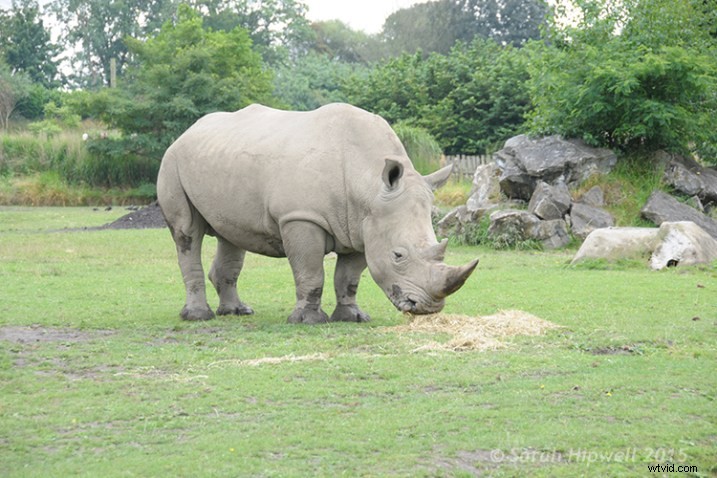
Overexposed photo of a Rhino taken at Dublin Zoo.
A Curves Adjustment layer with the Blend Mode set to Multiply.
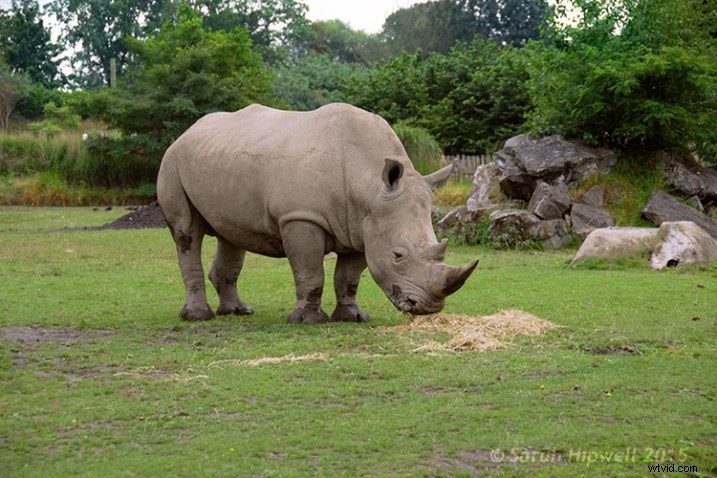
I reduced the Opacity of the Curves Adjustment Layer as the effect was too much. I then adjusted the color balance by tweaking the red, green and blue channels.
Correcting Underexposed Images
Underexposed shots are typical when working outdoors on sunny days. Usually, the background is properly exposed but your subject is silhouetted. Similarly, if the background is washed out but your mode/subject is exposed correctly.
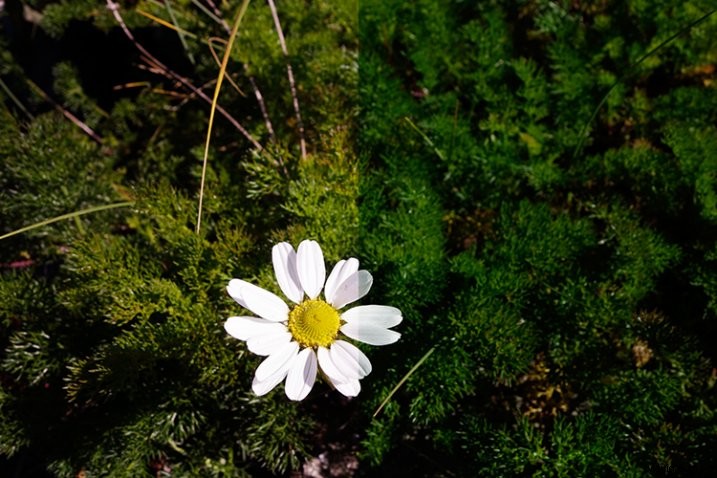
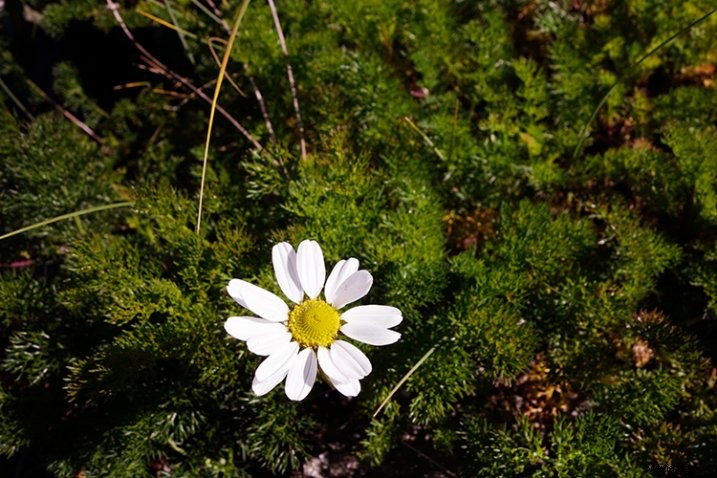
For example, the photo of the flower was taken at the beach on a very sunny day. I focused and exposed for the flower, which meant the background was way too dark. I applied a Curves Adjustment Layer and changed the Blend Mode to Screen. The shadows became lighter, but I duplicated this layer again as I wanted more detail in the shadows. (In most cases, this effect of using the one Adjustment Layer is enough but if your photo is very washed out, or very dark, you may need to duplicate the Adjustment Layer and adjust the opacity accordingly.)
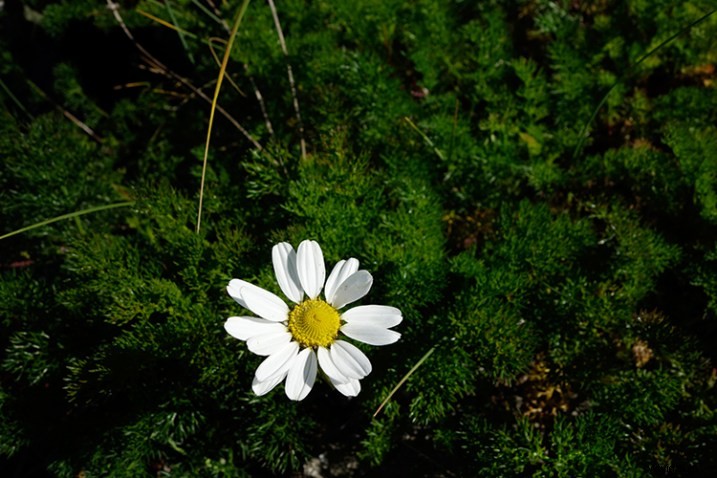
An underexposed flower in green foliage.
I reduced the opacity of both layers and added a mask to bring back the highlights on the flower’s petals. Similar to the Multiply Blend Mode, the Screen Mode can cause a shift in color. In this instance, the photo had too much green. Similar to the photo above, I was able to adjust the color balance in the Properties panel and chose the green channel to modify the color balance.
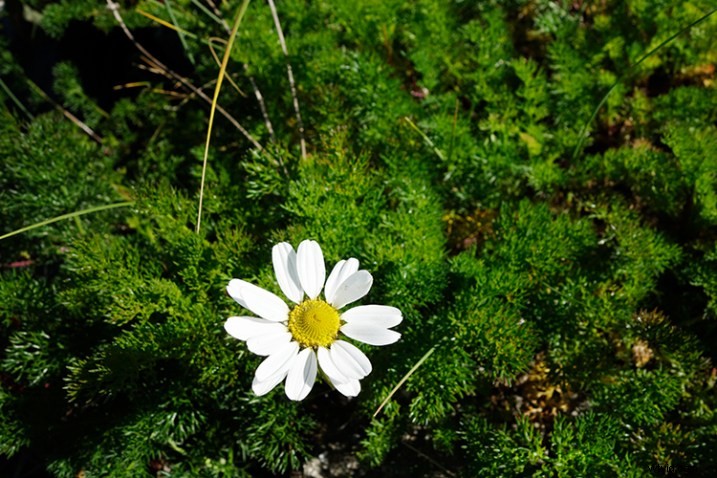
Two Curves Adjustment Layers were applied to this photo. I wanted to bring out more detail in the shadows.
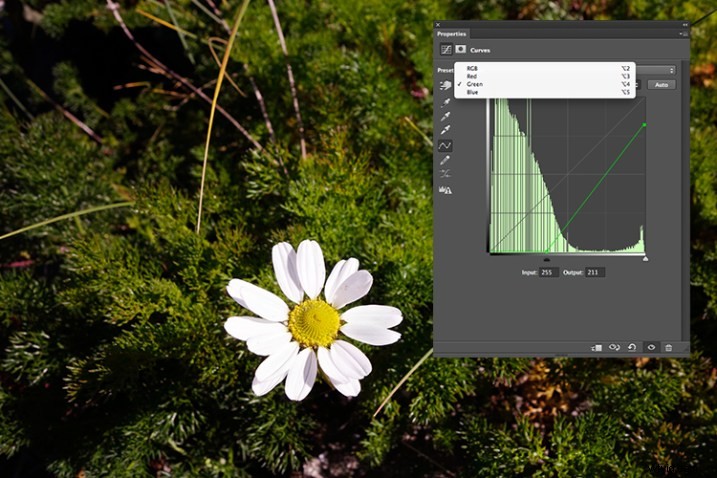

By going into the different channels, it’s easier to target the specific colour that needs adjusting. In the image of the flower, I wanted to reduce the green colour. So by clicking on the top right point of the graph (output) and dragging it down. I then moved this Input slider to the right to bring in some magenta. As this an adjustment layer, you can play around with each of the colour channels and experiment using the input and Output sliders in an non-destructive way.

A more accurate way would be to plot different points on the grid to get that classic S shape, which is what the Curves Adjustment is know for.
Opacity was reduced on each of the two Curves Adjustmnet layers. The green channel was adjusted to modify the color balance.
The shot of the hippo below was taken at Dublin Zoo and the day was quite overcast. As before, I added a Curves Adjustment layer and changed the Blend Mode to Screen. I then adjusted the red, green and blue channels to correct the color balance. I reduced the opacity on the Adjustment Layer only slightly.
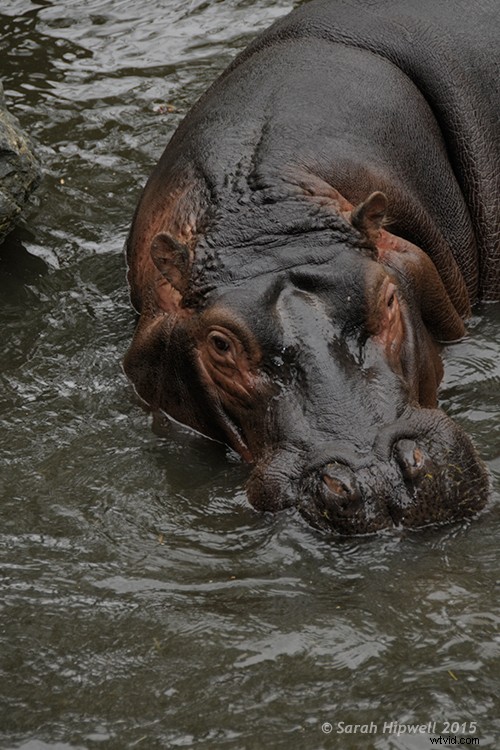
A underexposed shot of a hippopotamus taken at Dublin Zoo
A Curves Adjustment layer with the Blend Mode set to Screen.
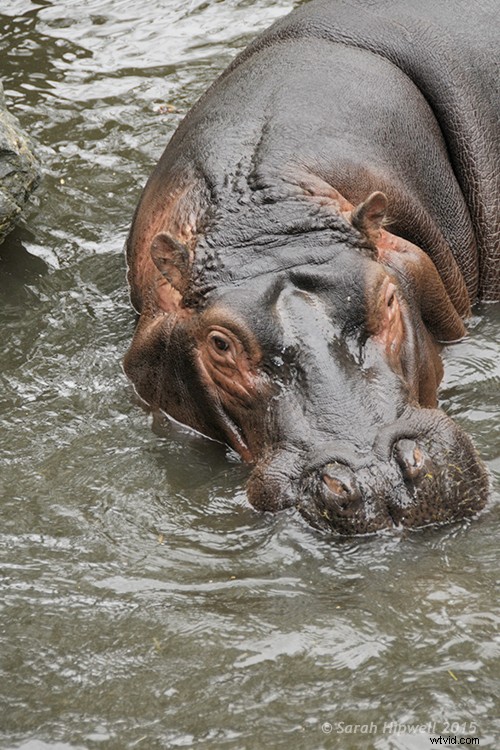
The shot of the Hippo was taken at Dublin Zoo and the day was quite overcast. As before, I added a Curves Adjustment layer and changed the Blend Mode to Screen. I then adjusted the red, green and blue channels to correct the color balance. I reduced the opacity on the Adjustment Layer only slightly.
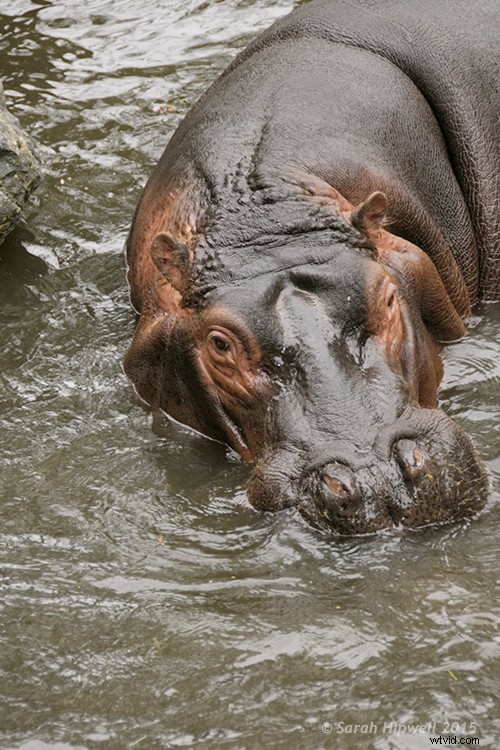
The Opacity was only slightly reduced for this image but the color balance again had to be adjusted in all the channels.
So by using an adjustment layer and changing the Blend Mode to Multiply or Screen, overexposed and underexposed shots can be easily fixed in a few steps. But what if specific areas of your image only need the exposure corrected?
Dodge and Burn
The Dodge tool lightens and the Burn tool darkens specific areas of your photo. This is why the Dodge and Burn tools are really useful if you don’t need to apply a global exposure correction.
I use these tools a lot in my workflow, it can create highlights in hair. When I shoot headshots, the eyes are important and the Dodge and Burn tools can also really enhance eyes and make them sparkle. Other forms or parts of the body can also be accentuated and given more depth by using these tools.
However, the Dodge and Burn tools, if used directly on a image, work in a destructive way. So to use these tools non-destructively, you will need to create a new blank layer above the image that you are working on, fill it with 50% gray and change the Blend Mode to Overlay or Softlight.
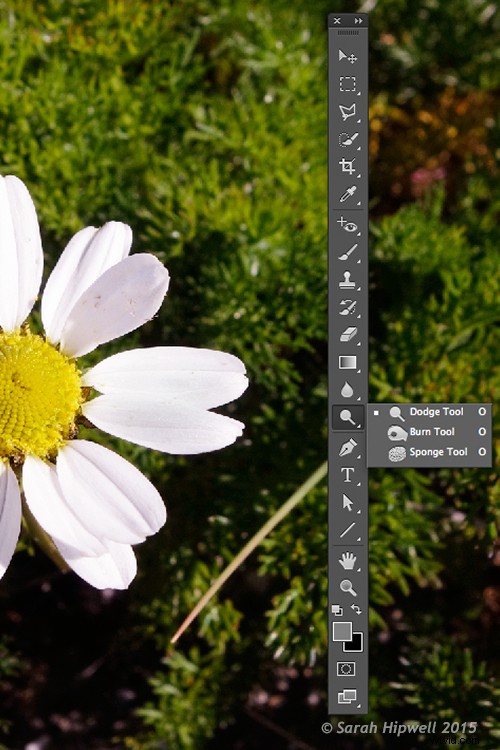
Where to locate the Dodge and Burn tools in Photoshop.
Before you begin, use a brush with the hardness set to soft (0-30). In the Tools Options Bar, make sure that you set the Range to Midtones, Exposure is set to low (8-10%) and that the Protect Tones is checked, as shown below.

Set the Range to Midtones. Keep Exposure at a low setting. Make sure the Protect Tones box has been checked.

In this photo of the dog, I want to create some highlights on the dog’s fur. Well, fur is like hair!
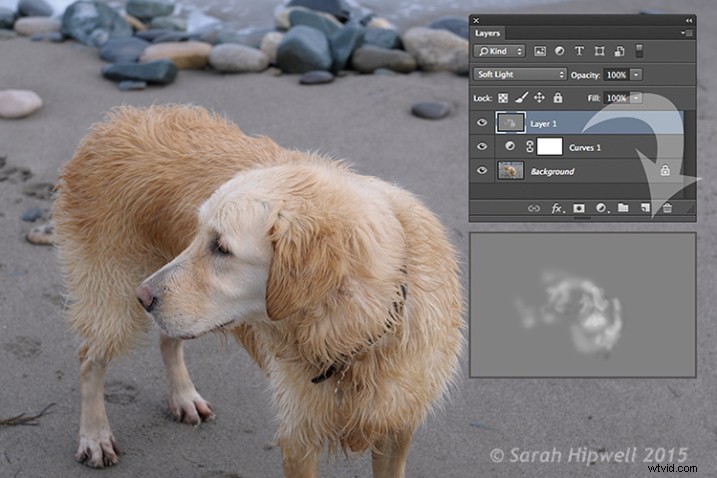
You can see the difference in what a little dodging can do in this image of the dog with the photo above.
If you feel that you have overdone either the Dodge or the Burn tool, just lower the opacity of the layer.
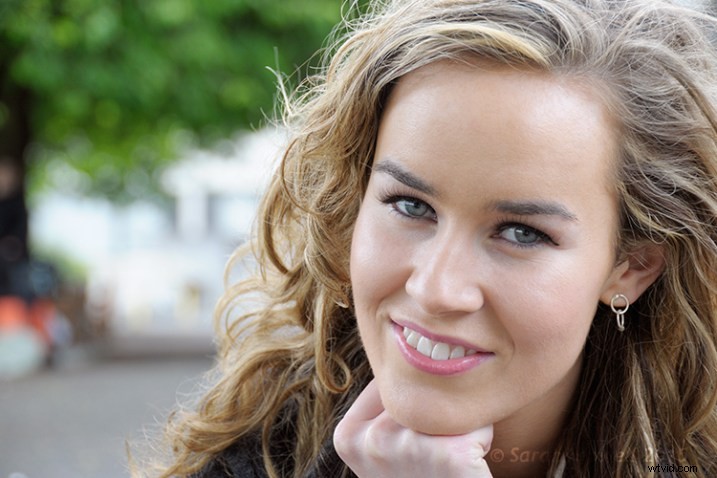
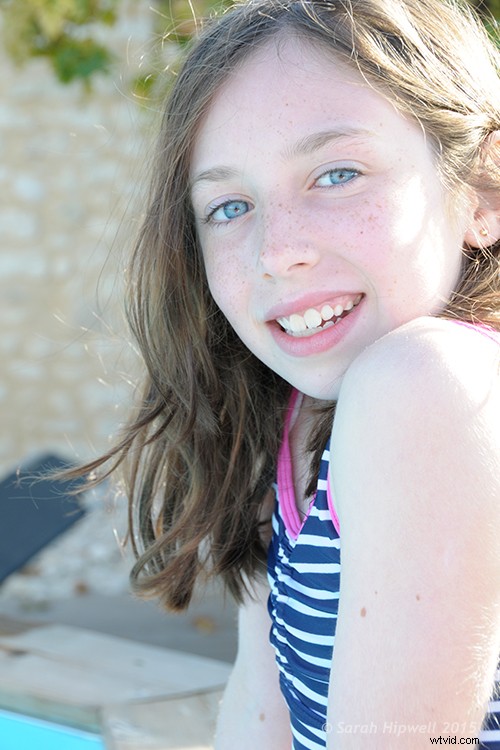
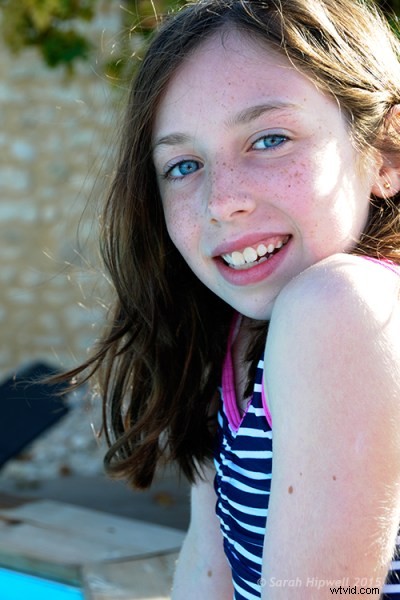
Lisa, before any Dodging or Burning has been applied to the image.
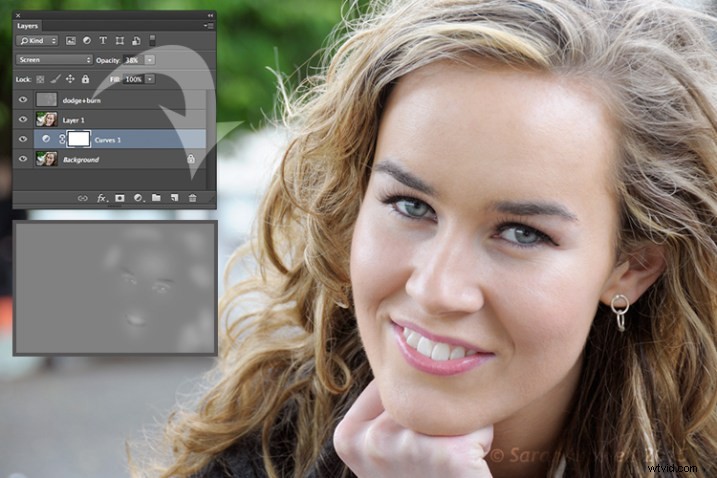
Just a little dodge and burn can make a difference to your photo.
Even subtle differences can enhance your images. In this image of Lisa, I applied some dodging to her eyes, I used the Burn tool to emphasize her lips. I then added a bit more dodging to the face and hair.
I hope you find these techniques useful? Maybe, you have some of your own? If so please share in the comments below.