I love long exposure images with smooth water and streaking clouds.
But long exposures take time and specific equipment. See my article on “How to Shoot Daytime Long Exposure Photography”. I might not have my tripod or the neutral density filters I need to make long exposures.
In other words, I can’t always create the long exposures I love in the field.
In this article, I’ll show you two ways to create a long exposure look by blending layers in Photoshop. I use the first method if I have only one image to work with. I use the second method if I have multiple images of the same scene.
Long Exposure Blending with One Image
If I have an image taken at a fast shutter speed, I can simulate a long exposure look in Photoshop. Let me show you an example.
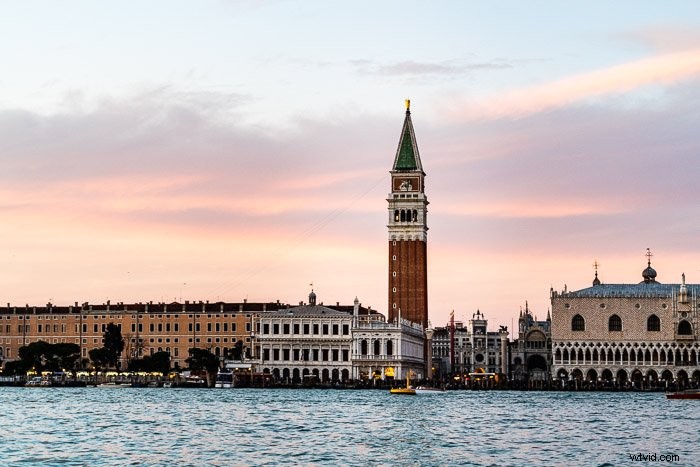
I was on a photo shoot in Venice, Italy. I wasn’t planning on being out for sunset, so I didn’t bring my tripod or neutral density filters. Big mistake! The sunset over the city was amazing.
I shot this image at 1/80th of a second. Not slow enough to blur the water or streak the clouds. I like the image. The color is nice. But I regretted not being able to use a slower shutter speed.
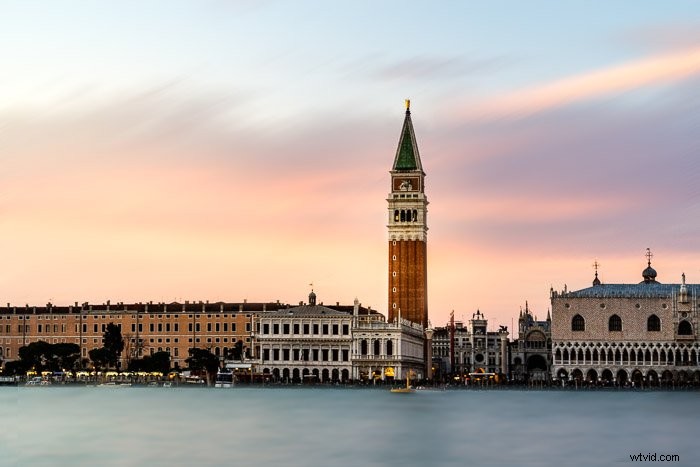
I used layer masks in Photoshop to simulate a long exposure look. I’ll show you the final image then I’ll take you through the steps to blur the water and the clouds in the final image.
How to Create Long Exposure Water Blur in Photoshop
Step 1: Open Image in Photoshop
Step 2: Select Water and Copy onto New Layer (Shortcut: ⌘-J)
Be really careful to select only the water. I mask buildings or other elements that I do not want to blur.
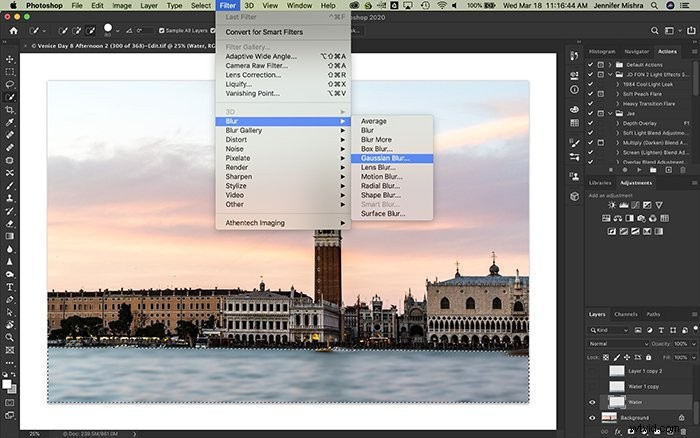
Step 3: Apply Gaussian Blur to Water Layer
This is only my first layer so my blur will look overdone. I usually add between 10.0 – 20.0 pixels of blur.
Filter > Blur > Gaussian Blur
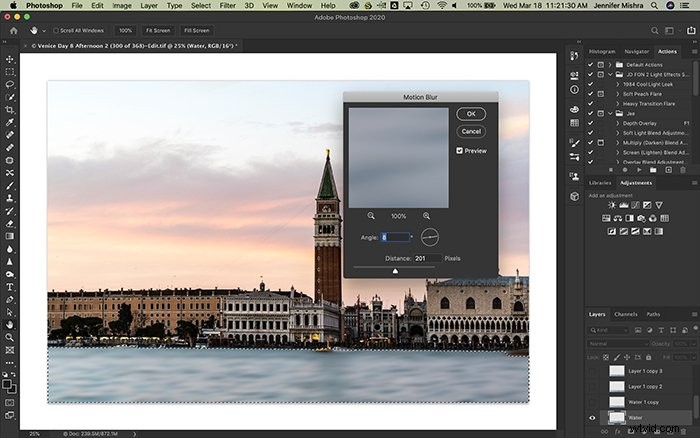
Step 4: Apply Motion Blur to Water Layer
I also add between 100 and 200 pixels of motion blur to my water layer. I usually add a slight angle that reflects the water’s natural movement.
Filter > Blur > Motion Blur
Step 5: Duplicate Water Layer
Step 6: Reduce Opacity to 30%
Reducing the opacity allows the original blurred water layer to show through.
Step 7: Shift Duplicate Water Layer
I shift my second water layer a little bit left or right, up or down. This simulates what happens when I take a long exposure in camera. The details smooth out because the water moves over time. In this way, you are digitally blending layers.
Step 8: Repeat Steps 5 Through 7
I copy the water layer at a lower opacity a few times. Each time, I shift the layer a few pixels in a different direction. Shifting the layer fills in gaps and smooths out the details.
For some images, I need only a couple of water layers. For other images, I need four or five layers. I’m aiming for a realistic long exposure look.
Once I’m happy with the water blur, I move onto the clouds.
Create Smooth Cloud Blur
I find smearing clouds is easier than smoothing water. I can create a natural long exposure look in fewer steps.
Step 1: Select Sky and Copy onto New Layer (Shortcut: ⌘-J)
Step 2: Add motion blur to sky layer
I imagine the direction the clouds might have been moving and blur generously. Somewhere between 200 and 400 pixels.
Filter > Blur > Motion Blur
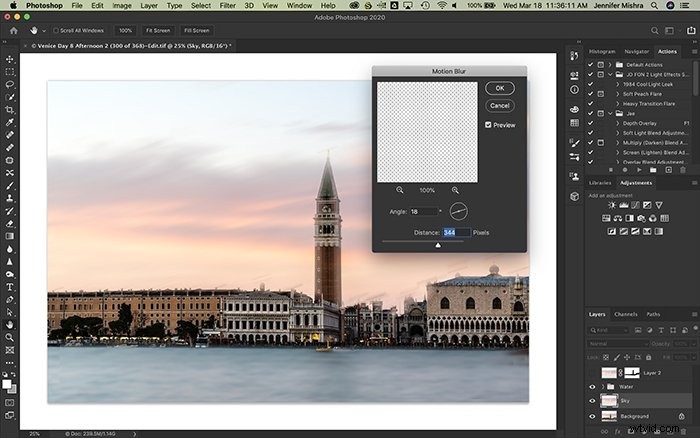
Step 3: Hide Blur Around Buildings
Notice in the screenshot of the sky, the clouds blur over the buildings. Also, details along the tops of the buildings blur. I create a layer mask and hide these.
To create a layer mask, choose the Layer dropdown menu. Select Layer Mask and Reveal All. Using a black paint brush, I hide the clouds in front of the buildings and details along the roofline.
Layer > Layer Mask > Reveal All
Clouds look natural by simply adding a motion blur but creating naturally smooth water takes a few more layers.
Long Exposure Blending with Multiple Images
Photoshop has a tool for blending multiple images. The tool isn’t very obvious, and it takes some preparation. But once you know how to use it, you can blend multiple exposures together for a long exposure look. I’ll use another photo from Venice, Italy as my example.
In this example, I was photographing a model in Venice. If I used a long exposure, the model would blur. I only wanted the water to blur.
My shutter speed was set at 1/1000 of a second, and I took five exposures. Here’s one of the exposures. Notice the detail in the water.
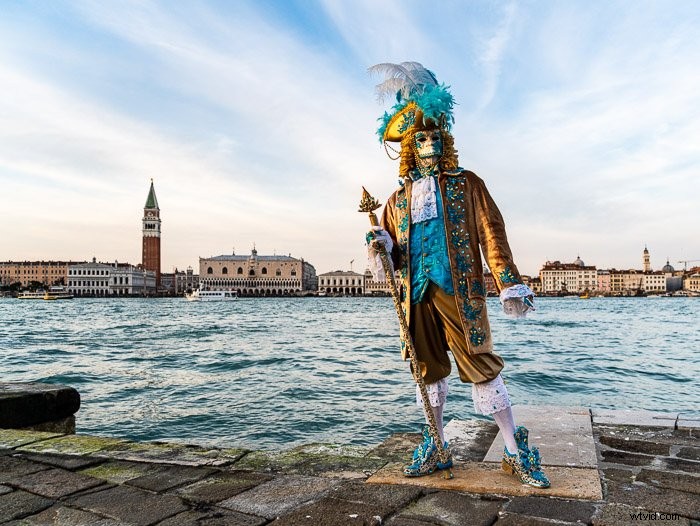
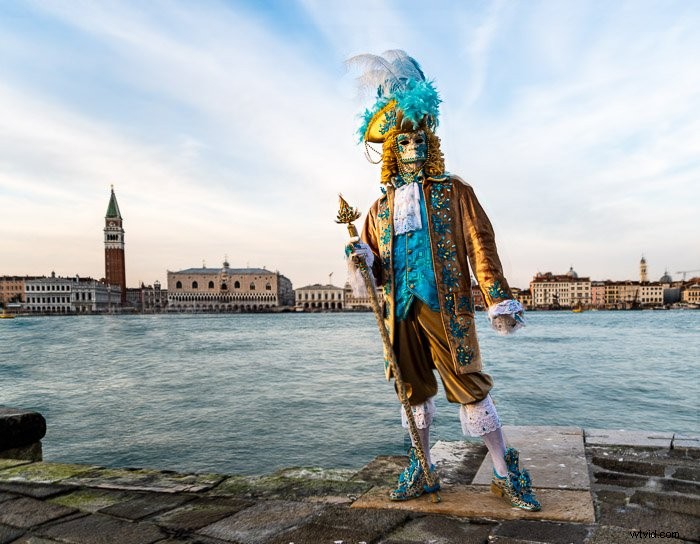
I’ll show you the final image then take you through the steps to blur the water.
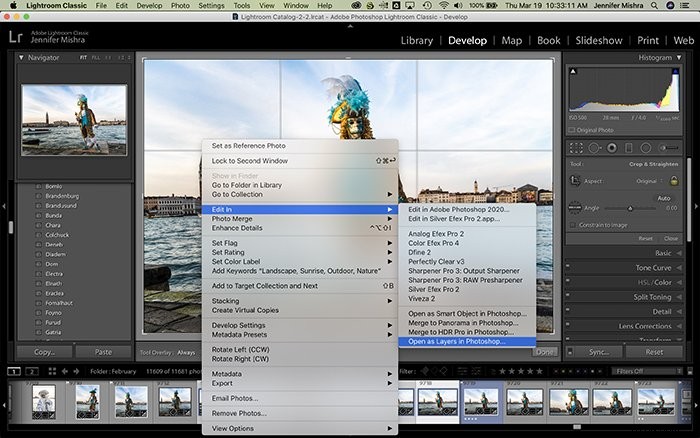
Step 1: Open Images as Layers in Photoshop
Select the images you wish to blend. There is a special command for this in Lightroom. Go to the Photo tab and select Edit In. Then select Open as Layers in Photoshop.
Photo > Edit In > Open as Layers in Photoshop
If you already have the individual files open in Photoshop, select Files dropdown menu then choose Scripts and Load Files Into Stacks. Select all open files. This will create a new file with images as layers.
File > Scripts > Load Files into Stacks
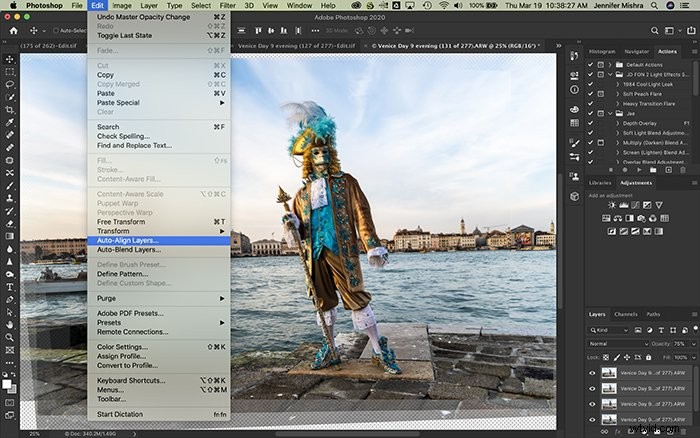
Step 2: Auto Align Layers
Highlight all the layers.
Under the Edit tab, there is the option to Auto-Align Layers. Choose the Auto option.
Edit > Auto-Align Layers
The static objects like the buildings will line up. Because I was hand holding and my model moved a bit, some images tilted slightly and did not quite line up.
It was impossible to align the model across layers. I masked out the model in all but the base layer.
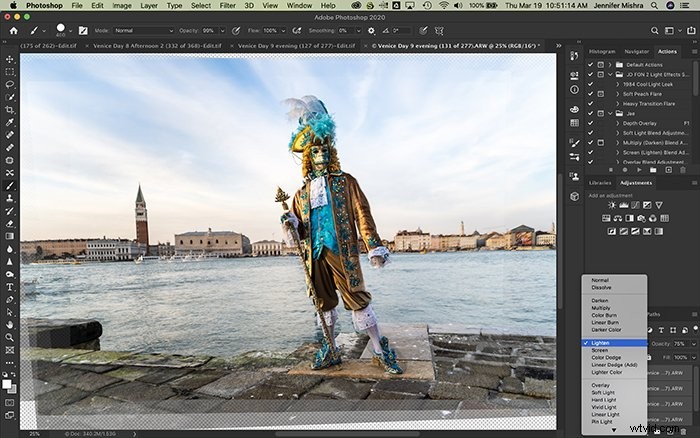
Step 3: Apply Lighten Blend Mode
At this point, I changed the blend mode for all but the base layer to Lighten.
This blend mode compares the layers and removed the darker elements. The buildings and the paving did not move between the scenes, so Photoshop sees no difference between the layers. But the water does change. This blend mode smooths out the ripples.
If this doesn’t give me the look I want, I move on to the next step.
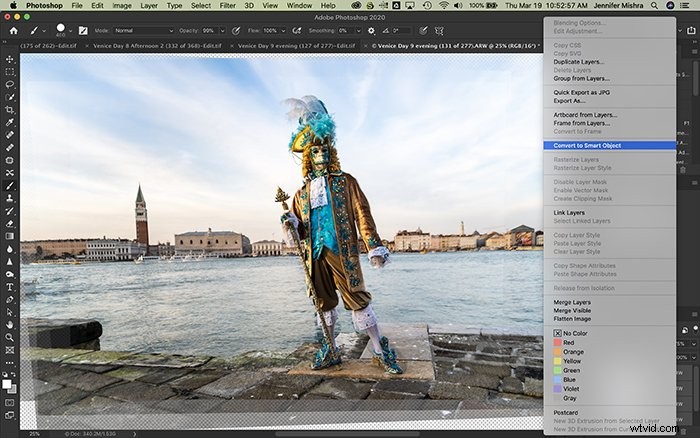
Step 4: Convert Layers to Smart Object
Select layers and select the Layers tab. Select Smart Object and Convert to Smart Object.
Layers > Smart Object > Convert to Smart Object
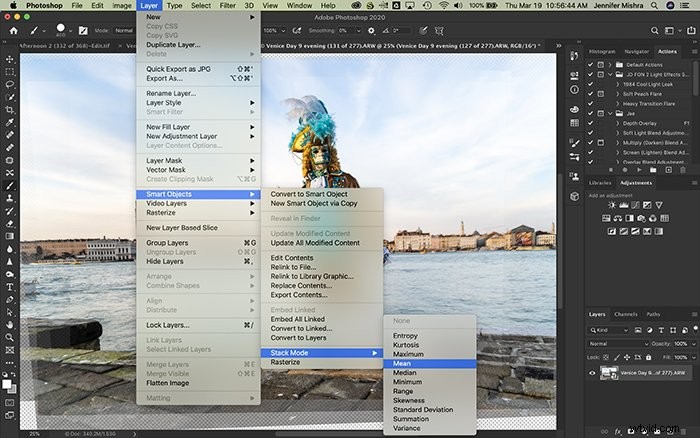
Step 5: Blend Layers using Stack Mode
Now that the layers are a smart object, I have some options on how I blend these layers. Go to the Layer tab and select Smart Objects. Then select Stack Mode and Mean.
Layer > Smart Objects > Stack Mode > Mean
Photoshop will compare the layers and take an average. This means evening out extremes, which is exactly what I want to do with the water.
If you’re trying to remove people from a crowded scene using long exposure, select MEDIAN instead. When I do this, people magically disappear! Well, most of them anyway. If people are still between frames, they will show up in the final image.
Step 6: Crop Image
For my final step, I tidy the image. I crop to remove odd edges created by the auto-align process. I may also have to do a little clean-up work with a clone or spot removal tool.
Conclusion
In this article, I showed you the steps I take in Photoshop to simulate the look of a long exposure using layers. Use the first process if you have only one image to work with. Use the second process if you have multiple images of the same scene taken in close succession.
Both processes use layers and blending modes in Photoshop to smooth water and clouds. This allows me to create long exposures in post-processing.