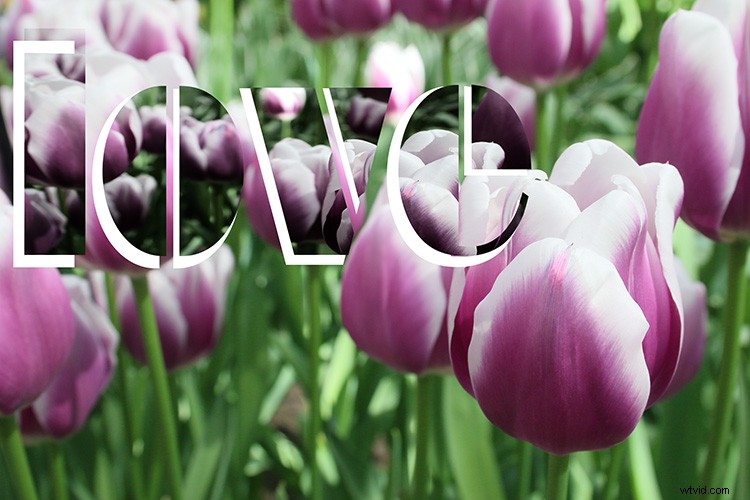
Do you want to make a photo-card for your loved one? Or maybe a flyer for your business? Or add some personalized notes to your photos that turn your album into a scrapbook? If you ever tried to add text on your photos and ended up just covering up the image, this article is for you.
Although Photoshop is not a software specially-made for design, it does have some design functions, one of which is the text tool. You don’t need to learn any extra software to integrate text into your photos, you’ll learn how to use layers and masks in Photoshop to overlap the text and the image so that they interact which results in integrated and elegant images.
Since Valentine’s Day is so close, I’ll give you some easy-to-do examples to make a card for your loved one. However, you can apply the same steps to any image to add text for any other purpose.
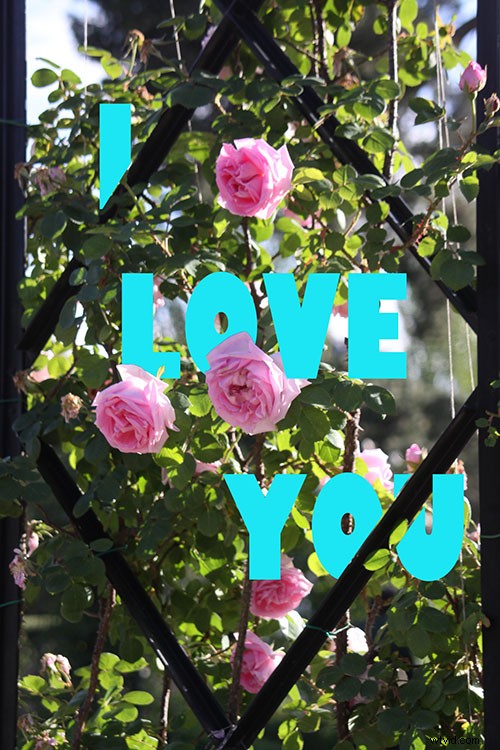
Overlapping
In this first technique, you won’t apply any effects to the text itself, therefore the result is a clean and simple design.
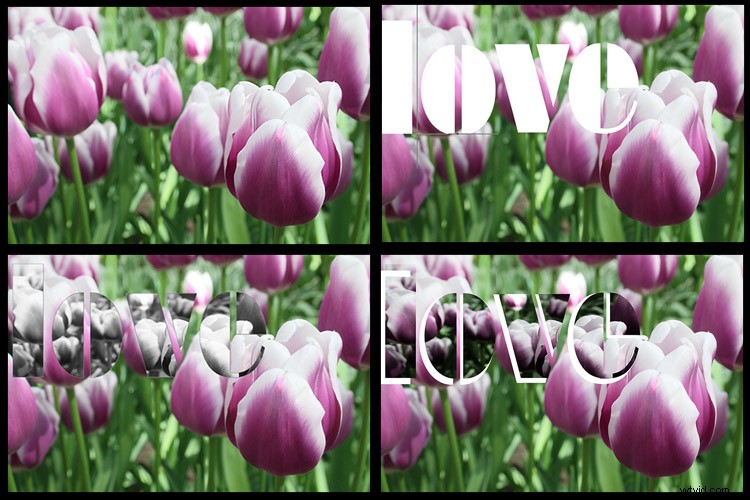
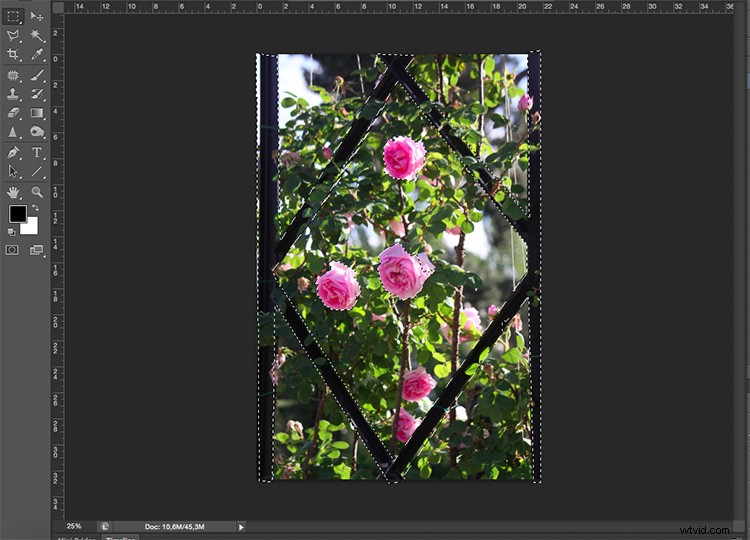
First open an image of your choosing in Photoshop, one that goes well with the message you want to convey. You can later move the text to make some final arrangements, however, you do need to start with an idea for the text placement. This is because you need to select the part of the subject that you want to overlap with the text. I used the Quick Selection tool, but you can use whichever is best for you.
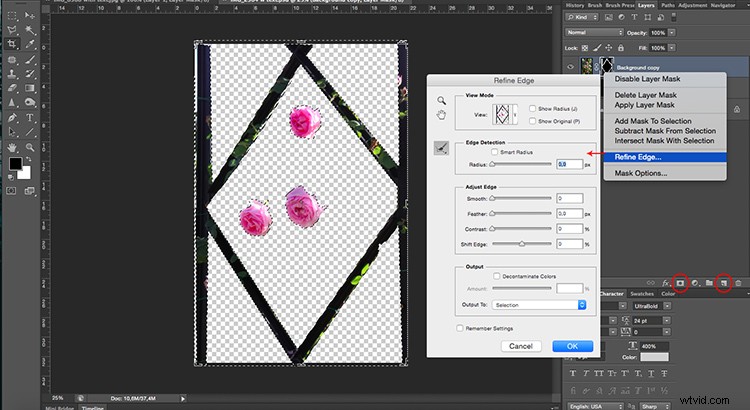
Then duplicate the layer by dragging it to the new layer icon at the bottom, or by going to Menu > Layer > Duplicate Layer (you can also use the keyboard shortcut Cmd/Ctrl+J). Then you will need to add a mask to the new layer by clicking on the layer mask button from the bottom of the Layers palette.
Whatever was selected is now the only thing visible from that layer. You can also refine the edges of this selection if you right-click the layer and select Refine Edge.
Add your text
Then, select the Text Tool and write your message. You can choose the font, size and color from the menu as you would in any word processor like Microsoft Word. Now your text is blocking your image but all you need to do to create the overlapping is to drag the text layer in between the background and the selected layers.
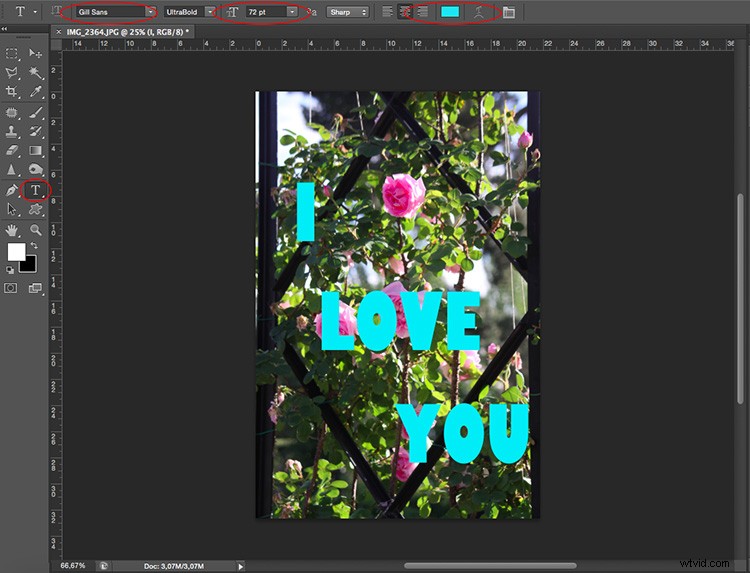
You can move or transform the text to make it fit better as well. Finally, if you want to have a part of the text appear to be behind the image and part in front, to make it more integrated, you can paint on the layer mask with a black brush (black conceals – white reveals) to hide the parts “behind”.
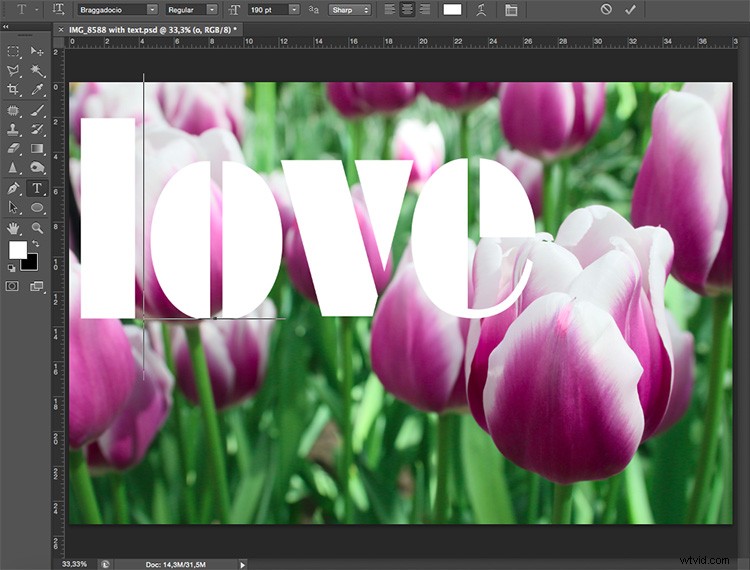
Picture in Picture
Another way to integrate text and image is to use the same background photo as a pattern for the letters and just change the blend to give it a personalized effect.
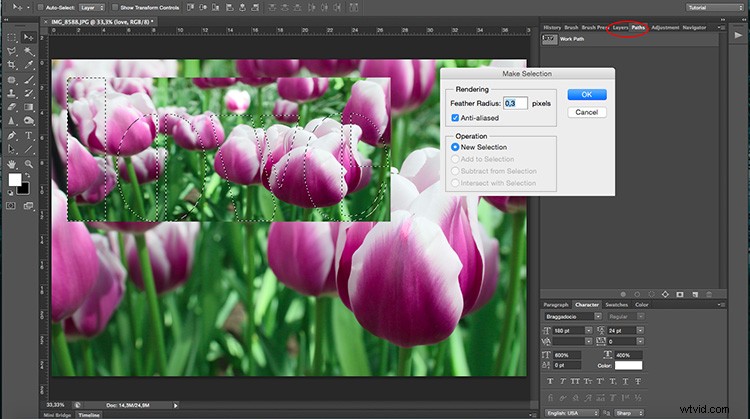
Open an image of your choosing in Photoshop. Then using the Text tool, write your message in a font that is wide enough to show the image inside, in this case, I used Braggadocio.
Add the photo
Now go to Menu > File > Place and choose the same photo that you are using in the background. Adjust its size to fit the text.
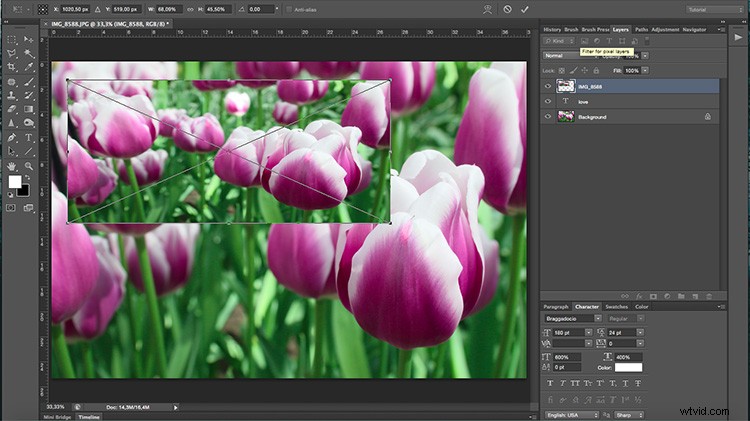
Go back to the Layers palette and right-click the text layer. In the drop-down menu choose “Make a work path”. Then from the Path palette, right-click the work path and click on “make selection”. This will create a selection around the letters, but it will keep the path to make the selection later in other layers where you are going to need it.
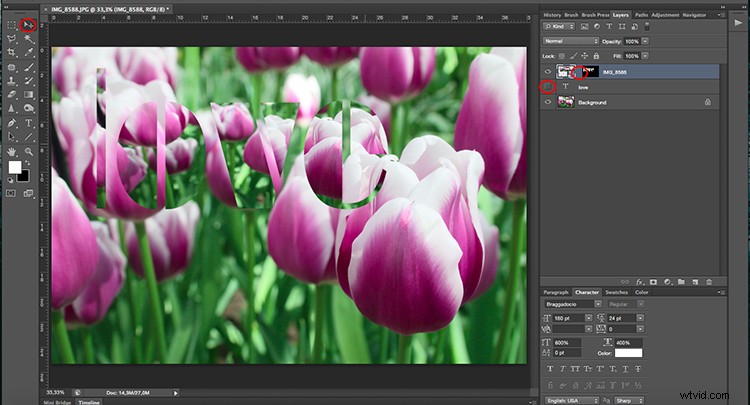
Then go back to the Layers palette and select the layer with the second image (the one you placed and added a layer mask to); this will have the shape of the letters.
If you want to rearrange the image inside the letters you can make the original text invisible by clicking on the eye icon on the left side of the layer name, and then unlink the mask by clicking the chain in between the thumbnails. That way you can just drag the photo until you are satisfied with how it looks (see below).
Once the image is placed the way you want it, you can apply any effect that you like. In this case, I added an adjustment layer with a Gradient map, this can be done by going to Menu > Layer > New Adjustment Layer > Gradient Map; or by clicking the shortcut button at the bottom of the palette. From there I chose a greyscale gradient.
Finishing up
Finally, I changed the blending mode of the layer to Multiply. You can do this or choose any other blending mode from the drop-down menu on the top part of the layer palette. Then I activated the original text layer (which was white if you remember) and I moved it a little bit so that it would show underneath and it gave it a border to separate it.