Normally when talking about digital blending, people will first think of exposure blending. That is correct, but it can do more than that. There is several situations where digital blending can be very handy. Not only can it help create a better photo, it also eases you in your shooting experience. In this article, I will share how I use a digital blending in Photoshop to create a much more interesting composition.
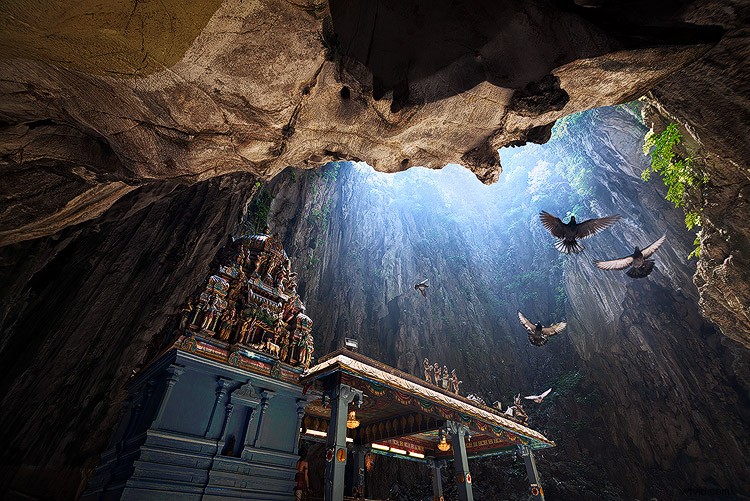
I took the photo above of Batu Cave in Malaysia. I chose to add a few pigeon photos from a series that I captured, and blended them all together into a single photo with the digital blending technique.
Select images
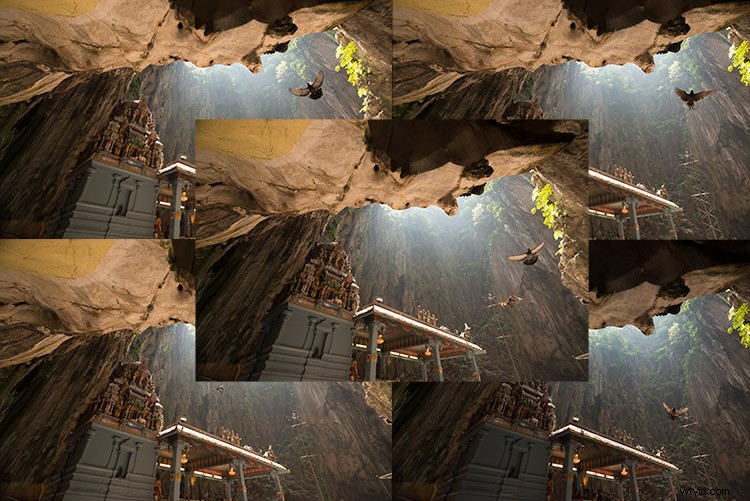
Here are the raw photos that I going to use. You can see that there are pigeons in different locations in each of the photos.
Open Photoshop
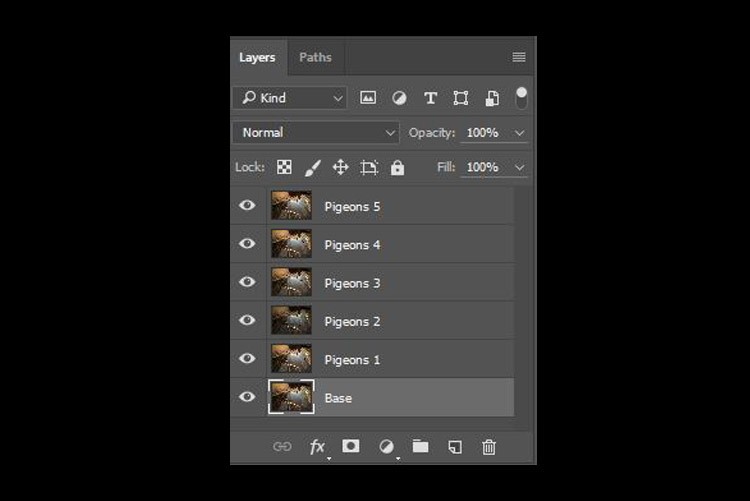
Next with Photoshop open, I load all the photos into one place as different layers. You can rename them if you want, as I did here.

Back up for a second: How the shots were done
Notice there’s a “base” layer at the bottom. That image was captured with different camera settings compared to the pigeon shots. I do this because normally before capturing any additional photos such as the pigeon images, I will first take a few photos with the BEST camera settings for that situation. In this case, that was ISO 100, aperture of f/8, 1/30th of a second shutter speed.
However, the 1/30th shutter speed was too slow to capture any photos of pigeons. So I needed a faster shutter speed which ended up with camera settings of; ISO 800, f/5, and 1/640th of a second. This allowed me to freeze the movement of the pigeons, but at the same time, it also generated more noise in the photos (ISO 800 compare with ISO 100) and a slightly more shallow depth of field (f/5 compared with f/8) resulting in a softer background.
So the ideal scenario is to have them both together in one final image. Using the digital blending technique you can have the best image quality photo with lesser noise and better focus, and then blend in only the pigeons from later photos. The pigeons will appear to have more noise than other areas of the photo but only in very small areas and you can do a separate Noise Reduction just for the pigeons if needed.
Shooting sequence
Here is the shooting process in sequence, to give you a better picture:
- Decide on a composition.
- Take your photo with the best (optimal) camera settings for the scene.
- Without moving your composition, change the camera settings to capture anything that looks interesting to you. For example; animals, people that able to bring out the atmosphere of the place such as monk praying in a temple, or even any lifeless objects such as trains or boats, or anything else you can think of or notice in the scene.
Photoshop steps
Step #1 – Turn off some layers
Back in Photoshop, you will see there is an “Eye” icon beside each layer. This means that all these layers are visible. Temporary, let’s hide all the pigeon photos first by clicking on the “Eye” icon to uncheck each layer. Leave only two visible, the Base and Pigeons 1 layers.
Step #2 – Add a layer mask
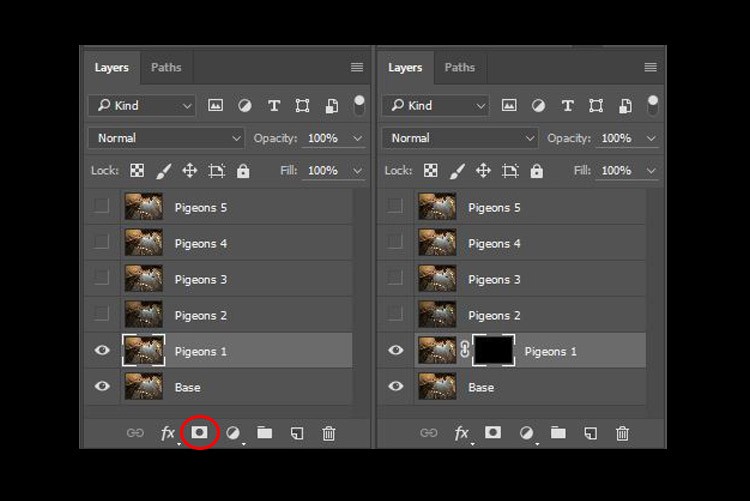
Next, select the Pigeons 1 layer and while holding down the Alt key, click on the “add layer mask” icon (circled in the red in the photo below left). You shall have a black rectangle appear at the right side of the layer, as seen in the photo below right. This is to add a reverse layer mask on your layer, the black mask means it is hiding what is currently in this layer. If you don’t hold the Alt key when you click on the icon, it will create a white mask which will reveal what is currently in the layer.
Step #3 – Paint on the mask to reveal the bird
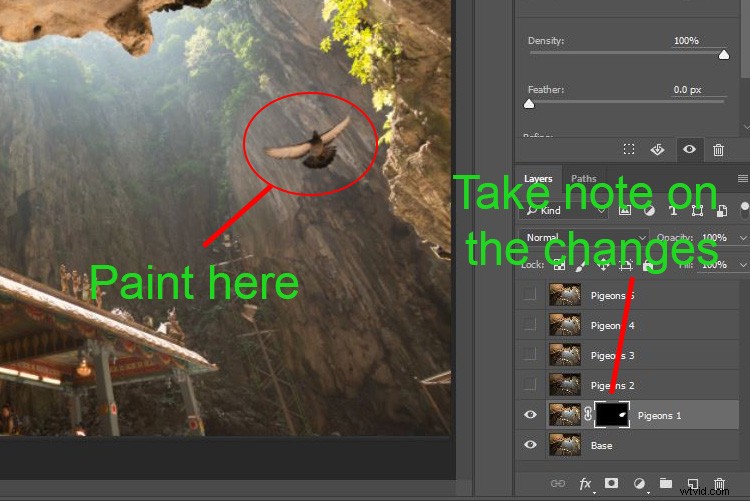
Now we have a black mask. To blend in only the pigeon from that layer, we will need to select the Brush Tool and paint on the mask in white over the pigeon’s area. Note: A black mask means hiding and white means revealing the layer.
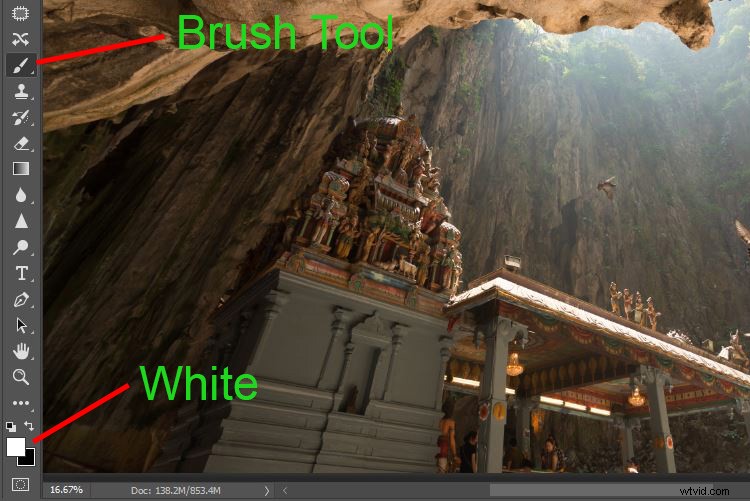
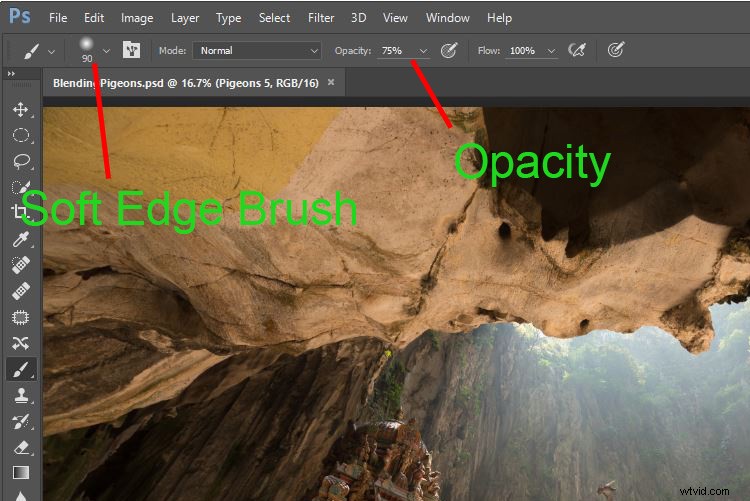
After selecting the Brush tool, make sure you are using a soft edged brush, and the opacity is set to about 75%. The opacity will affect how much of your painting result will be applied. Using opacity at 100%, you only need to paint once to fully reveal that particular area. However at 75 % or lesser opacity, you will need to repeat the painting few times in order to achieve the 100% effect. It is slower, but at the same time it create a smoother edges and the layer is better blended to the original image.
Notice when you do the painting, the mask on the layer also reflects your painting result. Congratulations, now you have the first pigeon blended in! Let’s repeat the same process for the next layer.
Step #4 – Repeat on next layer
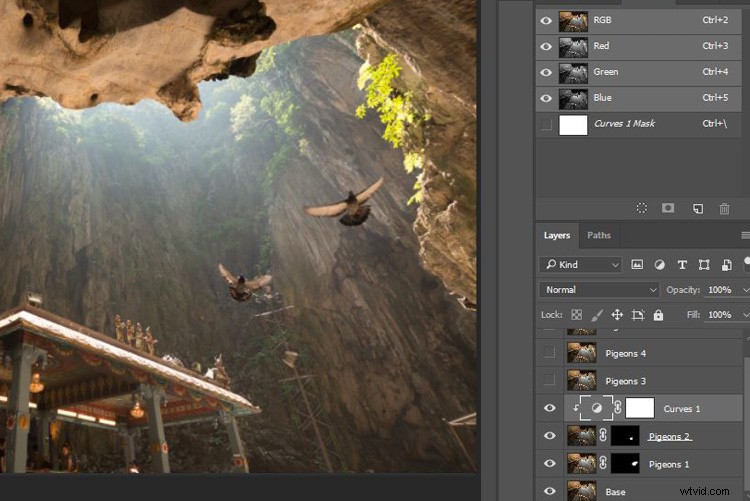
By performing the same steps on the “Pigeons 2” layer, you will now have the second pigeon added. But wait, something is not right. Do you notice that the second pigeon has dark edges surrounding it? Why?
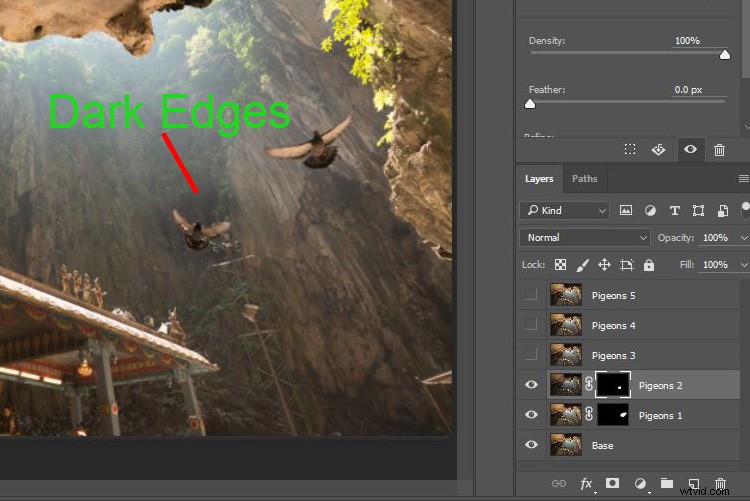
This is because even at the same camera settings, the lighting conditions may have changed during the shooting process. This image was captured when there were clouds blocking the sun and it dimmed the light in the cave. Instead of solving this by doing some really precise masking (by zooming in and brushing carefully on the edge of the pigeons, which can be a tedious process), let’s try adding a Curves adjustment layer.
Before doing any adjustment with the curve layer, right-click on it and choose “create clipping mask”. This will make sure whatever adjustment is done here will only affect the layer below it. Now add some brightness by slightly pulling the curve up, as shown below right.

The surroundings of the second pigeon looks much better now. Other than using a Curve, you can do this on any other adjustment layers such as color balance adjustment layer to correct the tone of the particular layer, if the white balance is not equal with the background.
You can see the bird blends in much better now with the Curve applied.
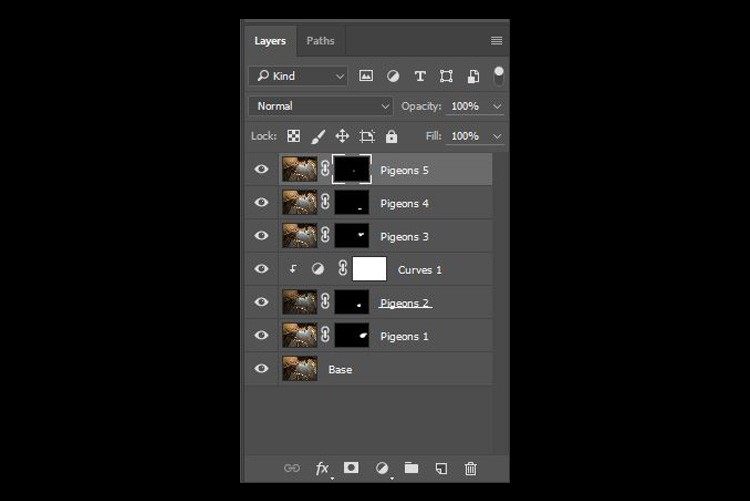
Step #5 – Complete masking on all layers
Let’s continue with the rest of the layers. The masking results will look like the photo below once you have done the blending process.
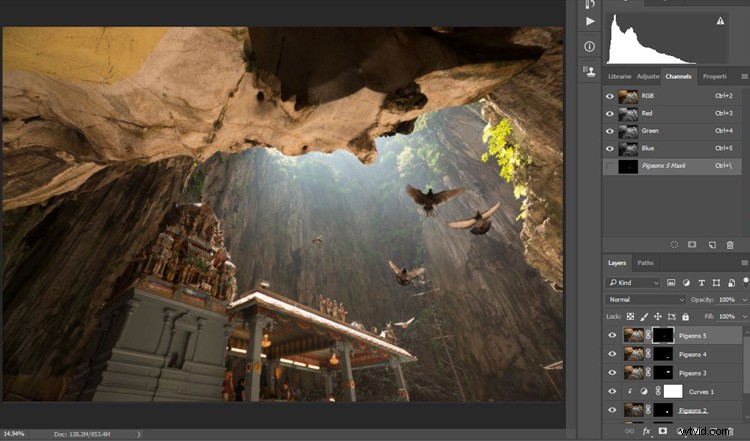
Finally
Here is the final output of the digital blending. Now you can perform any other post-processing adjustments from here by applying contrast, changing color balance, sharpening, or any other process that you think is necessary to enhance your photo.
I hope you have enjoyed this article, and it gives you some ideas or inspiration. If you have any questions or suggestions, feel free to leave a comment below.