
Sometimes you get that photo that is almost perfect. If all it takes to make it great is a little head swap, well, today is your lucky day! I’m going to show you two techniques, for quick and easy head swapping. I’ve even included a demo video at the end, if you want to watch the tips in action. I am using Photoshop CS6 for this demonstration. If you are using a different editing program, these methods may not work for you. If you are using an older version of Photoshop, the techniques should work the same, but your screen may look slightly different.
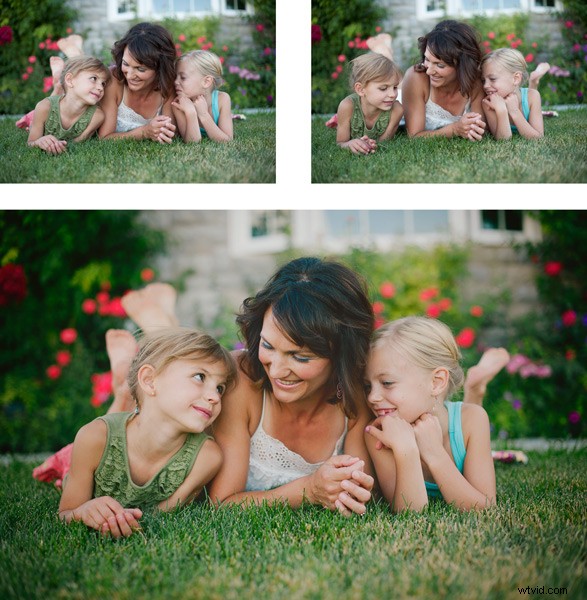
Ready to see how to combine two photos to make that perfect photo? Let’s get started! First, open the two photos you want to work on in Photoshop. Select the photo that you want to swap a head FROM. Now we’re ready to really get to work.
Method #1
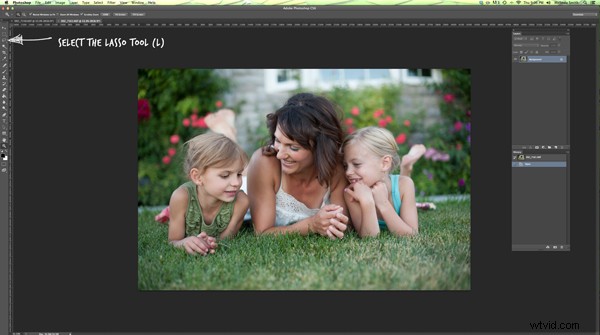
For the first method, we are going to use the Lasso Tool. You can click right on the lasso in the menu, or click “L” as a shortcut. The instructions will indicate shortcuts in parenthesis (L) to help speed things up as you as you try these techniques on your own photos.
Use Cmd/Ctrl+C to copy the selection
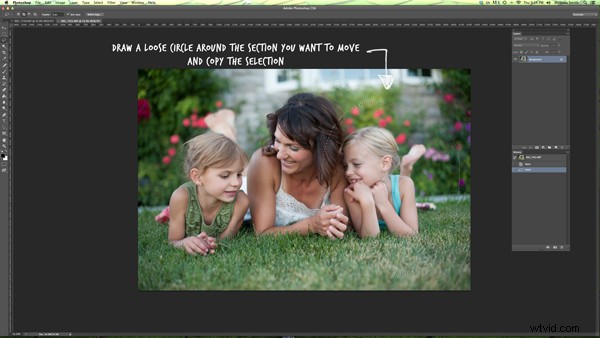
Use the lasso to draw a loose circle around the part of the photo that you want to move. You’ll want to leave extra room, and make the circle fairly large. This is easy to take off later, but if you have to add more on, you can’t do anything except start over. Copy the selected part of your photo.
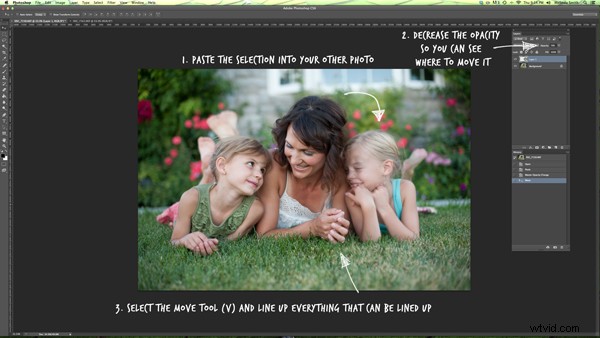
Go back to your original photo, and paste the selection there. I like to decrease the opacity of that layer so I can line things up a little bit easier. Select the move tool, and move the layer around until things are as lined up as possible. In the photos I worked with, I tried to line the mom’s fingers up exactly. If you can find something near the edge of the new part and the old part that is the same in both photos, this can make things a lot easier.
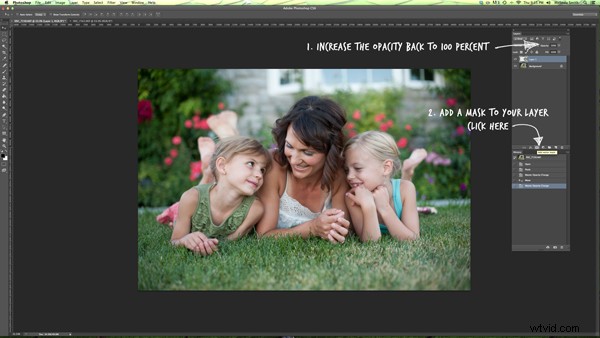
Bring the opacity of the layer back up to 100%, and add a mask to the layer. Layer masks are really awesome! They allow you to show parts of that layer or hide them.
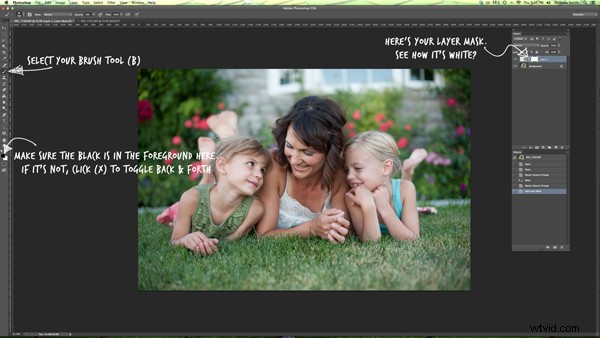
Now you can select a soft brush. You want your brush to be black, because your layer mask is white. When you are turning part of the layer off, you need to make sure that the brush is the OPPOSITE color of the mask (white reveals, black conceals). If the white box is in the front, just click “X” to toggle back and forth between black and white.
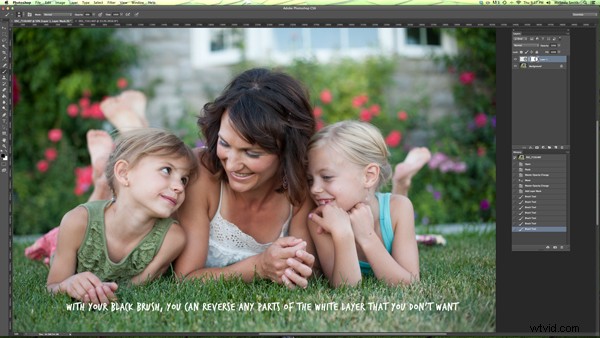
Use that black brush to hide the excess parts of the new layer. I like to start with the hard circle edges, and then work in to the details. You can zoom your photo in as close as you need to for this part.
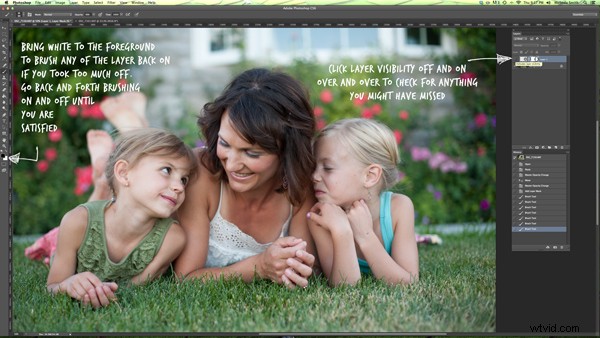
Once you feel that it’s mostly there, you can click the visibility off and on on the layer to see if there are strange things happening, or spots that you missed. If you turned too much of the layer off with your black brush, simply change your brush back to white and brush it back on.
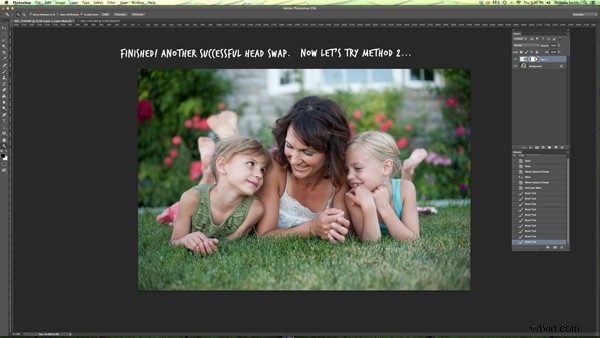
Method #2
Not too hard, right? Let’s try another method for swapping heads, this time using the Clone Stamp. This one is not as forgiving, but it is super quick! You’ll want to make sure that your two photos are very similar for this one. The placement needs to be close to the same for both photos. This method works especially well if you just need to replace closed eyes with open eyes from an almost identical photo.
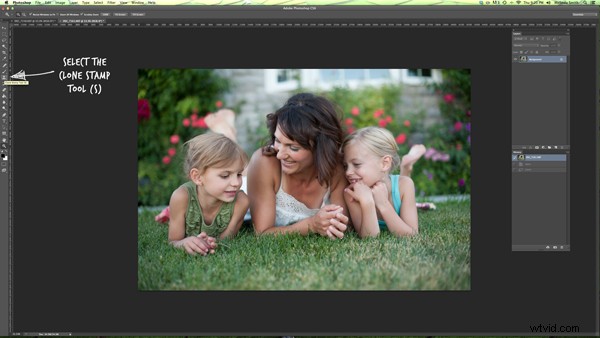
Select your Clone Stamp tool, and let’s give this one a try!
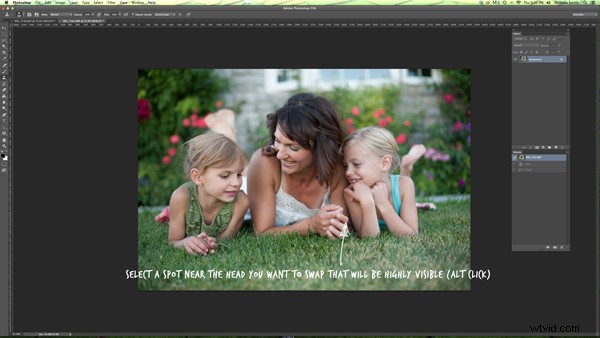
It’s easiest if you select a part of the photo that is easy to see and line up once you switch to the original photo. In this example, I selected mom’s hand.
Cmd/Cntrl+J duplicates the layer as well
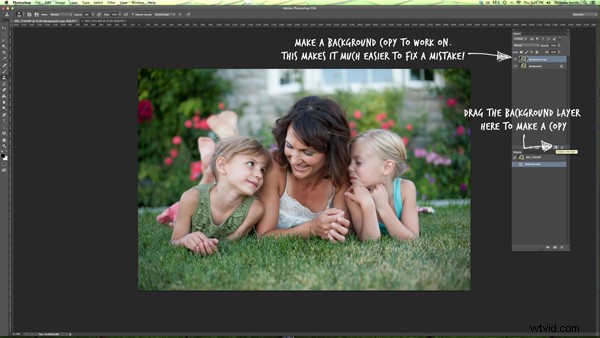
You can do this without making a background copy, but if you don’t make a background copy, and you make a mistake, you have to start over. This allows you to fix a mistake later without starting completely over.
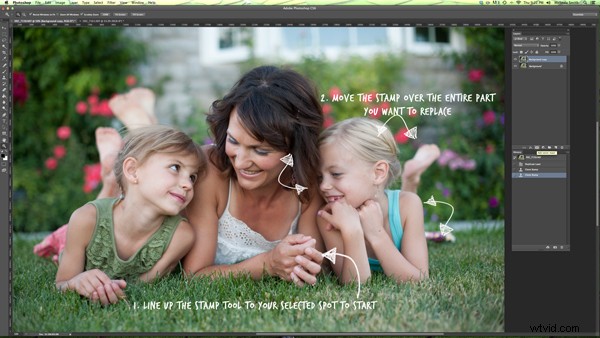
Line the stamp up with your selected spot, and then, while holding down the mouse button, move the stamp over the old part that you want to replace. As you do this, you’ll see the new face appear.
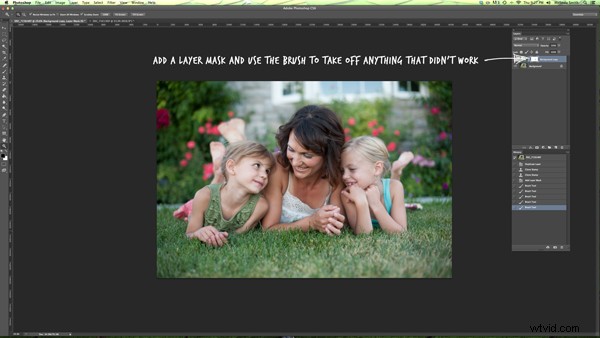
If you covered more area than you wanted to, add a layer mask, and use the soft black brush again to take off some of that layer. (Just like we did before.)

Head swapping doesn’t work for every photo, and it always works best for photos taken one right after the other, with all the people positioned almost the same. It never hurts to give it a try, and the more you practice, the better you will get at making it look natural, and working quickly. You’ll also be able to tell at a glance if a head swap will work for two photos or not.
I’ve made a quick video demo to show these techniques in action. Let me know if you have any questions, and I’ll do my best to answer them. Now, go swap a few heads, just for fun!