When you start learning photoshop it is scary to see all those different tools you can choose from. It is often said there are seven ways to achieve the same results, using different tools in photoshop. So, it means you have to find the one that suits you perfect, in order to give to your pictures the look that you want.
In this article I want to show you how you can change colors in your pictures using Photoshop. This is a very easy method that you can use, either you are a beginner or you are a more advanced user.
You could add a surreal twist to your images, or remove colors you do not feel like comfortable working with (I am sure we can all relate to this, because as artists we have our favorite and least favorite colors- the ones we struggle to work with!). You can use this technique for anything from changing the color of a dress or any other prop, to changing the forest tones to enhance the autumn feeling, or creating it if you want to create an autumn picture even though it is still spring.
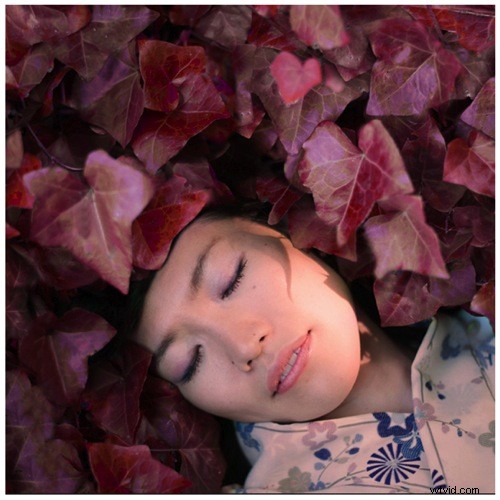
This is the before and after color change:

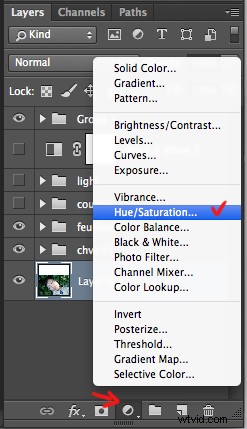
Create a color adjustment with Hue/Saturation
You can get to the Curves dialog in two ways:
- Image adjustment: By choosing Image > Adjustments > Hue/Saturation or Click the Hue/Saturation icon in the Adjustments panel.
- As an adjustment layer: Layer > New Adjustment Layer > Hue/Saturation, or in your layers panel use the shortcut: New adjustment layer> Hue/Saturation.
I strongly recommend working with layers. It allows you to come back to the adjustment and to erase it, or modify it, as many times as needed. Especially when you make big changes, you may want to be able to have full control. Layers can be scary at the beginning, but trust me, they will become your best friend once you overcome this fear.
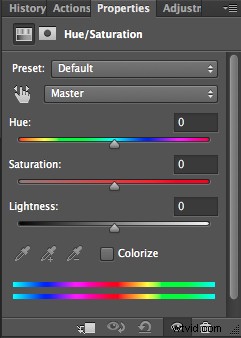
Creating a new layer you will have the following Hue/Saturation dialog box:
Select the color you want to change.
The more different you want your original color to be, the more important this selection is so that the color change does not affect areas do not want to shift. Removing a general color cast is usually a very light change. But, a total different color requires you to be more careful when selecting, and sometimes require several color adjustments.
When your object has a very clear color – as to say all red, one red tone – it is easy. When your object has different color shades it is tricky but not impossible.
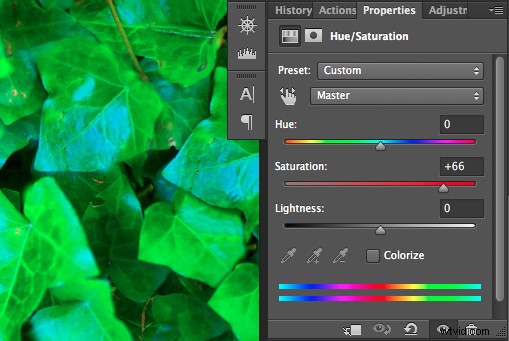
In this case we are changing the color of ivy leaves, with different tones of green, blue, and even yellow.
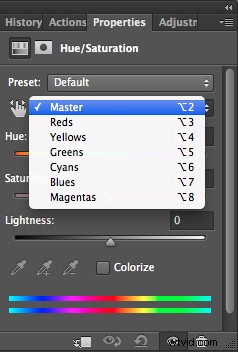
First step: Make the color selection:
You can choose Master to adjust all colors at once, or one of the other preset color ranges listed for the color you want to adjust (reds, yellows, greens, cyans, etc.).
Or you can also choose the Targeted Adjustment Tool (the little white hand) – this is the easy way to select color if the area/object you want to change is a mix of several color tones.
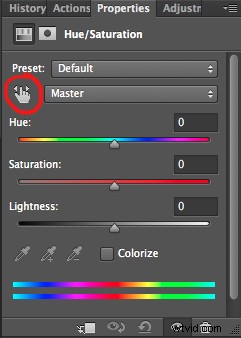
Click on the Targeted Adjustment Tool and put your cursor on your image, the eyedropper tool appears. Drag it on your image, and click on the color tone you want to select.

Four color values appear in degrees in your properties panel. If you click again, you change the selected colors.
Second step: Refine your selection
To check your selection, grab the saturation slider and move it to the right to increase saturation. The idea here is to see what you have selected, and make sure you have the right colors, therefore helping you adjust the selection. For example, when editing a portrait, you want to make sure it doesn’t affect the skin tones of your subject. If editing a forest you want to make sure you have selected the leaves, but not the tree trunks (or anything in the background).
As you can see there is still a lot of blue of the leaves, that is not included in the selection. To add those blue tones you will drag the adjustment sliders to expend your selected colors, and change the color value (appearing in degrees in your properties panel).
There are four sliders. The ones in the middle allow you to expend or shorten the selected color ranges. The two sliders on both sides are to adjust the range of color and fall-off. Play with those sliders until you find a good selection. Don’t worry if it’s not perfect, you can still make a second hue/saturation adjustment layer, or mask this layer.
Third step: Change the color
In your properties window, drag the hue slider to the left or right depending on the new color tone you want to give to your selection. Then you can play with adding or removing saturation by dragging that slider either way.
Learning to use hue/saturation will give you more creative options when editing your images in Photoshop. Share any images that you’ve changed the color on, or any other methods you use for doing this technique.