 The following tutorial on Image Processing was submitted by John Short from www.canonphoto.co.uk and www.johnshort.co.uk
To get the best out of any image requires processing in an image editing package.
To have the greatest latitude and control of the final picture then it is always best to shoot in raw. In a future tip I will illustrate the difference between raw images and JPEG’s and the increased latitude when processing. In this tip I want to show a raw image and explain the processing I applied in Adobe Photoshop.
Whilst I hear cry’s of ” I don’t have Photoshop ” and it’s alright for him he has professional software at his fingertips ” all of the modifications can just as easily be achieved in Photoshop elements or other image processing applications.
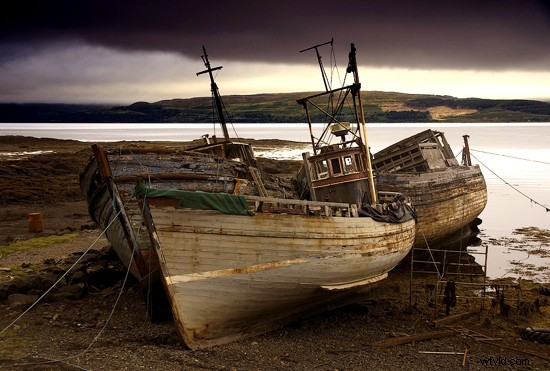
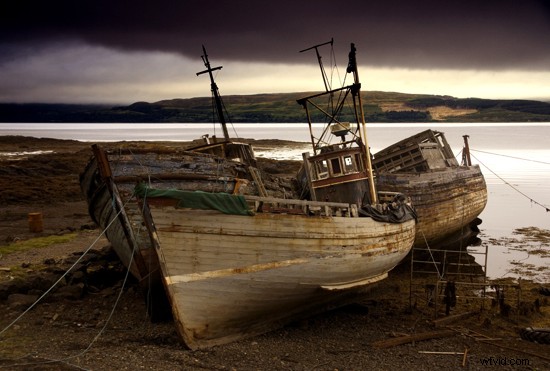
The first image (above) is the original raw file prior to any post processing. The photograph was taken with a Cokin P series Neutral graduated filter but to emphasize the depth of the clouds I selected the sky area ( including the hills )using the quick select tool and made this a separate layer. This layer was then adjusted for levels making the dark clouds blacker and the highlights a little lighter (without blowing the detail).
Then the sky layer colours were adjusted using the colour balance tool . The mid tones had the red increased by 15, the highlights had the yellow reduced by -17 and the shadows I increased the blue by 19.
Now select the background layer, once again we need to adjust the levels to maximise the contrast in the image again ensuring you don’t clip the highlights or fill the shadows.
Once you are happy with the levels the background layer also need the colour balance changing. Again increase the red in the mid tones, reduce the yellow in the highlights and increase the blue in the shadows.

Now flatten the layers and adjust the levels to provide the image you had in your imagination.
Finally ( and this is always the final operation ) sharpen the image. Please note you should never sharpen an image until all processing is complete and you have resized to the final image size. It’s always worth keeping an unsharpened copy in case you want to produce a bigger version at a later date.