There is one thing in photography that seems to be universally loved – reflections. They aren’t always easy to get, especially if water is involved. The wind only has to be blowing slightly to create ripples in the water, and you will lose the chance of a reflection.
Take the following image, a real reflection taken one morning just before it started raining on the Yarra River in Melbourne. It was almost perfect, but after repeated efforts to get something similar it has never happened again, well not for me.
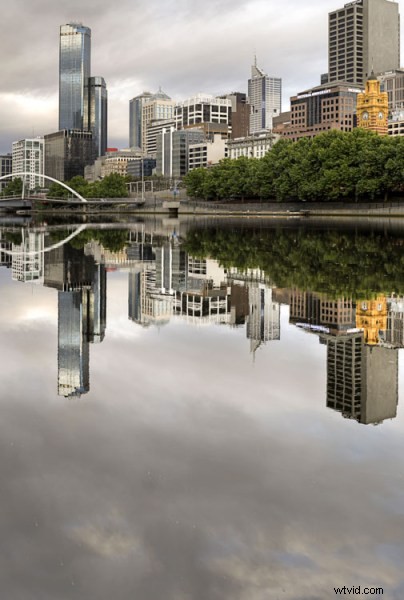
One of those magical times when the river was so still the reflection just happened.
If you love that look, then there are ways to do it without having to wait for the perfect conditions. You can fake it in Photoshop, with the right image. Finding the right image is hard, especially when you start, but as you get more experienced at doing it you will find it easier to put reflections in other images.
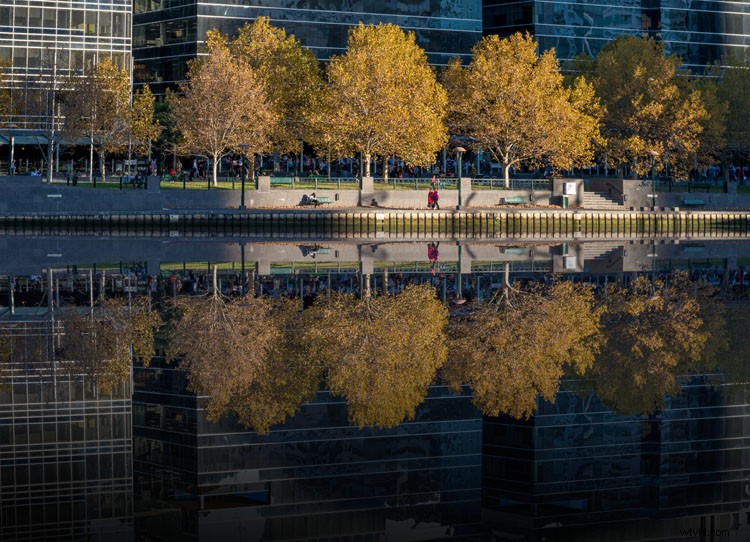
Find an image that is straight on, like the following one.
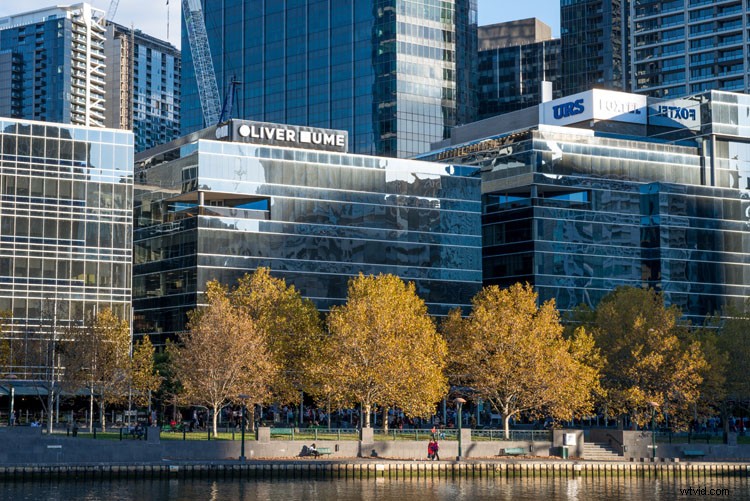
The basic image.
Adding a reflection layer
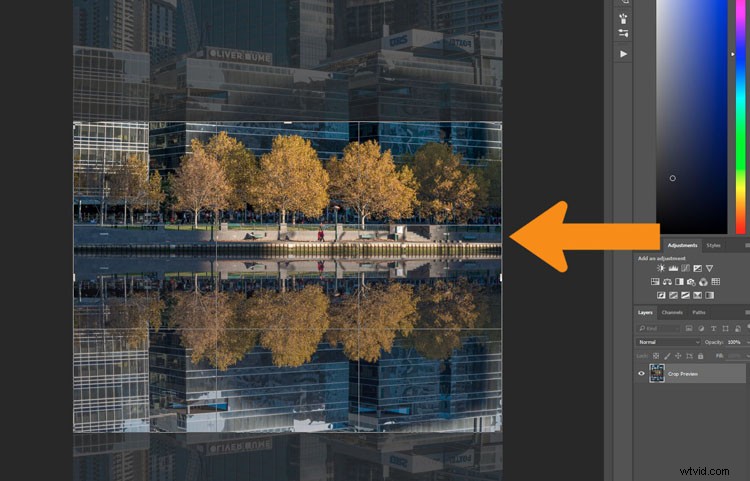
Open the image in Adobe Photoshop, or any program that will allow you to work in layers. You could use Adobe Photoshop Elements or even GIMP to do this tutorial. Once the image has been opened in Photoshop, you will need to make it bigger to fit the reflection. You can do this by using the Crop tool.
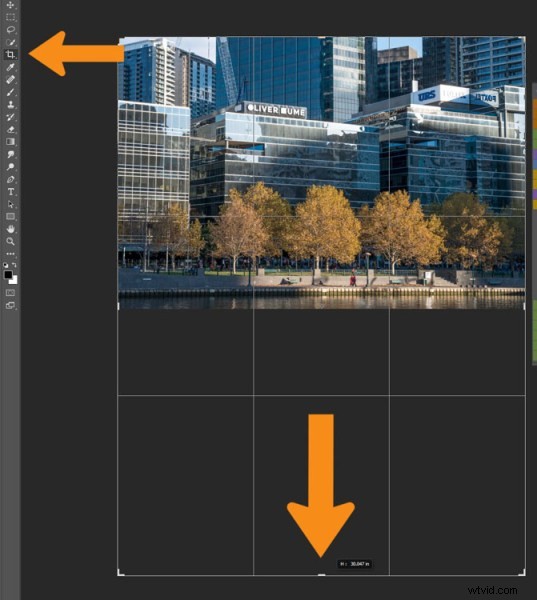
Extend the area of the image with the Crop Tool
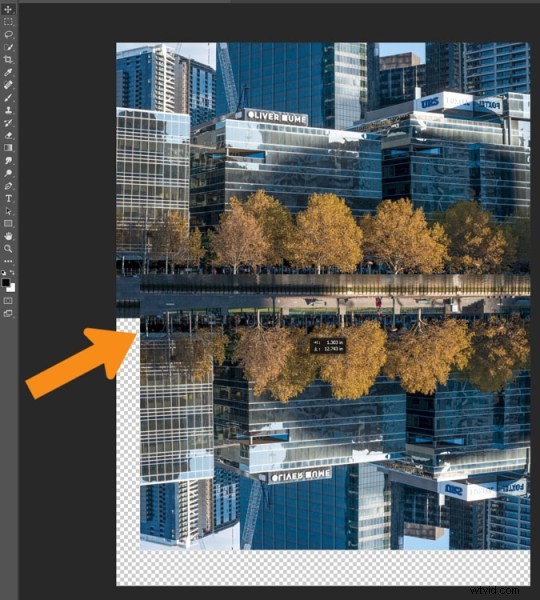
You can double the size of the original image, simply by dragging down the point at the bottom of the image using the Crop tool. If the overall size is too big, you can always crop it down once you are finished with the photo.
Press Ctrl J to duplicate the original image to new layer, or go to the main menu at the top, to Layer > Duplicate. Go to Edit > Transform > Flip Vertical.
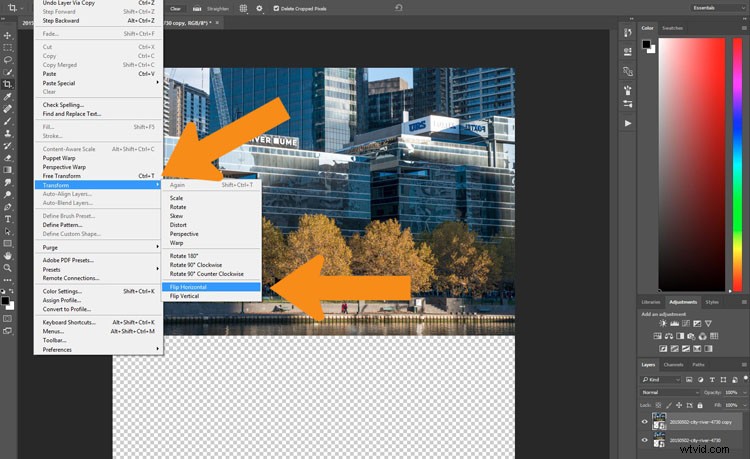
Flip the duplicate image.
If you do the vertical flip in the Image menu you will flip all layers, and for this you only want to flip the one layer. Select the Move tool, the first one in the tool bar on the left, the cross shape (keyboard shortcut is V). Click on the duplicate layer and move the image down, as in the following.
Move the flipped vertical image down to where the reflection will begin.
You will need to figure out where the image finishes, and the reflection will start. In the example image for this tutorial, the river edge has a wooden panel which seemed to be the perfect place to start the reflection. However, to do this you will need to erase or delete the water in the image.
You will need to add a mask to the flipped layer and click on the brush tool so you remove some of the image. You can add a mask by using the icon at the bottom of the layers panel or go to the Main Menu > Layer > Layer Mask > Reveal all.
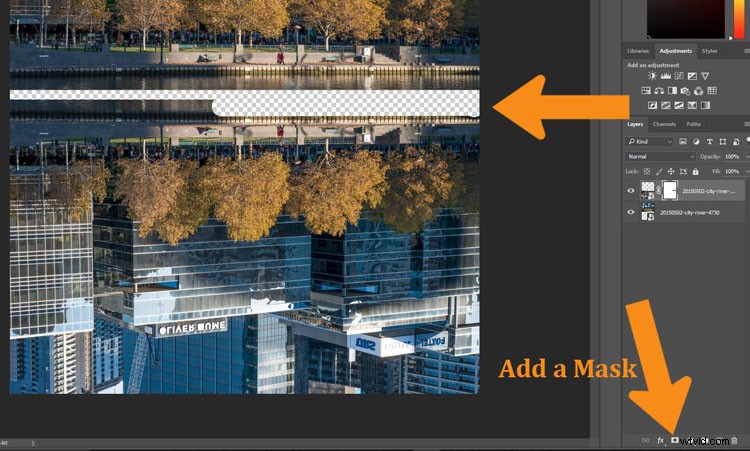
Remove or mask out part of the image that won’t be needed.
Using the Move tool, shift your image up to meet the original, at the line between the image and the reflection.
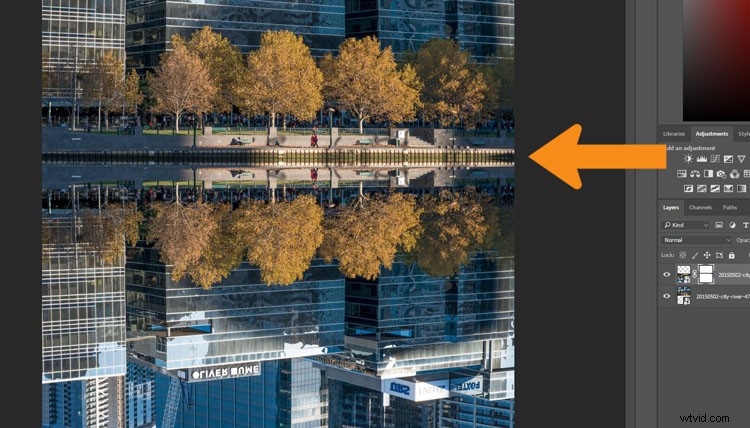
See where the reflection will begin.
You will need to remove the water, or the area underneath the reflection. To do this click the Eye next to the reflection layer so that you can no longer see it (turn off that layer). Add a layer mask to the original image and using your brush, hide those areas away as you did on the duplicate layer.
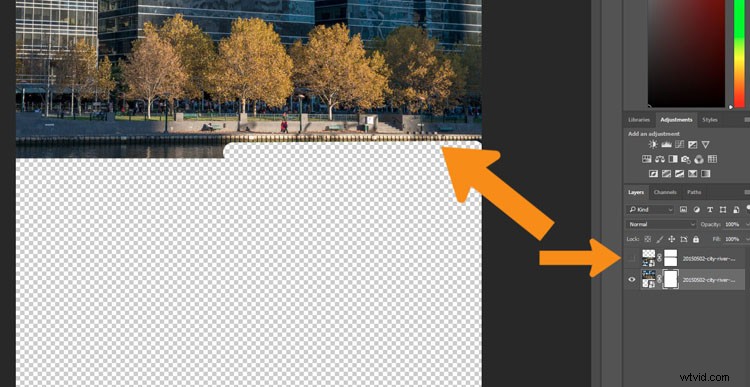
On the original image, hide the area that is covered by the second photo.
Turn the reflection layer on again. Now you will have a basic reflection, but you can take it a lot further than that.
Refining your reflection
Add a blank layer to your image, then drag it down to be the bottom layer. If you are unable to do that, it may be because the original image layer is locked and called the Background layer. To remove that, double click on the word Background, you should be able to change the name to something else. This will allow you to move the new blank layer to the bottom.
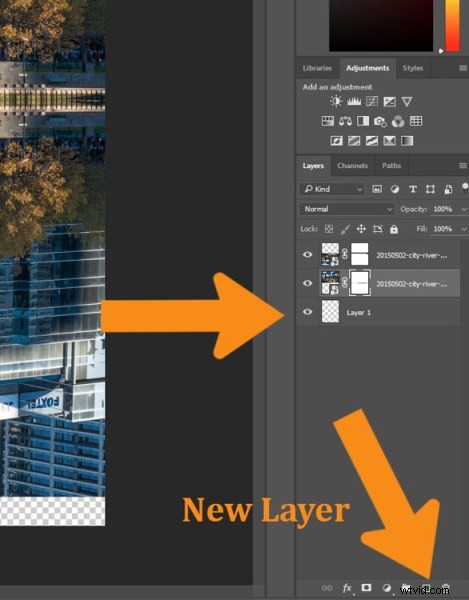
Add the new layer at the bottom.
Turn off two image layers so they disappear (click the eyeballs on each). Select the Paint Bucket Tool, it is with the gradient tool, right click and you will see the bucket tool.
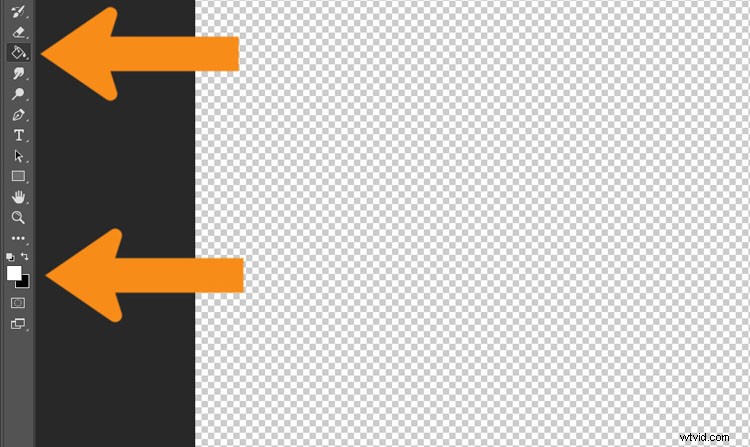
Select the Paint Bucket Tool and click on the foreground color.
Click on the foreground and background color selectors and a window will pop up for you to select the background colour of your reflection. It is good to go with something dark, and a similar colour to your image.
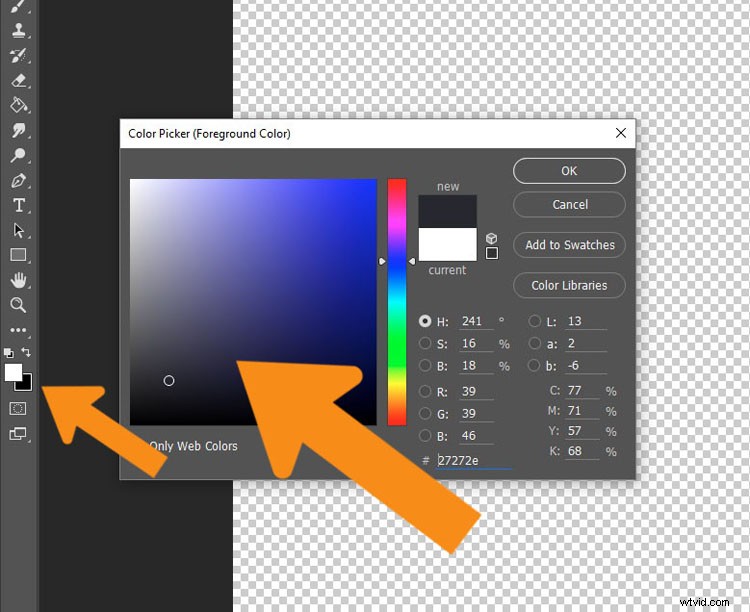
Select the color to go under the image.
When you have chosen your color, fill the layer with it and turn the other two layers back on.
Select the layer that is the reflection and go up to the Opacity Slider which is just above the layers panel. Turn the reflection layer opacity down a little. Just make it slightly less bright than the original. For this tutorial it was turned down to 71%.
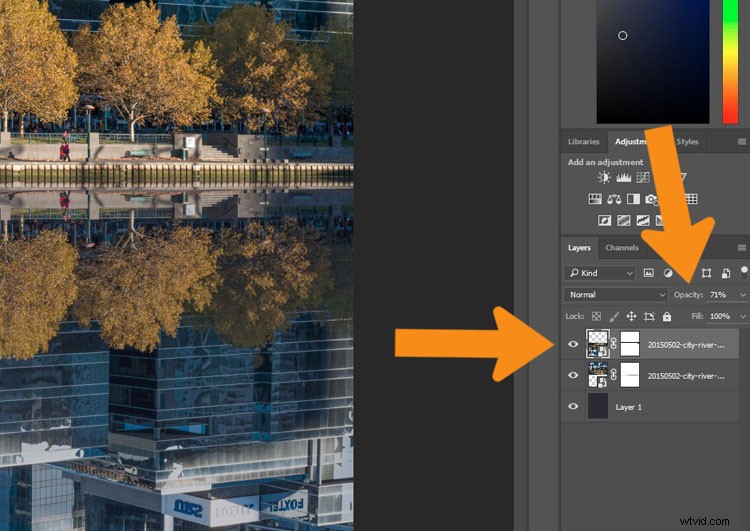
Change the opacity of the reflection.
Select the Crop tool so you can remove any part that is now no longer needed. You may also want to crop the image so it is doesn’t look like there is just one image on top of another.
Select the crop tool to get the final image.
Fade the reflection
For the final part, add one more blank layer, then select the gradient tool. Make sure that black is the foreground colour. Add some Gradient to the bottom of the image to help it blend in. If you are not getting the gradient to work so that you are getting the foreground to transparent, you will need to select that option in the tool options bar at the top under the main menu. You may also want to change the opacity of the tool to around 50%.

Add a gradient to the bottom.
Here is the final image.
The final image
This can be done for many things and you don’t have to have a body of water to do it. Here is an image of a train station in Melbourne where I have tried to make it look like the street is flooded.
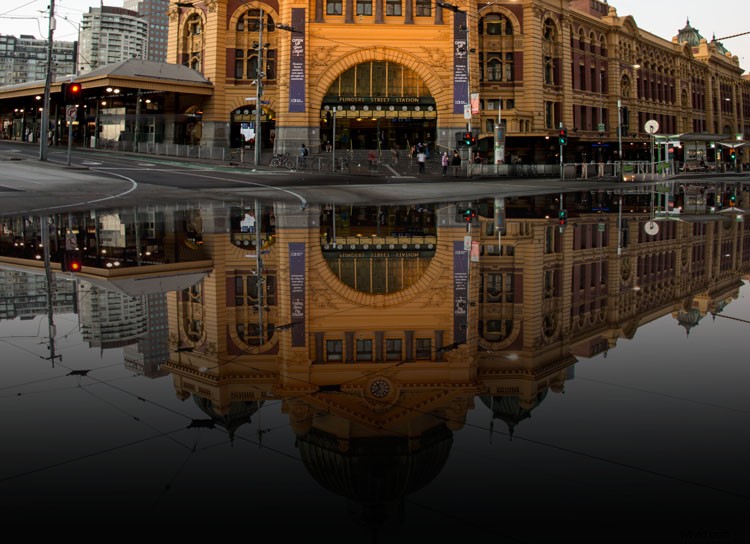
Flinders Street Station as though the street in front were flooding.
Here are a couple of other images in different situations for you to look at and give you inspiration. Let your imagination go wild and see how else you can use this technique.
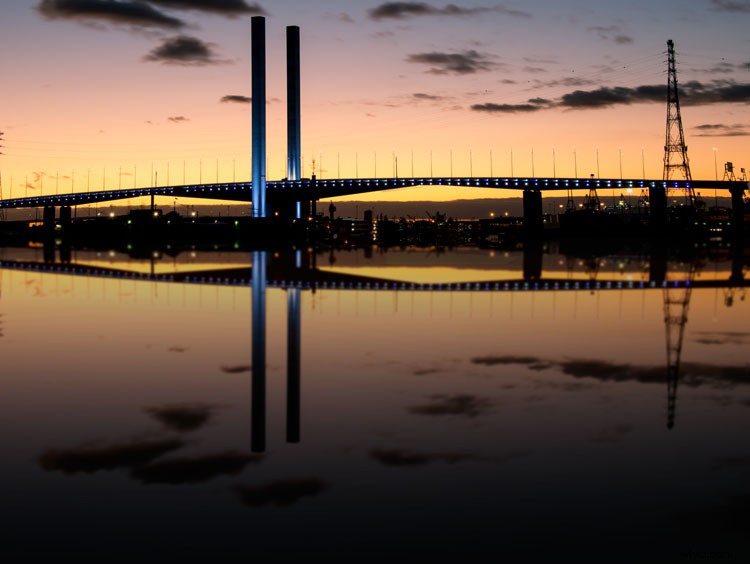
Bolte Bridge at sunset with a reflection in the harbour.
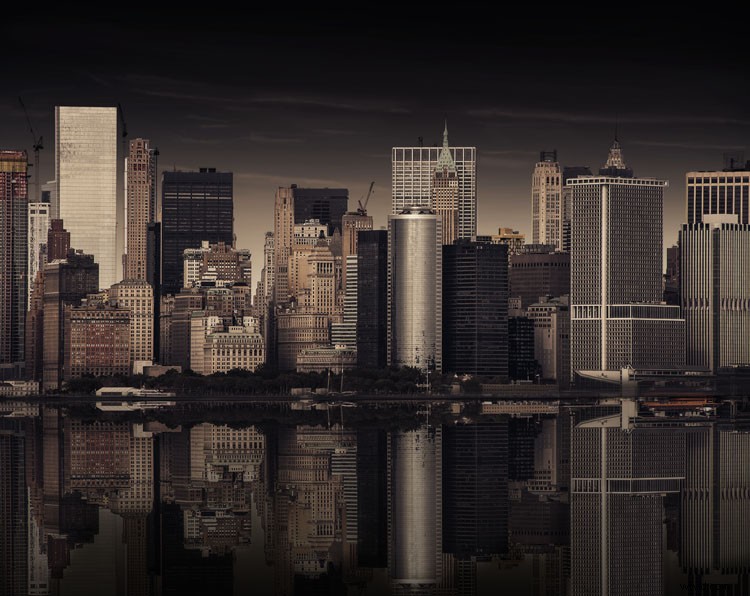
The New York skyline with reflection in the water.