A Guest post by Jacob Shultz
HDR photography – It has become a term synonymous with overly-saturated, cartoony looking photographs with large halos. This tutorial will explain the benefits of HDR photography, and how you can take your own high quality HDR photos which look amazingly realistic – without the use of Photomatix.
The method I am about to show you is used in many of my photographs. It uses the same principal as normal HDR photography, however there are two large differences. The ‘stereotypical’ HDR photography uses a method called tonemapping, which creates the obnoxious halos and often over saturated look. This tutorial looks at a method which makes use of High Dynamic Range, without tonemapping, and with full manual control.
To start off, you need to take some photos. Choose a suitable location, for me it was the local beach. Just as if you were taking a normal HDR, you will need to ‘bracket’ your photograph. ‘Bracketing’ simply means to take the same photo at differing exposures. This ensures that different elements in the photograph are all exposed correctly in at least one of the images. Take as many photographs as you need to cover all ranges of light in the composition. In my photograph, I used four images. In situations with more extreme levels of light (sun, shadows, etc.) you may need to use more images. However, you can often get away with two images, one exposed for the foreground, and one exposed for the background. Shooting in RAW is also highly recommended.
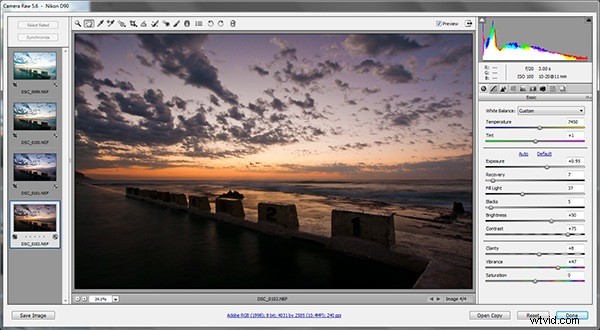
Once you have downloaded your images to your computer, the first step is to edit them initially in Adobe Camera Raw (select all files and then press CTRL+R). The first step is to apply straightening and/or cropping to every photo (do this by selecting each photo on the left hand sidebar). Next, establish what element each image is going to effect. For example, image number 1 is going to be the foreground. Edit the photo, only paying attention to the foreground.
These were the settings I used:
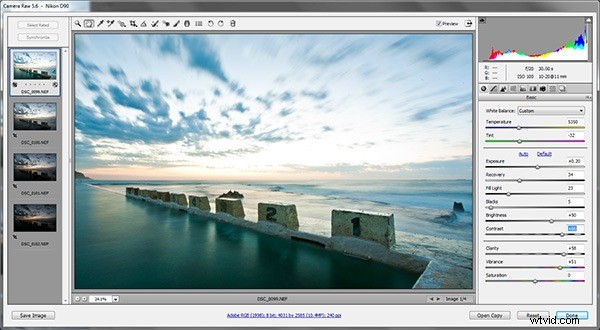
Image 2 will affect the ocean. My edits:
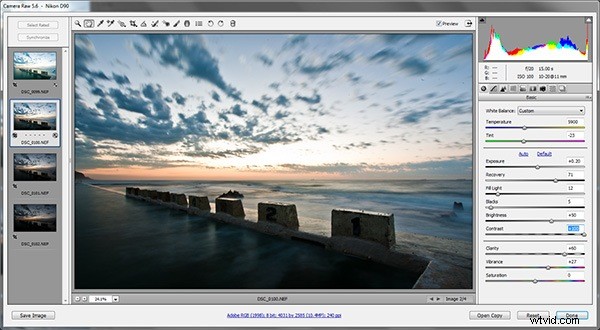
Image 3 will take care of the top portion of the sky:
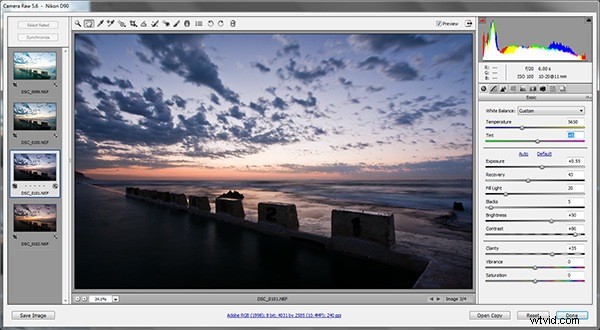
And finally image 4 will be the bottom portion of the sky, closest to the horizon:
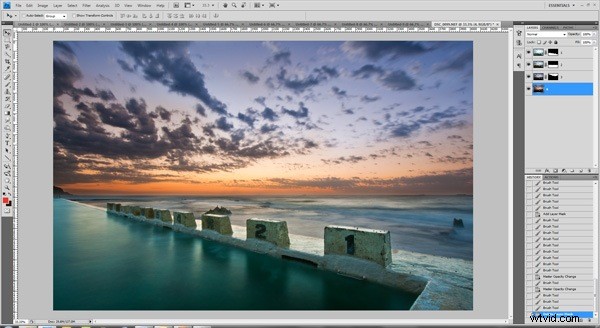
Once you have finished the rough editing of individual photos, open them all into Photoshop, and then duplicate them into the one document:
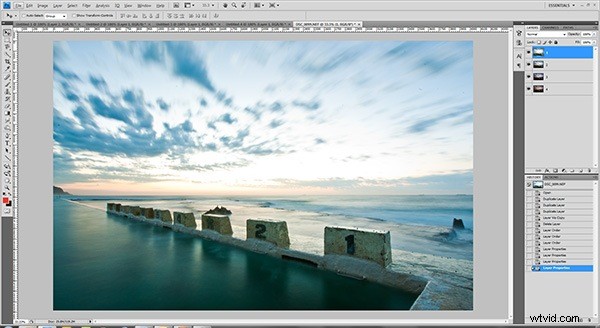
The next step is to basically ‘erase’ portions of each image, so that all parts blend together and show a higher dynamic range – HDR. Apply a layer mask to image 1, and use a soft black brush to rub out everything but the general area that this photograph is affecting (we will make more detailed adjustments later). Then continue this for each image:

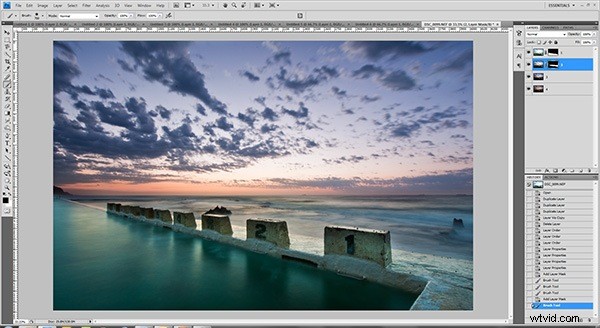
Great work! You now have a basic idea of how your final image will look. Now, go through each layer and make finer adjustments to improve the quality of the image. Use a white brush to paint back or show the image, and a black brush to rub it out again. This is called non-destructive editing. Note: try to eliminate cloud ‘ghosting’ by making sure clouds blend between images without any abrupt or unnatural shifts.
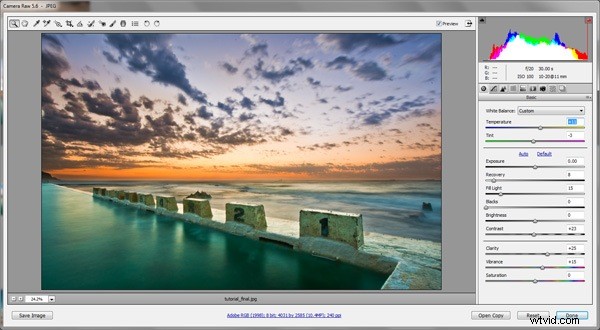
Once you are satisfied with the image, save the file as a PSD document. The next steps will cover the final edits before the image is finished. Merge all the layers in your document to one layer (if you want, keep a separate group with the individuals layers there, but hidden), then save as a.JPG file. Open Adobe Bridge, then select the .JPG you just saved and press CTRL+R. We are now going to re-edit the HDR photograph. Here are the changes I made:
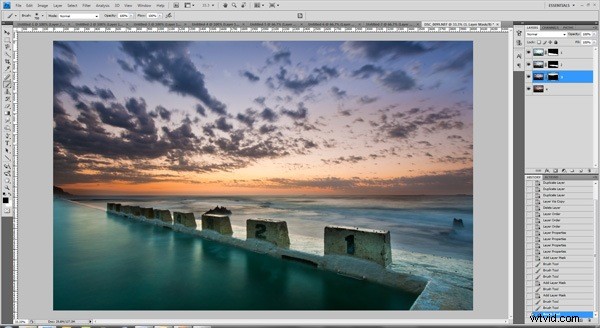
Open the edited file back up in Photoshop, and apply any final editing that suits your workflow. In my case, I cloned out some sensor dust, added a bit more purple into the photo and applied some sharpening. Finally, save the image, and you have completed the tutorial! This is a great way to enhance the dynamic range of a photograph, without the need of a HDR tonemapping program such as Photomatix. You can apply the same method with differing extremes – using two photos to subtly enhance a minimal image, or use 5 or 6 photos to fine tune every detail of a complex composure. If you struggle to get realistic results, then keep trying! Practice makes perfect. This is a technique I’ve been using for over 6 months, but it has only been recently that I have really started to really finetune my workflow. Above all though – have fun!
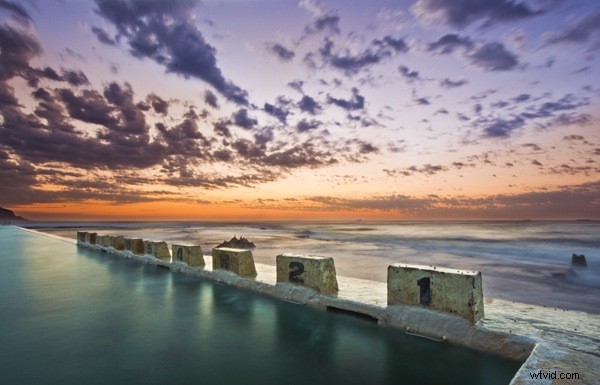
Final product:
About the Author: See more of Jacob Shultz’s work at his blog, Facebook page and Flickr account.