 In this Post Scott Wylie shares how he creates dreamy black and white skies in landscapes.
In this article I’ll show you how to take a colour landscape image with white clouds against a blue sky and convert it into a black and white image with a high contrast sky using Adobe Photoshop CS4.
We will use the channel mixer to control which colour channels are mixed into the black and white image, and levels to produce the high contrast dream-like effect which is similar to the images you may have seen from Infra-Red photography.
When I was shooting on film I would often use a red or orange filter over the lens, these filters don’t allow much blue light through and so blue areas of the image look quite dark, we can create a similar affect in Photoshop by using the channel mixer to convert a colour image to greyscale.
Here is our starting image:
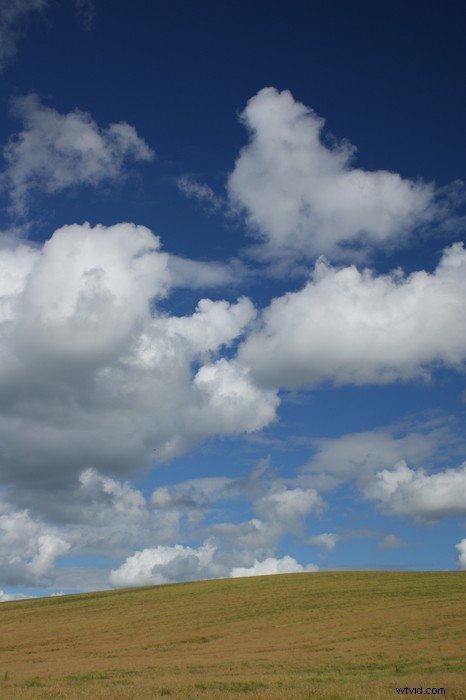
This dull image was taken in poor light and I wouldn’t consider presenting it but with a good black and white conversion we can create something really dramatic from it. I often use a polarizing filter to saturate blue skies and in this image you can see that the sky darkens gradually towards the top of the image as a result of the filter. This will help us to push the contrast further in the post processing stage.
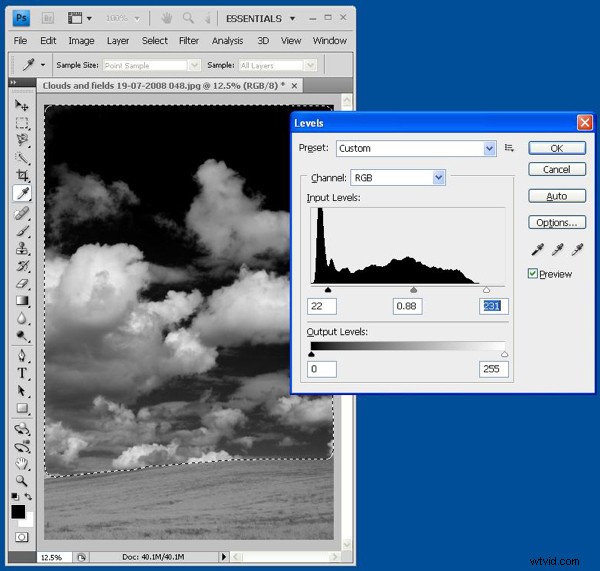
Step 1:
Rather than just desaturating the image or converting to greyscale, we will use the channel mixer to blend the three colour channels into a greyscale image. If we use a lot of red by setting the value to around 110%, no green by leaving it at 0% and we subtract some blue by setting it at -10% we create a black and white mix in which the blue sky is darkened against the white clouds. The total across the three channels should add up to 100%, any less and the image will be darker, any more and the highlights may become blown.
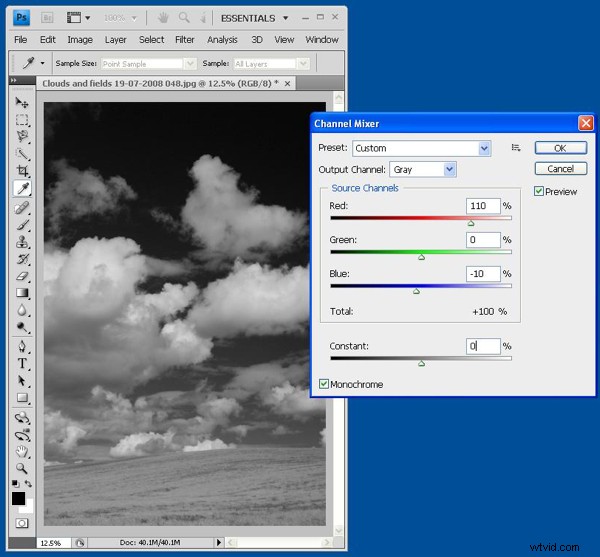
When using the channel mixer, take care not to subtract too much of any colour channel because the result will look very unnatural and often creates a very noticeable ‘halo’ around parts of the image. -10% is probably as low as we can get away with without things looking over-processed.
Step 2:
When we’ve created the black and white mix the next stage is to select the sky area, this is because we want to be able to push the contrast as far as possible in the sky without losing highlight/shadow detail in the ground. To do this, use the magnetic lasso tool to select the sky.
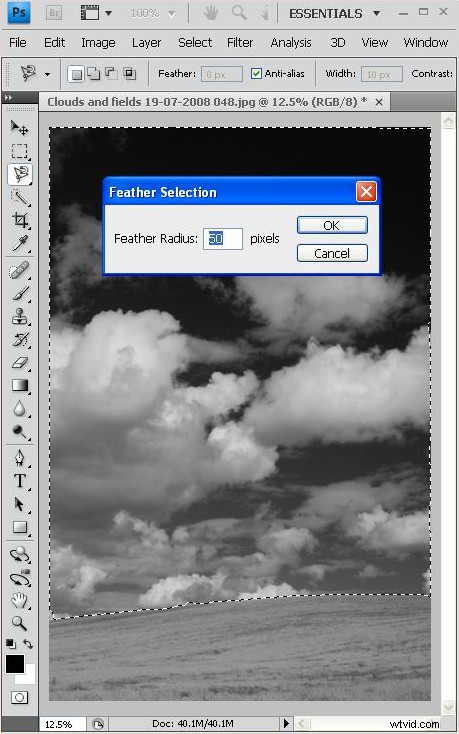
It’s important to feather the selection so that any changes we make are blended into the non-selected area, if we don’t feather then there will be a very obvious border between the two. As a rule of thumb I usually set the feather radius to around 10-20% of the number of pixels along the longest edge of the image.
Step 3:
Using the levels control, we adjust the contrast in the selected area until we’re happy with the result. If the black point is set too high then the dark sky will begin to look pixelated, if we set the white point too low then the highlights in the clouds will become blown out.
It’s a good idea too see how far things can be pushed by doing an auto-contrast adjustment, see how it looks and then undo it and use the levels control – any more contrast than this will definitely blow the highlights and lose shadow detail making things look very unnatural. The best result is usually gained by using a little less contrast than the auto feature produces.
Step 4:
After setting the levels on the sky, we invert the selection and do the same for the ground.
The final image looks like this:

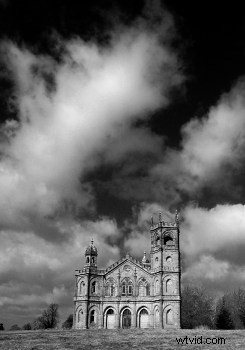
Here’s another example where I’ve taken a colour shot and created a dream-like black and white image from it.
Before:
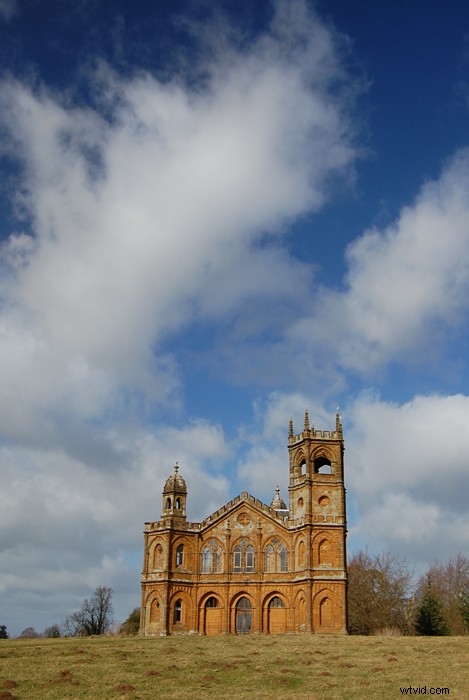
After:

Scott Wylie is from England and likes to photograph abandoned or curious places and use light to produce dynamic and interesting images of people. See more of Scott’s work at www.scottwylie.co.uk.