Click on the above image for a 1200 pixel wide version.
I had a number of requests to explain how I shot and edited this image and I thought it might be helpful to the DPS audience at large to explain it here. When I first started in photography 20+ years ago, I was often baffled by the results some pros were able to accomplished and it was only through asking that I found tricks to give my images similar looks. I understand that nothing is more frustrating than to try to emulate something you like and facing unanswered questions.
If you like the image above, read on. If not, here’s a post on how to shoot waterfalls.
Preparation
We have been having some glorious weather in Seattle as of late and I knew it would be ending soon. Sunrise always interests me but it tends to somehow get placed very early in the day most of the time. This collides with my desire to sleep. But not last week! I vowed to wake up early and capture this beautiful city in some radiant light.
Step 1: Wake up early. Step 2: Make sure you pack the night before. Cards, batteries, directions to where you’re going. All of that stuff, get it ready the night before. Few things are as harsh to a photographer as having to rush around the morning of a shoot to find last minute items.
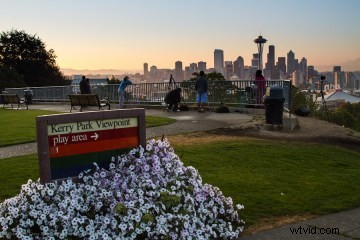 Also, scout your location. I used the Photographer Ephemeris to make sure the sun would be at the right angle when I made it to Kerry Park in Seattle. I have been to the park a number of times, but it would suck to get up early and have the sun’s angle all wrong. Along with scouting early, if your spot is a popular spot, arrive early. Do you see that tripod on the right side of this image that looks like it will fall down the hill at any moment? That’s mine. Less than prime spot = got up later than I should have.
Shooting
I shot this scene with a Pentax 645D and 55mm lens. This is a medium format camera and the images are large, with lots of detail. My original shot had to include more skyline than I wanted by being restricted to the one lens (Pentax is loaning the camera to me for review purposes and I did not have a choice of lens).
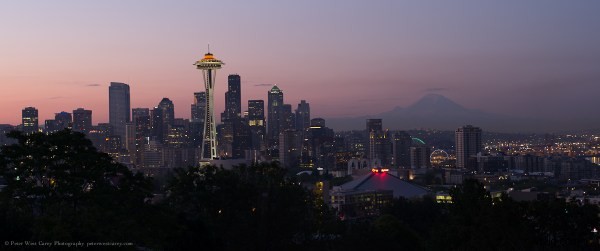
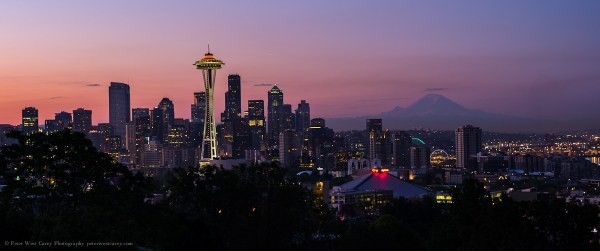
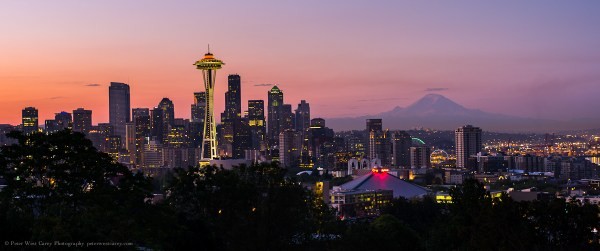
While waiting for the sun to show, I took some sample images and adjusted my settings. Here is the shot as it came out of the camera.
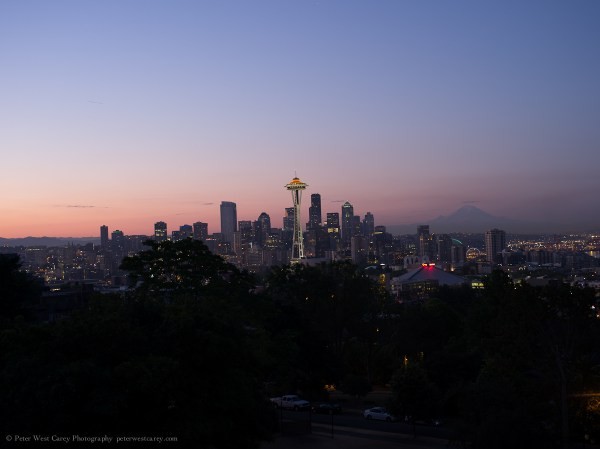
For settings I used ISO 100, 55mm, f/5 and 1 second in Manual mode. I used the camera’s ability to create a DNG file and this is a JPG version you see above. Otherwise, no edits at this point.
I was looking for clarity of the image and a good color saturation. I didn’t want to “shoot to the right” too much because I prefer a darker look and rich colors from the start.
Editing
As is often the case, shooting was the easy part. Except the waking up early aspect, I had this shot well before the sun came up (6:11am, the sun didn’t come up for another 30 minutes).
At home, excited because of actually feeling awake and spending time in the glorious early morning light that followed, I sat down and made the following changes in Adobe Photoshop Lightroom 4.
1) My first step was to crop the image down to what I wanted. The 55mm version was too far away, but I knew that when taking it. First, I zoomed in.
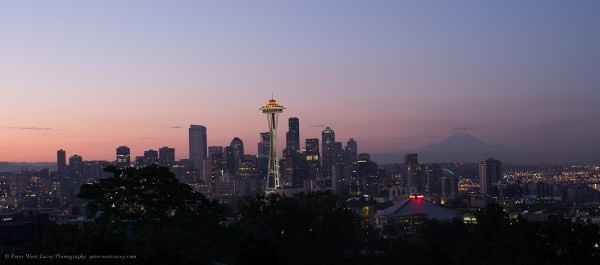
I didn’t like the Space Needle being right in the middle, so I brought in the left side some.
The Space Needle is better, but too much sky. Also, the angle is off a little (this is something I would fight with until the final export). So let’s correct that a little now too.
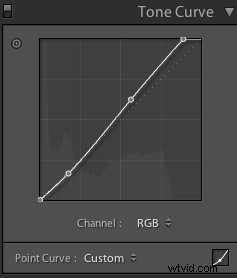
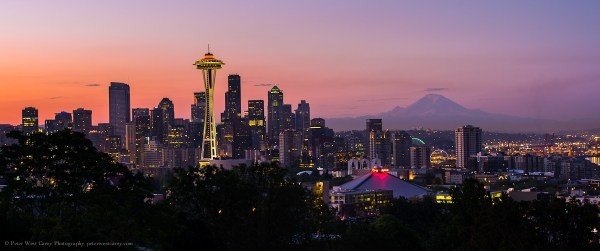
2) With the general crop done, I adjusted the Tone Curve to bring up the white point and give a little contrast to the image. It looks like this:
3) I adjusted Clarity to +33 to give the foreground some punch.
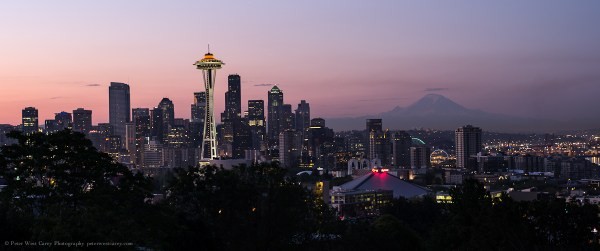
Also, Vibrance by +24 and Saturation by +20 to add more color into the sky.
Last, Contrast by +20 for a subtle darkening of the sky and then Highlights down to -56.
Subtle changes and not so obvious on these smaller sized images.
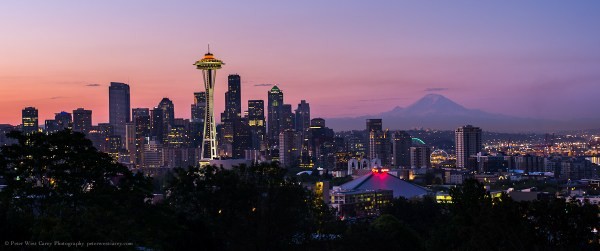
4) Next, I wanted to right side, away from the sun, to not be so dark. So I added in a Graduated Filter as such (I usually paint in my Graduated Filters and Adjustment Brushes with an Exposure of around 3 stops to make them easy to see and that is what you’re seeing here).
I then toned this down to be just .4 stops brighter, helping bring up that corner of the image.
5) Now I adjusted Blacks to -7 and Exposure to +.20.
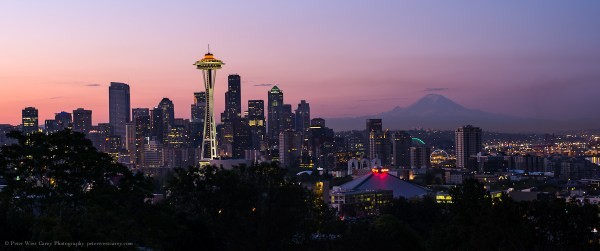
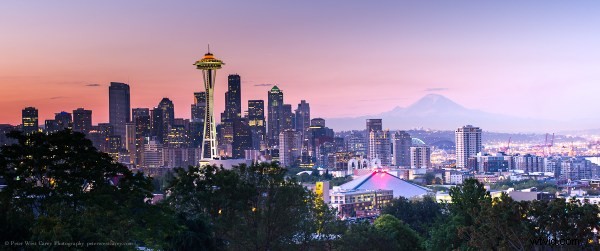
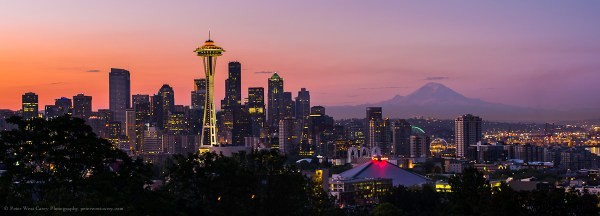
6) At this point, I wanted more warmth in the image. I increased the Yellow Saturation to +50 and the Orange Saturation to +31.
The Space Needle starts to stand out more but I still want the whole scene to be warmer, so I increase the Color Temperature to 6000K from 5400K.
In making this change the Orange and Purple Saturation have suffered slightly, so I increase Purple Saturation to +19 and Orange Saturation to +58.
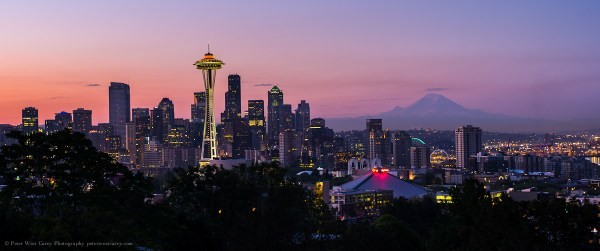
7) A couple more crops and straightening (after you have been staring at an image for a while, step away and come back. It also helps to have another person take a fresh look and point out little changes) and I’m done!
Thank you for reading along and I hope this has helped in some way. Not every change is a “WOW!” moment and sometimes it is the subtle changes that make a big difference in the final product.