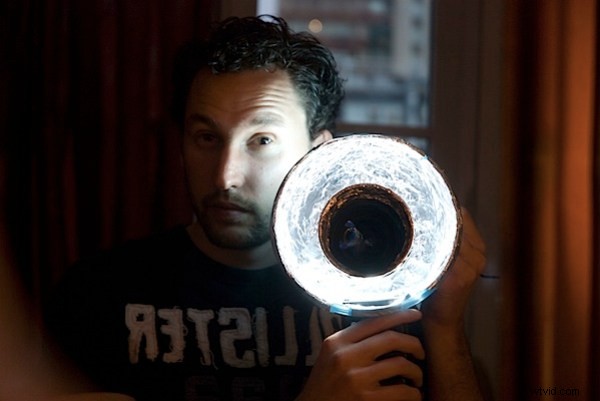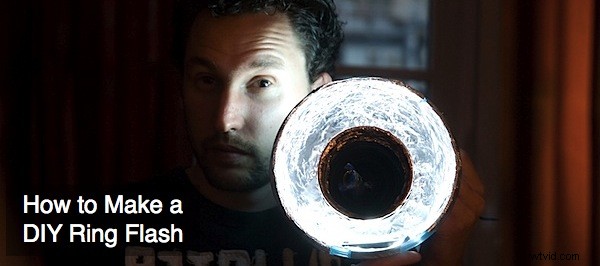
Don’t have the budget to buy yourself a Ring Flash? Today one of our forum members Manzin (see some of his work here) shares a tutorial on how he created his own DIY Ring Flash.
You like Ring Flashes but you can’t pay the price? I have a solution for you, and it doesn’t involve stealing one from a store!
Make your own for a very very cheap price, about 20 euros. The only thing is that you need to already have a cobra flash. Ok, so let’s get started.
First Step
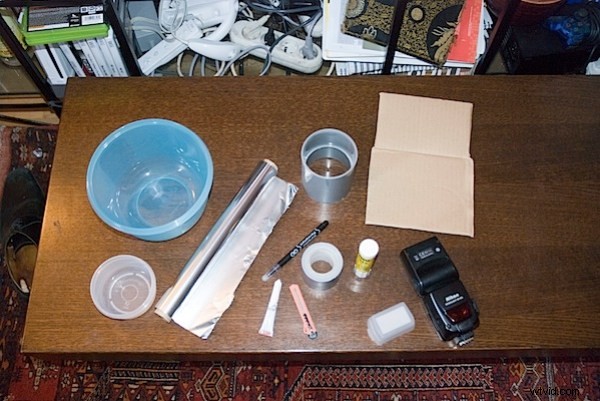
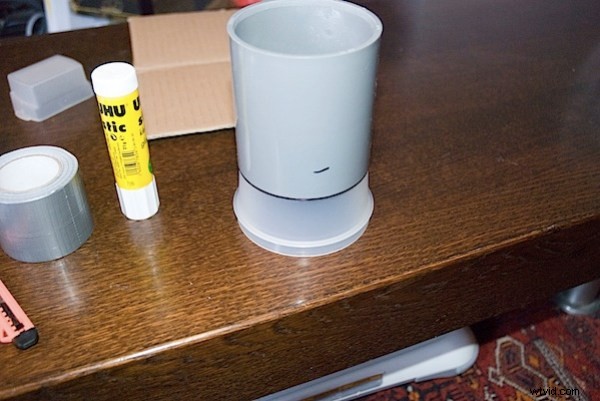
What you need.
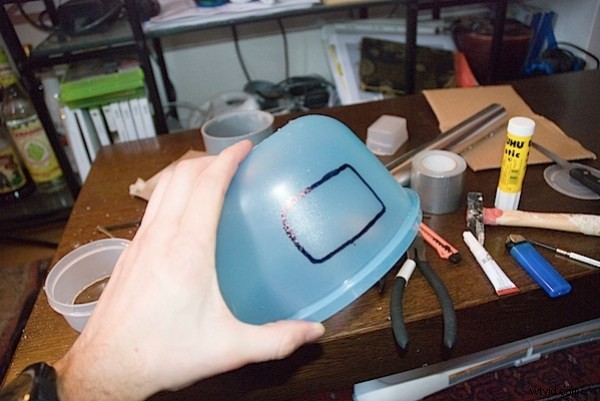
- A plastic bowl (not too thick) whose base is about 8 cm of diameter. Your lenses need to be able to go through.
- Another plastic bowl, but slightly smaller, but not under 8 cm. It needs to get inside the big bowl, but your lenses will also have to go through it.
- A piece of pipe (PVC gives the best results in term of weight and toughness) about 5 cm long and 8 cm of diameter.
- Some aluminum foil
- A pen
- A ton of big tape
- A cutter
- And you’ll need some hard glue.
Step Two
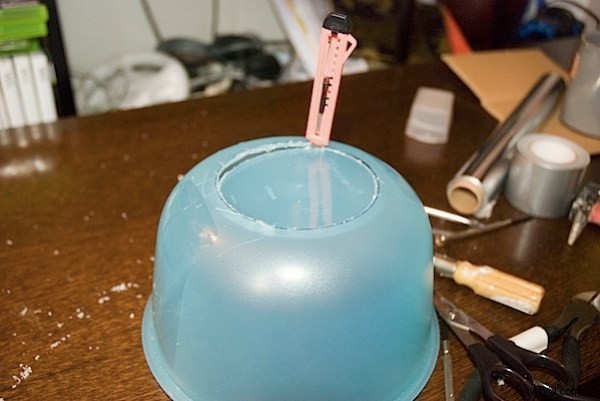
Place the pipe on the base of the big bowl, and use the pen to draw a circle. Then do the same on the small bowl.

Step Three
Take the cutter (or anything that cuts) and try to remove the circles you just drawn from the base of your plastic bowls. This can be really tough, depending on the thickness of the plastic. Mine was really hard, so it took me a while and I had to use a bunch of different tools. But, hey, I made it eventually, so you will ! Don’t forget to do the same on the small bowl.
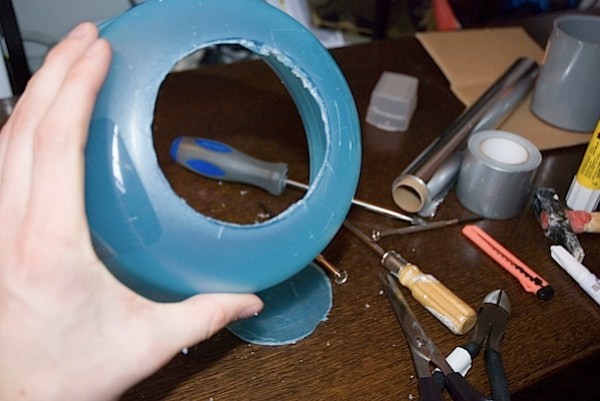

Step Four
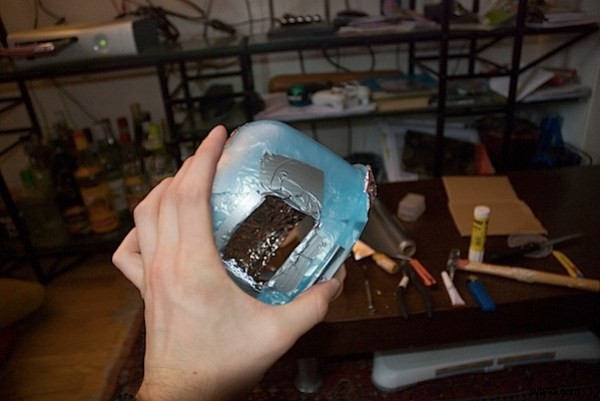
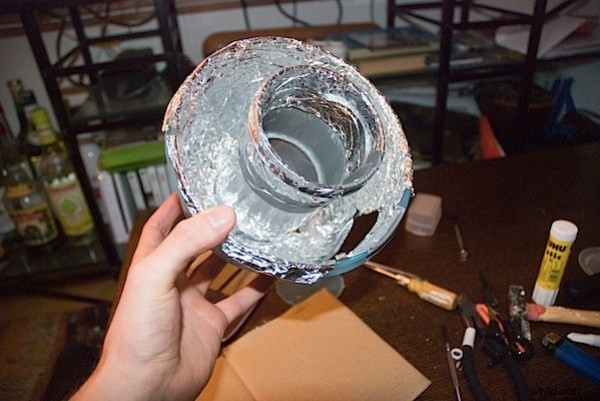
Place the head of your flash on the side of your big bowl, and draw around it. Then, take back all your tools, and cut out the rectangle you just made. This is the last cutting! Hang on!

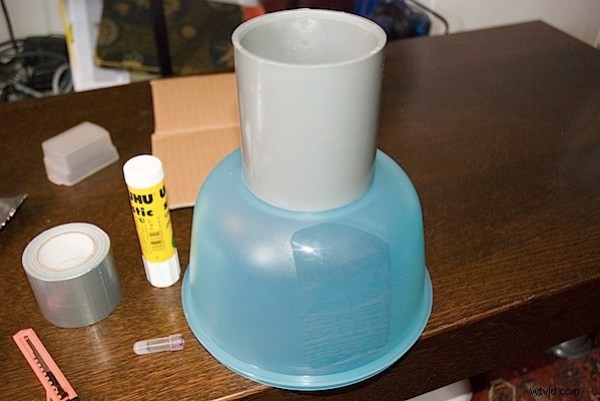
Step Five
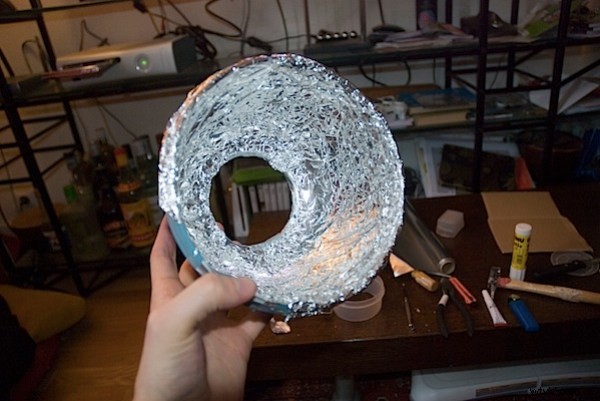
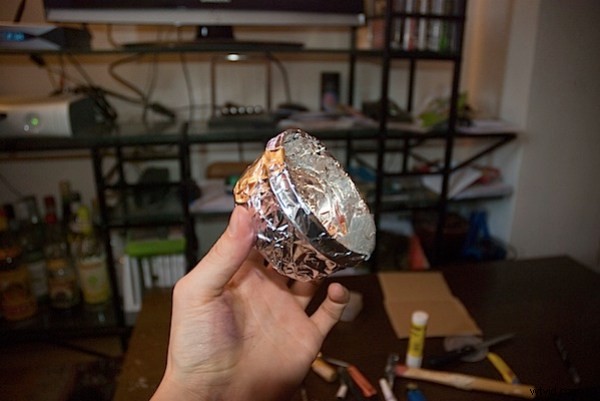
Cut sheets of alu foil, and glue them inside the big bowl, around the pipe and outside of the small bowl. You can also put some alu foil inside the small bowl, but it won’t change anything. Then again, depending of the type of plastic you chose, the glue might, or not, works. In my case, it did a pretty terrible job. So I had to tape everything. Taping is cool.
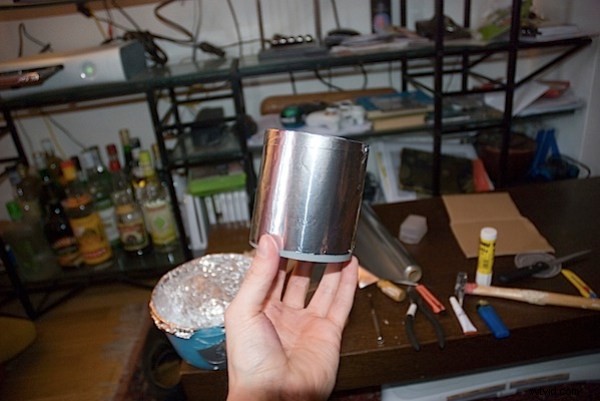
Step Six
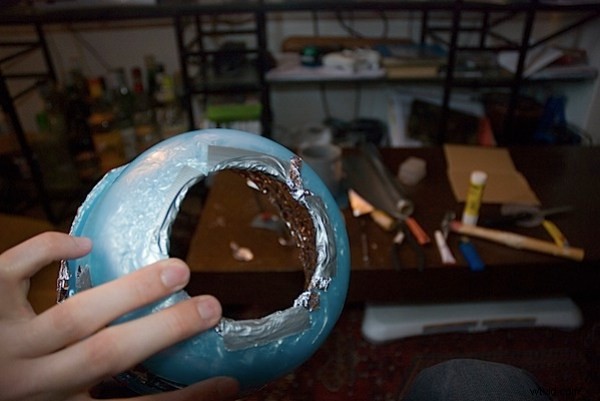
Now you have to put everything together. It may be a bit tricky because the alu foil is not very tough, and you don’t want to rip it. Here’s what I did, and it works pretty well. Put the pipe inside the big bowl, and then put pieces of tape from the inside to the outside of the rear of the bowl. This will prevent the pipe to move, and will allow it to support his own weight plus the small bowl. Talking of witch, take the small bowl and put it on the top of the pipe, then tape around the base. This should fix it for a while. Now let got the tape, and have a look to what you’ve just did, because you’re done!
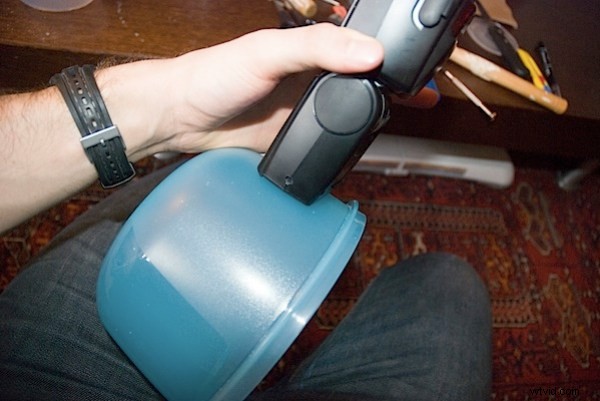
How to use it?
Great you just made it! You now have a Ring Flash that used to keep food in the fridge. So, how do you use it? Pretty easy. Insert the head of your flash in the hole on the side. Don’t push it too far, just a little bit. Use a remote wire, or use the wireless TTL of your flash. Insert your camera from the rear hole, turn on your built in flash, and enjoy the show!
Here some pics of the results. You may need to use photoshop, or any other program, to give a better look to the image, but even in raw the results a pretty good for a very low investment.
Hope you enjoyed it !