Masking in DaVinci Resolve gives editors precise control over what stands out in a scene. You can highlight a subject, blur the background, or create cinematic transitions that guide the viewer's eye.
However, many beginners find masking in DaVinci tricky at first—it involves nodes, windows, and tracking tools that can feel overwhelming.
In this guide, we'll cover:
- How to add and adjust masks step by step
- Pro tips for smooth tracking and clean edges
- Common mistakes to avoid
- A simpler alternative using Wondershare Filmora's Pen Tool
Let's dive in.
Part 1. How to Mask in DaVinci Resolve: Simple Steps That Make a Big Difference
Many editors love using DaVinci Resolve for masking because it gives precise control and flexibility. You can highlight a single subject, adjust only certain parts of a frame, or blend different shots seamlessly. The tools are built to help you focus attention exactly where you want it and bring more depth to your scenes.
How to Mask in DaVinci Resolve
Below, you'll find a simple tutorial on how to mask in DaVinci Resolve 18, shared by YouTuber DanVinci. Follow along to create clean, professional edits that look natural and well-balanced.
Step 1
Open DaVinci Resolve and Create a New Node
- Start by opening DaVinci Resolve on your computer.
- Once it's up, import your video and drag it onto the timeline so it's ready to edit.
- Go to the Color page and create a new node to start your masking work.

Step 2
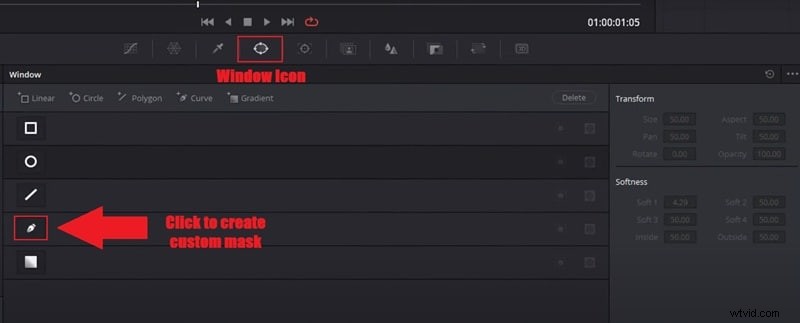
Open the Window Panel (Mask Tool)
- Next, click the Window icon to open the masking panel.
- You'll see several mask options you can use, like circle, square, or polygon. Choose the Pen icon to make a custom shape.
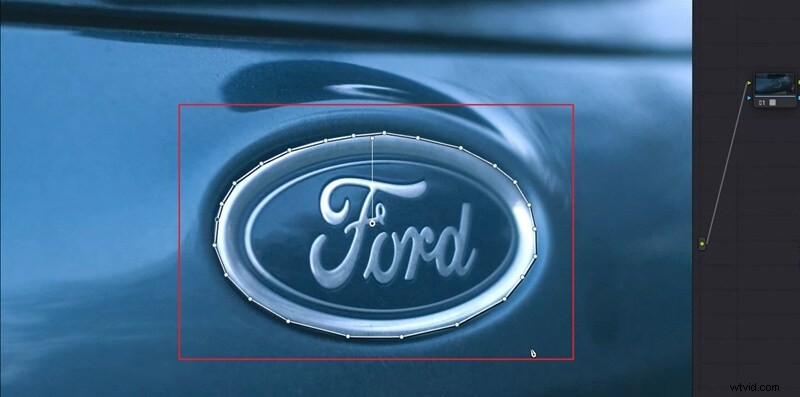
- Go to your preview window and trace around the logo by clicking point by point.
- Once you close the path, it will form a clean mask around your object.
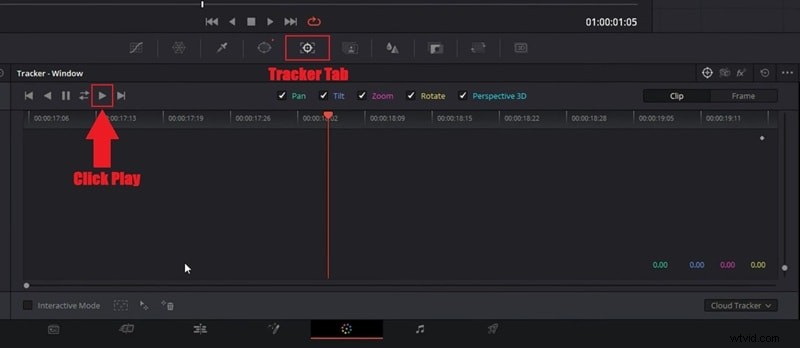
- Click the Tracker tab so DaVinci Resolve can automatically follow the motion.
- Click the Play button to start tracking, and you'll see the mask move smoothly along with your subject in real time.
- Use the Color Wheels to change the tones, adjust brightness, or even turn that area black and white.
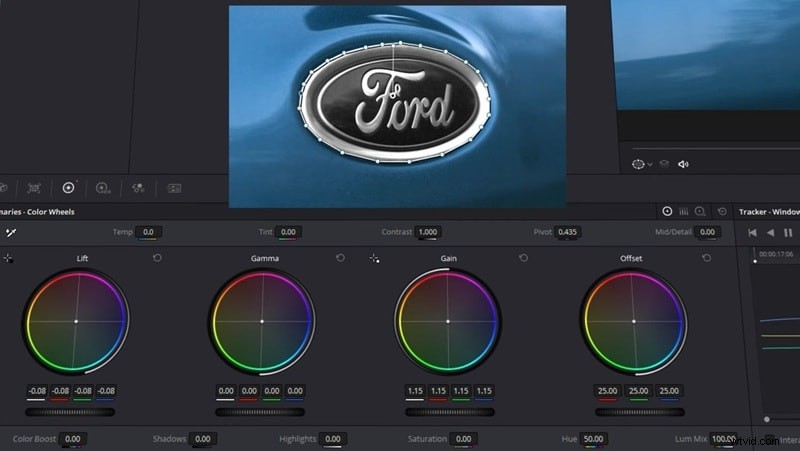
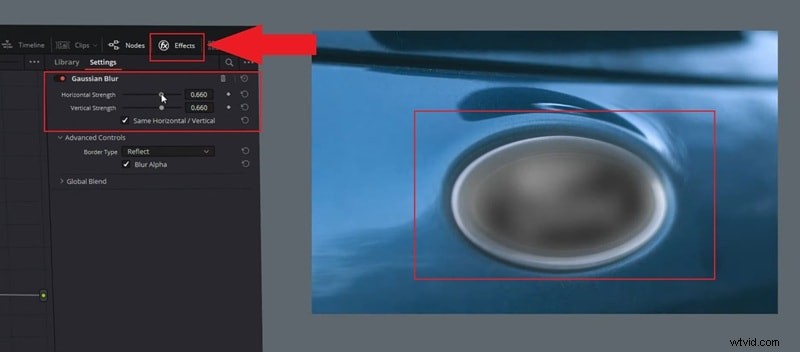
- You can also add effects like Gaussian Blur from the Effects tab, and you'll see only the masked area change in the preview.
And this is just one way to learn how to mask in DaVinci. There are many other techniques you can try since the tool can be used for different creative effects. For a more complete walkthrough, check out the video:DaVinci Resolve | Every Masking Method.
Pro Tips: Improve Mask Accuracy
To get cleaner and more accurate masks in DaVinci Resolve, try these quick adjustments:
- Zoom in up to 200% when refining edges. It helps you see the outline clearly and avoid harsh borders.
- If tracking fails, switch to Frame mode and adjust the mask manually frame by frame for smoother motion.
- Use multiple masks if your subject has different moving parts — for example, separate the face and background.
- For complex shots, open the Fusion Page. It gives you extra precision and advanced control for intricate shapes or animations.
Part 2. When DaVinci's Mask Isn't Enough: Try a Simpler Way
After spending some time learning how to add a mask in DaVinci Resolve, it's easy to see why many editors love its precision. But it can also feel a bit too technical, especially when you're dealing with multiple nodes or tracking that doesn't always behave as expected. Plus, fine-tuning every frame takes so much effort.
If you want something faster, more intuitive, and more accessible (especially if you aren't a colorist), Wondershare Filmorais a strong alternative. It gives you masking with less friction, yet still delivers professional control.
 Secure Download
Why Filmora Is the Smarter Choice for Masking
Filmora includes a dedicated Video Masking feature that works smoothly without the node-based complexity. It's simple enough for beginners but still gives you the kind of control that makes your edits look sharp and professional.

Here's what makes Filmora's masking workflow better:
- Quick Shape & Custom Masks: Choose from preset shapes (circle, rectangle, polygon) or draw freehand masks directly on your video. No nodes required—just click and adjust.
- Effortless Tracking: Enable motion tracking with one click, and Filmora automatically follows your subject throughout the clip. No manual keyframing or frame-by-frame adjustments needed.
- Instant Effect Application: Apply blur, color grading, or filters directly to masked areas. What you see is what you get—no confusing node trees to navigate.
- Smooth Edge Control: Adjust feathering, expansion, and opacity with simple sliders. Get clean, natural-looking masks without technical guesswork.
- All-in-One Interface: Everything you need is right there—masking tools, effects, and preview all in one clean workspace.
Quick Steps to Mask in Filmora
Now, it's time to try the new tool in action. Follow the quick steps below to learn how to make a mask in Filmora, like this:
Step 1
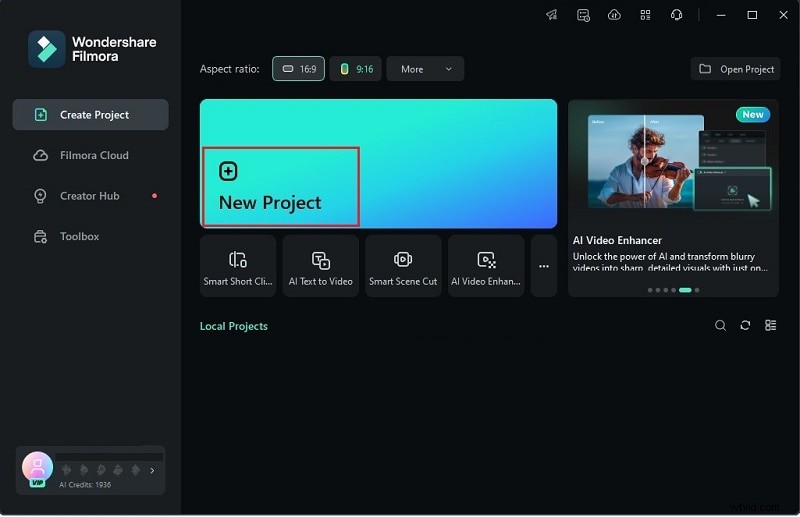
Open Filmora and Start a New Project
- Make sure you've downloaded and installed the latest version of Filmora.
- Open the program and click “New Project” to start with a fresh workspace.
Secure Download
- Click “Import” and drag both of your video files into Filmora's timeline on top of each other.
- Select the clip you want to apply video mask effects to.

Step 3
Access the Mask Tools
- Click your clip on the timeline, then go to the property panel on the right.
- Select the "Mask" tab to see all available masking options.
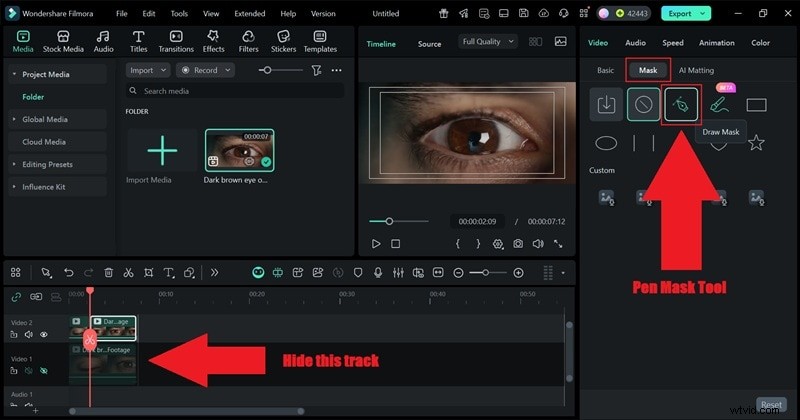
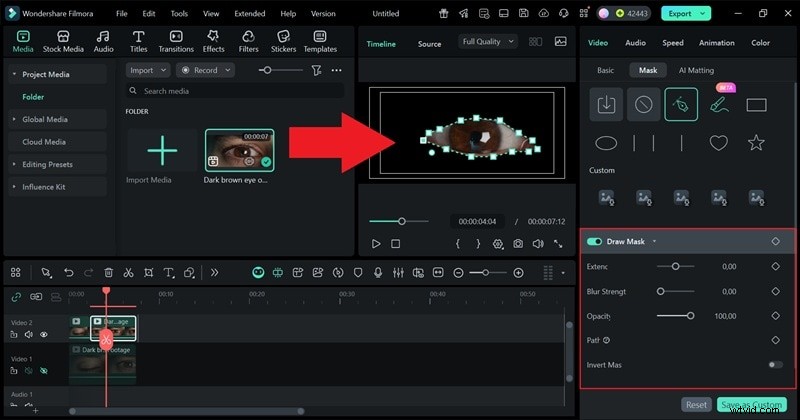
- Choose a preset shape (Circle, Rectangle, Polygon) or use the Draw Mask option to create a custom shape.
- Adjust the mask's position and size to cover the area you want to isolate.
- Use the Feather slider to soften the edges for a more natural blend.
Step 5
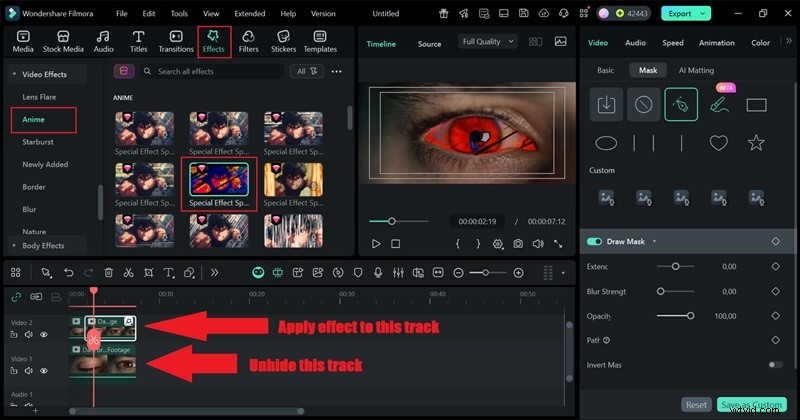
Apply Effects to the Masked Area
- With your mask active, go to the "Effects" tab or use the color adjustment tools.
- Apply effects like Blur, Color Correction, Brightness, or any creative filter.
- Only the masked area will be affected, while the rest of your video stays unchanged.
Step 6
Enable Tracking (Optional)
- If your subject moves in the video, click the "Motion Tracking" button in the Mask panel.
- Filmora will automatically track the subject's movement and adjust the mask accordingly.
- Preview the tracking to make sure it follows smoothly.
- When you're finished editing, hit Play to preview how your mask effect looks.
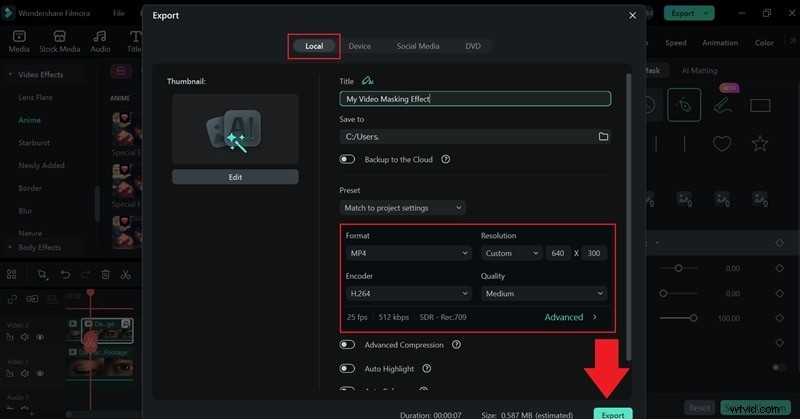
- If everything looks good, click “Export” to save your video.
- You can save it to your device or share it directly to your favorite social media platforms.
As you can see, masking in Filmora gives you full creative control without the technical overhead. The workflow is straightforward, and the results look just as professional as what you'd get in DaVinci Resolve—but with way less hassle.
Part 3. Creative Masking Ideas to Try
After spending some time with both editors, it's easy to see that masking in Wondershare Filmora feels much easier and more natural to work with. You can draw, adjust, and animate without getting tangled in too many settings, which makes the whole process more enjoyable.
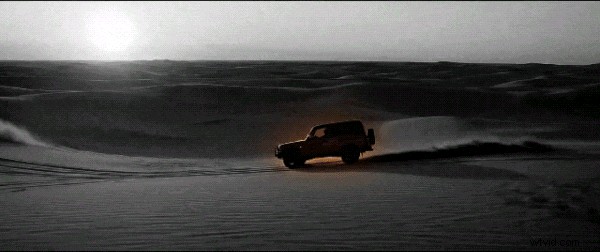
Now that you know how to add a mask in DaVinci Resolve and Filmora, you can start playing around with more creative ideas. Here are a few fun ways to use masking that can bring extra life to your travel videos, intros, or storytelling projects.

Classic Masking Effects
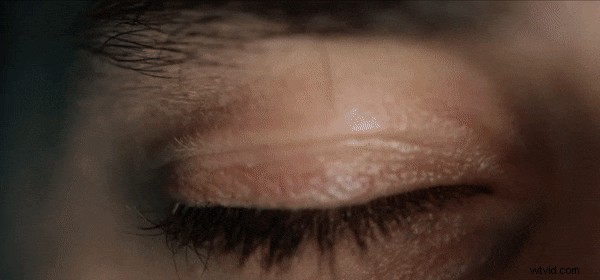
Focus Blur Effect
Use a soft mask to keep your main subject sharp while blurring the rest of the frame. It creates a clean, cinematic look that adds depth and keeps attention exactly where you want it.

Cinematic Color Spot
Mask out everything except one object and tweak its color to make it pop. This effect instantly draws the viewer's eye and gives your video a stylish, movie-like feel.
Clone Yourself Effect
Film two separate clips of yourself doing different actions, then blend them together with a mask. The result looks like there are two of you in one scene, which always grabs attention. Watch the official Filmora tutorial below to try it yourself.
Animated Masking Effects – Powered by Pen Tool
Want to add motion to your masks? Filmora's Pen Tool takes things further by letting you:
- Draw custom paths and shapes directly on your video
- Animate mask reveals with stroke effects and Trim Path
- Bind elements to paths for smooth follow animations

Here are two standout techniques:
Text Reveal Mask
Create a smooth text reveal by drawing a custom path that makes your words appear as if they're being written on screen. This technique adds motion and personality to your titles—perfect for intros, lower thirds, or storytelling sequences.
How it works:
- Use the Pen Tool to draw a path around your text
- Apply Trim Path to control the reveal timing
- Add stroke effects for a glowing or hand-drawn look
Animated Route Map
Turn your travel clips into a compelling story by animating a route on a map. With Filmora's Pen Tool and path-follow feature, you can make it look like your journey unfolds right on screen.
How it works:
- Draw your travel route using the Pen Tool
- Bind icons, markers, or stickers to the path
- Animate the path reveal with Trim Path
Key Takeaway: While basic masking helps you isolate and adjust specific areas, combining masks with the Pen Tool's animation features unlocks a whole new level of creativity—without needing plugins or complex workflows.
Part 4. Comparing DaVinci Resolve vs Filmora's Masking Tool
And after trying both masking in DaVinci Resolve and Filmora, it's clear each has its strengths, but Filmora makes the process faster and easier to manage. Take a look at the table below to see how they compare before choosing which one fits your workflow best.
| Category | DaVinci Resolve | Wondershare Filmora |
| Ease of Use | Powerful but technical with its node-based system. Steeper learning curve for beginners. | Simple and direct with a visual, click-and-adjust workflow. Beginner-friendly. |
| Masking Tools | Offers various window shapes (circle, polygon, curve) with detailed node controls. | Includes preset shapes, draw mask, and instant feathering controls—no nodes needed. |
| Tracking | Advanced tracking options but requires manual setup and keyframe adjustments. | One-click motion tracking that automatically follows your subject. |
| Precision Control | High precision for professional colorists and VFX users. | Smooth and accurate with adjustable feathering, expansion, and opacity controls. |
| Effect Application | Requires linking nodes and understanding signal flow. | Direct application—select mask, add effect, done. |
Conclusion
There are endless creative edits you can explore with video masking, and this guide walks you through exactly how to make a mask in DaVinci Resolve step-by-step. The results can look great, but the process often feels technical and time-consuming, especially when you need to adjust multiple nodes or track moving objects.
For a smoother and more reliable option, Filmora with its Pen Mask Tool gives you the same creative freedom without the complicated setup. You can draw, animate, and refine your masks right on the video, making everything feel faster and more intuitive. After trying both masking in DaVinci and Filmora, it's easy to see that Filmora keeps the creativity while removing the frustration.

Filmora
AI Video Editing App & Software
Best tool for making videos anywhere for all creators!
Your Perfect First Video Edit Starts Here - No Experience Needed