When you want your text to stand out against the background, adding an outline is often the answer. Outlining text makes it easier to read and effortlessly more eye-catching. It also gives your text a bit of style and personality that makes everything look more put-together.
In Photoshop, there are several ways to add a text outline, depending on the look you're after and how much control you want over the final result. If you've been looking for a simple way to do it, this guide will walk you through easy step-by-step instructions on how to outline text in Photoshop, plus a handy tip to make your design look even more stylish.
Part 1. How to Outline Text in Photoshop Using Layer Styles
Best for: quick edits, fully editable outlines, and everyday design tasks.
If you just need a clean, adjustable outline for titles, thumbnails, or social media graphics, this method is the easiest way to go. Layer Styles in Photoshop let you refine your text's appearance anytime without flattening or losing editability.
How to Add an Outline to Text in Photoshop
Start by selecting the layer where you want your text to appear. Or, create a new one if needed. Then pick the Type Tool from the toolbar.
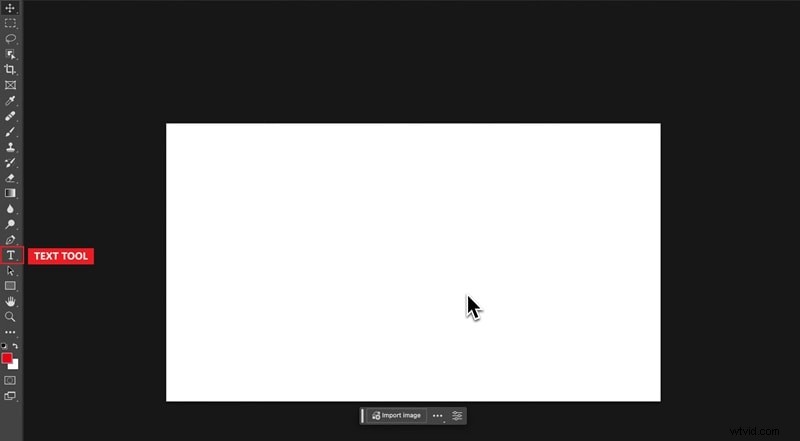
Click anywhere on the canvas and type in the words you want to display.
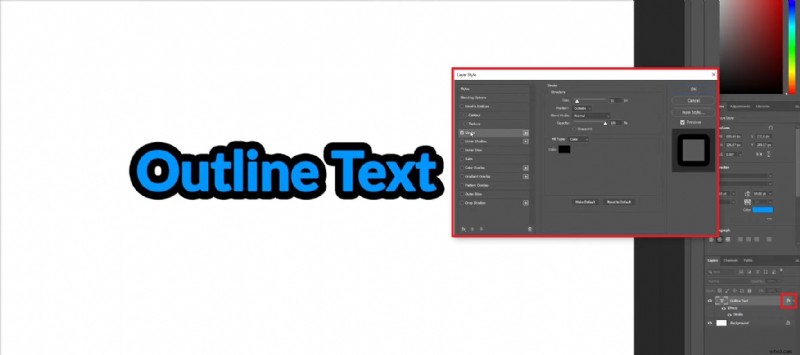
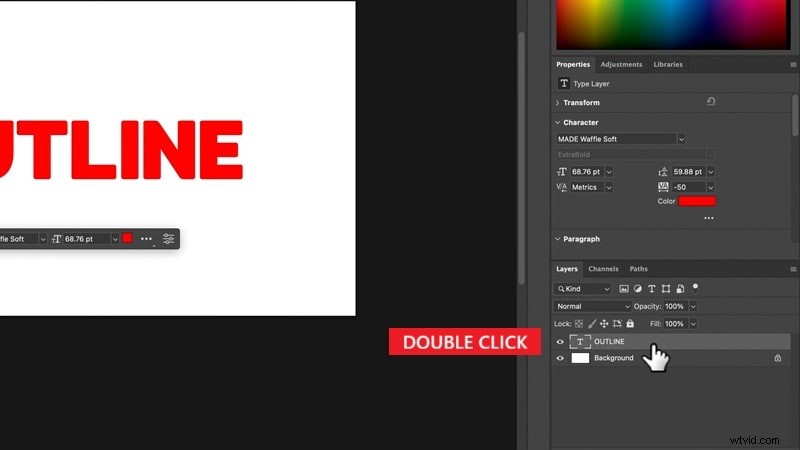
Click the FX icon at the bottom of the Layers panel, or double-click the layer itself to open the Layer Style window. Enable the Stroke option by checking its box.
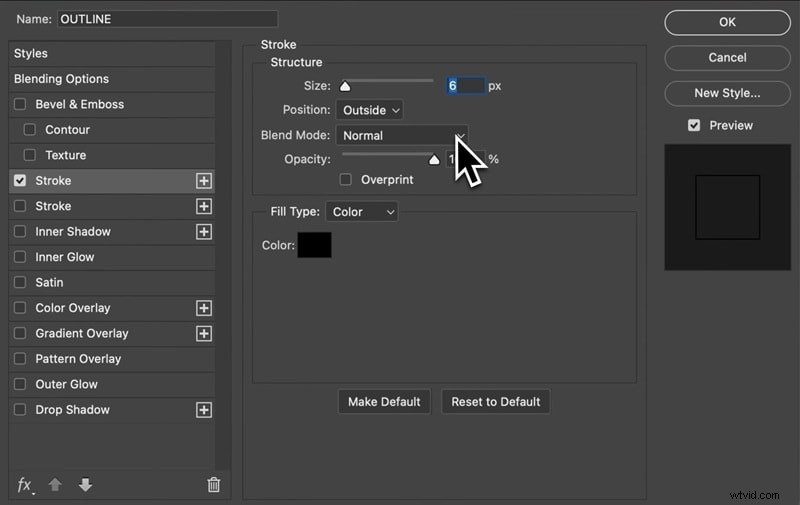
Inside the Stroke settings, you can fine-tune the outline:
- Adjust the Size slider to change the thickness
- Use Position to decide whether the outline sits inside, outside, or centered on the text edges
Step 5
Pick your color and blending
Click the Color Picker to choose your outline color. You can also experiment with the Blend Mode dropdown to decide how the stroke interacts with the text or background.
Once you're happy with the result, press OK to confirm and apply the outlined text effect to your image.
Part 2. How to Outline Text as a Vector
Best for: scalable designs, logos, and high-resolution print graphics.
Compared to using Layer Styles, this method works by turning your text into a vector shape. Once converted, each letter becomes an editable path that you can adjust point by point. You can resize it freely, every curve and angle, without losing quality.

It's perfect if you want to outline text in Photoshop because you want to make brand assets, posters, or detailed typography work since they need to stay sharp at any size.
How to Make Outline Text in Photoshop
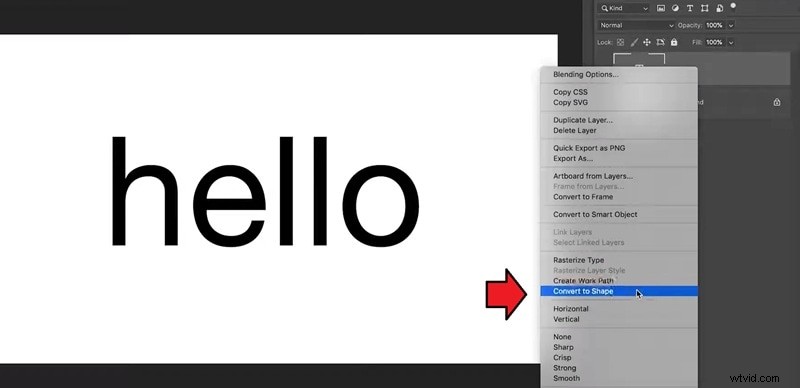
Create your text with the Type (T) tool, then right-click the text layer in the Layers panel and choose Convert to Shape.
Step 2
Enable Vector Editing
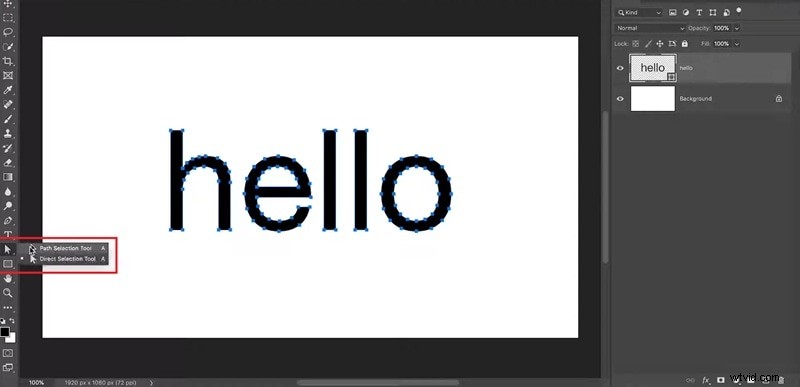
Pick any vector tool (e.g., Direct Selection (A) or Pen (P)) from the toolbar to reveal the text's anchor points and paths.
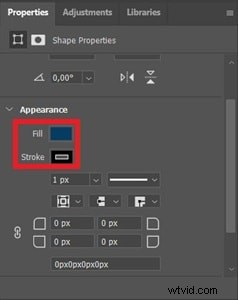
Use the top Options bar (or Properties panel) to set Fill and Stroke. Adjust stroke color, weight, and alignment to define the outline's look.
When you're happy with the result, confirm your settings (click OK if prompted) to finalize the vector outline.
Part 3. How to Outline Text Without Fill (Hollow Text Effect)
Best for: modern, lightweight, and stylish text styles and overlay effects.
If earlier you learned how to add a solid outline around your text, this time you can also outline fonts in Photoshop, except that it's only the borders that stay visible.
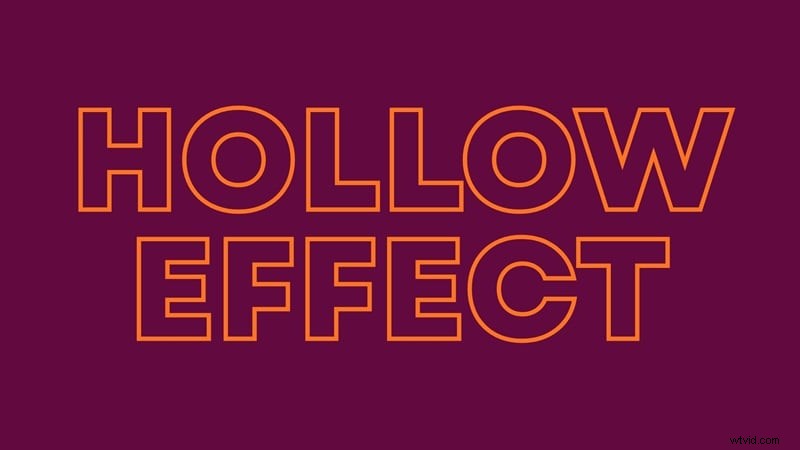
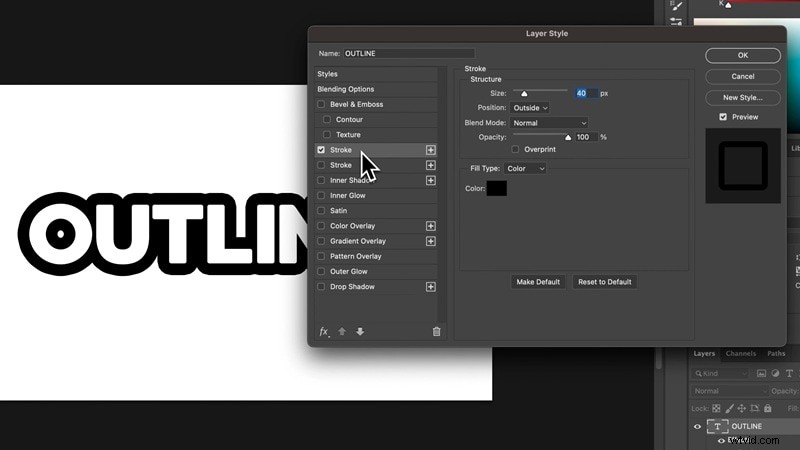
This effect is called the Hollow Text effect, where the inside of each letter becomes transparent. It gives your design a clean, modern look that feels lighter, which is often used for minimalist layouts or any creative project that calls for a stylish yet subtle text treatment.
How to Add a Stroke to Text in Photoshop Without Fill
Select your text layer and double-click the layer thumbnail (or click FX at the bottom of the Layers panel).
In the left list, click Blending Options: Default and drag Fill Opacity all the way to 0% (leave Opacity at 100%) until only the outline remains visible. Click OK to save the changes.
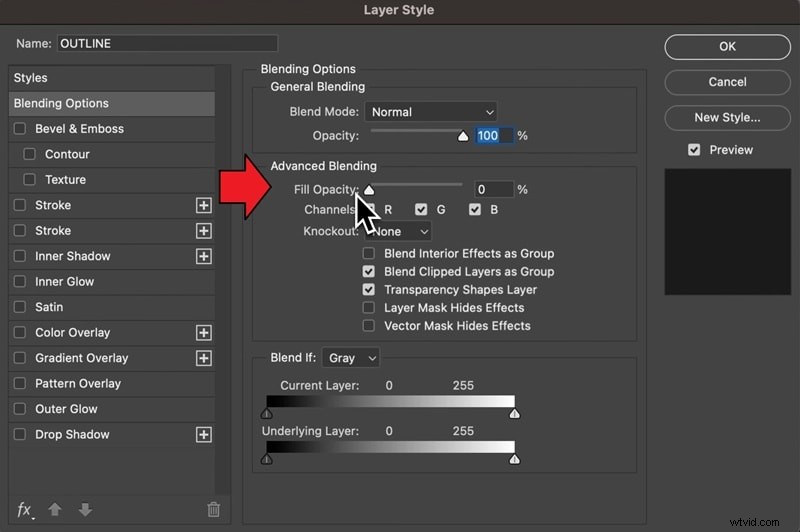
Tip: Use Fill Opacity, not Opacity. Fill Opacity hides the text fill but keeps Layer Styles (like Stroke) visible.
Step 2
Enable Stroke and Make the Fill Transparent
Check Stroke, then set Size, Position (often Outside looks best), and Color.
To achieve the same Hollow Text effect with a vector outline:
- Access the Layer Style window
- Click the checkbox next to Stroke
- Click the Fill icon from the top menu and select the No Fill icon (a white box with a slanted red line through it).
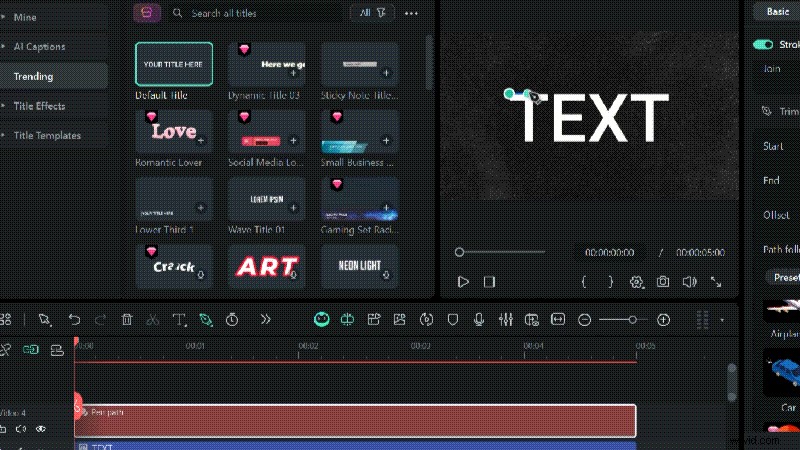
Part 4. How to Outline Text and Animate It for a More Stylish Look
After learning how to outline your text in Photoshop, you can start experimenting with different styles and take it further by turning it into a motion design or animation, like this:
Generated by Filmora
Photoshop might be ideal when you're focusing on graphic design or static visuals like posters or social media banners. But it might not be the most efficient choice when you want your outlined text to move or interact dynamically with your video, for a few reasons:
- Photoshop's keyframe controls are basic and not designed for complex motion graphics.
- You often have to move your project to Adobe After Effects to create real animation, which can make the process slower.
- Photoshop doesn't include ready-to-use text animation presets, so you have to build everything from scratch.
To do it effectively, you can use a video editor like Wondershare Filmora. Filmora can help you create basic stroke effects and also add dynamic path animations with a few clicks. Everything is done within the same editor without the complexity of keyframes or installing third-party plugins.
 Secure Download
For example, you can:
- Freely draw paths in videos using the Pen Tool, similar to the vector concept in Photoshop.
- Animate those paths using Trim Paths, so the outline traces or reveals your text in real time.
- Attach elements to follow the path with Path Follows, adding motion and energy to what would otherwise be static text, just like animating graphics along a path in Photoshop.
- Layer in transitions, filters, or glow effects using Filmora's built-in features.

So, compared to Photoshop, Filmora is the better choice when you want to create motion graphics from your text easily and make your outlined text move and blend naturally within your video.
| Photoshop | Filmora | |
| Output Type | Static images (PSD, PNG, JPG) | Video formats (MP4, MOV, WMV, etc.) |
| Purpose | Static designs, logos, and print-ready graphics. | Motion design and video projects with animated elements. |
| Text Outline Options | Supports Layer Styles (Stroke), vector outlines, and hollow (no-fill) text. | Supports animated outlines, handwriting effects, and custom stroke paths. |
| Editability | Text remains editable until rasterized; vectors allow scalable precision. | Text and strokes can be keyframed for motion or timing adjustments with real-time preview |
| Animation Tools | Limited | Lets you animate with keyframes, motion presets, and path animation. |
| Audio & Video Integration | Unavailable | Available |
| Suitable for | Text graphics, posters, and high-resolution assets. | Short videos, social media content, animated intros, etc. |
Secure Download
How to Outline a Text in Filmora (Basic)
Step 1
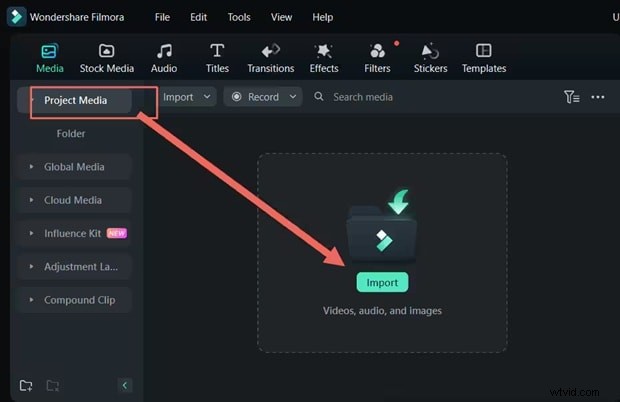
Create a New Project and Import Your Video
Open Filmora and start a new project. Then, import the video you want to edit by dragging it into the Media tab or clicking Import Media. Once added, drag the video to the timeline.
Step 2
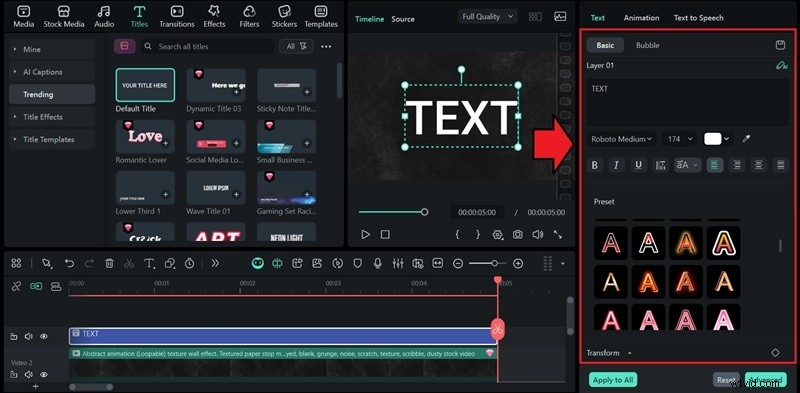
Add a Title to Your Video
Go to the Titles tab at the top and browse through the available presets. You can pick from simple default titles or explore more creative templates. Drag your chosen title onto the timeline above your video track.

Step 3
Customize the Text and Add an Outline
Click on the title in your timeline to open the Text Editing panel on the right side. Here, you can edit the font, size, alignment, color, and other settings.
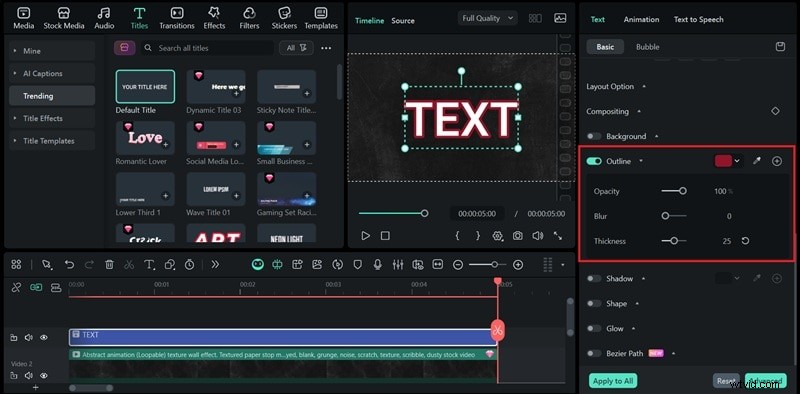
To simply outline your text, enable the Outline option. Adjust the opacity, blur, and thickness sliders to control how bold or soft the outline appears. You can also click the color box to choose your preferred outline color.
Or, you can design and create custom outline text using the Pen Tool in Filmora. You can use it to sketch curves, straight lines, or unique shapes that form the letters as you want.
How to Freely Outline Text Using the Pen Tool
Step 1
Trace the Text Outline
With your text already in place, open the Drawing Tool from the toolbar, then choose the Pen Tool to start creating your custom path.
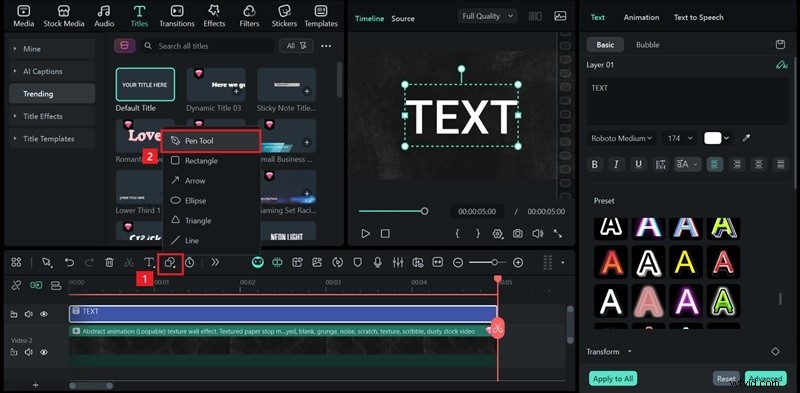
Next, use your text as a visual guide and carefully trace over it with the Pen Tool in the Preview Window. You can tweak the path as you go to add more style to your outline.
Note: Clicking from one point to another creates a straight line. If you want to draw a curve instead, click and hold while dragging to shape the path.
Step 2
Adjust and Customize the Outline
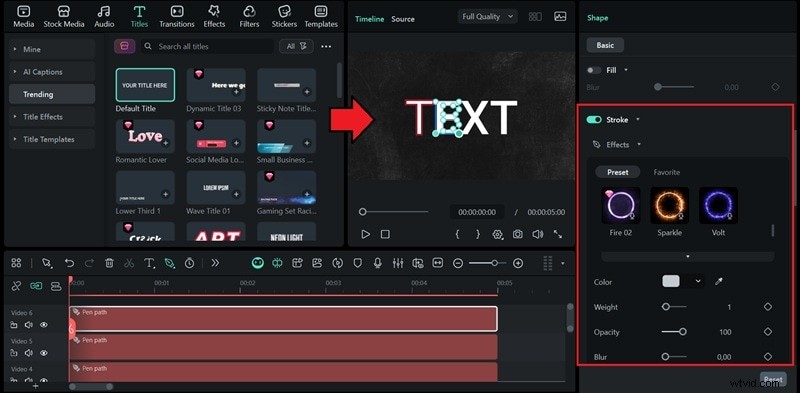
While tracing, refine your outline by adjusting the anchor point. To change the look, navigate to the Stroke > Effects menu on the Properties Panel and adjust the outline color, thickness (weight), and other visual settings.
Once everything looks good, you can delete the original text track so that only your outline remains.
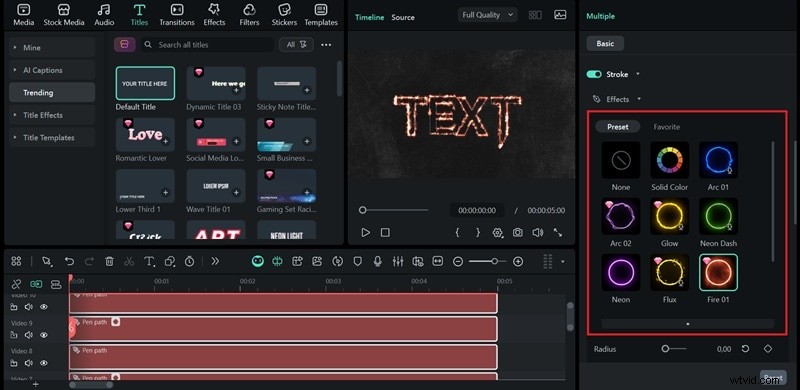
If you want to add a glowing effect like neon and fire around the path, you can choose from the available presets. Click on your preferred glow style to apply it.
Step 3
Animate the Outline Using Trim Path
To start making the outline move, you need to use Trim Paths.
- Select all of the Pen Path track(s) you want to edit on the timeline.
- Move the playhead to the start of the timeline.
- Set Start = 0% and End = 0%, and create the first keyframe by clicking the keyframe icon beside End.
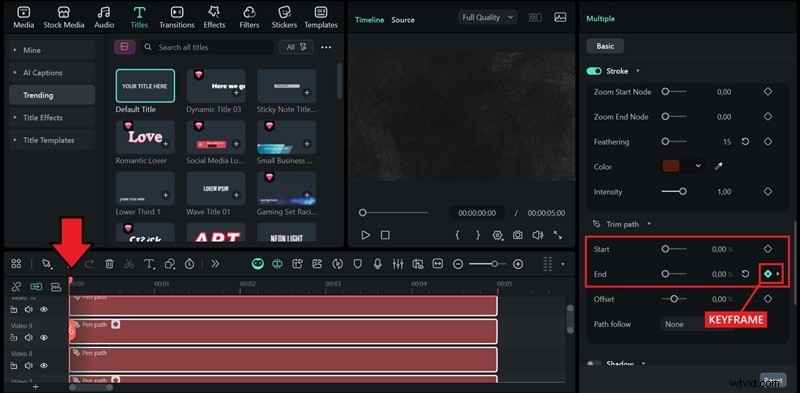
After that, move the playhead to the time where you want the animation to finish. Change End = 100%. A second keyframe will be added automatically. If not, you can manually add it.
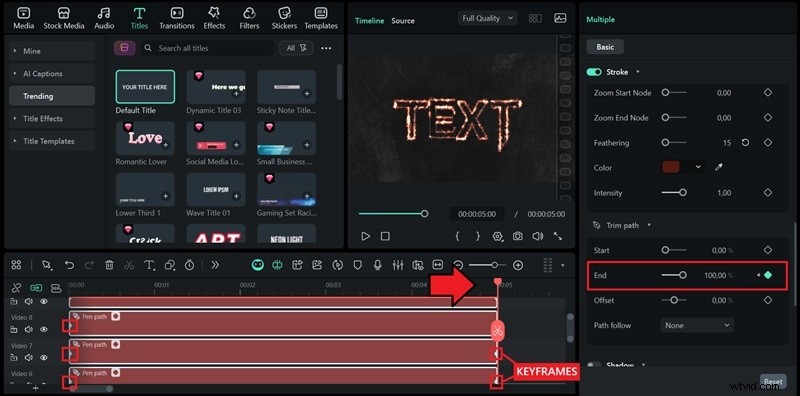
- The first one at the beginning of the timeline, with the End value set to 0%
- The second one at the point where you want the animation to finish, with the End value set to 100%.
Play back to see the line drawn from start to finish.
Step 4
Bind an Object to Follow the Path
To add a moving object that follows the animated path, open the menu next to Path Follow.
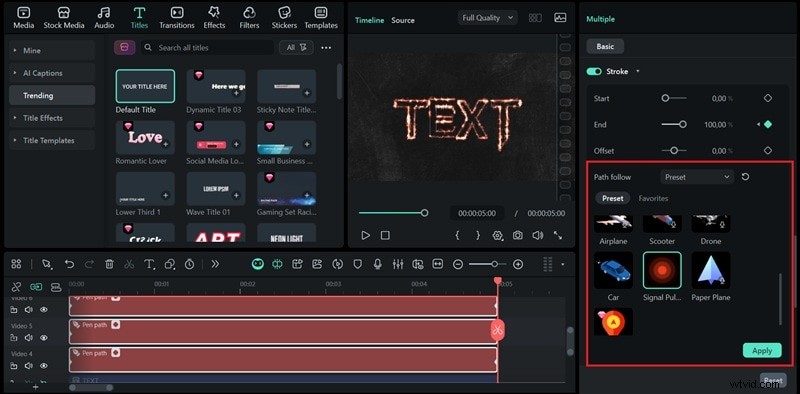
Then, choose how you want to attach an element to your path:
- Use a preset from the built-in library.
- Import your own object or image from your computer.
- Select an existing element already placed in the timeline.
After choosing the object, click Apply. The selected element will move along the path, following the direction and speed of your animation.
Conclusion
Outlining text in Photoshop is one of those simple techniques that can completely change how you design your text. And to do that, you no longer have any trouble since we have covered several ways to add a stroke to text in Photoshop.
If you want to take things up a notch, try adding some motion to your outlined text. You can do it all inside Filmora, or even bring in the text you made in Photoshop and animate it there. It's an easy way to make your designs move and feel more alive in videos.

Filmora
AI Video Editing App & Software
Best tool for making videos anywhere for all creators!
Your Perfect First Video Edit Starts Here - No Experience Needed