Audacity has a few ways to make your audio sound bad or distorted. Audio clipping and distortion effects will give you a distorted sound quality. On the other hand, by using reverb, EQ and exporting settings, you can control other aspects of your audio quality, such as noise and audio coloring.
Hence, we’ll be using the following tools and methods:
- Audio clipping
- Distortion
- Reverb
- EQ
- Low-quality settings
Normal audio:
Clipping audio to make it sound distorted
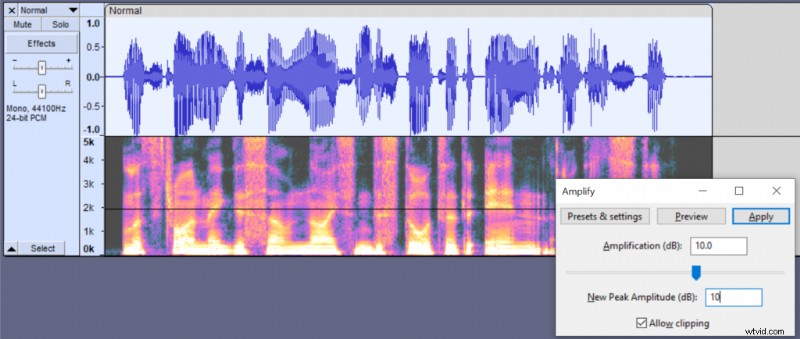
This is probably the most common way to make your audio sound bad. By going above 0dB and introducing audio clipping you’ll lose a part of your audio details and cause a metallic sounding distortion.
Distorted audio with 10dB clipping:
Audio distorted by setting a Peak Amplitude to 10dB in Audacity.Here’s how to distort audio with clipping:
- Make sure your audio track format is not a 32-bit float
- Select your audio recording
- Go to Effect->Amplify
- Check the ‘Allow clipping’ box
- Set New Peak Amplitude (dB) above 0dB
- Higher peak amplitude will introduce more distortion
- Preview whether you like what you hear and click apply
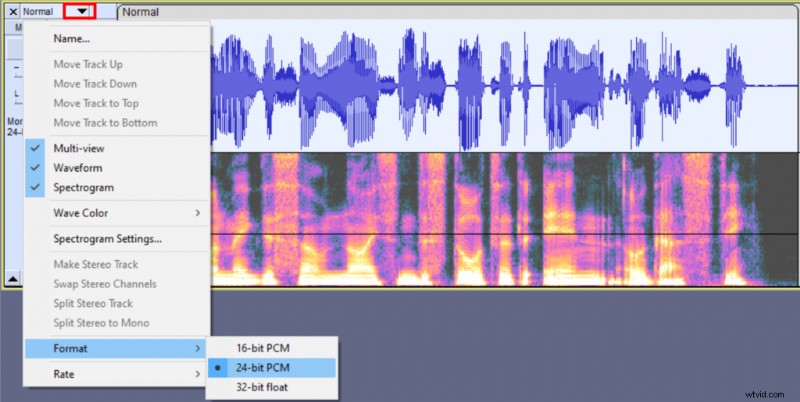 Setting your track format to 24-bit will make your audio distorted even if you decide to adjust its volume down below the 0dB threshold later in the editing process.
If you didn’t use the 32-bit float format, you’ll be able to reduce your audio volume in case it’s too loud and it’ll maintain the same distortion.
Distorting audio with Distortion effect
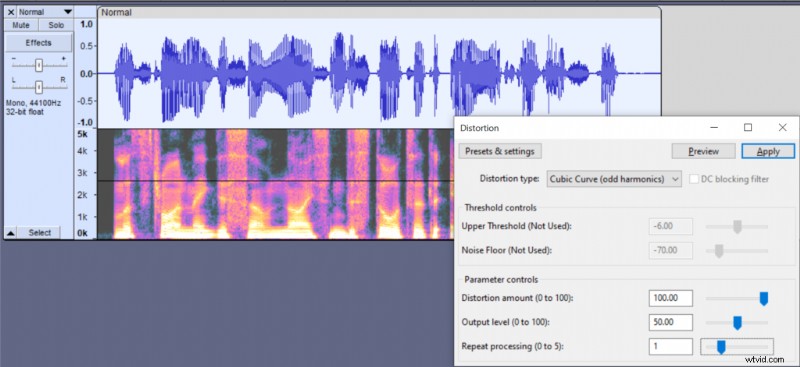
Another easy way to distort your audio is using Distortion effect that’s built-in Audacity.
Distortion effect in Audacity:
Audio distorted with 100 Distortion amountHere’s a quick step-by-step guide for Distortion effect:
- Select your audio recording
- Go to Effect->Distortion
- Select Cubic Curve (odd harmonics) Distortion type
- Adjust distortion amount to your liking, higher values will introduce more distortion
- You can add even more distortion by increasing Repeat processing parameter which works like a distortion multiplier
 Using distortion effect in Audacity.
Adding reverb to your audio
Reverb is not necessarily bad, but it’s usually unwanted if you’re doing voice-overs. By adding reverb you can make your audio sound similar to what you would hear in bathrooms, big empty halls or caves.
Reverb audio:
In Audacity, you can add reverb to your audio by following these steps:
- Go to Generate->Silence and add at least 5 seconds of silence at the end of your clip
- Go to Effect->Reverb
- Adjust the settings to your liking, or choose one of the presets
- Click Apply
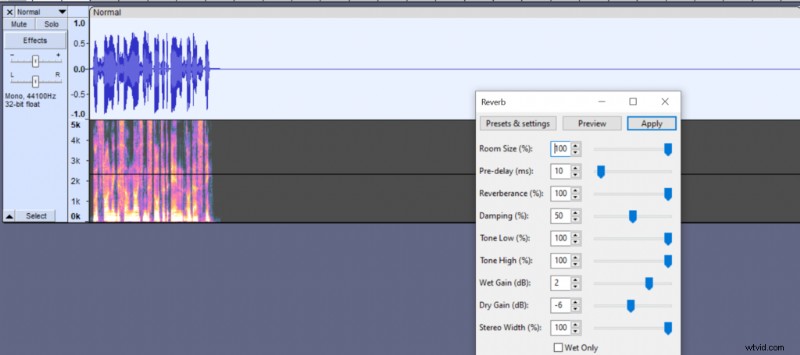 Reverb settings in Audacity.
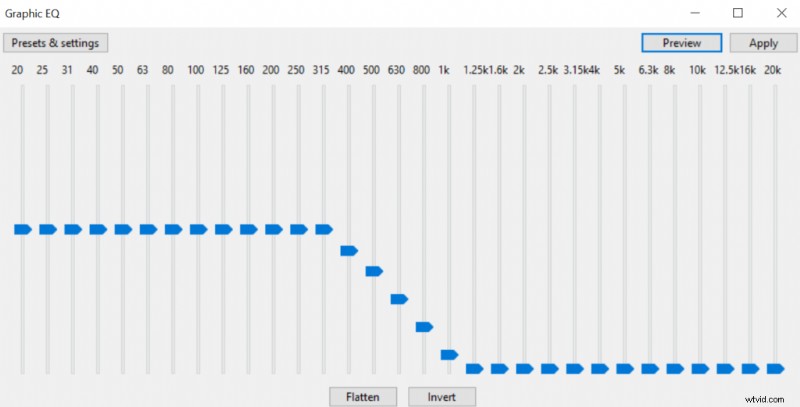
Using EQ to cut out frequencies
An equalizer can be used to cut out frequencies and make your audio sound similar to what you would hear on smartphones or a walkie-talkie, which is a reduced quality audio.
You can find Audacity’s equalizer by going to Effect->Graphic EQ
Muffled audio:
 EQ settings for muffled audio.
Walkie-Talkie/Phone audio:
 EQ settings for walkie-talkie audio.
Adjusting audio quality with exporting settings
Lastly, you can control audio quality by adjusting its exporting settings.
One of the ways to diminish the quality is by setting a lower bit rate when exporting an mp3 file (File->Export->Export as MP3). By adjusting quality to anything below 100 kbps, you’ll noticeably diminish its quality.
8kbps audio:
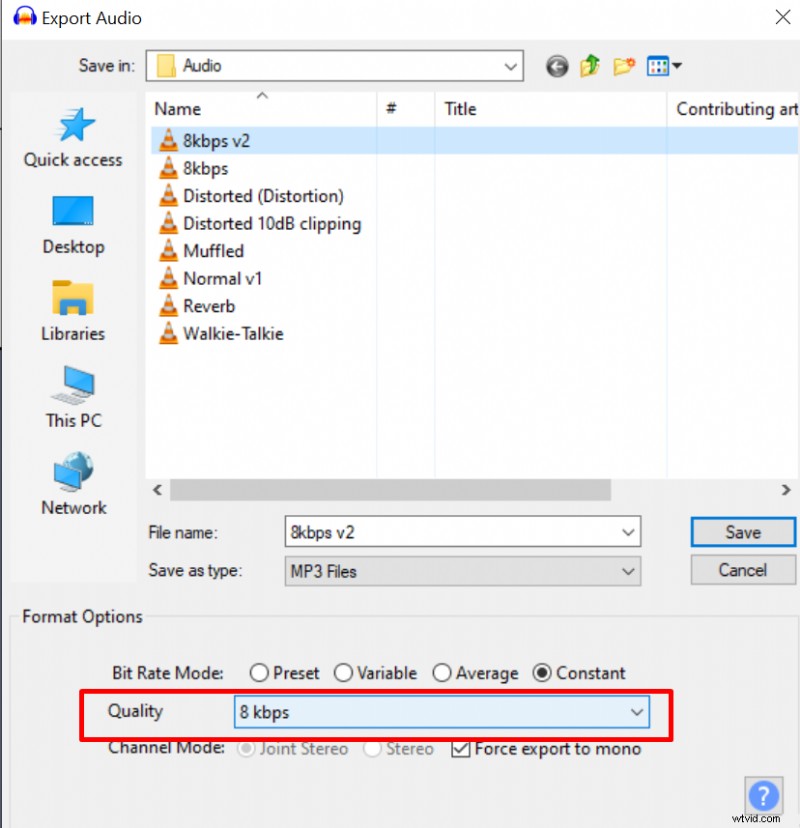 Exporting audio in MP3 file format (8kbps bit rate)
You can also export in WAV file format and choose 8-bit PCM bit depth to add lots of hissing noise to your audio (File->Export->Export as WAV).
8-bit depth PCM WAV audio:
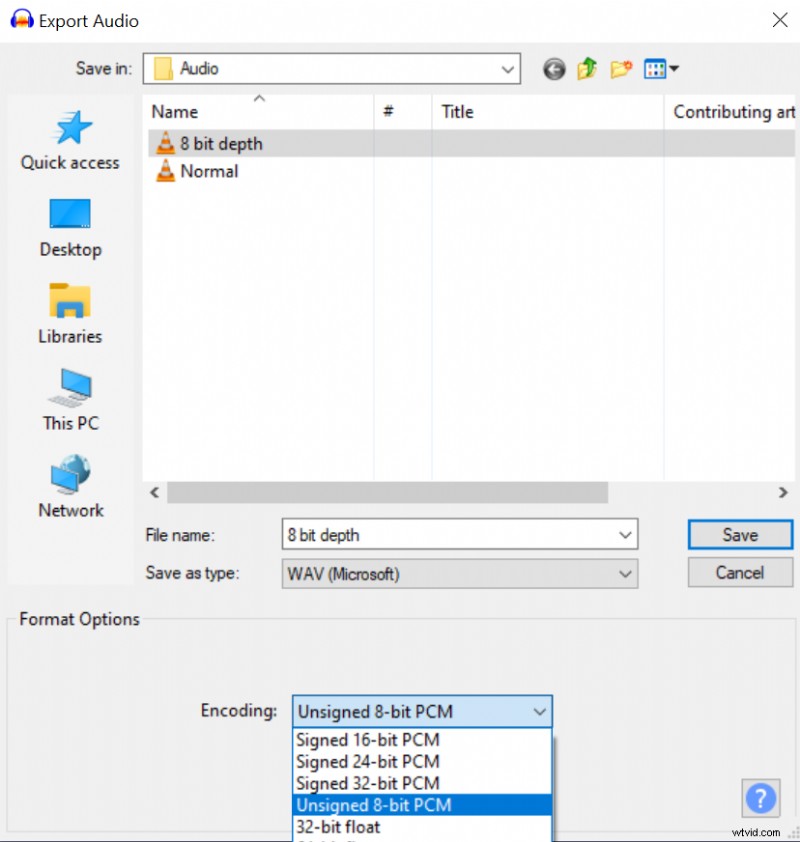 Exporting audio in WAV format (8-bit PCM).