Creating a walkie‑talkie effect in Audacity is straightforward thanks to its built‑in Filter Curve EQ. Walkie‑talkies naturally cut off the low and high ends of the spectrum, leaving a pronounced mid‑range that gives the familiar “chatty” sound. While this compression reduces overall fidelity, the preserved mid‑range still carries clear speech.
For an even more authentic result, you can layer radio transmission hiss—common on handheld radios—into your mix.
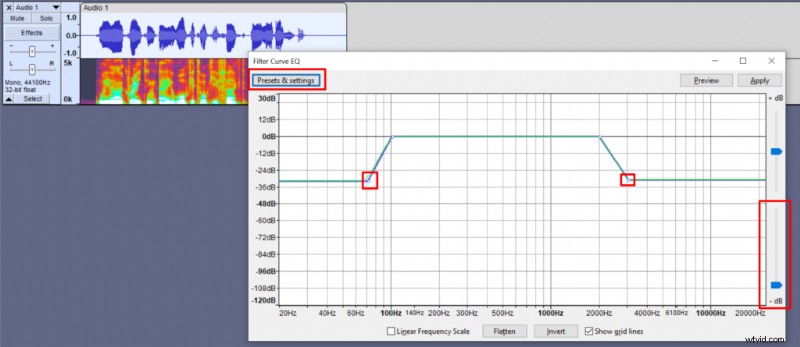
Step‑by‑Step: Apply the Walkie‑Talkie EQ
- Select the portion of the audio you want to transform.
- Navigate to Effect → Filter Curve EQ → Presets → Factory Presets → Walkie‑talkie.
- Optionally, slide the “–dB” knob to the bottom to increase the effect’s intensity.
- Optionally, boost the low or high frequencies slightly if you need a cleaner sound.
- Click Apply.
Normal audio vs. EQ‑enhanced audio
Adding Radio Transmission Sounds
Sources like Freesound offer free “Radio Static” and “Walkie Talkie – Transmission Start” clips. Import them via File → Import → Audio.
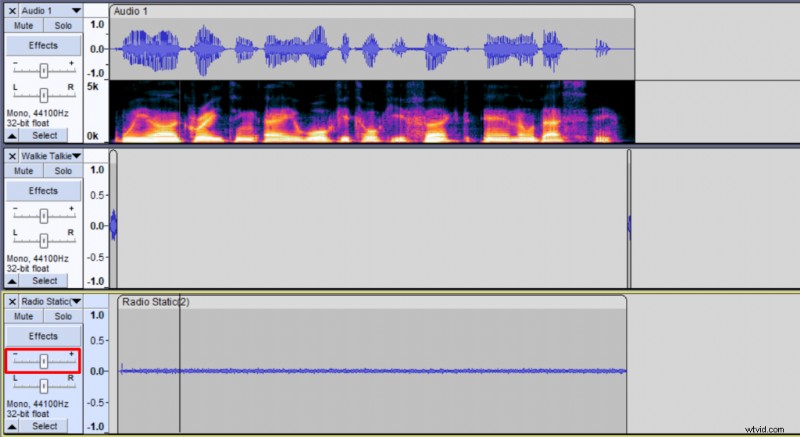
To sandwich your speech with realistic transmissions:
- Duplicate the “Walkie Talkie – Transmission Start” clip and place one copy at the beginning and another at the end of your vocal track.
- Insert the “Radio Static” clip between the two start/end markers.
- Trim the static to match the length of the spoken section.
- Adjust its volume—click the track’s gain knob or use Effect → Amplify to reduce it by around 12 dB if it’s too loud.
These layers give your audio the unmistakable feel of a handheld walkie‑talkie, perfect for film, podcasts, or any project that needs a touch of vintage radio.