This guide shows you how to effortlessly retouch faces in your Windows videos using two popular editors: MiniTool MovieMaker and CapCut. From smoothing skin and widening eyes to adding virtual makeup, you’ll learn practical techniques to elevate your footage.
Quick Navigation
Face editing can serve privacy (blurring) or creative (face‑swap) purposes. Here we focus on aesthetic enhancement—achieving a polished, natural look with minimal effort.
Method 1: Use MiniTool MovieMaker
MiniTool MovieMaker is a free, user‑friendly editor that balances powerful features with an intuitive drag‑and‑drop interface. It’s especially welcoming for beginners while still offering advanced tools for seasoned creators.
Key capabilities include:
- Basic edits: trim, split, rotate, speed‑adjust.
- Aspect‑ratio tools: 16:9, 9:16, 4:3, 1:1 for YouTube, TikTok, Instagram.
- Rich library of filters, transitions, motion effects, text templates, stickers.
- Multi‑track timeline for complex layering (e.g., picture‑in‑picture).
- Seamless 4K editing and export—no watermark.
Follow these steps to retouch faces:
Step 1: Download and Install
Click the button below to obtain the latest installer. Once installed, launch the program and dismiss any promotional pop‑ups.
MiniTool MovieMaker – Click to Download (100% Clean & Safe)
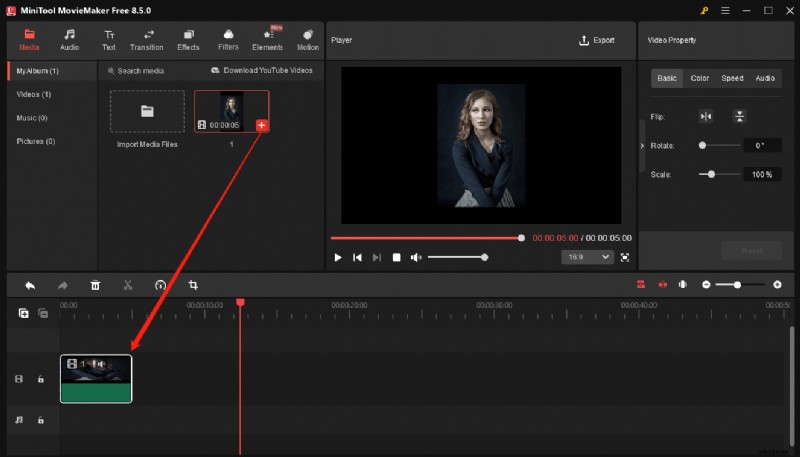
Step 2: Add Your Video
In the main interface, click Import Media Files to open File Explorer. Locate your footage and drag it into the workspace.
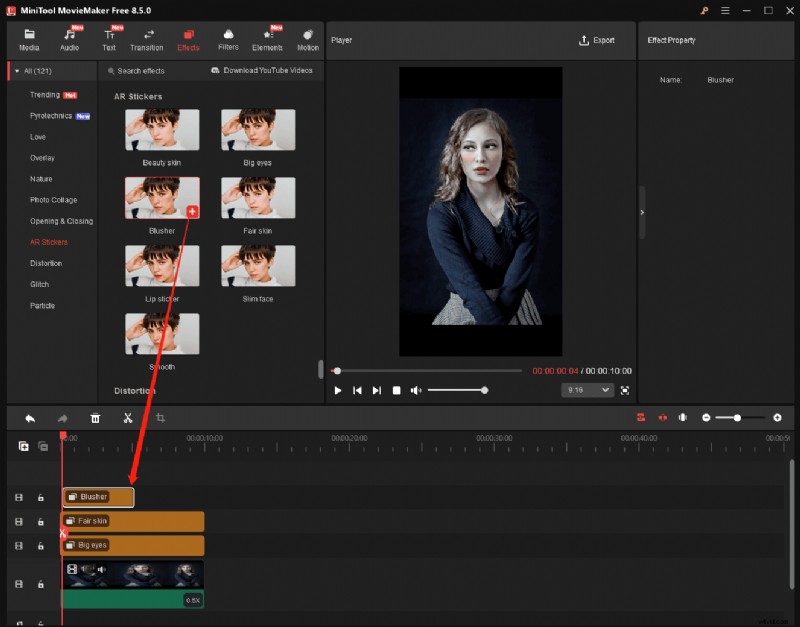
Step 3: Apply Face‑Enhancement Effects
Drag the clip onto the timeline, then select Effects > AR Stickers from the top menu. You’ll find options such as:
- Betufy skin – brighter, luminous skin.
- Big eyes – widened eyes and eyebrows.
- Blusher – soft cheek glow.
- Fair skin – fairer, radiant complexion.
- Lip sticker – virtual lipstick.
- Slim face – slimmer appearance.
- Smooth – even‑toned skin.
Download the desired sticker, click the + icon to apply it, and the software will auto‑detect faces in the clip. You can stack up to eight stickers per video. Adjust duration by dragging the sticker’s edges on the timeline. Note that these filters work on static faces only.
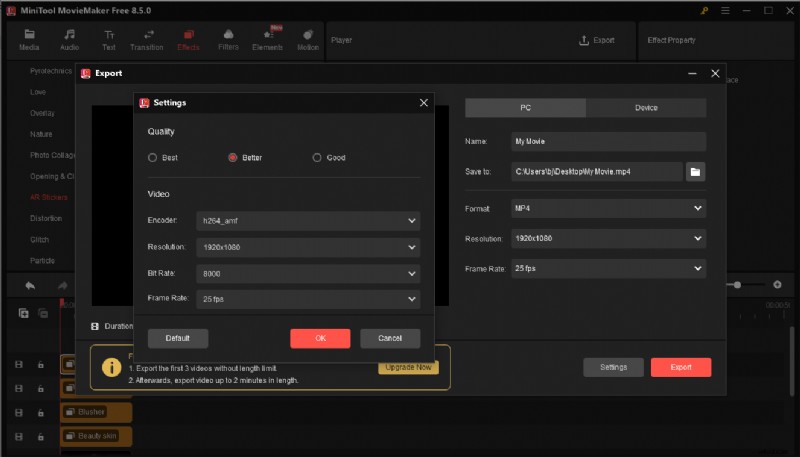
Step 4: Export Your Video
Click Export (upper‑right). Choose file name, format, resolution, and frame rate. The Settings button lets you tweak bitrate and quality. Click Export to render the finished file.
Method 2: Use CapCut
CapCut is a popular, free editor tailored for social‑media creators. It offers robust face‑retouching features—including reshaping, makeup, and facial‑motion tracking—but some premium tools require a subscription.
Steps to edit faces with CapCut:
Step 1: Install CapCut
Download the latest version from the official website or the Microsoft Store.
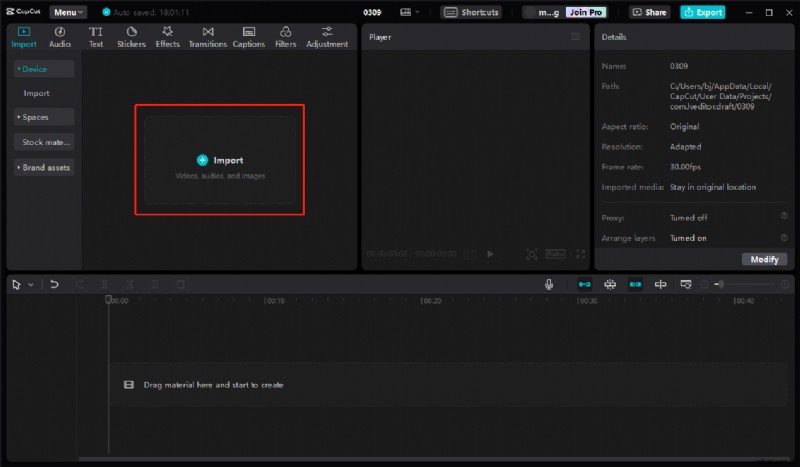
Step 2: Import Your Video
Open CapCut, click + Create Project, then Import to add your clip. Drag the video onto the timeline.
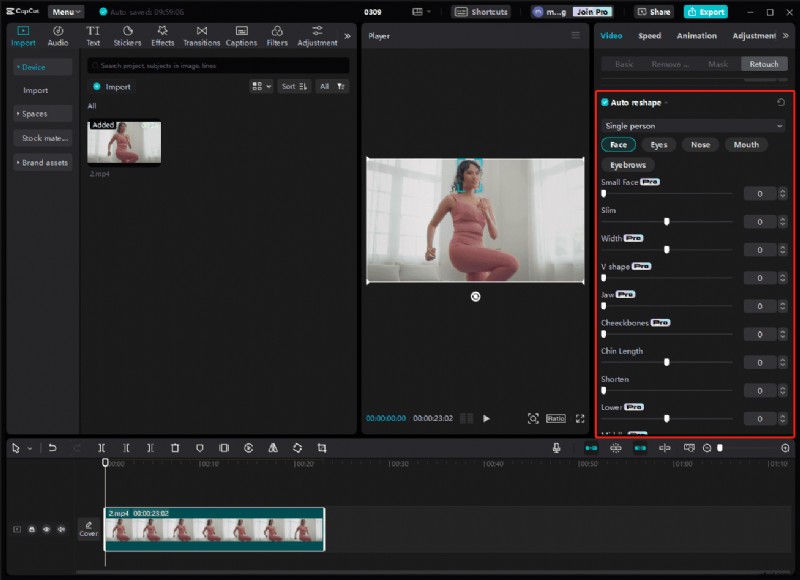
Step 3: Retouch the Face
Select the clip, open the right‑hand panel, and toggle the Retouch tab. Here you’ll find sliders for:
- Skin tone balance & smoothing
- Smile‑line reduction
- Eye enhancement & dark‑circle minimization
- Teeth whitening
- Overall skin lightening
CapCut lacks a global reset button, so you’ll need to adjust each slider manually if you want to revert changes.
For automated facial reshaping, scroll to Auto reshape and fine‑tune individual features—face, eyes, nose, mouth, eyebrows.
To add virtual makeup, enable the Makeup option and choose lipstick, eyeshadow, blush, or eyeliner for a polished finish.
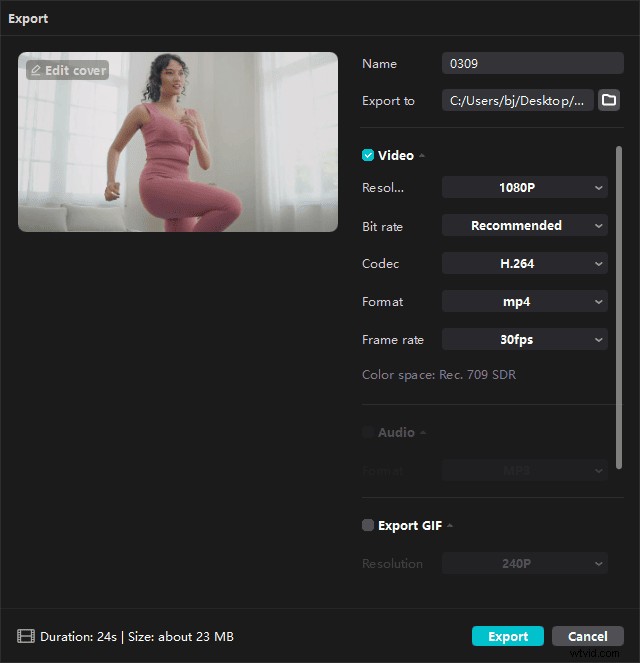
Step 4: Export Your Video
Click Export, adjust frame rate, resolution, codec, and bitrate, then confirm to start rendering.
Conclusion
With either MiniTool MovieMaker or CapCut, enhancing facial features in your Windows videos is straightforward and efficient. Follow the steps above to achieve professional‑looking results without a steep learning curve.
If you run into issues with MiniTool MovieMaker, our support team is ready to help: support@minitool.com.