How to Add a Magic Finger Trick Effect in Filmora
As a filmmaker, you may want to add a cinematic “magic finger” reveal to a mechanical scene. With Wondershare Filmora’s robust masking and keyframe tools, you can create a professional‑looking effect in minutes. This guide walks you through the entire process, from importing footage to layering PNG assets and animating the final reveal.
Preparation
- A computer (Windows or macOS)
- Your video footage (record a short clip of the object you’ll reveal)
- Wondershare Filmora (latest version)
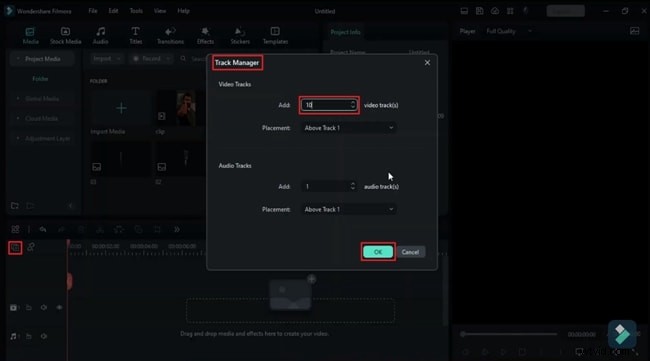
Step 1: Import Video and Add Tracks
Start a new project and drag your clip into the Media Panel. To create the trick, you’ll need a dozen tracks. Open the Timeline toolbar, click the “Manage Tracks” icon, add 10 additional tracks, and confirm.
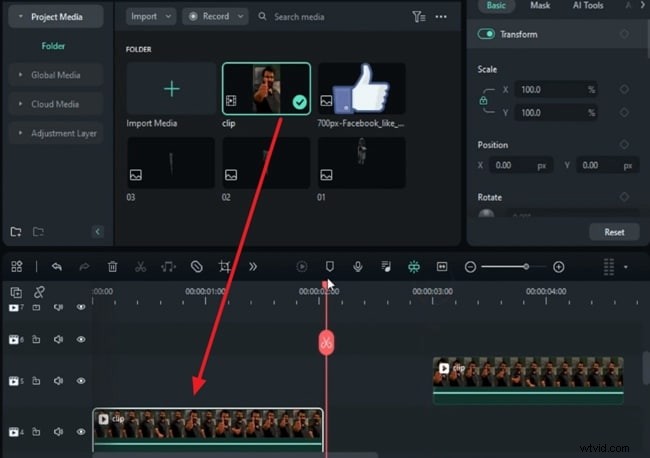
Step 2: Identify the Effect Segment
Place the clip on Track 4. Move the playhead to the moment you want the trick to begin, split the clip, and move the second half to Track 2. Do the same at the end point of the effect.
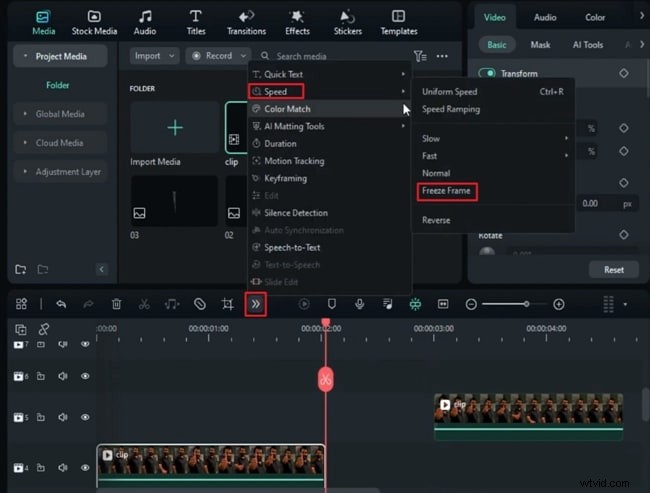
Step 3: Freeze Frame the First Segment
With the first segment selected, go to More → Speed → Freeze Frame and set it to hold for 6 seconds. Position the second split segment immediately after the freeze frame on the same track.
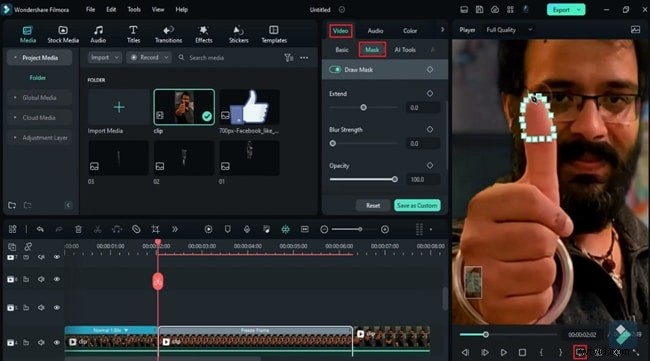
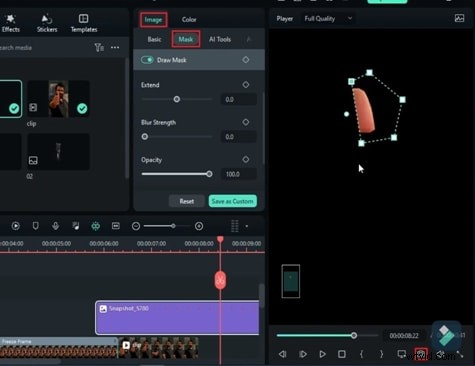
Step 4: Create a Mask Around the Thumb
Split the freeze frame clip at its start. Double‑click the freeze frame, go to the Mask tab, and choose Draw Mask. Zoom in to 75% and outline the upper part of the thumb. Click the camera icon to snapshot the mask, enable Invert Mask, and drop the snapshot onto an empty track.
Step 5: Split the Thumb Snapshot into Two Halves
Select the snapshot, open the Mask settings, and draw a second mask covering only half of the thumb. Take a snapshot, then invert the mask to capture the other half. Remove the original full‑thumb snapshot from the timeline.
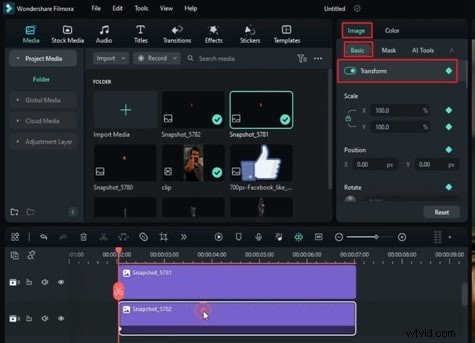
Step 6: Place Half‑Thumb Snapshots on the Timeline
Drop each half‑thumb snapshot onto separate tracks (e.g., Tracks 8 and 9). In the Image → Basic panel, enable Transform and insert keyframes at the start of each snapshot.
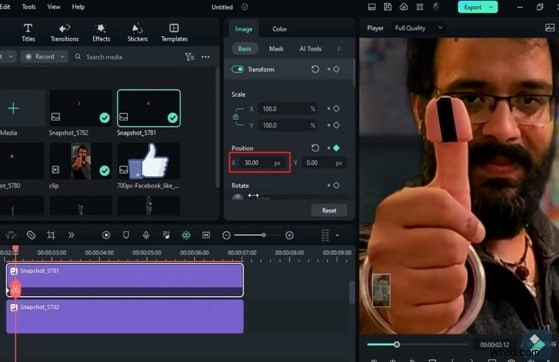
Step 7: Animate the Opening and Closing Motion
At the required frames, adjust the X‑position of each half to move them apart, creating the opening. Insert a blank keyframe when you want them to return together. Trim any excess frames to keep the motion smooth.
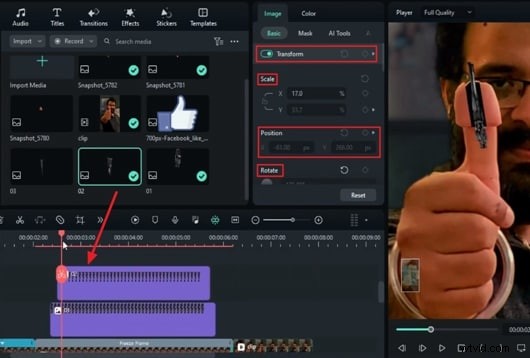
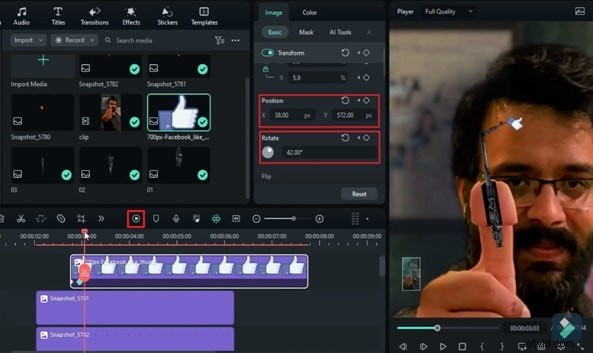
Step 8: Add the Mechanical Reveal Layer
At the point where the thumb is half‑split, import a PNG of the mechanical part you want to reveal. Place it on a track below the video layers. Enable Transform keyframes, then adjust Scale, Position, and Rotation to align the object with the thumb’s tip.

Step 9: Create the Reveal Animation
Move the playhead a few frames forward and add keyframes for Position, Scale, and Rotation. Let the half‑thumbs slide apart while the PNG animates into view, producing a pop‑out effect. Repeat the process for any additional objects, stacking layers a few frames ahead to maintain sync.
Step 10: Add a Swing Effect (Optional)
To add dynamism, drop a new PNG onto a top track. Set keyframes for Position, Scale, and Rotation at the start and end of the clip. Vary rotation values (e.g., 105°, 78°) every 10 frames to simulate a realistic swing. Reverse the keyframes for the closing motion.
Final Touches and Rendering
Preview the sequence to ensure all layers align and the motion is fluid. When satisfied, hit Render Preview to watch the final magic finger trick in action. Export your project in the desired format.
Summary
Wondershare Filmora’s intuitive timeline, masking, and keyframe features empower you to create sophisticated magic effects quickly. By following this step‑by‑step guide, you can add professional‑looking reveals, splits, and swing motions to any project.