Memes thrive on visual punchlines, and the latest face‑effect technology lets you add that extra layer of humor to any video. This guide walks you through every step—from setting up your footage to adding dynamic AR stickers—so you can produce professional‑looking meme videos in minutes.
Tool
Transcript Overview
0:19 – Import multiple video clips and align them to a common resolution using the "Match to Media" feature. This ensures consistent quality across all clips.
0:38 – Arrange the clips on the timeline. Position them so they play sequentially without overlapping, giving you a clear preview of the final edit.
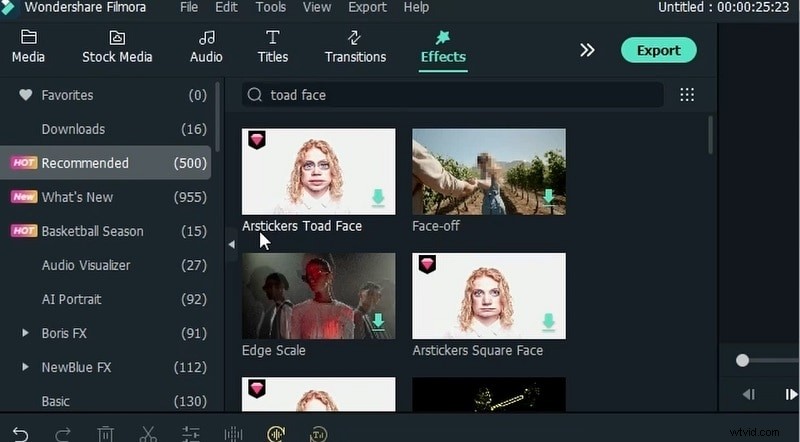
0:49 – Search the effects library for "toad face" and select the AR Sticker Toad Face. Browse other stickers in the list to find the perfect match for your mood.
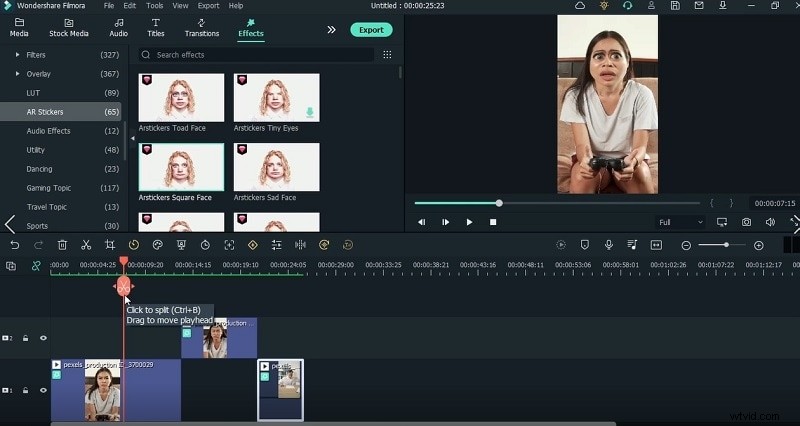
1:49 – Split the video into segments. This allows you to apply different effects to each scene, tailoring the vibe to the on‑screen action.
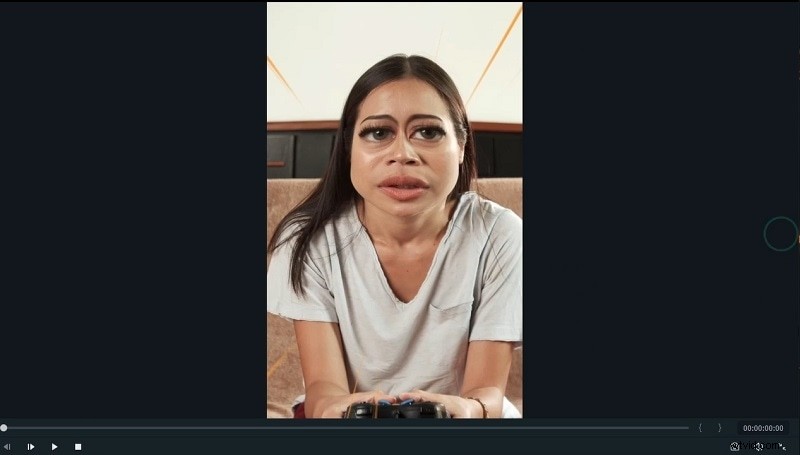
2:00 – Drag the toad face effect onto the first split segment. Place it over the portion where the character looks annoyed, turning a grim expression into a playful one.
2:14 – Apply a second sticker to the following scene where the character shifts to a sad mood. Feel free to experiment with other stickers that convey emotion.
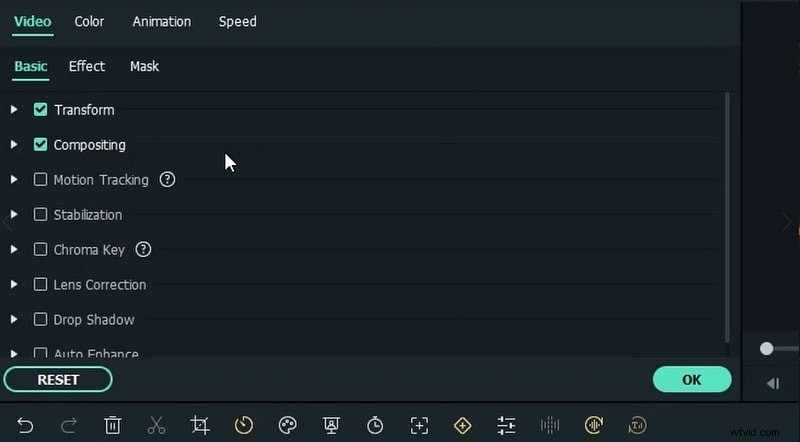
2:26 – Preview each video, double‑clicking the clip to open the effect menu for fine‑tuning.
3:10 – Select unique stickers for each video clip. Verify that different stickers are applied to distinct scenes by checking the AR sticker list.
3:28 – Use overlays and color corrections to unify the visual style across clips. Adjust saturation and contrast to keep the footage lively.
4:18 – Open the animation panel and add keyframes at the start of the timeline. This lets you animate stickers and transitions smoothly.
4:38 – Apply a zoom‑in at the video’s end. Scaling the subject adds cinematic flair and keeps viewers engaged.
5:06 – Search for "rain" in the effects panel and drop the cinematic rain overlay onto the scene where the mood changes. This atmospheric touch enhances storytelling.
5:27 – Use a blue filter to deepen the sad tone, mirroring the emotional shift. The blue hue is widely recognized for melancholy visuals.
5:52 – Add a shake or mild effect to the second video clip to emphasize movement or tension.
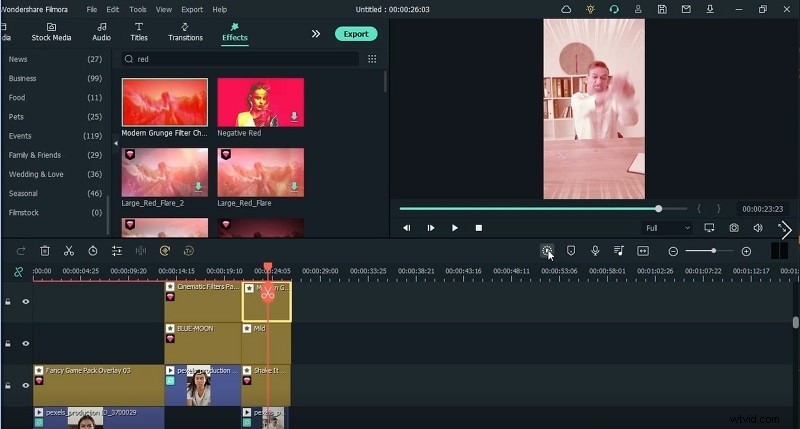
6:24 – Apply a red filter (modern grudge) to highlight anger. Red is a classic visual cue for aggression.
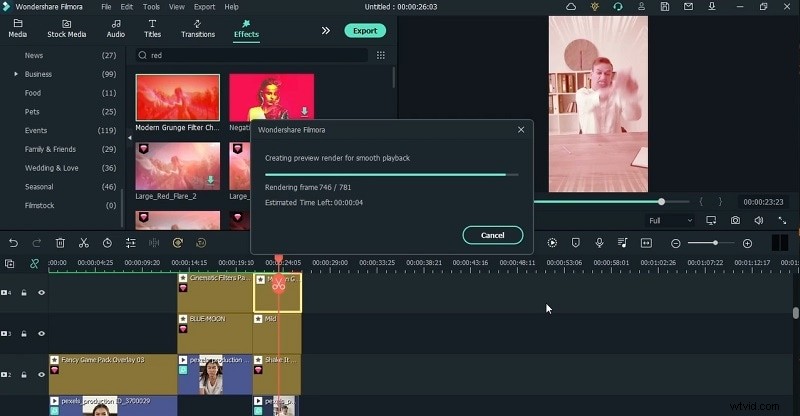
6:45 – Initiate rendering by clicking the playback icon in the timeline. Watch the progress bar to gauge completion.
7:45 – Preview the first video in the playback window, pausing to confirm that all effects appear correctly.
8:08 – Repeat the preview for the second video. Fine‑tune any misaligned stickers or animations before final export.
Show More >> Show Less >>
How to Create a Meme with Face Effect
Preparation
What you need to prepare:
- A computer running Windows or macOS
- Your raw video footage
- Filmora video editor (free trial or full version)
Step 1: Download and Install Filmora
Begin by downloading Filmora from the official website. Click the link below to download the installer (the .exe for Windows or .dmg for macOS). Follow the on‑screen prompts to complete installation.
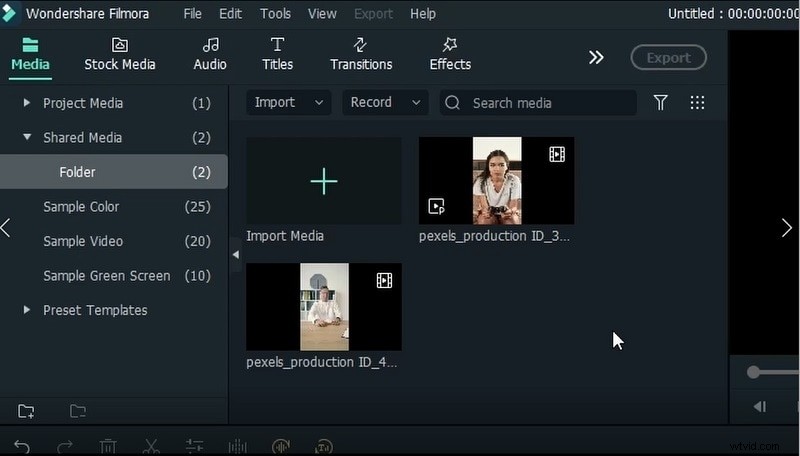
Step 2: Import Your Footage
Launch Filmora, click the Import button, and select your video files. The editor will automatically prompt you to set the resolution; choose the same dimensions for all clips to maintain visual consistency.
Step 3: Select and Download the Desired Effect
Navigate to the Effects panel and search for “Toad Face.” Within the AR Sticker section, choose the sticker that best fits your concept and click Download. Filmora also offers AI‑powered filters:
- AI Age Filter – tweak the age of on‑screen characters.
- AI Facial Expression Changer – instantly modify expressions.
- Funny Face Filter – add playful visual elements.
Step 4: Add the Effect to the Timeline
Split your clip where you want the effect to begin, then drag the chosen sticker onto that segment in the timeline.
Step 5: Customize the Effect
Double‑click the sticker to open its settings. Adjust position, scale, opacity, and duration until the effect feels natural within the scene.
Step 6: Polish the Scenes
Enhance your video with additional color corrections and atmospheric overlays. Try rain, blue or red filters to match emotional beats, or add light leaks for a vintage feel.
Step 7: Render the Video Meme
Once all keyframes and stickers are set, click Render in the timeline. The editor will process the final sequence, ready for export.
Step 8: Preview and Export
Play back the rendered video to ensure every effect appears as intended. Then click Export and choose your preferred format—MP4 for online sharing, MOV for higher quality archives, or others listed in the format menu.
Hit Export again, select an output folder, and let Filmora finish. Your meme video is now ready for upload to YouTube, Instagram, or any platform.
Summary
With Filmora’s intuitive interface and a wide array of AR stickers, creating a meme video is both fast and flexible. From simple toad‑face overlays to cinematic rain and color grading, the software empowers you to craft engaging content that resonates with online audiences.