How to Add a Zoom‑In Effect in Filmora
Filmora’s intuitive tools let you create a polished zoom‑through screen transition in minutes. Follow this expert guide to add the effect with precision and confidence.
Tool
Transcript
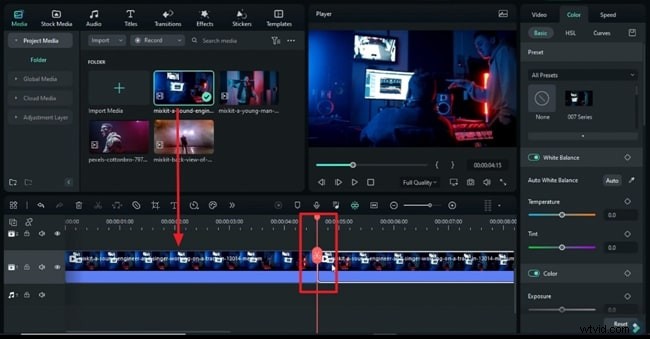
00:19 – Start by placing your footage on track 1 and selecting a transition point. Split the clip a few frames after that point, then move the second portion to track 2.
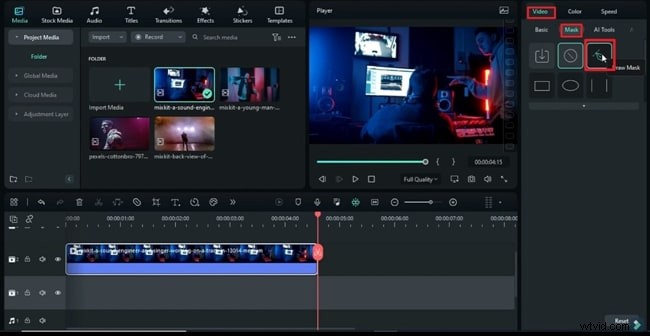
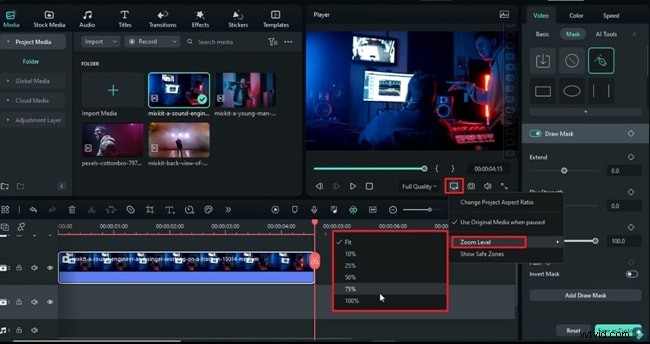
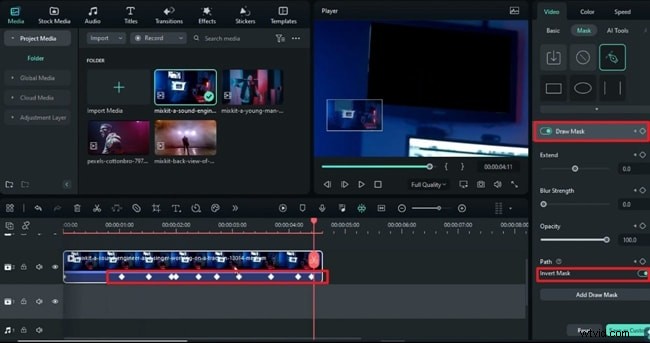
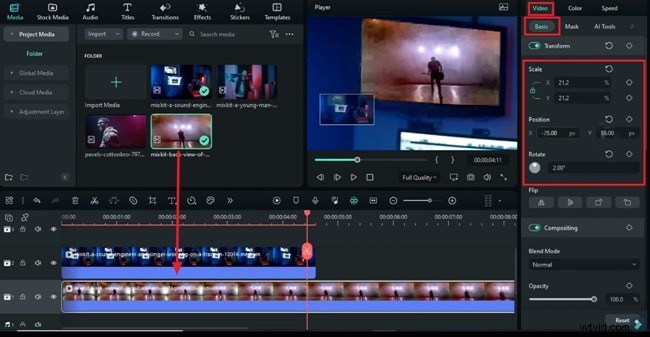
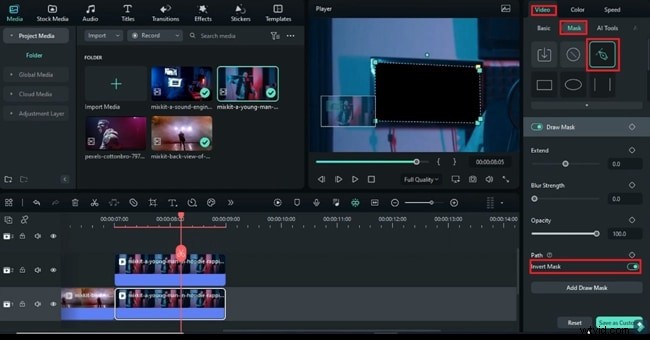
00:35 – Open the Mask panel, choose Draw Mask, and set the zoom level to 75%. Draw a mask around the screen and enable Invert Mask to target the outer area.
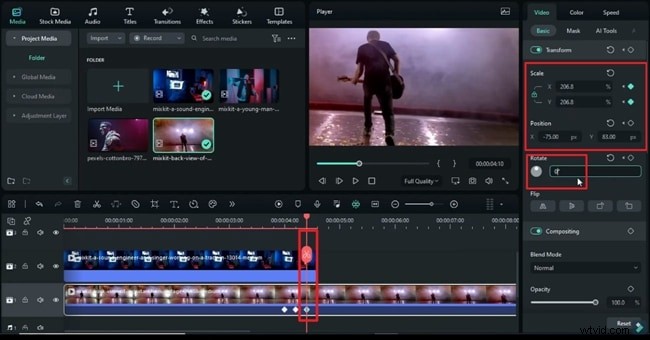
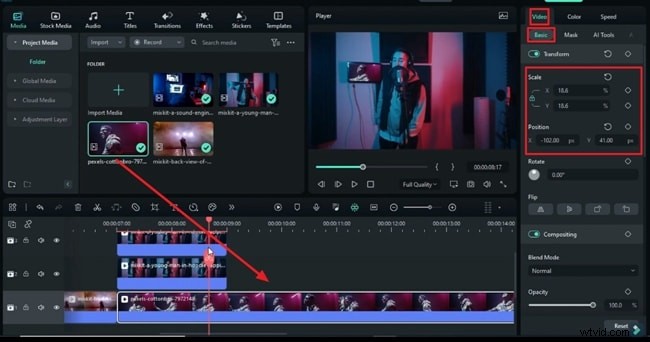
00:53 – Enable keyframes at the start of the mask, adjust as needed, and drop the second clip onto track 1. Use the Basic controls to rotate, scale, and fit the clip inside the screen.
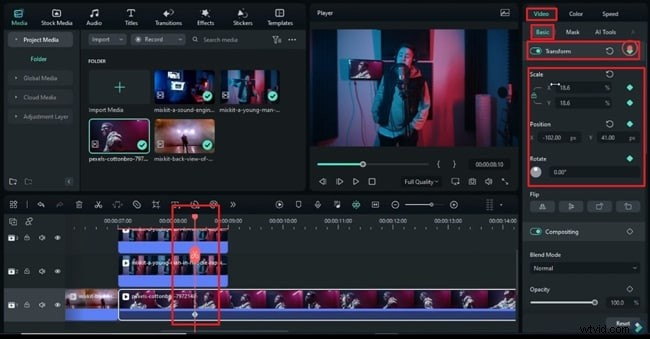
01:20 – Turn on Transform keyframes for the track 2 clip, then 10 frames forward adjust Scale and Position to zoom into the screen. Apply similar adjustments to the track 1 clip for smooth alignment.
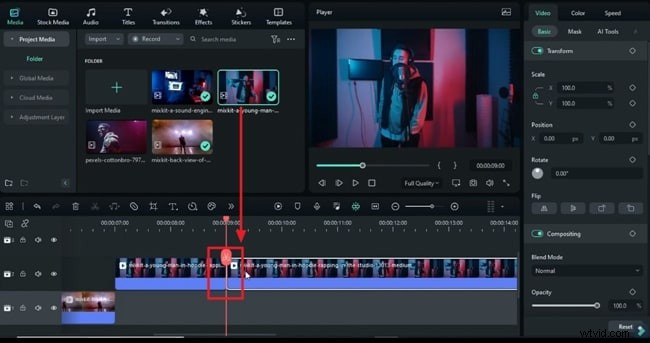
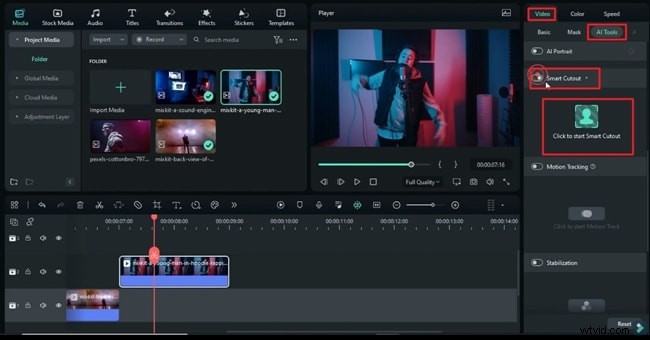
01:55 – For complex scenes, split at 7 s, add a third clip on track 2, and use AI Tools → Smart Cutout to isolate a moving subject. Invert the cutout, place it above, and mask the background accordingly.
02:46 – Mask the background clip on track 1, invert the mask, and align it behind the subject. Ensure all layers share the same Transform keyframes to keep motion synchronized.
03:15 – Set the final transition point, apply Transform keyframes across all layers, and create a unified zoom‑in. Render a preview to confirm the effect is seamless.
For detailed guidance on pan and zoom, visit Filmora’s Zoom & Pan Guide.
Zoom Through Screen Transition Filmora Tutorial
Preparation
- Computer running Windows or macOS
- Your video footage
- Wondershare Filmora installed
Step 1
Import Media and Choose a Transition Point
Launch Filmora, start a new project, and import your files via the Media tab. Drag the main clip to the timeline, decide where you want the transition, and split the clip a few frames beyond that point.
Step 2
Draw a Mask and Adjust the Zoom Level
Move the clip to a second layer and apply a mask. Select the Video tab, click Mask, then Draw Mask. If the clip appears too small, use the Preview Quality and Display Settings icon to set the desired zoom level.
Step 3
Invert the Mask and Set Mask Points
Outline the area you want to preserve, then enable Invert Mask. Place the playhead at the start, enable mask keyframes, and adjust the points while scrubbing through the clip.
Step 4
Adjust Scale and Position of the Second Clip
Add the second clip to the timeline and use the Basic controls under Video to set rotation, scale, and fit it within the screen.
Step 5
Insert Transform Keyframes and Create Zoom‑In
Activate Transform keyframes at the transition point, then advance a few frames and adjust Scale and Position to start the zoom. Fine‑tune the first clip’s keyframes similarly to ensure a smooth blend.

Step 6
Use Smart Cutout for Moving Objects
For dynamic scenes, split the clip at the required moment, add a third clip on track 2, and use AI Tools → Smart Cutout to isolate the subject. Draw the mask across several frames, invert it, and save. The subject will appear above the background.
Step 7
Mask the Background and Enable Invert
Select the background footage, choose Draw Mask, zoom in to outline the screen, and invert the mask so the background sits behind the subject.
Step 8
Add the Final Clip and Sync Transform Keyframes
Place the fourth clip on the timeline, adjust Scale and Position to fit, and then apply Transform keyframes across all layers at the chosen transition point. Advance frames, set identical scale and position values, and render a preview to confirm alignment.
Summary
By mastering masks, keyframes, and Smart Cutout, you can craft seamless zoom‑through screen transitions that elevate your video storytelling. Filmora’s user‑friendly interface ensures that even complex effects are within reach.