Step‑by‑Step Guide to Adding a Van Gogh Starry Sky in Filmora
With Wondershare Filmora, you can transform any video into a cinematic masterpiece by overlaying a stunning Van Gogh starry sky. This tutorial walks you through every stage—from preparation to final rendering—ensuring a professional result that feels authentic and engaging.
Preparation
What you need:
- Computer (Windows or macOS)
- Your source video
- Van Gogh starry sky PNG
- Filmora 15+ (latest version recommended)
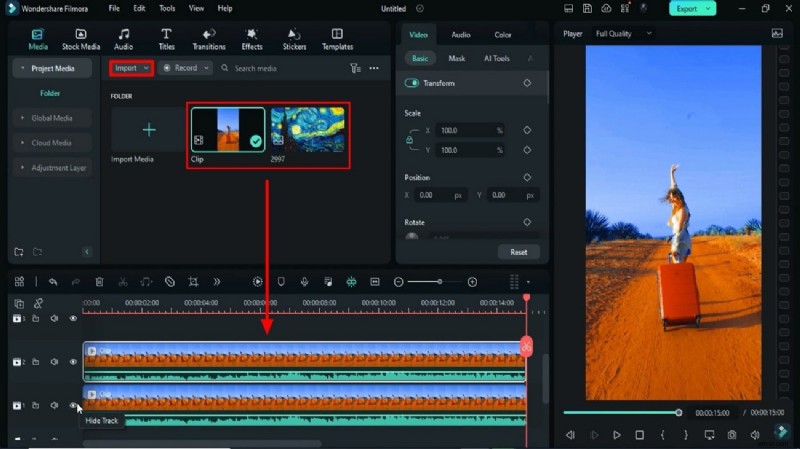
Step 1: Upload Files to Apply the Effect
Launch Wondershare Filmora and import your media files. To apply this effect, you’ll need two files: the video you want to edit and a PNG of the starry sky.
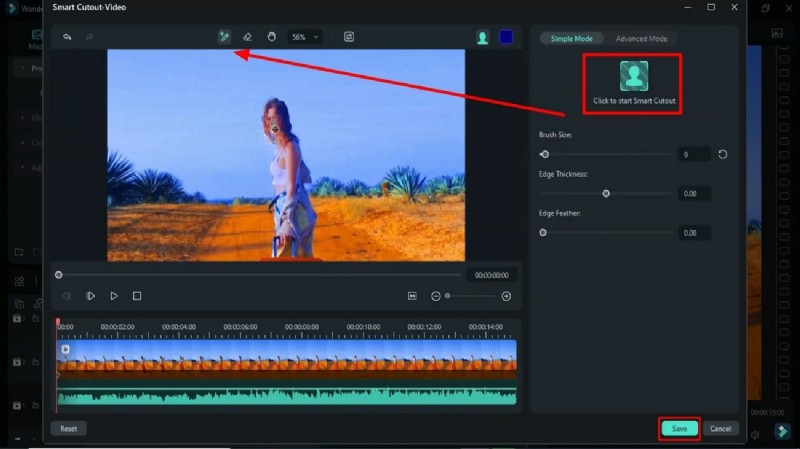
Step 2: Use Smart Cutout to Isolate the Main Subject
Drag your clip onto the timeline across two tracks. Temporarily hide the first track by clicking the Hide Track icon. Select the second track to access the right‑hand panel. Under the Video tab, enable AI Tools → Smart Cutout. Paint over the main subject or person, then click Click to start Smart Cutout and hit Save to apply the settings.
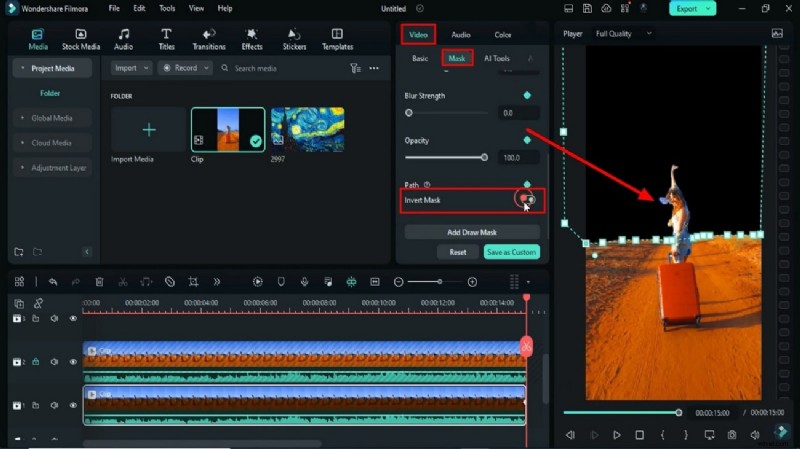
Step 3: Add a Mask to the Sky Background
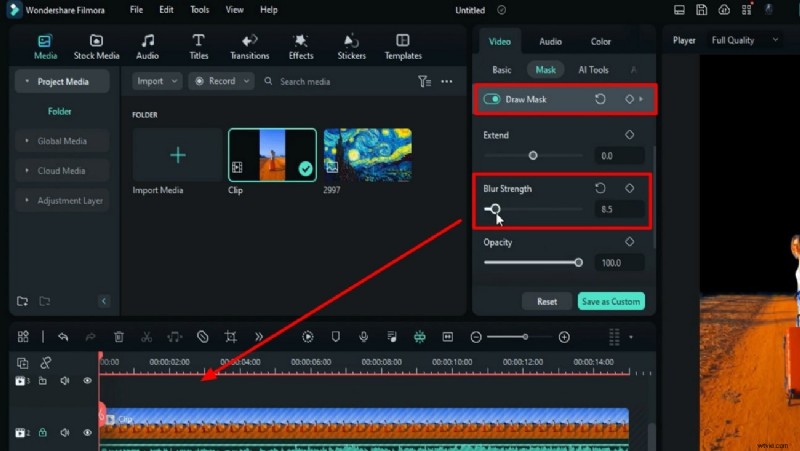
Lock the second track and unhide the first track. Click Mask under the Video tab and select the Pen Tool to draw the mask around the sky. Turn on keyframes by clicking the circle next to Draw Mask, then enable Invert Mask. Adjust the mask’s position over 1–2 seconds, reset the zoom, and increase the blur level for a smooth transition.
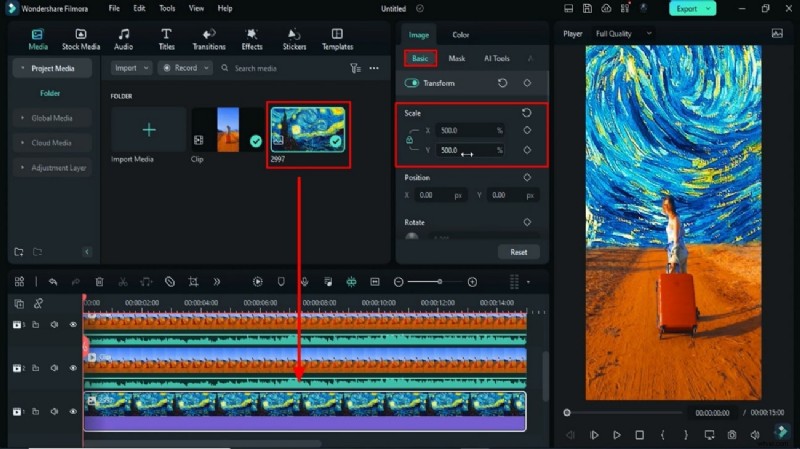
Step 4: Place Van Gogh’s Starry Sky
Unlock the second track, move both tracks onto one, and add the Van Gogh starry sky PNG on the first track. Sync its duration with the video by dragging the playhead. In the Image tab, use the Basic → Scale settings to fit the image to the background.
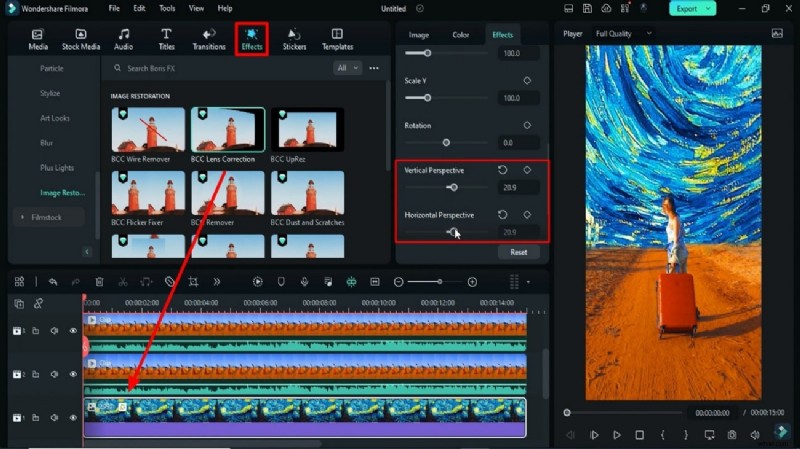
Step 5: Create Motion in the Sky
Apply the BCC Lens Correction effect to the PNG layer. Adjust Vertical Perspective and Horizontal Perspective to match the camera angle. Enable Transform → Keyframes and tweak the Rotation values to animate the sky.
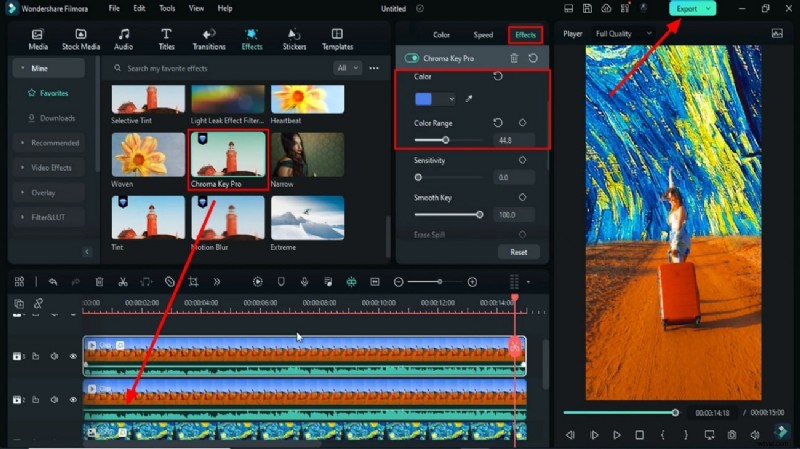
Step 6: Add and Refine Chroma Key
Drag the Chroma Key effect onto the third track from the Effects panel. Fine‑tune the Color and Color Range sliders until the background blends seamlessly. Export the video in high quality.
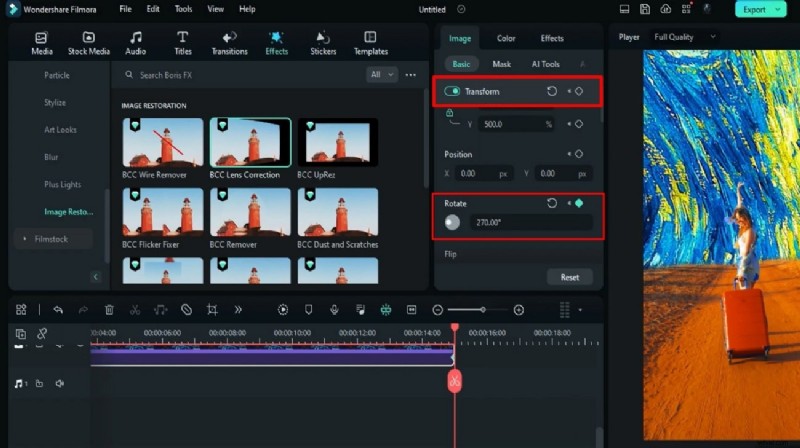
Step 7: Re‑import the Exported Video and Polish
Import the exported clip back into the media library and add it to a new track. Activate Transform → Keyframes again, adjust Rotation, and set the playhead at frame 15. Hide unnecessary clips, then fine‑tune Scale and Position to cover any black edges. Render a preview to confirm the final look.


Summary
By leveraging Filmora’s intuitive tools—Smart Cutout, Masking, BCC Lens Correction, and Chroma Key—you can create a captivating Van Gogh starry sky backdrop that elevates any video. This tutorial demonstrates how to blend creative artistry with technical precision for a professional‑grade result.