Preparation
What you need to prepare:
- A computer (Windows or macOS)
- Your video materials.
- Filmora video editor
Step 1
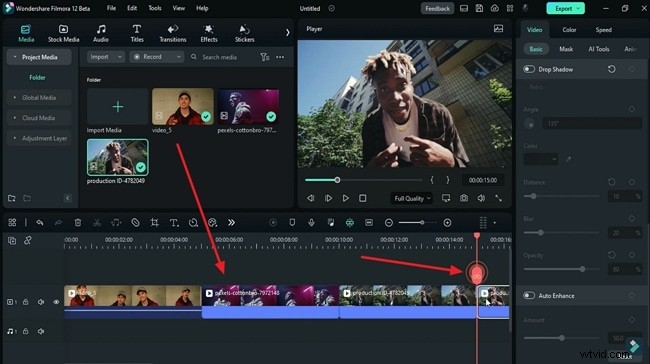
Launch Filmora and Import Clips
Open Filmora, start a new project, and import the footage you want to use. Drag the clips onto the timeline, position the playhead where you want the strobe effect, and trim each clip to the desired length. Repeat for all imported footage.
Step 2
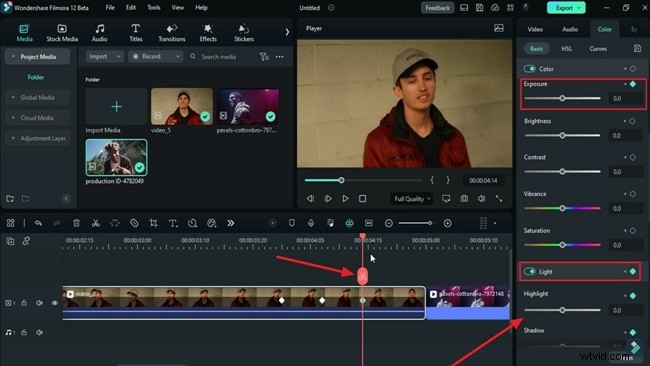
Turn on Keyframes and Increase Light and Color
Navigate to the first track on the timeline and place the playhead one second before the clip ends. In the right‑hand panel, open the “Color” tab and, under the “Basic” sub‑tab, enable both “Color” and “Light” keyframes. Zoom in on the timeline, move the playhead 7 frames forward, and raise the “Exposure” to match your footage.

Continue stepping 7 frames ahead, increasing “Exposure” each time. Then, alternate between boosting “Exposure” and adding a “Light” keyframe to create the strobe flicker. Finally, advance 7 frames and tweak “Exposure,” “Brightness,” “Highlights,” “Whites,” and “Shadows” to fine‑tune the effect.
Step 3
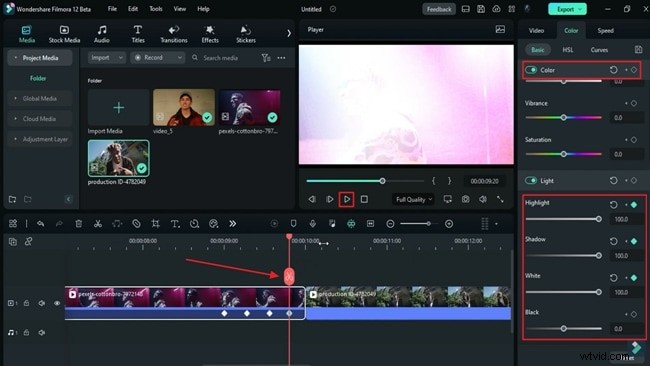
Edit the Second Clip the Same Way
Repeat the keyframe adjustments for the next clip, tailoring the color and light settings to its unique palette. Once all clips are configured, zoom out of the timeline and use the preview panel’s “Play” icon to review the transitions.
If desired, add light effects at the transition points. When satisfied, click the “Export” button in the upper‑right corner and save your project.
Summary
With this quick guide, you can create eye‑catching strobe transitions in Filmora in just a few minutes. Experiment with different color and light settings, and pair the effect with music for dynamic music or rap videos.