Preparation
What you need to prepare:
- A computer running Windows or macOS
- Your video footage
- Filmora video editor installed
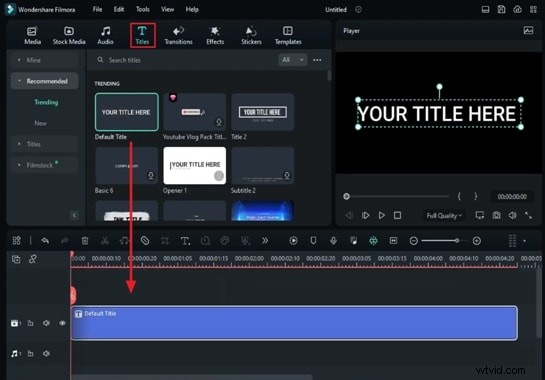
Step 1: Add and Edit the Default Title
Open Filmora’s main editing window, go to the toolbar and click the “Titles” tab. Drag the “Default Title” onto the timeline.
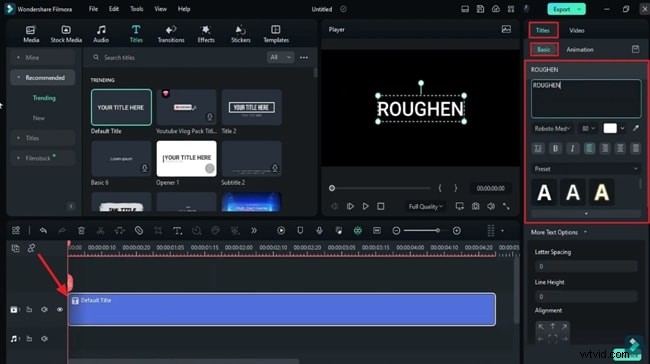
Click the title on the timeline to bring up its settings on the right. Under the “Titles” tab, choose “Basic.” Here you can add text, pick a bold font, adjust the size, and preview your changes. Capture a snapshot by clicking the camera icon.
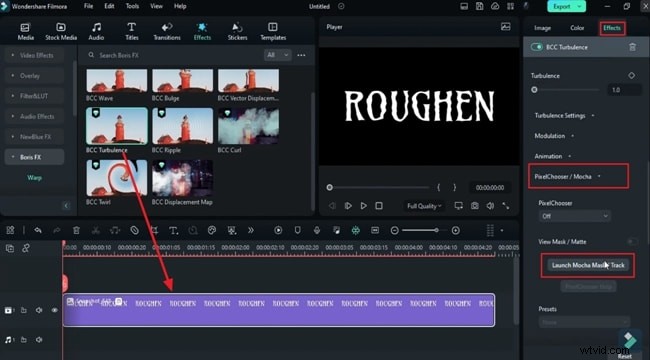
Step 2: Replace the Title with the Snapshot
Delete the “Default Title” from the timeline and insert the snapshot you just captured. Navigate to the “Effects” tab and select an effect that suits your style. Drag this effect onto the timeline.
Open the effect’s settings in the right panel, then expand the specific section you added. This will bring up a new window for fine‑tuning.
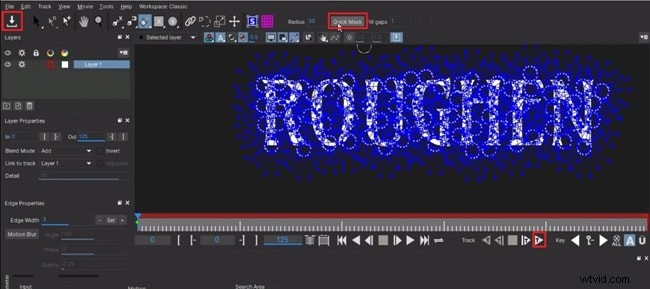
Step 3: Create a Roughened Edge Pattern
A new panel appears; zoom in with your mouse wheel. Use the brush tool in the toolbar to paint dots around the edges of your text. Activate “Quick Mask” to generate blue markers covering the text.
Play the preview, then click the “Download” icon in the top‑left corner to capture the pattern, and close the window.

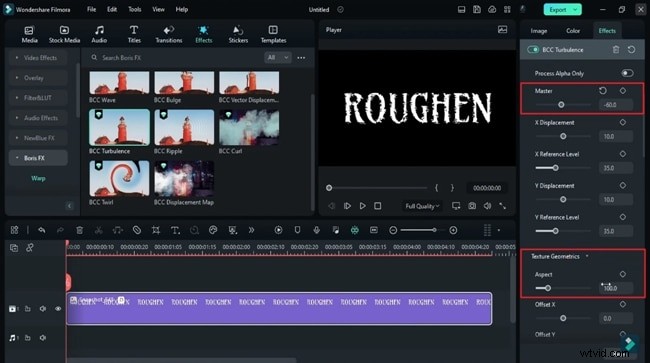
Step 4: Fine‑Tune Effect Settings for Roughen Edges
Return to the main editing window. Adjust the following parameters under the “Effects” tab:
- Scale, Reference levels, and Intensity
- Distortion: reduce “Master” and increase “Texture Geometrics – Aspect”
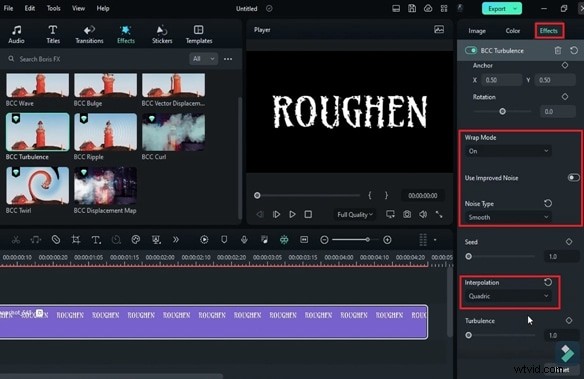
- Optional: tweak “Wrap Mode,” “Use Improved Noise,” and “Interpolation” for added texture
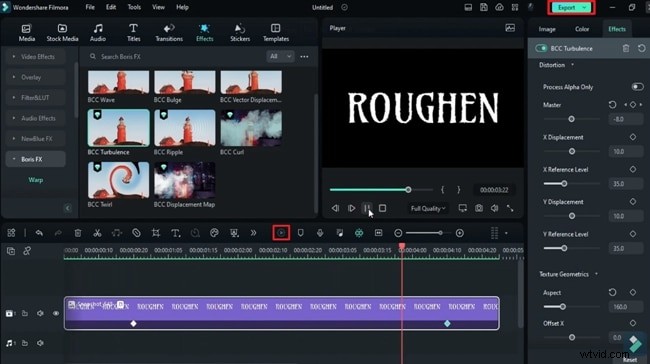
Place the playhead a few frames after the start, enable a keyframe for “Master” under Distortion, and modify its value to create a dynamic edge effect.

Step 5: Preview and Export
Click the “Render Preview” button on the timeline toolbar to review your work. When satisfied, hit “Export” to finalize the video.
Conclusion
By following these steps, you’ll add a unique roughened edge effect to any text, making your intros, vlog titles, or film scenes stand out. Filmora’s intuitive interface and robust effect library allow even beginners to achieve professional‑looking results.