
Welcome back to Part II of our series on 3D integration. In the previous post we set up camera tracking in PFTrack and exported a virtual camera to Maya. Now we’ll show how to blend 3D objects into real footage with precision and professionalism.
If you haven’t read Part I yet, How to Integrate 3D Elements into Video Footage – Part I is worth a quick look.
Camera Tracking Recap
The camera track we finished last time is displayed below. Inside Maya, the virtual camera follows the footage exactly while the test objects stay fixed in 3‑D space.
In Maya the camera moves while the test objects maintain their position in space.We omitted lights, materials, and shadows at this stage; the goal was a clean, accurate track.
Beyond Static Props
Before lighting and rendering, understand the types of 3D integration you can achieve in a shot:
- Static props – place a pre‑made mesh on a marker.
- Animated objects – attach a pre‑animated mesh to a marker.
- Objects following a path – use feature tracking to build a curve and animate the mesh along it (e.g., a car on a moving highway).
- Object/geometry tracking – attach a mesh to a moving element in the scene. PFTrack offers a dedicated node for this.
For instance, I inserted a blue car into multiple shots for a Nashville client. The car follows the road, lights, and shadows are rendered to match the original footage.
A commissioned work for a client in Nashville where I had to insert the blue car in different shots. Personal ProjectObject/geometry tracking is especially useful for animated rigs. By tracking a pair of arms across a scene, we can overlay a 3‑D model that either stays visible or serves as a support for other effects, such as a digital wound on a real forearm.
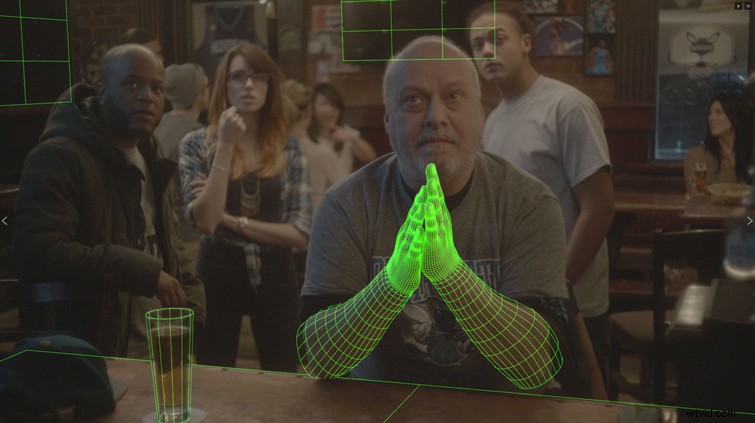 Object/geometry tracking on the character’s arms. Image via fxguide.com
Tracking a Character’s Face
A marker‑based approach works well for facial animation. In the famous Pirates of the Caribbean clip, actors wore markers that allowed the VFX team to replace the actor’s face with a digital monster that matched every expression.
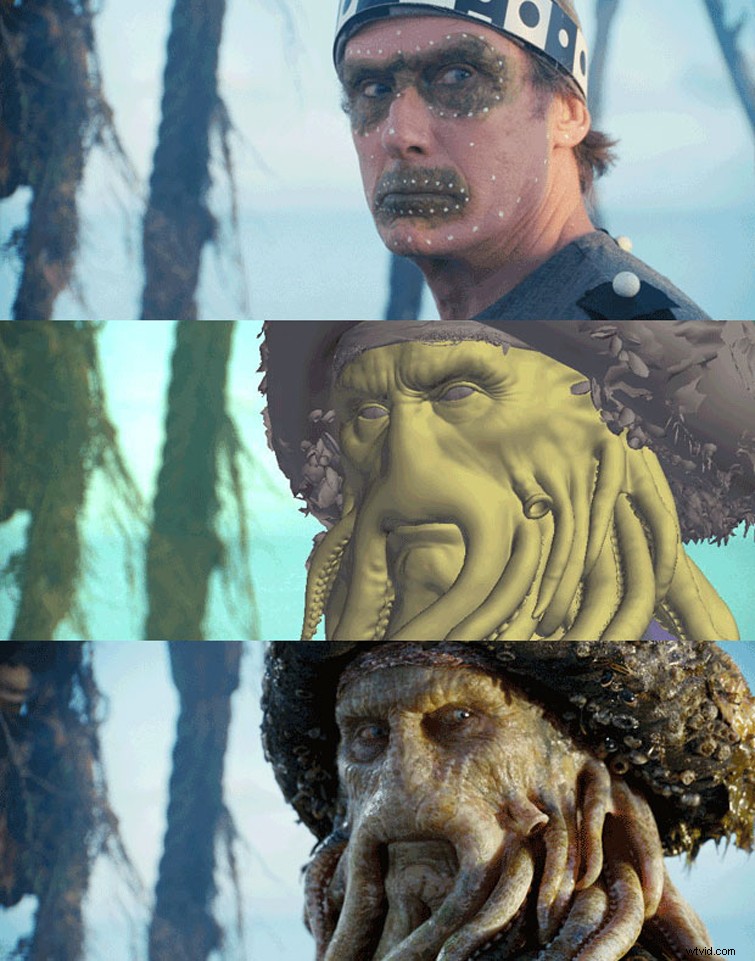 A tracking example on Davy Jones’ face from Pirates of the Caribbean. Image via beforesandafters.com
Building Your 3‑D Scene
We’ll revisit the example from Part I and walk through the Maya workflow. With the virtual camera already exported, we can focus on lighting, materials, and motion.
Test Your Object Under Various Lights
A model should behave correctly under any illumination. If shading looks off, the issue may lie in topology or material settings. Physically based rendering (PBR) automatically enforces energy conservation, reducing common mistakes.
For quick checks, a single HDRI map provides 360‑degree lighting. Rotate the model in a render turntable to spot shading issues early.
I used several HDR maps for a project that later required integrating the 3‑D car into on‑location photographs.
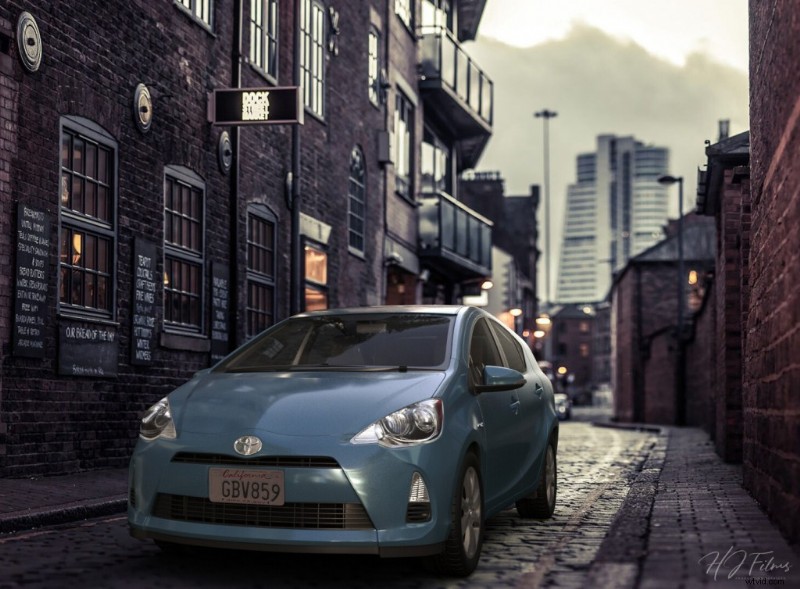 Creating a render while testing the shading quality. Personal Project
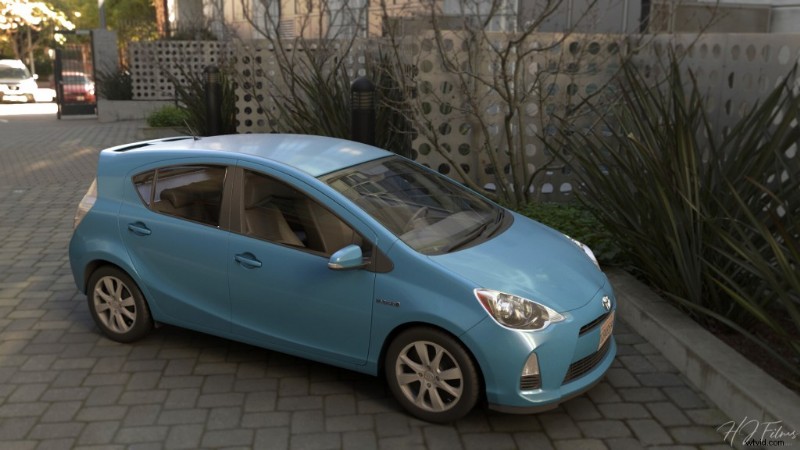
Once the shading looks natural, move on to the next step.
Match Environmental Lighting
Approximate the lighting that appears in the footage. A simple but effective workflow:
- Determine the time of day in the clip.
- Browse a high‑quality HDRI library (e.g., TurboSquid).
- If the sun is visible, locate its direction in the scene.
- Match shadow softness—use ambient occlusion for cloudy scenes.
- Account for artificial lights like lamp posts or neon signs.
For aerial shots with minimal surroundings, I spent little time on reflections. In tighter shots, you’ll need to bake environment reflections onto shiny surfaces.
We’ll cover advanced reflection techniques in Part III.
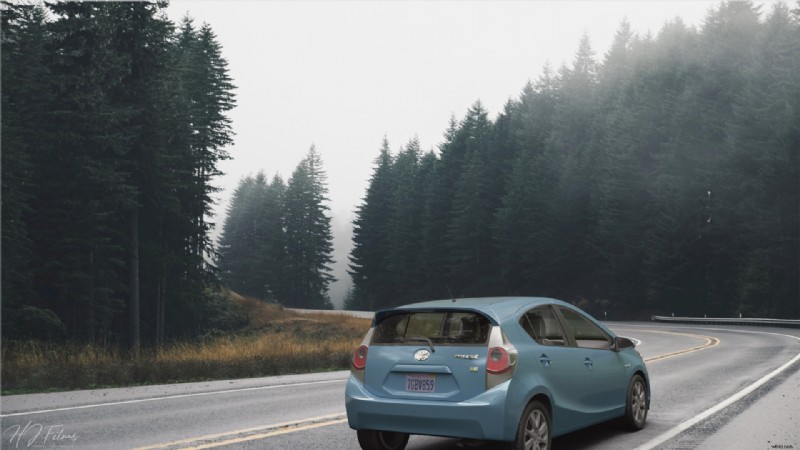
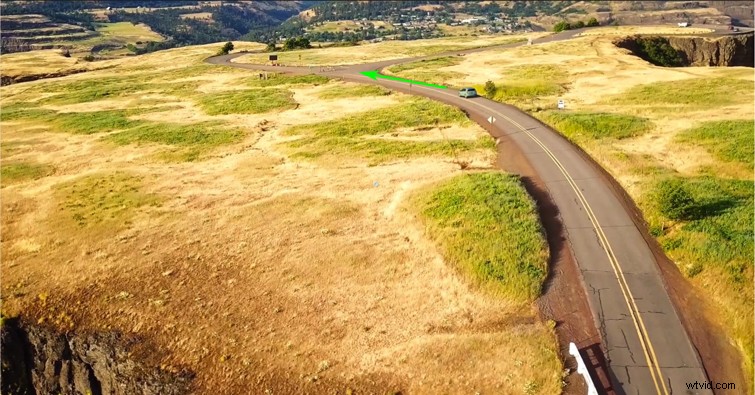
Here’s a practical example: the CG car follows a curved path and emerges from a bend in the footage.
The CG car is in a real clip. Look at how it follows the road and appears from the bendLighting Setup in Maya
Three key elements:
- HDRI (Skydome) that matches the clip’s ambient lighting.
- Directional light positioned to cast correct shadows.
- Invisible geometry to capture shadow casters.
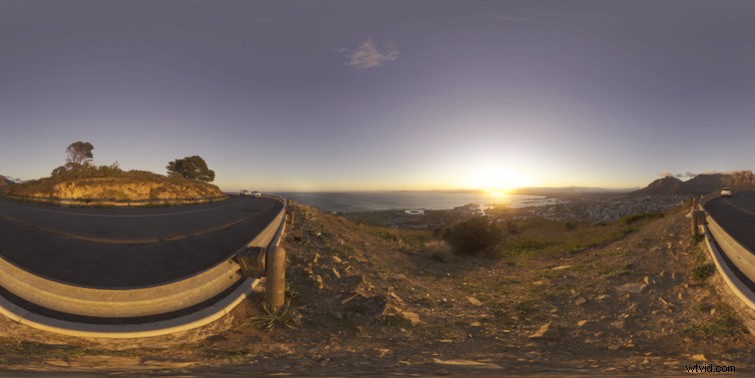
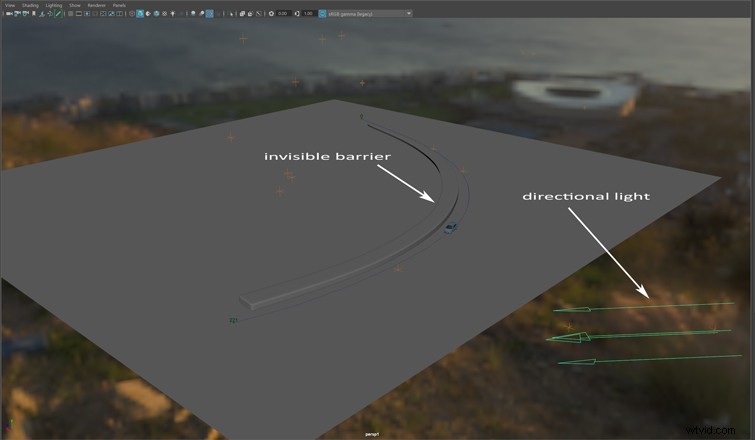
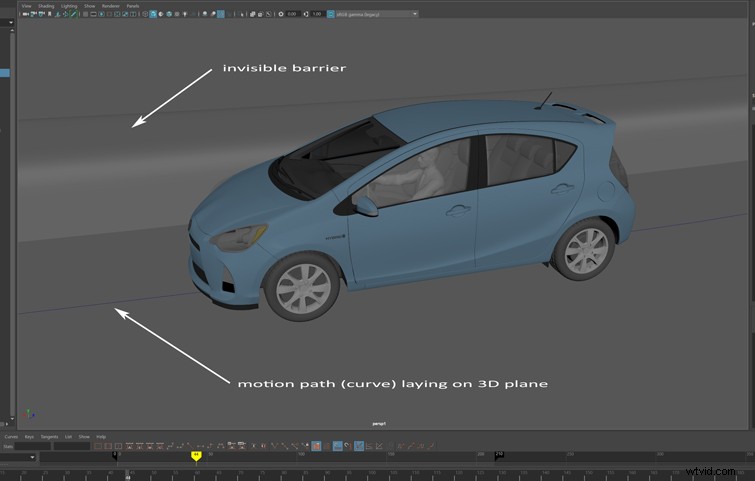
The scene is intentionally simple; the road is a flat plane because the camera distance hides small elevation differences. We create a curved motion path on that plane and attach the car to it.
Shadows are rendered to a separate layer and composited in After Effects. In the next article we’ll dive into render passes and mask usage.
HDRI shadows were suppressed in favor of directional light shadows for better control.
Testing animation inside of Maya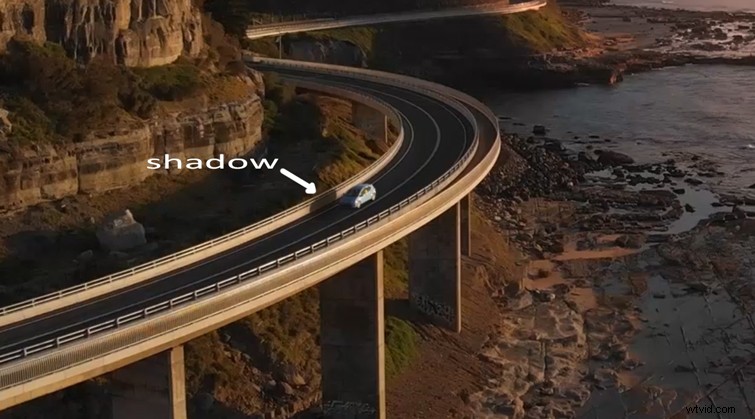 The shadow is projected onto the invisible barrier, which follows the real one on the footage.
Custom Geometry for Realistic Shadows
When the terrain is uneven, PFTrack can export locators that trace the actual surface. Building a 3‑D road that matches the real slope adds realism.
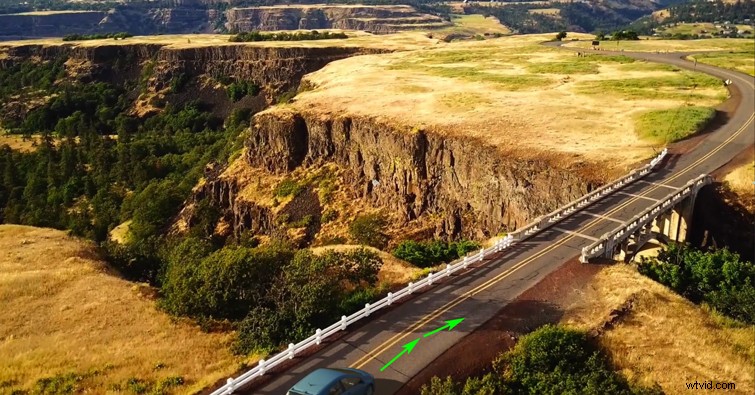
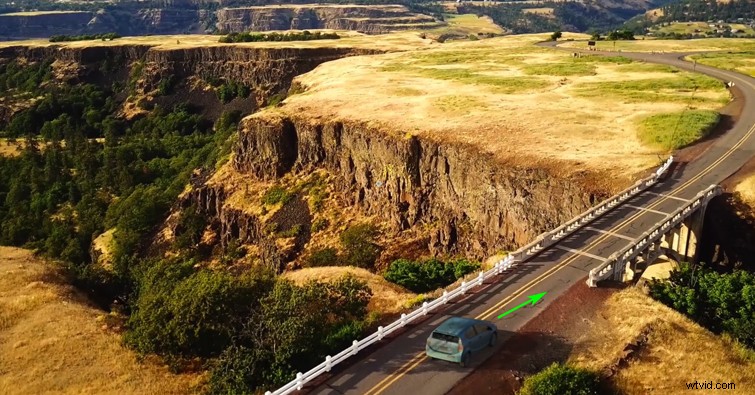
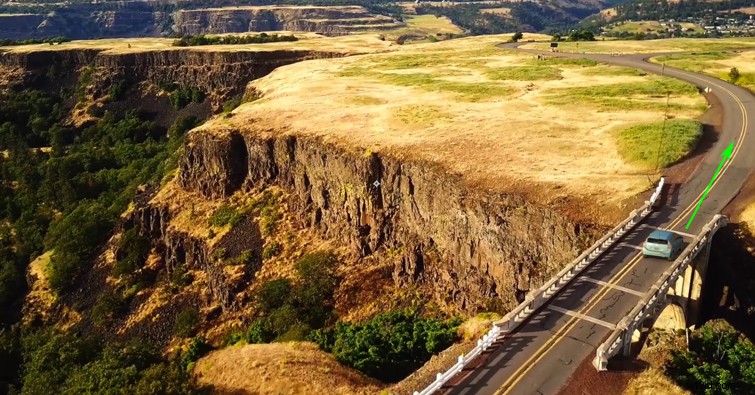
A new video clip with our 3‑D car- Road with accurate elevation.
- Lower terrain segment to catch the car’s shadow.
- Bridge side with pillars to show shadow interaction.
- Tree that projects a shadow onto the car at the start.
These simple geometries remain invisible in the final render; they exist only to capture correct shadows.
Maya scene with custom geometries Using a fixed camera that follows the car through the whole shotThe terrain’s variation is evident: the car descends toward the bridge, then climbs onto a relatively flat surface.
Light and Shadow Nuances
Shadows are essential for depth. They must adapt to the terrain’s slope and any intersecting objects.
The tree’s shadow must match its real position; a generic prop suffices as long as the projected shadow aligns.
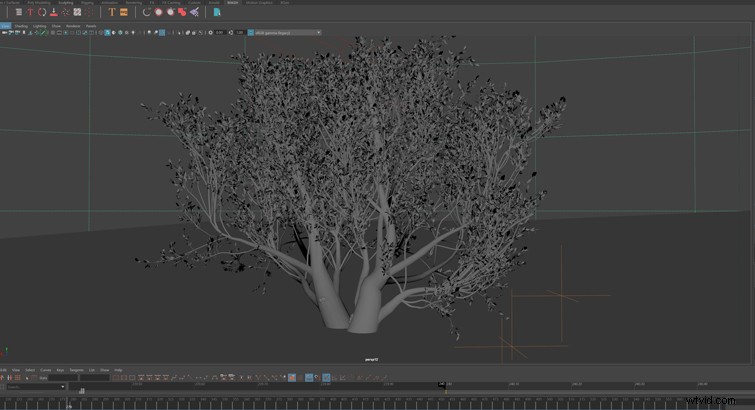 A generic 3‑D tree used in the scene
The directional light comes from the left, supported by the HDRI. Small shadow gaps between bridge pillars add realism.
Recap of the lighting strategy:
- One directional light plus an HDRI.
- Road plane doubles as a shadow catcher and motion track.
- Invisible geometry captures all shadows.
- Optional ambient occlusion pass for contact shadows.
Final Thoughts
Integrating 3‑D objects into live footage is meticulous but manageable with a clear workflow.
We covered:
- Quality testing of 3‑D objects.
- HDRI selection to match ambient light.
- Sun orientation and shadow softness.
- Using custom geometry to capture shadows.
- Animating along a path.
Below is another example of a car moving along a winding road, where I used a rotating plane attached to the car to capture shadows efficiently.
Another car animation along a pathFeel free to experiment with these techniques and choose what works best for your project. If you enjoyed this installment, follow me on LinkedIn for more tutorials.
In Part III we’ll tackle After Effects compositing to polish the integration.