
Mastering Post‑Processing for Realistic 3D Integration
Welcome to the third installment in our series on embedding CG models into live footage. In Parts I and II we covered camera tracking with PFTrack, scene setup, and basic rendering workflows. Now we’ll dive into the compositing phase—showing how After Effects can elevate the integration of 3D elements into real‑world shots.
After completing the camera tracking and creating a 3‑D scene that respects the original footage’s geometry, we turn to the post‑production toolkit. This guide focuses on After Effects, though the concepts apply equally to Nuke, Fusion, or any compositing suite.
Render Passes
Render passes are individual layers that isolate specific visual components—specular reflections, shadows, ambient occlusion (AO), etc. Combining them into a “Beauty Pass” gives you full control during compositing.
- Beauty Pass – final image with specular and diffuse reflections.
- Shadow Pass – isolated shadows for precise placement.
- Ambient Occlusion Pass – soft contact shadows that deepen integration.
- Object ID Pass – enables selective editing of individual objects.
For a hero car shot where surface detail is limited, a minimal set of passes (Beauty, Shadow, AO) is sufficient and keeps file sizes manageable.
Choosing the Right Passes
Match the number of passes to your compositing goals. A robust pass workflow lets you tweak individual layers without re‑rendering the entire scene.
In my test render, I used three passes: Beauty, Shadow, and AO. Specular reflections were baked into the Beauty Pass to avoid an extra pass.
Post‑Production Breakdown
- Initial render from Maya shows color mismatch and over‑saturated blue.
- Color correction with Tint to match white‑black points, followed by Curves to restore contrast.
- AO pass added contact shadows, making the car sit naturally on the road.
- Shadow pass overlaid real sun‑shadow with a subtle motion blur.
The following sequence demonstrates the AO and Shadow passes in action before the final render.
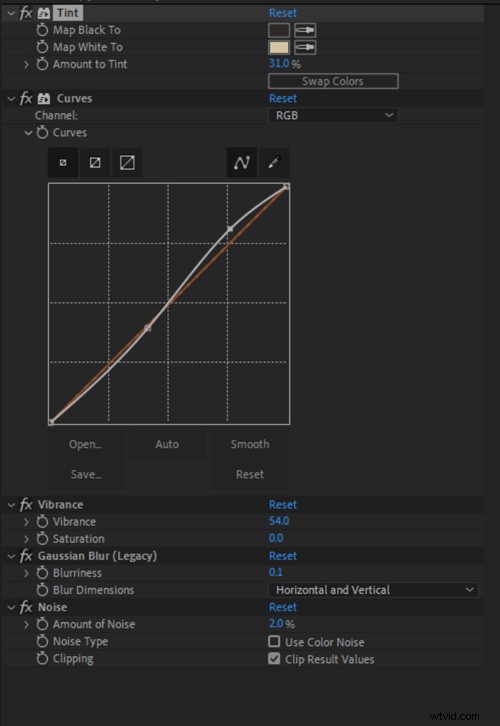 The list of effects applied to the beauty pass layer in After Effects.
Key advice: polish your 3‑D render as much as possible in Maya to reduce color‑matching headaches later. Accurate HDRIs, shadow geometry, and auxiliary lights save countless hours in compositing.
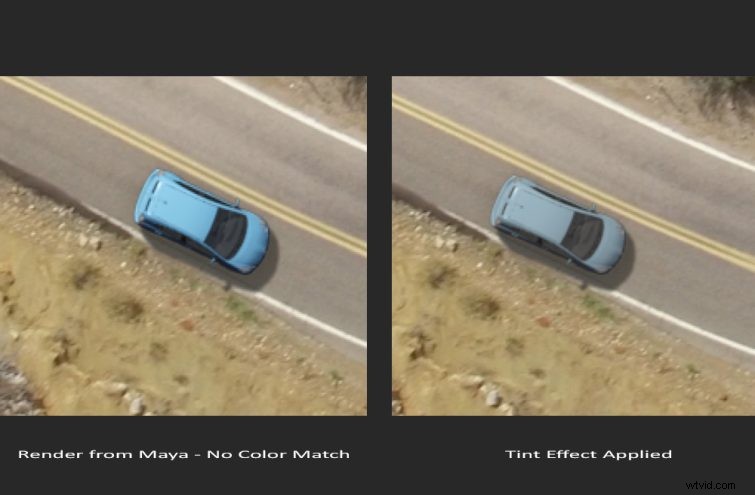
Tint aligns white‑black points with the footage. The following Curves restore contrast after tinting.
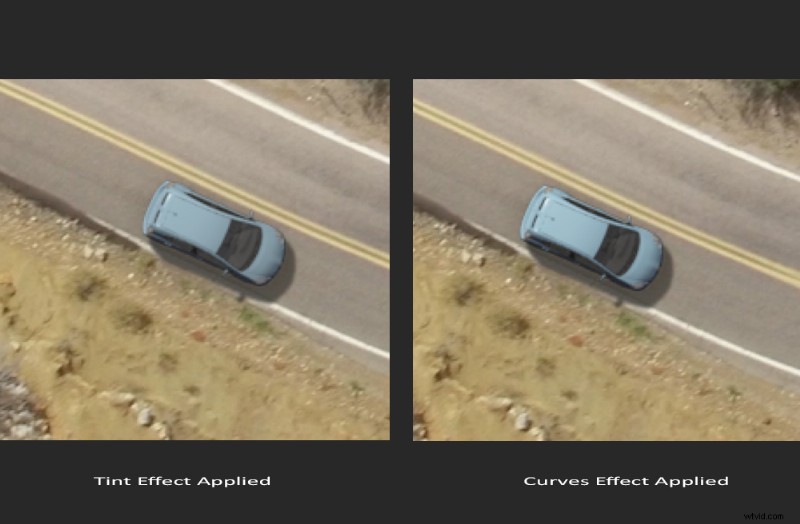
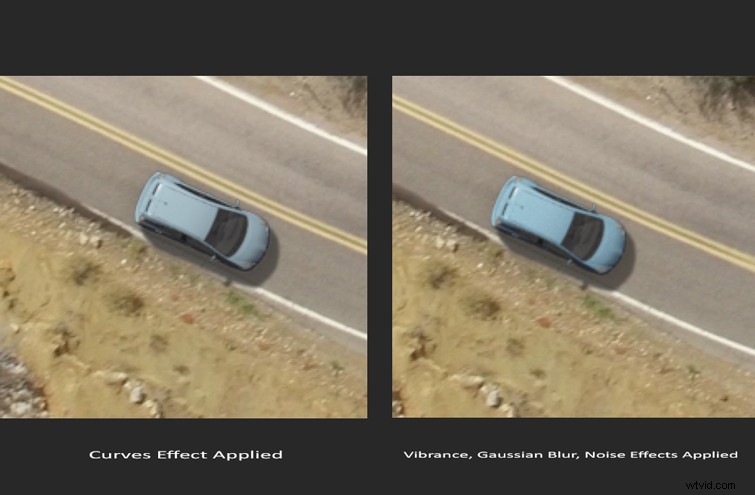
Vibrance subtly lifts the car’s light‑blue hue. Final touches include Blur and Noise to blend the CG with the real footage.
In‑Depth Post‑Processing on a Bridge Shoot
For a high‑contrast bridge scene, optical distortion (barrel) is present. Use PFTrack’s Distortion tab during tracking, then reload the undistorted footage for rendering.
- Backlight effect mimics real sun‑rim lighting.
- Balanced shadows to avoid under‑exposure.
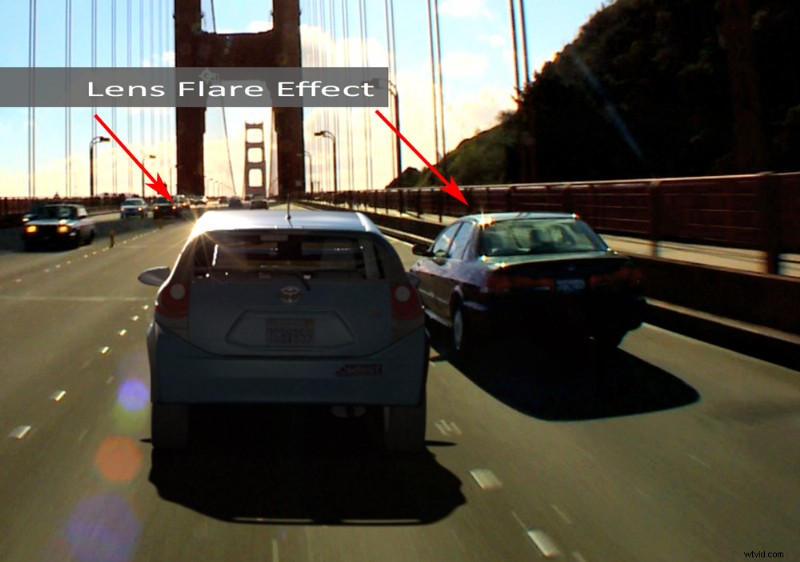
- Lens flare simulates the glossy roof reflection.
- Fake reflections for the rear window and roof.
- Grain and blur emulate the original film stock.
Remember: realistic footage rarely looks perfect. Replicate camera imperfections to enhance believability.
Creating a Backlight Effect
Study the reference footage: a directional light casts a sharp rear shadow, while a subtle area light lights the back side. Add a point light near the roof to accentuate specular highlights.
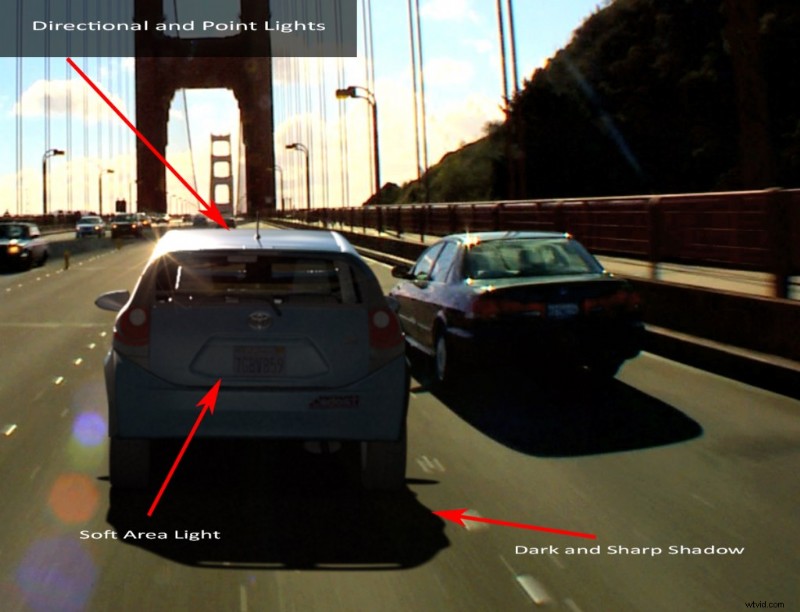
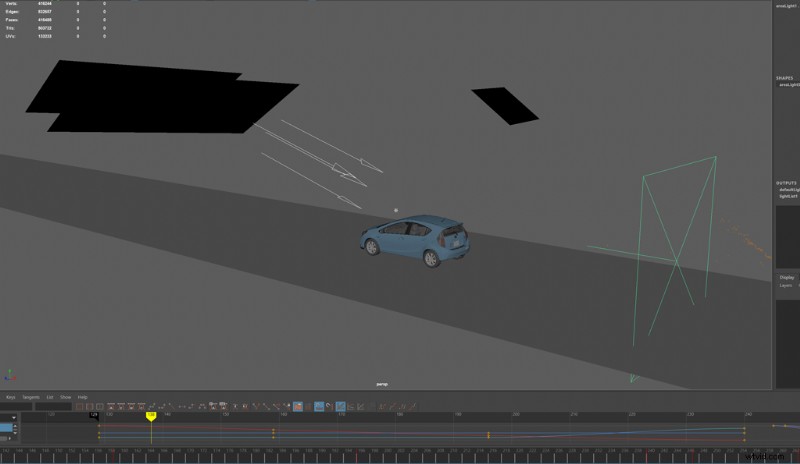
In Maya, set up a directional, point, and area light to match this configuration.
Color Matching in After Effects
Use Levels to adjust the RGB channels independently. Tweaking the G and B channels often corrects saturation imbalances.
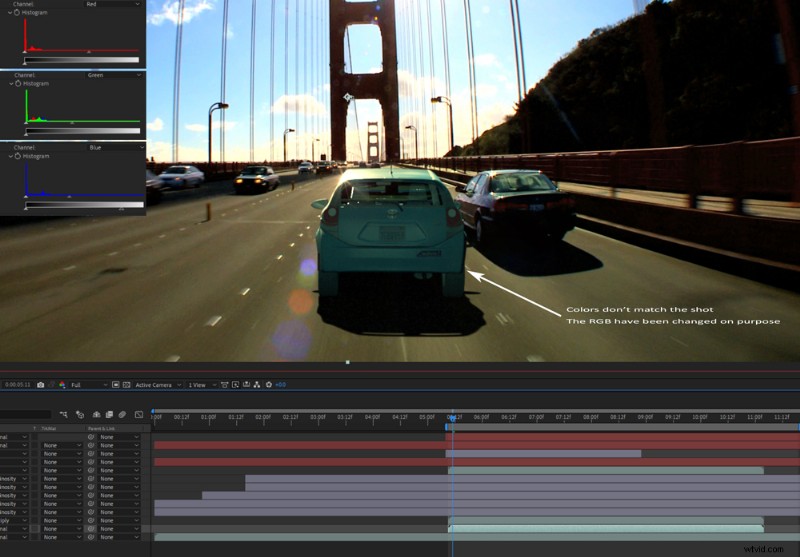
After fine‑tuning, the car blends seamlessly with the background.
Custom Reflections
When environment capture isn’t possible, create fake reflections with pre‑rendered video planes. Target the rear window and roof with animated planes that mirror the original footage.
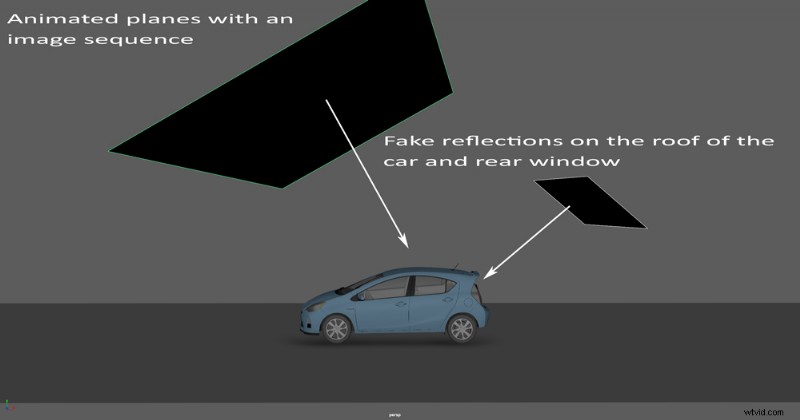
Saving a dedicated reflections pass lets you boost intensity during compositing.
Lens Flare Integration
Add a subtle lens flare to match the real car’s roof reflection. Use Shutterstock’s library for high‑quality flares, then blend via Add or Screen modes.
Final Touches
- Hue/Saturation – gentle increase to enrich colors.
- Curves – brighten highlights, especially the roof.
- Camera Lens Blur – softens edges for depth.
- Unsharp Mask – sharpens edges without over‑sharpening.
- Add Grain – simulates camera noise.
The following video showcases the combined post‑processing workflow.
A few post‑processing effects in action.Thank you for reading Part III. Follow me on LinkedIn for more 3‑D workflow insights.
Further reading:
- How to Integrate 3D Elements into Video Footage – Part I
- How to Integrate 3D Elements into Video Footage – Part II
- Replicating 3D Lighting from a Movie Scene
- Creating Specific Color Schemes in 3D for Filmmaking