Need an easy way to work with FLAC files in Premiere Pro? Use this simple technique.
Several years back, I competed in a 48-hour online editing contest, and I had to work with 30gb of FLAC files. Perfect: the lossless format with fantastic sound quality. However, Premiere Pro doesn’t support the FLAC format. In fact, many NLEs don’t. (I won’t get into the FLAC debate — it’s almost as heated as film vs. digital.) Suffice it to say, FLAC is a great archival format. Going from FLAC to MP3/WAV or any other format will always export a better file than a compressed format to another compressed format.
If you need a little more background on the FLAC format, here’s what you need to know.
I understand there is a plug-in lurking in the corners of the internet that will allow Premiere to read FLAC files. However, I’ve always been superstitious about installing third-party plug-ins on Adobe products, especially those that aren’t secure — I’ve had one too many bad experiences. There is also an abundance of conversion software that you can use to convert a FLAC file to an MP3 or a WAV file. However, converting FLAC files to another format en masse is an audacious task that may not pay off if you end up only using one of several thousand files.
Instead, let’s take a look at a quick technique to move FLAC files from Audition to Premiere in under a minute.
The Method
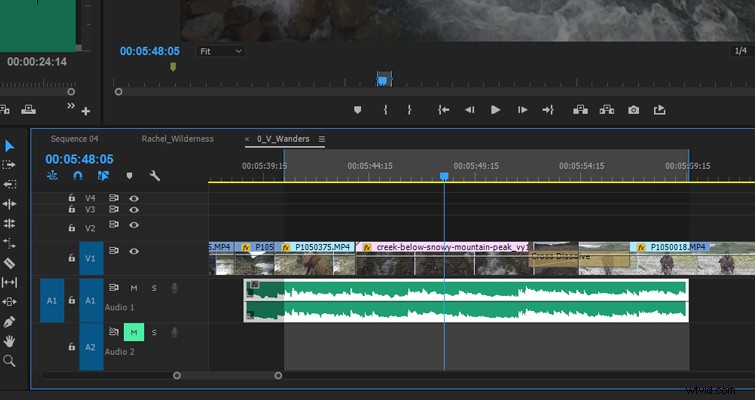
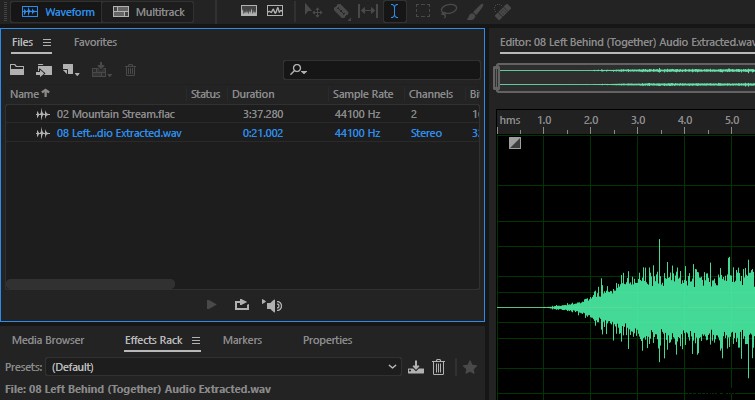
In Premiere, position a temporary high-quality WAV file (it can be any song/SFX/audio as long as it’s high quality) where you would like the FLAC file to appear. In my example below, I intend to use a FLAC stream SFX file. I’m going to place it underneath the desired video clip, but most importantly, I’m going to extend each end by five seconds so we will have an extra ten seconds. This is important for when we head to audition.
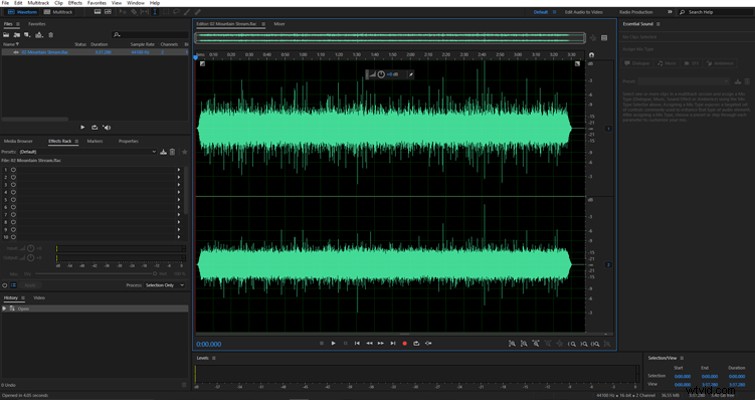
Open Audition and import the FLAC file.
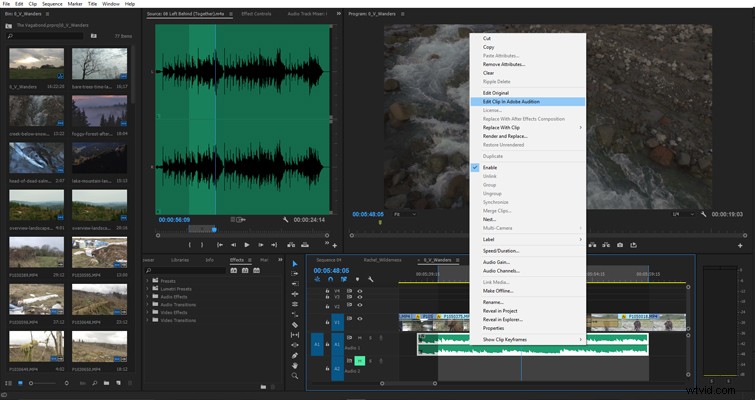
Switch back to Premiere, right-click the audio file, and select Edit Clip in Audition.
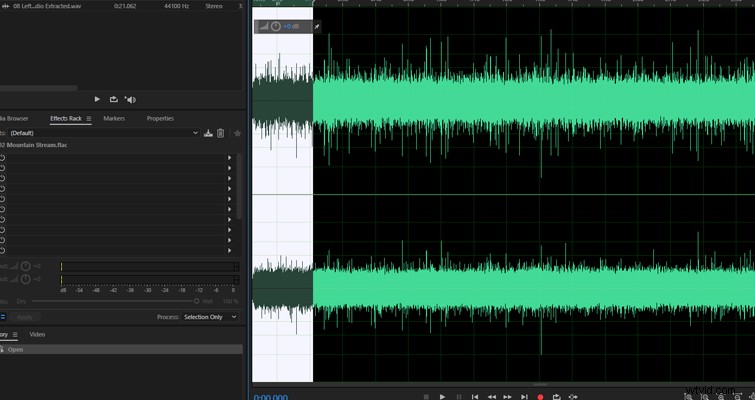
The WAV file will now open in Audition.
With the FLAC file active, go to the time code on the bottom left of the edit panel and enter the duration of the extracted audio clip. Press O on the keyboard. This marks the out point of the audio clip and gives us a highlighted area to copy. Hit CTRL+C to copy the highlighted segment, and then paste the FLAC segment onto the audio track from Premiere Pro.
Hit Save, and now in Premiere, the audio from the FLAC file appears in the position of the original WAV file. Since our audio clip is ten seconds longer than we need it to be, we can trim it into the correct position.

Notes
As the title suggests, this is a quick tip, and not a final solution for using FLAC files in Premiere.
If you export the FLAC file as a WAV clip from Adobe Audition and compare that to the WAV clip returned to Premiere, you will see that this quick tip involves very little data loss.
This quick tip is perfect for YouTube videos. However, for more professional projects, I recommend the lengthier process of individually exporting entire FLAC files into a useable format to make sure you’re getting the most out of the lossless format.
Do you have tips for working with FLAC files in Premiere? Let us know in the comments.