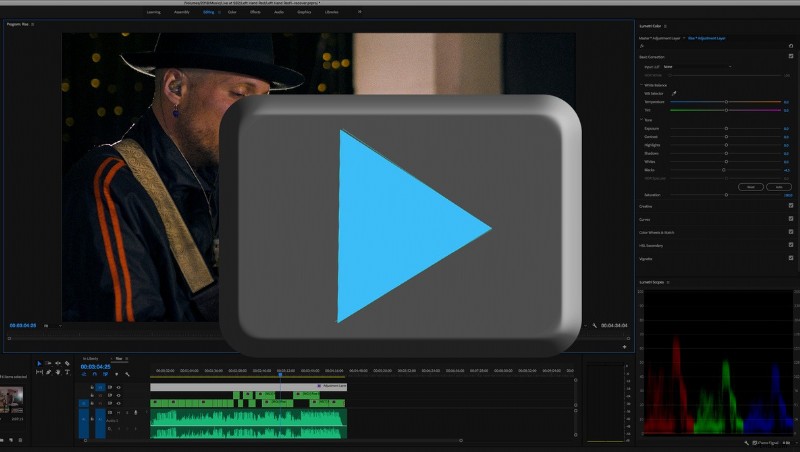
Adobe’s latest update to Adobe Premiere CC has made it more accessible than ever for beginners to start editing video, but if your processing power is limited, playback lag can make the editing process frustrating. Here are six ways to reduce playback lag when editing your timeline.We won’t make any suggestions for shooting in an improved file format or upgrading your PC, these tips are for improvements to a current project that can be actioned immediately. With this in mind, in at one…
1. Increase Memory Allowance
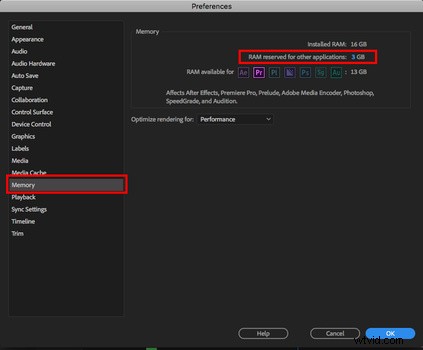
Adobe lets the user define how much RAM will be dedicated to Premiere Pro CC, so the obvious first step is to maximize its allowance. To do this, open up the Preferences window and select the Memory tab. Reduce the “RAM reserved for other applications” to the lowest number possible and hit OK.
2. PC MOT
Editing video is memory intensive, so if you are experiencing playback lag, make sure all other applications are closed. Delete or move files so there is at least 20% internal hard drive space. Memory Clean 2 is a useful free app for Mac will give your RAM a refresh. Basically, make sure your machine is the best version it can be to before you open Premiere Pro CC.
3. Change The Playback Resolution
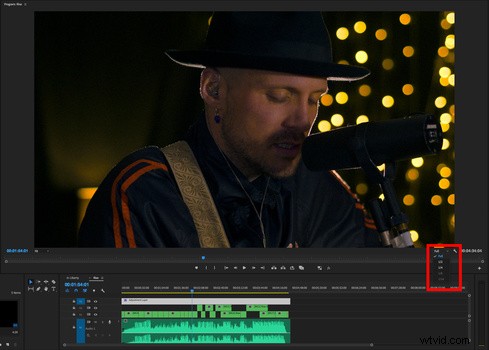
In the bottom right of the Program window, change the “Full” dropdown to a reduced resolution like ½ or ¼. This reduces the detail of the playback resolution but will diminish lag significantly. While you’re here, click on the spanner next to the dropdown and make sure the “High Quality Playback” is switched off.
4. Global FX mute
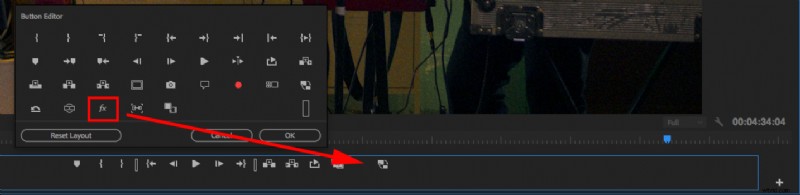
It’s always better to edit your timeline before you start grading or adding effects to improve the chances of a lag free playback. But if you’ve added effects during the edit, you can turn off all effects using the “Global FX Mute” button in the Program window. If this isn’t visible, click on the + in the bottom right of the window, then drag the “fx” icon into the icon row. This will dramatically improve playback to those clips with effects.
5. Close Scopes and Audio Bars
Color Scopes and Audio Bars, to a lesser extent, increase the demand on real-time playback and are unnecessary at the timeline editing stage, so close these respective panels to reduce the demand on unessential memory intensive tasks your machine needs to perform.
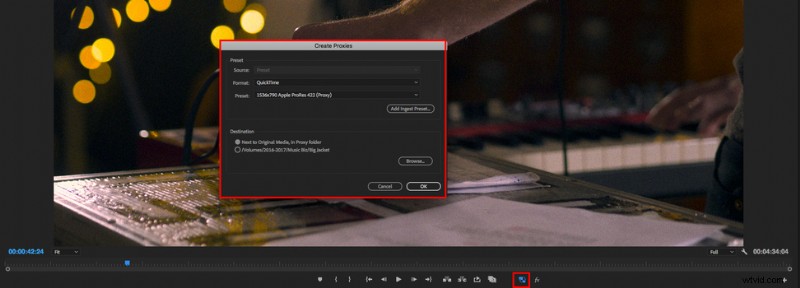
6. Create Proxies
If you’ve performed all of the above but are still seeing a significant lag in your video playback, then it’s time to create Proxy files. Proxy files are smaller versions of your original files that are used for editing. Once the edit is complete, you can restore the original files. This is standard practice for pro editors given the large files used in professional productions, but the theory is the same for amateurs shooting 4k on consumer cameras and using slower PCs or Macs.
Highlight the source files in the Project window, right click and select “Proxy,” “Create Proxies…” Experiment with the Presets to find one that will playback smoothly on your machine. Creating the proxies will take some time depending on how much footage you have, I usually let it run overnight for larger projects. Back in Premiere Pro, make sure the “Toggle Proxies” button is in the Program window, it’s the two squares with arrows and can be found in the + menu if it’s not visible. Keep in mind that creating proxies will make new memory heavy files, so you’ll need the hard drive space. You can delete the proxies once your project is complete.
If you start to get serious with video editing, it’s worth investing in better hardware, but when this isn’t possible, these tips will help make the editing process a little less challenging and time-consuming by editing using a real-time video playback.