Syncing audio with video is a cornerstone of polished video production. While a single camera can capture both tracks, most creators record audio separately to elevate sound quality. This guide shows how to merge those tracks effortlessly in Filmora, whether you prefer manual precision or automated convenience.
In this article
- Why separate audio and video are essential
- Pre‑recording prep for flawless sync
- Manual audio‑video alignment in Filmora
- Automatic synchronization with Filmora’s Premium feature
- Frequently asked questions
Why Separate Audio and Video Are Essential
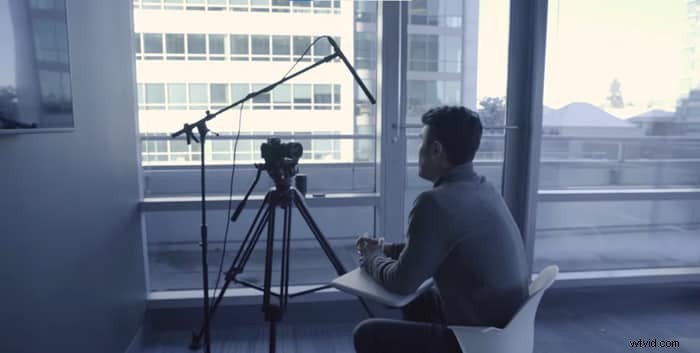
Professional‑grade video demands both crisp visuals and pristine audio. A camera’s built‑in microphone often struggles with background noise and limited dynamic range. Using an external recorder—whether a shotgun mic, lapel mic, or field recorder—captures cleaner sound. The trade‑off is a post‑production step: aligning the two files. A small mistake can throw off a project, so proper preparation is vital.
With a little forethought, syncing becomes a routine task rather than a headache. Below you’ll find the steps to make that happen with ease.
Pre‑Recording Prep for Flawless Sync
Before you hit record, create a visible cue that will act as a reference point in both the video and audio waveforms. The simplest cue is a hand clap. For a more cinematic touch, use a clapperboard: the slap of the board produces a sharp spike in the audio, making it easy to line up tracks later.
Clap before the first “Action” cue and again before each cut. If you forget, a “tail slate”—a clap at the end of a take—works just as well. These cues are the backbone of any successful audio‑video sync.
Once you’ve recorded with a cue in place, you’re ready to import the files into Filmora and start the alignment process.
Manual Audio‑Video Alignment in Filmora
Filmora is a popular choice for creators because of its intuitive interface and powerful tools. Follow these steps to sync manually on desktop or mobile.
Desktop (Windows / Mac)
1. Download & Install Filmora
Get the latest version of Filmora from the official site. The free download offers full functionality for basic editing, but the Premium license unlocks the auto‑sync feature.
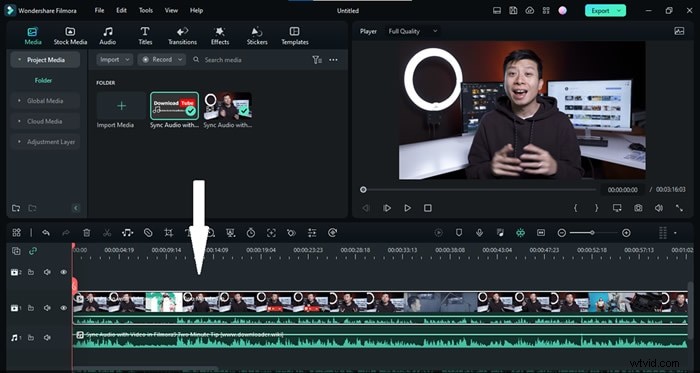
2. Import Your Media
Open Filmora and create a new project. Click “Import Media” or drag your video and external audio files into the media bin.
3. Place Tracks on the Timeline
Drag the video clip to the first track. Place the external audio on a track below it.
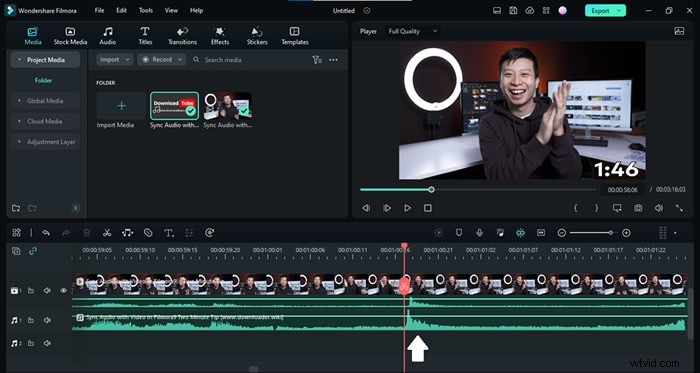
4. Locate the Clapping Spike
Zoom into the waveform of the in‑camera audio and the separate track. The clap appears as a pronounced spike.
Tip: If the spike is hard to see, zoom in further for clarity.
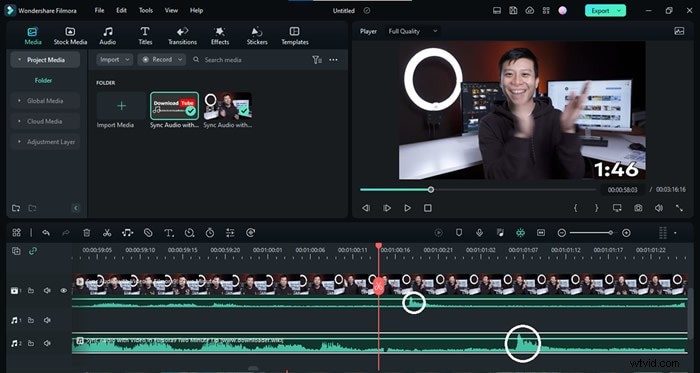
5. Align the Audio
Drag the external audio so that its spike lines up exactly with the in‑camera spike. Once matched, the audio is perfectly synced.
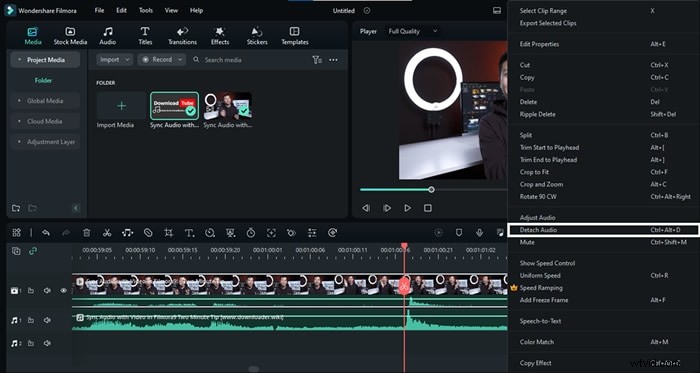
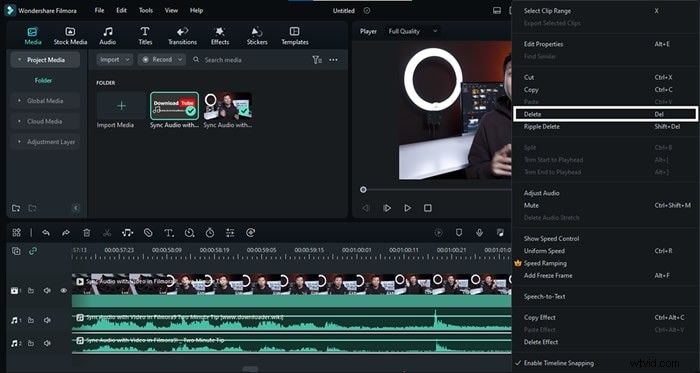
6. Remove the In‑Camera Audio
Right‑click the video clip and select “Detach Audio” (or press Ctrl+Alt+D). Delete the now‑separate in‑camera audio track.
7. Export the Finished Video
When satisfied, click “Export” to render your newly synced footage.
Mobile (iOS / Android)
Filmora’s mobile app lets you perform the same steps on the go. After installing the app, import your media, align the tracks by dragging the external audio, mute the original audio, and export.
Automatic Synchronization with Filmora Premium
For a one‑click solution, Filmora’s Premium license offers an auto‑sync tool. This feature analyzes audio waveforms and lines up tracks automatically.
1. Prepare Files
Same as the manual method: import both video and external audio into a new project.
2. Select Both Tracks
Click to highlight the video and audio clips on the timeline.

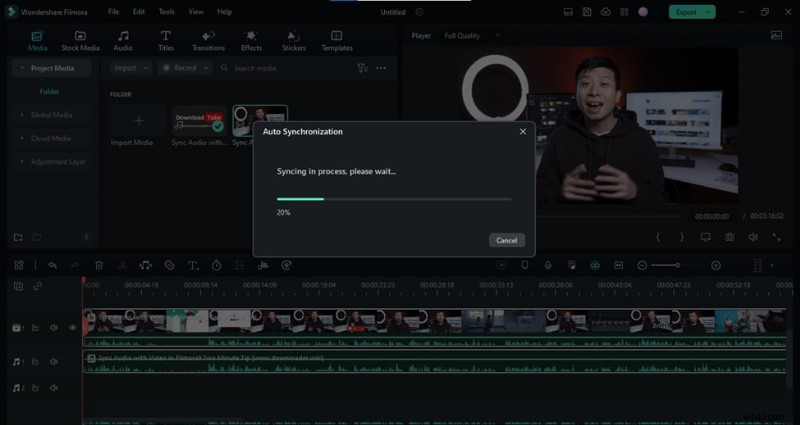
3. Activate Auto‑Sync
Click the “Auto Synchronization” icon that appears on the toolbar. Filmora will begin aligning the files.
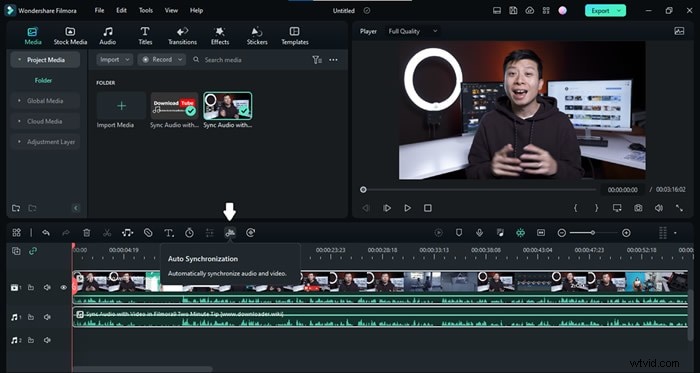
4. Wait for Completion
During the process, a progress bar will appear. When it finishes, the tracks will be perfectly synced.
5. Finalize and Export
Delete the original in‑camera audio, then hit “Export” to save your polished video.
Frequently Asked Questions
Is auto‑synchronization better than manual?
Auto‑sync is faster and works well when the audio waveforms are clear. However, manual sync offers finer control and is essential in complex scenes or when the automatic algorithm misaligns.
Can I sync audio and video for free?
Yes. Filmora’s free version allows manual sync. The auto‑sync feature requires a Premium license.
Conclusion
Mastering audio‑video synchronization is a must for any serious creator. With Filmora’s intuitive tools—whether you choose manual precision or automatic convenience—you can ensure your audio matches every frame, elevating the overall production quality.

