Whether you’re building a podcast, adding voice‑over to a presentation, or simply want to listen to a video’s soundtrack, extracting audio on a Mac can be a powerful, yet often overlooked, skill. New users frequently run into confusion when trying to pull audio from video files, but macOS offers a suite of built‑in tools that can handle most basic needs. For more advanced editing, third‑party software such as Wondershare Filmora gives you studio‑grade control.
Using macOS Built‑in Tools to Rip Audio
For quick, no‑frills audio extraction, you can rely on either QuickTime Player or iMovie. Both are free, pre‑installed, and easy to use.
Method 1: QuickTime Player
- Open QuickTime Player and locate the video file you want to process.
- From the File menu, choose Export As > Audio Only.
- Select a destination folder and click Save.
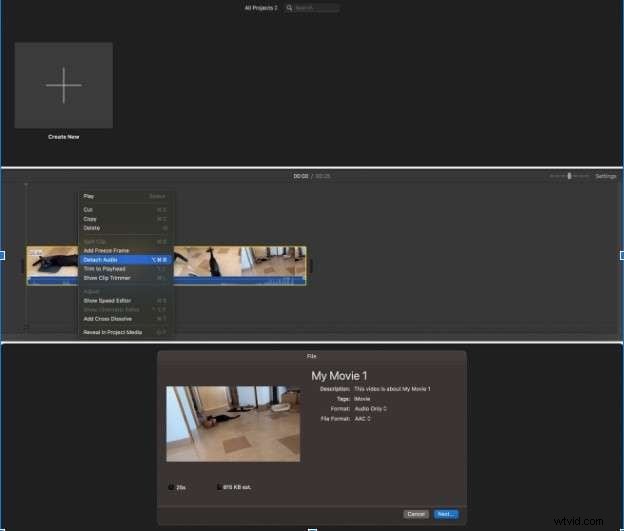
Method 2: iMovie
- Launch iMovie and start a new project.
- Drag the video into the project timeline.
- Right‑click the clip and select Detach Audio to separate the track.
- Export the detached audio by choosing File > Share > File and selecting an audio format.

While QuickTime and iMovie are ideal for straightforward tasks, they lack the depth required for high‑quality audio production. For professional results, consider Wondershare Filmora.
Studio‑Grade Extraction with Wondershare Filmora
Filmora extends beyond basic extraction by offering AI‑powered tools to clean, enhance, and customize audio tracks. It’s suitable for podcasts, voice‑overs, and any project where audio clarity matters.
Key Features
- AI Voice Enhancer – Sharpens vocal clarity and adds natural polish.
- AI Audio Denoiser – Eliminates background hiss, hum, and reverb.
- Audio Fade – Apply smooth fade‑in/out transitions.
- AI Voice Generator – Create realistic voices in 33 languages.
- Voice Clone – Replicate tone and emotion for consistent narration.
- AI Music Generator – Generate royalty‑free background tracks tailored to mood.
- Batch Extraction – Process multiple videos in one go.
Step‑by‑Step Extraction in Filmora
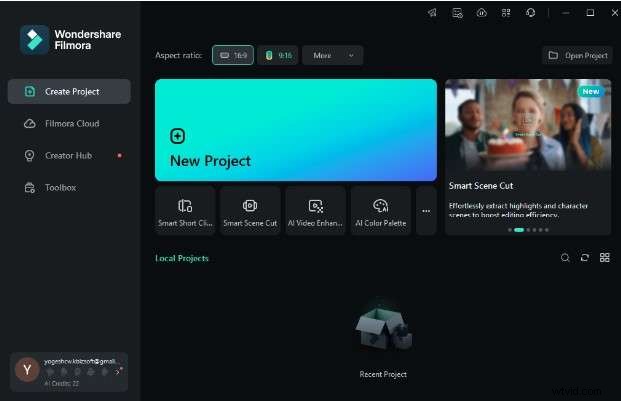
- Download and install Wondershare Filmora from the official website. Open the app and select New Project.
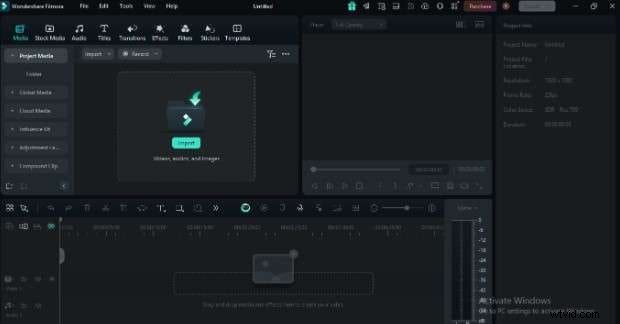
- Import the video file into the media library.
- Drag the clip onto the timeline, right‑click it, and choose Detach Audio.
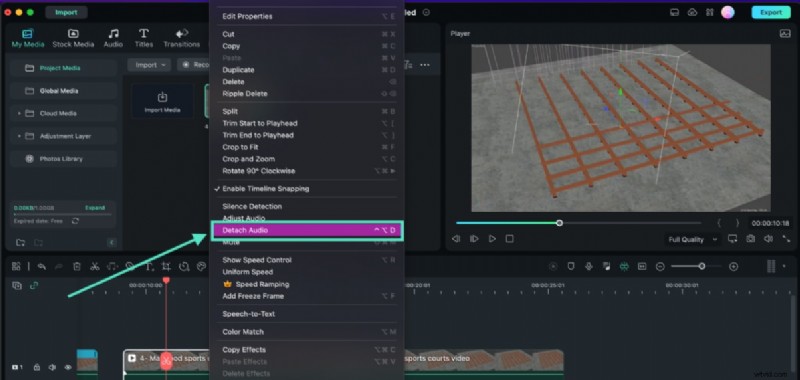
- The detached audio track appears separately on the timeline. From here you can edit, apply effects, or export directly.
For those who prefer an online solution, explore dedicated web‑based audio extraction tools. And if you’re looking for mobile options, check out the best video‑audio extracting apps for smartphones.
Polishing Extracted Audio in Filmora
Once you’ve isolated the audio, Filmora’s suite of editing tools can transform a raw track into a polished final product:
- AI Audio Denoise – Removes unwanted background noise.
- Audio Equalizer – Fine‑tune bass, mids, and treble for optimal sound.
These enhancements turn any unedited audio into a professional‑quality track that complements your visual content.
Conclusion
QuickTime and iMovie are excellent for straightforward audio extraction on macOS. However, when audio quality becomes paramount—such as for podcasts, voice‑overs, or marketing videos—Wondershare Filmora provides the advanced tools and AI assistance needed to deliver studio‑grade results.
FAQs
-
How do I separate audio from MP4 on Mac?
Use QuickTime, iMovie, or Filmora depending on your needs. For example, in Filmora: import the MP4, add it to the timeline, right‑click and select Detach Audio.
-
Can QuickTime extract audio from a video?
Yes—open the file, go to File > Export As > Audio Only.
-
How to extract audio from a Mac video with iMovie?
Import the clip, right‑click in the timeline, and choose Detach Audio to separate the track.