Glitch art captivates designers with its distinctive aesthetic, transforming ordinary images into striking visual statements. By simulating digital errors, glitch effects introduce color, texture, and movement that elevate the creative impact of any photograph.
Photoshop offers both ready‑made templates and the flexibility to craft bespoke glitch effects. This guide walks you through both approaches, ensuring you can produce professional results tailored to your vision.
In this article
Part 1. How Do You Do Photo Glitch Effect in Photoshop?
Glitch visuals combine jagged lines, chromatic noise, and color distortion to create a compelling aesthetic. While templates provide a quick start, customizing these elements lets you achieve a unique, signature look.
Adobe Photoshop remains the industry standard for crafting sophisticated glitch effects, including VHS‑style distortions. Follow the steps below to master the process.
Step 1
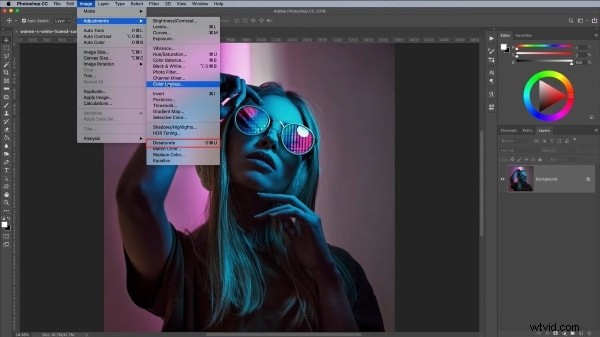
Begin by importing your chosen image into Photoshop. Convert it to grayscale by selecting Image → Adjustments → Desaturate. This baseline simplifies subsequent color manipulation.
Step 2
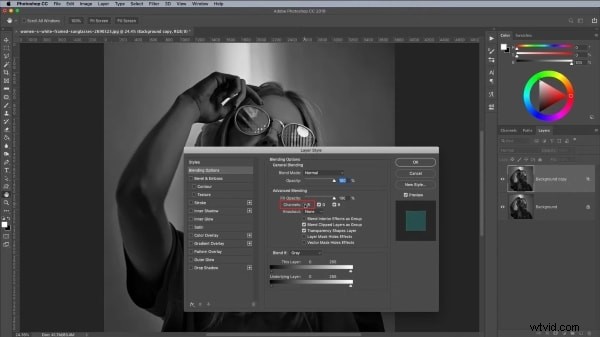
Duplicate the background layer (drag it onto the New Layer icon). Double‑click the duplicate to open Layer Style, then uncheck the R channel to isolate the red channel.
Step 3
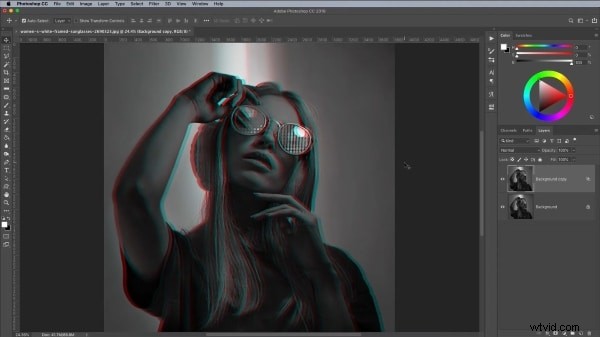
Create the first glitch displacement by holding Shift and nudging the duplicate layer left or right with the arrow keys, producing a subtle offset.
Step 4
Use the Marquee tool to select rectangular regions, then shift those selections horizontally to introduce localized distortions. Repeat across the canvas for layered effect.

Step 5
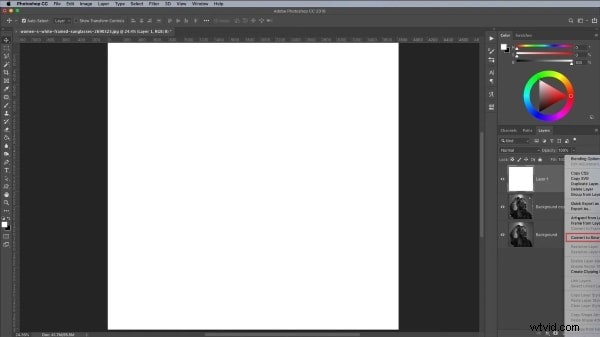
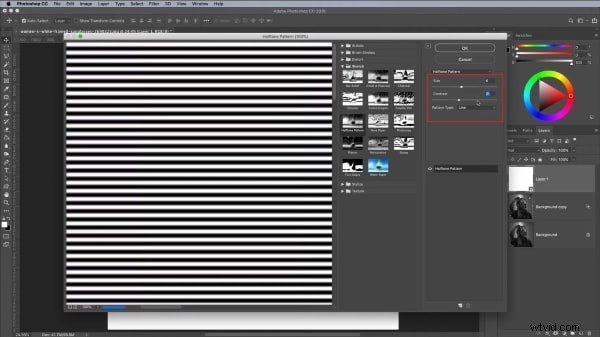
Create a new layer, fill it with pure white, and convert it to a Smart Object for non‑destructive editing.
Step 6
Open Filter → Filter Gallery, navigate to Sketch, and set Pattern Type to Line. Adjust Contrast and Size to fine‑tune the line texture.
Step 7
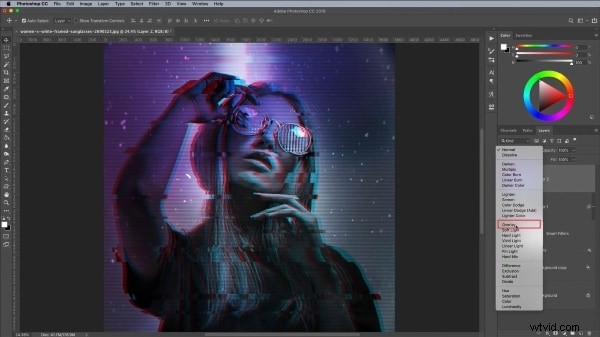
Set the Smart Object layer’s blending mode to Overlay, then adjust the opacity slider to control line prominence.
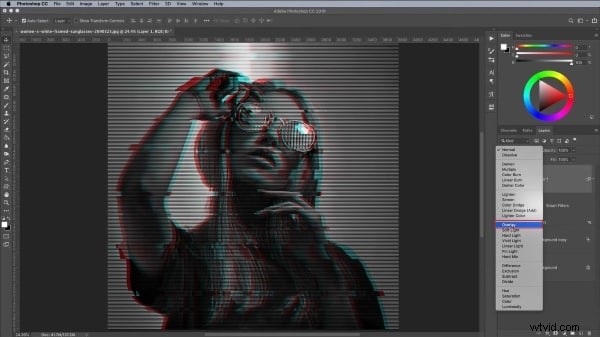
Step 8
Apply a Gradient Map to inject color, or overlay custom textures. Ensure each overlay uses Overlay blending for harmonious integration. Experiment with hue and saturation to achieve the desired vibrancy.
Step 9
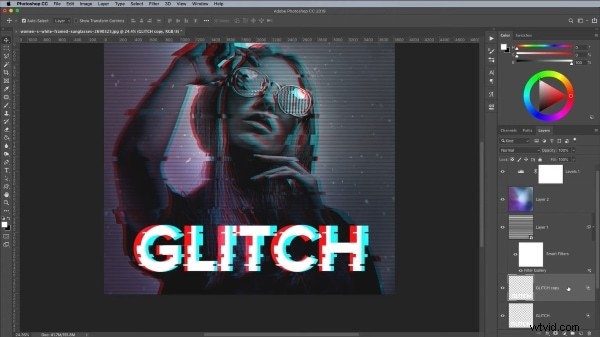
Add text using the Type tool. Apply the same glitch displacement techniques to the text layer for a cohesive aesthetic. With these steps, your glitch masterpiece is complete.
Part 2. 5 Awesome Glitch Effect Photoshop Actions.
Photoshop enables full customization, but when time is limited, pre‑made actions provide a rapid alternative. The following five actions deliver high‑impact glitch effects with minimal effort.
1. Distorted Glitch Photoshop Action
Distorted Glitch Action delivers a dramatic, dark‑toned distortion with a single click. Its built‑in adjustments let you fine‑tune intensity and color, producing an instantly striking glitch overlay.

2. Geometric Glitch Photoshop Action
Geometric Glitch Action moves beyond line‑based glitches, offering clean shapes, sharp angles, and fully editable layers. It blends abstract geometry with glitch aesthetics, ideal for contemporary, professional imagery.

3. Animated Glitch Photoshop Action
Animated Glitch Action is designed for motion graphics. With 12 customizable color presets and a structured layer hierarchy, you can generate dynamic glitch frames that sync perfectly with video timelines.

4. Futuristic Photoshop Action
Futuristic Action injects neon hues and high‑contrast circuitry motifs. Its modular layers allow photographers and designers to craft forward‑looking glitch visuals that resonate across media.

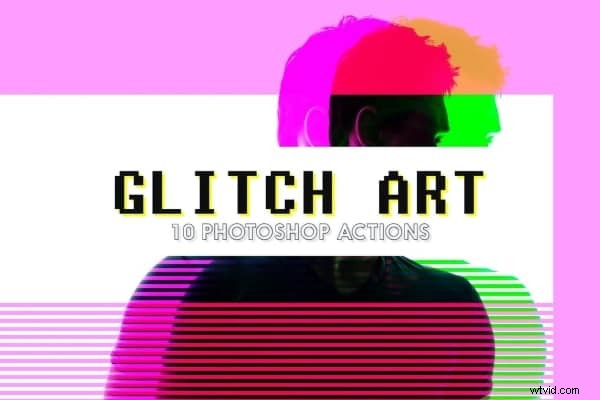
5. Glitch Art Photoshop Action
Glitch Art Action offers ten abstract elements in a fully editable template. It delivers a cohesive glitch vibe, making it suitable for both still images and animated sequences.
Final Words
This guide covers the complete workflow for creating a compelling glitch effect in Photoshop, from manual layering to action‑based shortcuts. Whether you build the effect from scratch or apply a ready‑made action, you now have the tools to elevate any visual project.