Versatile Video Editor – Wondershare Filmora
Wondershare Filmora is a powerful yet user‑friendly editor that brings professional‑grade tools to both mobile and desktop platforms.
With a library of effects, intuitive interface, and step‑by‑step tutorials from the official channel, Filmora lets you elevate any time‑lapse clip to a polished final product.
Whether you’re capturing a sunrise, a blooming flower, or a construction site, this guide will walk you through shooting, editing, and publishing stunning time‑lapse videos on your iPhone.
Table of Contents
- What Is a Time‑Lapse Video?
- How to Shoot a Time‑Lapse Video
- Editing the Time‑Lapse on iPhone
- Filmora Mobile Editing
- Filmora Desktop Editing
- Conclusion
What Is a Time‑Lapse Video?
Time‑lapse is a cinematographic technique that captures frames at a much lower frequency than the playback rate. When played back at normal speed, the passage of time feels accelerated, creating a dramatic visual effect. For example, photographing a scene once every second and then playing the footage at 30 frames per second results in a 30‑fold speed increase.
Unlike slow motion, which emphasizes minute details, time‑lapse compresses large time spans into a concise narrative.
How to Shoot a Time‑Lapse Video
Choosing the Right Subject
Any subject that moves, grows, or changes can make a compelling time‑lapse. Key factors are:
- Consistent motion or transformation
- Visible changes over minutes, hours, or days
- Visual interest and emotional impact
Need inspiration? Try one of these ten ideas:
1. Sunset/Sunrise
The dynamic light shift of dawn and dusk offers breathtaking color transitions.
2. Clouds
Cloud movement, storm fronts, or even a single cloud passing overhead creates a gentle rhythm.
3. Starry Sky
Capturing the Milky Way or star trails showcases the vastness of the night sky.
4. Flowers
Document the subtle blooming of a flower over days or weeks to reveal growth.
5. Seasonal Changes
From leaf‑fall to spring blossoms, nature’s cycles provide endless visual stories.
6. Traffic or Pedestrians
City life in motion offers a vibrant, urban narrative.
7. Cooking Process
Showcase a multi‑step recipe in a concise, engaging format.
8. DIY Projects
Build a table, install shelves, or assemble a gadget—capture the process in a time‑lapse.
9. Construction Progress
Highlight the evolution of a building or infrastructure over weeks or months.
10. Art Creation
Reveal the layers of a painting or sculpture from start to finish.
Step‑by‑Step Shooting Guide
1. Select Your Subject
Decide on a scene that has clear movement or change.
2. Secure a Stable Mount
Use a tripod or a level, steady surface to avoid jitter. Stability is critical for a smooth final product.
3. Set Focus
Choose autofocus or manual focus to lock onto the main subject.
4. Adjust Exposure
Opt for aperture or shutter priority to let the camera auto‑adjust to lighting changes, or set exposure manually if you know the light trajectory.
5. Determine Frame Count
Example: Shooting at 10 fps for a 30‑second video at 24 fps requires 720 frames (30 × 24).
6. Import & Stitch
Transfer photos to editing software, sequence them, and apply necessary corrections.
Editing the Time‑Lapse on iPhone
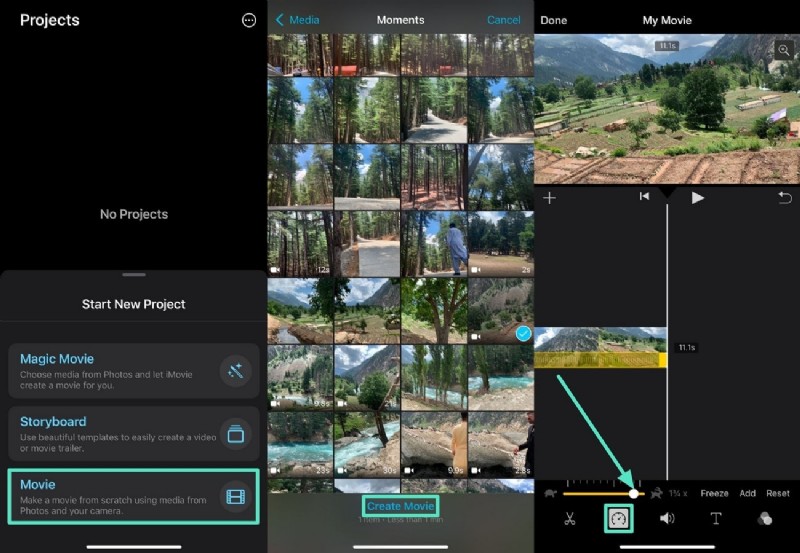
Speed Adjustments with iMovie
iMovie offers basic speed control:
- Open iMovie → Tap Movie → Select clip → Tap Create Movie.
- Tap the Speed icon in the bottom toolbar.
- Drag the slider right to speed up or left to slow down.
Filmora Mobile Editing
For granular control, Filmora’s mobile app provides speed‑ramping, custom curves, and a wide array of effects.
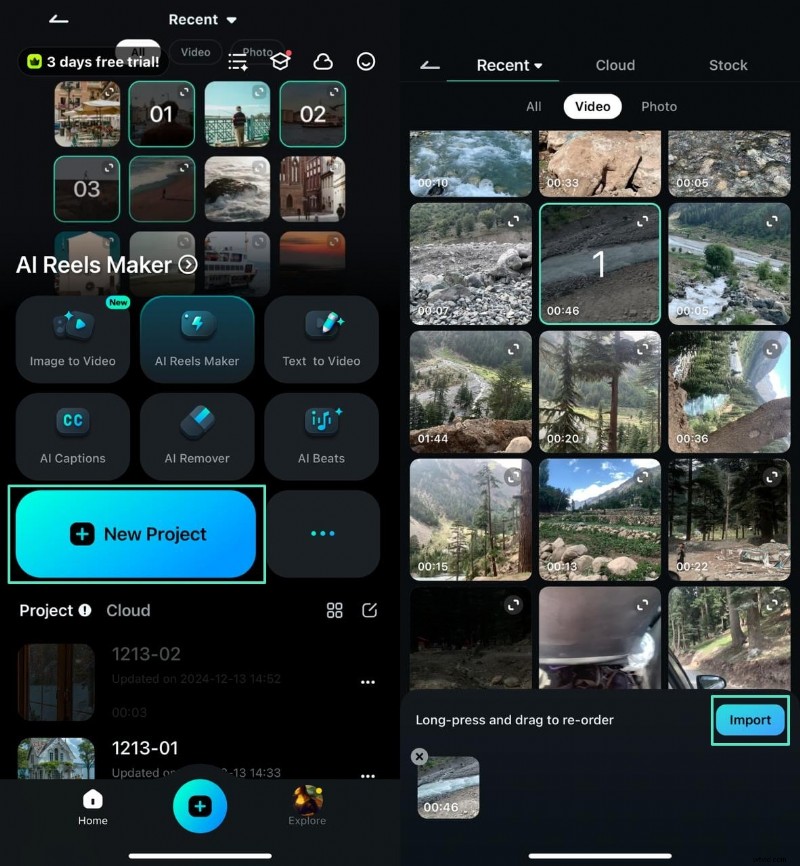
Step 1: Create a New Project
Open Filmora → Tap New Project → Import your time‑lapse clip.
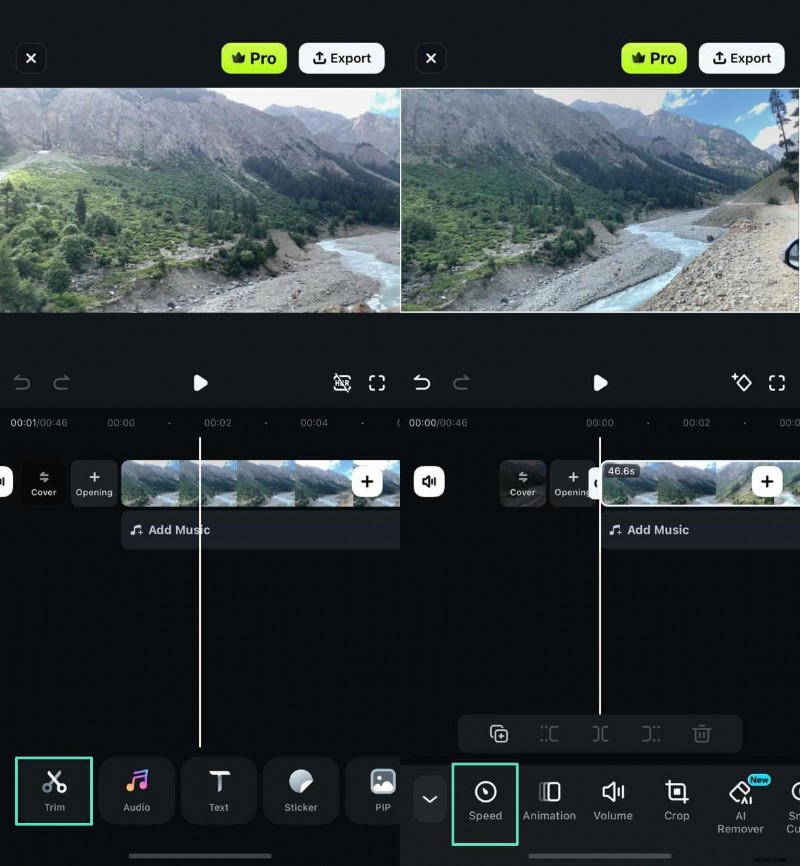
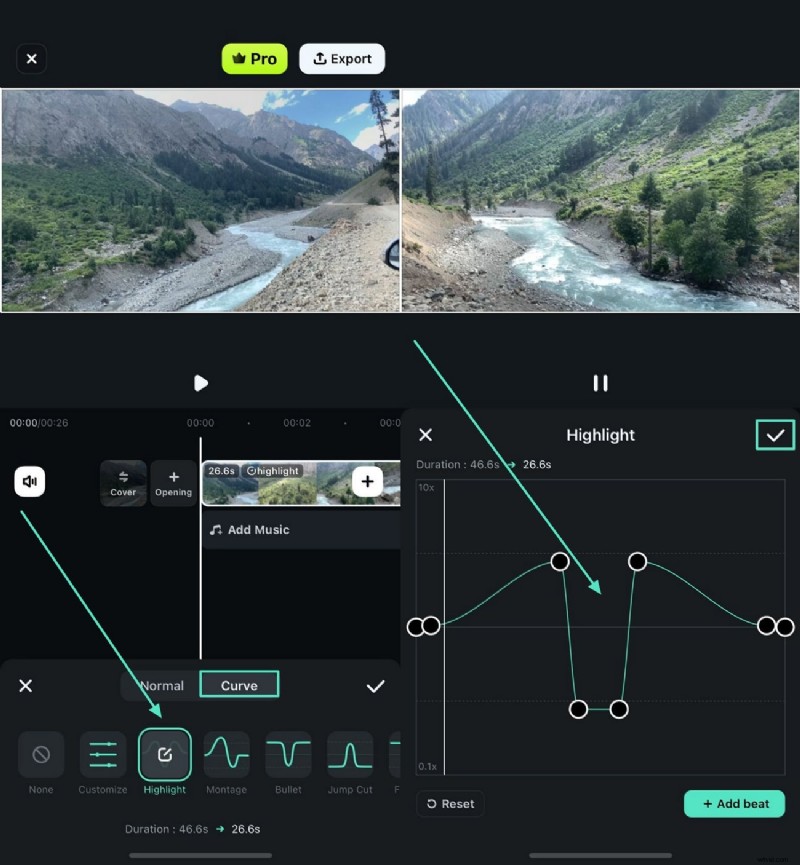
Step 2: Trim & Speed
Navigate to Trim → Tap Speed → Choose Normal or Curve to adjust pace.
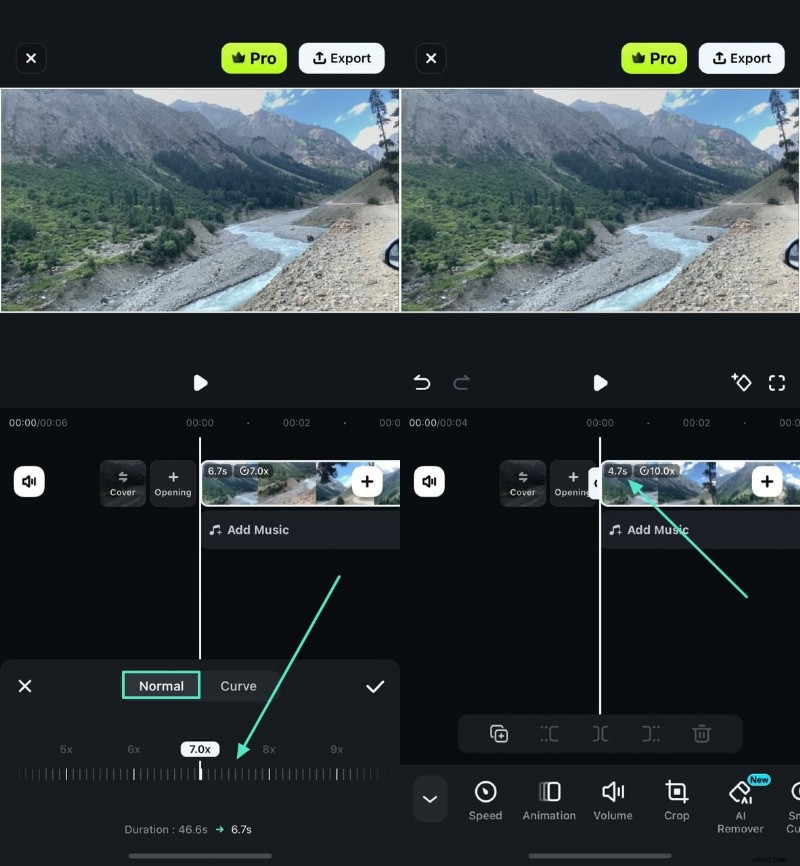
Step 3: Normal Speed
Drag the slider to the left or right. The preview updates instantly, allowing you to fine‑tune duration.
Step 4: Curve Speed
Select a preset or tap Customize to draw your own curve. Adjust points to match beats or key moments.
Filmora Desktop Editing
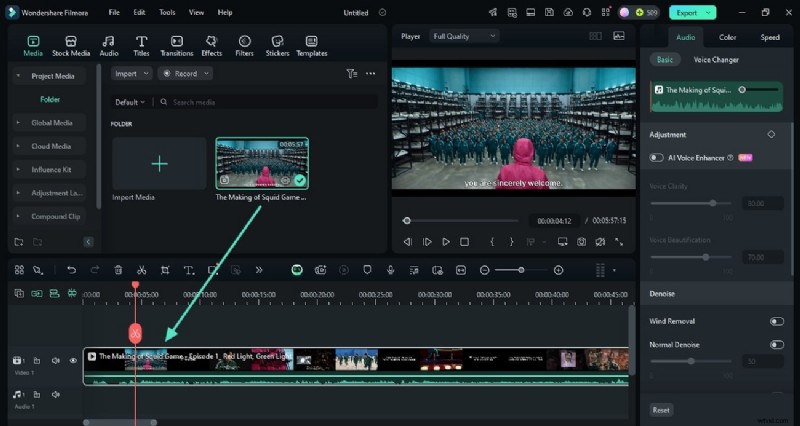
1. New Project
Open Filmora on PC → Click New Project → Import your clip into the timeline.
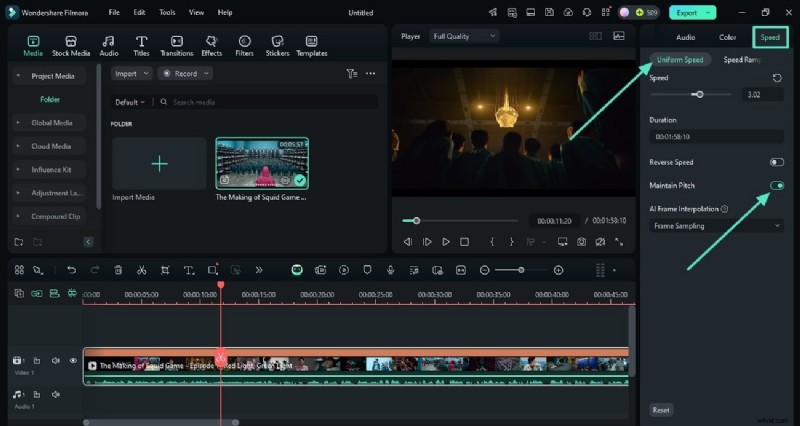
2. Uniform Speed
Right panel → Speed tab → Adjust the slider. Enable Maintain Pitch to avoid audio distortion.
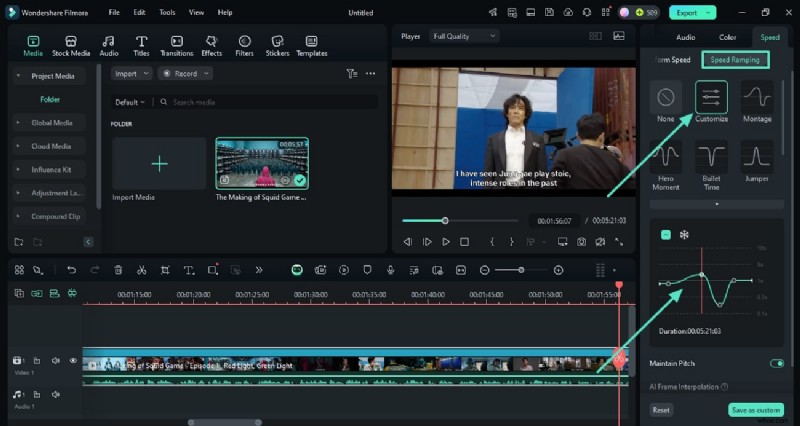
3. Speed Ramping
Access Speed Ramping → Choose a preset or click Customize to draw your own curve. Save for future use.
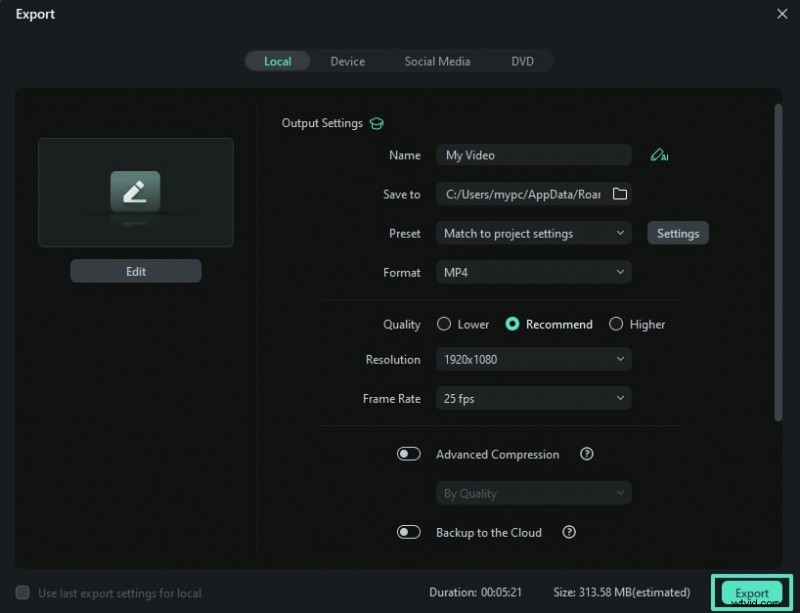
4. Export
Top right → Export → Choose format, resolution, and quality → Click Export to save.
Try Filmora for free today. Compatible with Windows 7 or newer (64‑bit).

Conclusion
With the right equipment, a clear shooting plan, and a powerful editor like Filmora, creating professional‑looking time‑lapse videos on your iPhone is straightforward. Experiment with angles, try different subjects, and let your creativity shine.
Ready to start? Grab your iPhone, set up a tripod, and turn the ordinary into extraordinary footage.

Filmora – ⭐⭐⭐⭐⭐ The Best AI‑powered Video Editing Software and App