Editing a video is essential for keeping viewers engaged. In today’s video‑rich world, trimming unwanted sections and tightening the narrative can dramatically improve watchability and retention.
Why Cutting Matters
Removing excess footage allows your video to start promptly, ensuring that the first ten seconds capture attention—critical for audience retention.
Using QuickTime to Edit
Apple’s QuickTime Player, launched in 1991, remains a reliable, cross‑platform tool for basic video editing. It supports cutting, splitting, and trimming directly within the player, making it ideal for users who prefer a straightforward interface.
1. Cutting / Splitting a Video
Splitting divides a clip into separate segments, enabling independent editing of each part. This is useful when you need to reorder scenes or remove specific sections.
- Open your video in QuickTime Player.
- From the menu bar, choose View > Show Clips.
- Drag the red marker to select the desired portion.
- Select Edit > Split Clip to separate the segment.
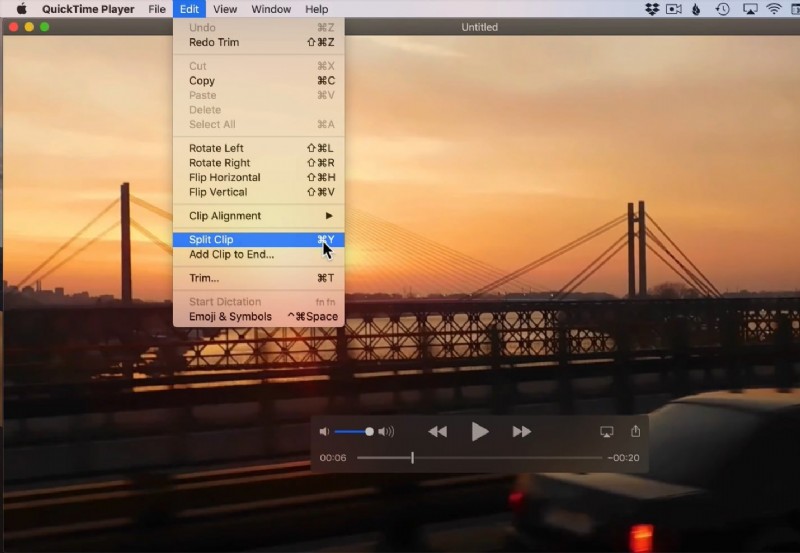
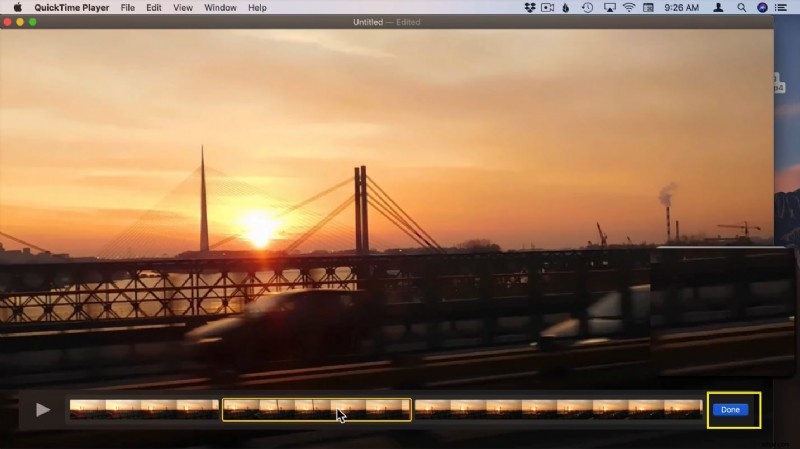
- A yellow rectangle will appear at the clip’s edges.
- Delete or rearrange segments as needed.
- Repeat until your timeline is organized.
- Click Done to finish editing.
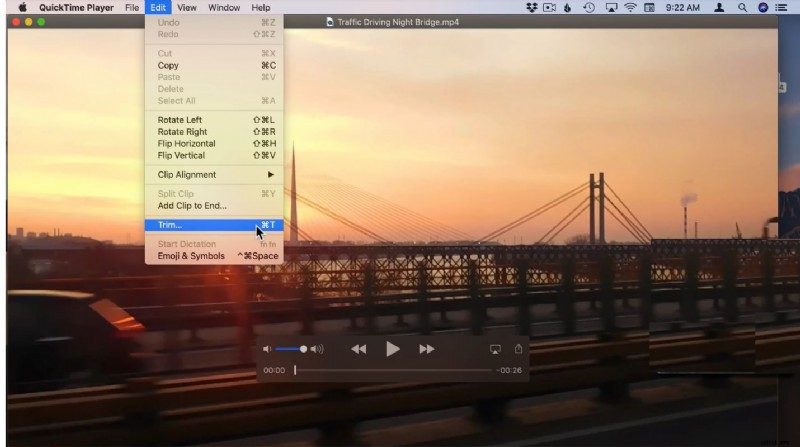
2. Trimming a Video
Trimming removes footage from the beginning or end of a clip, keeping only the core content.
- Launch QuickTime and open your video.
- Select Edit > Trim (or press Command‑T).
- A yellow trimming bar appears around the clip.
- Drag the handles left or right to set start and end points.
- Click Trim and then File > Save to preserve changes.

Advanced Editing with Filmora 11
For more sophisticated editing without sacrificing quality, consider Wonder Share Filmora 11. Its intuitive interface and automated tools, such as scene detection, streamline the process.
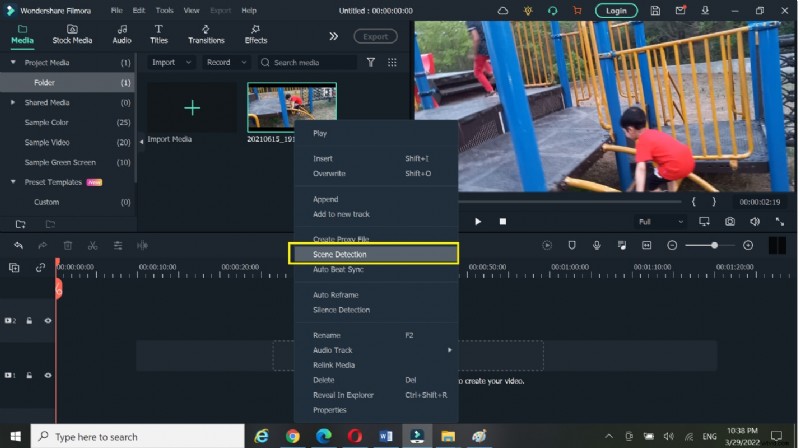
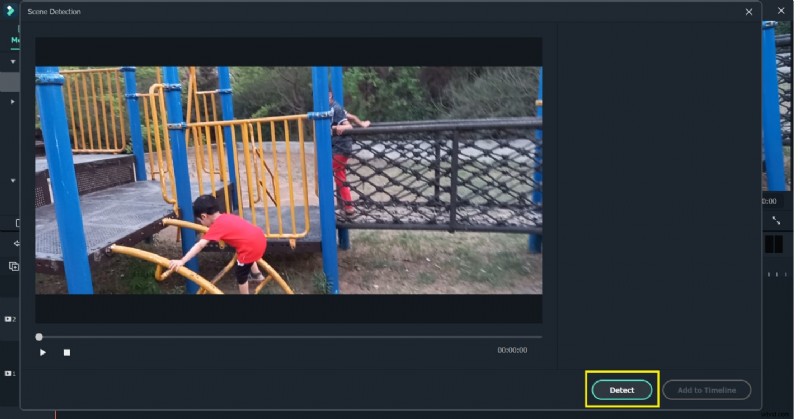
1. Cutting with Filmora’s Scene Detection
Automatic scene detection isolates cuts where the visual content changes, making it easy to remove unwanted footage.
- Open Filmora and start a new project.
- Import your video into the media library.
- Right‑click the clip and choose Scene Detection to view detected segments.
- Drag the desired sections to the timeline and delete the rest.
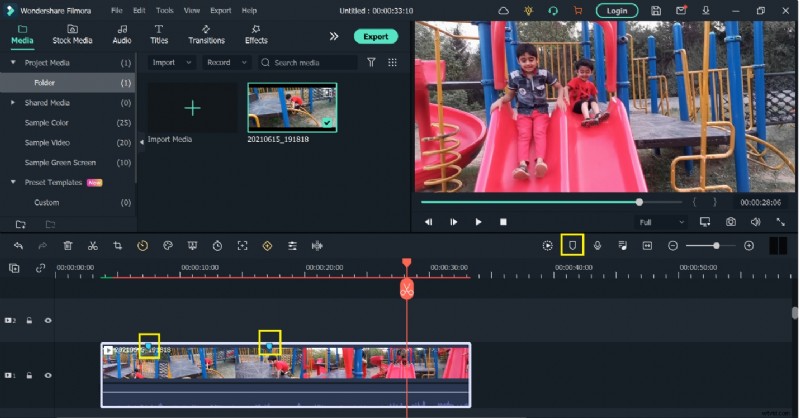
2. Manual Trimming and Splitting
Filmora also offers manual tools for precise control.
- Drag the video onto the timeline.
- Add markers to identify key points.
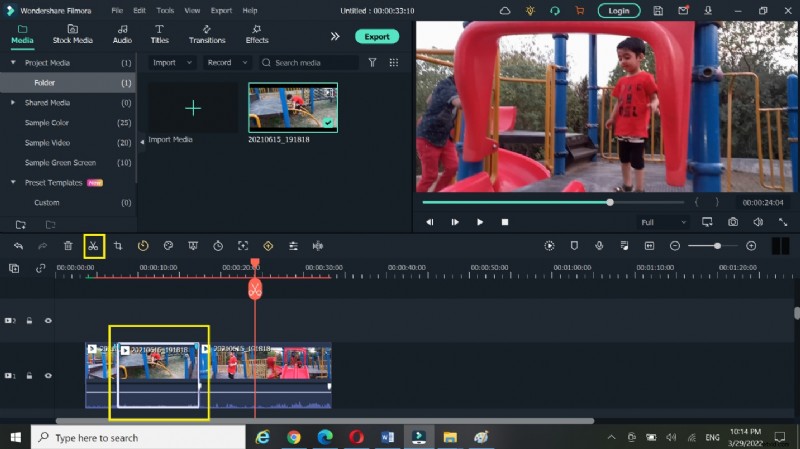
- Use the split icon to divide the clip at specific timestamps.
- Delete unwanted segments and fine‑tune the remaining footage.
Key Takeaways
Cut removes selected sections, Split divides clips, and Trim trims the start or end. Mastering these functions keeps your videos concise and engaging.
Conclusion
Effective video editing—whether in QuickTime or Filmora—transforms raw footage into polished content that captivates viewers. With the right tools and techniques, you can streamline production and deliver compelling stories every time.