VLC Media Player may not be the default video player on most operating systems, but its powerful feature set makes it a favourite among users who need more than basic playback. One such feature is the ability to zoom into specific parts of a video, allowing you to focus on details that would otherwise be lost.
Table of Contents
- Zoom with VLC’s Interactive Zoom
- Instant Zoom via the Video Menu
- Using Windows Magnifier with VLC
- Alternative: Wondershare Filmora
Part 1: Zoom with VLC’s Interactive Zoom
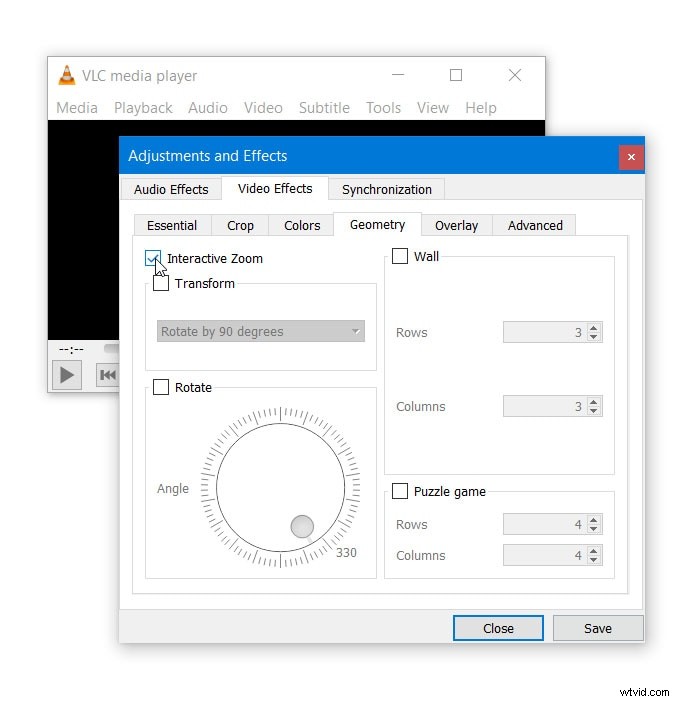
Interactive Zoom lets you magnify any region of a video up to eight times its original size. While the zoom is digital and may degrade quality on low‑resolution footage, it offers fine control for detailed inspection.
- Open VLC and navigate to Tools > Effects and Filters. The Adjustments and Effects window appears.
- Click the Video Effects tab, then the Geometry tab.
- Check Interactive Zoom and click Save & Close.
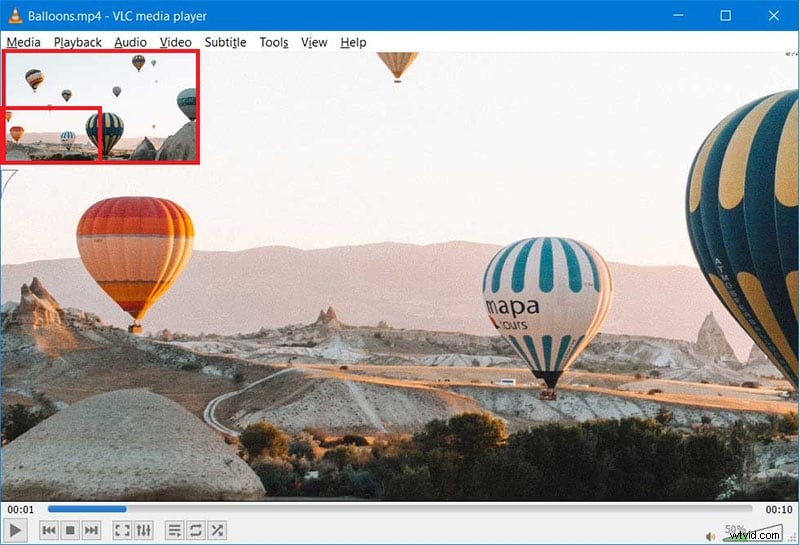
- Play your video. A picture‑in‑picture (PiP) window will appear in the top‑left corner, showing a live preview.
- Drag the rectangular box within the PiP window to select the area you wish to magnify. The selected region is displayed outside the PiP window.
- Adjust the zoom level using the vertical slider below the PiP window.
Part 2: Instant Zoom via the Video Menu
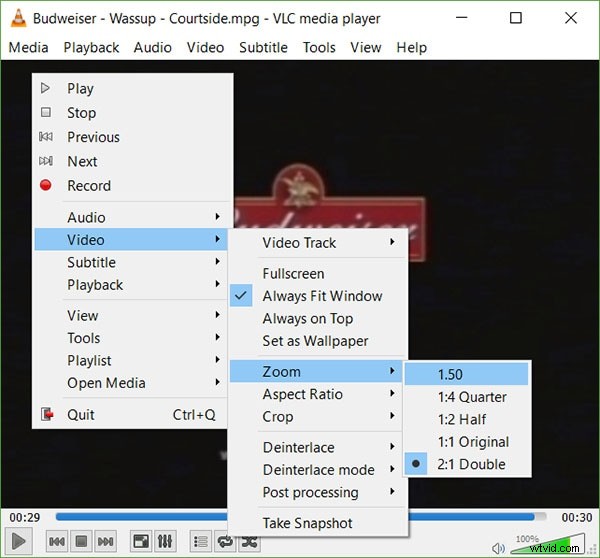
The Video menu offers quick zoom presets that apply immediately while the video is playing. This method is handy for a fast, less detailed zoom.
- Run VLC in windowed mode and load your video.
- Go to Video > Zoom and choose from the options: 1:4 (quarter), 1:2 (half), 1:1 (original), 2:1 (double).
- Alternatively, press Shift + Z to cycle through the presets.
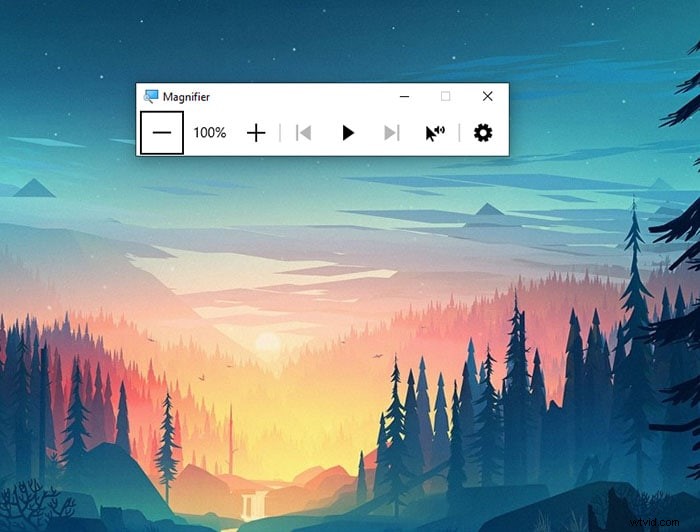
Part 3: Using Windows Magnifier with VLC
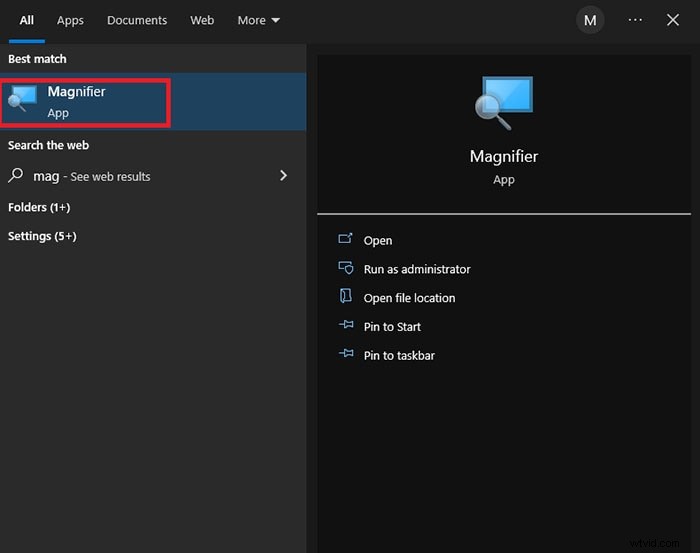
For Windows users, the built‑in Magnifier tool can magnify video content up to 16×. While this offers the highest zoom level, it can introduce noticeable distortion.
- Open VLC and play your video.
- Open the Start menu, search for Magnifier, and launch the app.
- Hover the mouse over the video; the magnified view appears.
- Zoom in with Win + + and zoom out with Win + -.
Part 4: Alternative – Wondershare Filmora
If you require more robust zoom and editing capabilities, Wondershare Filmora is a reliable choice. It supports high‑quality zoom, pan, and cropping, and works across desktop and mobile platforms.
Zoom in on Videos with Wondershare Filmora
- Zoom in and out on specific video sections.
- Instant preview of zoom changes.
- Easy to use for beginners and professionals.
- Available on macOS, Windows, iOS, and Android.


- Download and install Filmora (Windows or macOS).
- Launch the app and create a new project.
- Drag and drop your video into the media folder.
- Place the clip on the timeline and click the Crop icon.
- Navigate to the Pan & Zoom tab, adjust the bounding box, and preview the effect.
- Export the edited video in your preferred format.
Zooming on Filmora Mobile
Filmora’s iOS and Android apps provide the same powerful zoom tools on the go. Simply:
- Download Filmora from the App Store or Play Store.
- Create a new project and import your clip.
- Select the clip on the timeline.
- Pinch outward to zoom in, pinch inward to zoom out.
- Slide with one finger to pan across the video.
These gestures are as intuitive as zooming in photos on your device, making editing quick and natural.
Conclusion
Whether you need a quick, preset zoom or a detailed, interactive magnification, VLC offers versatile options. For advanced editing and superior quality, Wondershare Filmora stands out as the best alternative for professional video zooming.