Time‑lapse movies are versatile tools for film, television, and marketing. By stitching together photographs taken at regular intervals, they compress hours, days, or weeks into a few seconds. In this guide, we’ll walk through how to create a polished time‑lapse in After Effects, from importing your image sequence to adding motion and exporting the final clip.
Let’s get started!
In this article
- Step 1. Create a new composition
- Step 2. Import your images
- Step 3. Create movements
- Step 4. Create slow motion from a video
- Step 5. Make an overlay
- Step 6. Exporting your video
Step 1. Create a new composition
Calculating your composition length to accommodate the frame rate and number of images is the first step in generating a time‑lapse video.
- Verify the number of images you have for your sequence.
- Open a New Composition dialog and set a frame rate. A 30 fps time‑lapse will play smoothly, but you can choose any frame rate that suits your project.
- Determine the duration by dividing the number of photographs by the frame rate. For example, 600 photos at 30 fps will produce a 20‑second clip.
Step 2. Import your images
When all of your photographs are saved to the same folder and named sequentially, After Effects can automatically create a time‑lapse sequence. This method works with RAW, PNG, and JPEG files.
- Press Ctrl/Cmd I or choose File > Import and locate the folder containing your image sequence.
- Select the first picture in the series. If the files are correctly named, After Effects will recognize the entire sequence.
- Check the Force Alphabetical Order and Camera Raw Sequence boxes, then click Import. The sequence will appear in the Project panel.
- Right‑click the sequence, choose Interpret Footage > Main, and adjust the frame rate if necessary.
- Confirm the new frame rate and click OK.

Step 3. Create movements
- Use the image sequence like any other clip: add keyframes for scale or position to give the time‑lapse a subtle pan or zoom.
- Place the playhead at the start of the clip, set the first keyframe, then move to the end and set the second keyframe.
- Right‑click the timeline, choose New > Adjustment Layer, and apply effects such as noise or grain to the adjustment layer.
Step 4. Create slow motion from a video
After shooting a video clip, you can blend it with your time‑lapse sequence.
- Drag the finished time‑lapse sequence onto the timeline.
- Add the performer clip above the time‑lapse layer.
- Right‑click the performer clip and choose Time > Time Stretch.
- Enter a new stretch factor or duration; the other value updates automatically.
Step 5. Make an overlay
- Apply the Luma Key effect to the clip.
- Set the key type to Key Out Brighter.
- Adjust Threshold, Tolerance, and Edge until only the silhouette remains.
- Use the Pen or Mask tool to carve out any remaining corners.
- Add creative effects—such as light leaks—by creating a new adjustment layer (Right‑click > New > Adjustment Layer) and applying the desired effect.

To start, open After Effects CC, create a new project, and choose File > Import > File. Locate the folder with your image series, ensuring that the JPEG Series and Force Alphabetical Order boxes are checked. After you select the first image, the entire sequence appears in the Project panel. Right‑click the filename and choose New Comp from Selection to automatically generate a composition that matches your sequence.
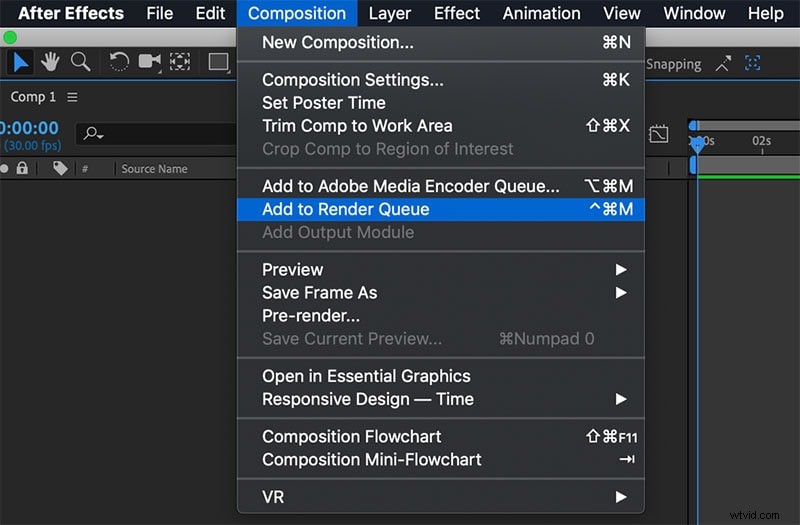
Step 6. Exporting your video
When you’re ready to share your time‑lapse, add the project to the Render Queue:
- Choose File > Export > Add to Render Queue.
- Open the Render Queue panel (Window > Render Queue).
- Select an Output Module and tweak its settings as needed.
- Click the Output To path and choose a destination folder.
- Press Render to export the final video file.
Conclusion
After Effects offers a wealth of tools to refine and enhance your time‑lapse creations. Experiment with frame rates, composition settings, and creative effects to achieve the look you want. For deeper insight into Time Stretching and Remapping, consult the official After Effects manual.