Video speed is a versatile tool that can dramatically alter a clip’s mood and impact. Whether you’re looking to inject humor, heighten drama, or create a time‑lapse effect, mastering speed control is essential for any serious editor.
In this article
- Why Speeding Up or Slowing Down Matters
- How to Adjust Video Speed with Filmora
Why Speeding Up or Slowing Down Matters
Adjusting a clip’s playback rate—known as speed ramping—lets you play footage faster or slower than its original pace. When done thoughtfully, it can reinforce narrative beats, sync with music, or simply add visual flair.
With the right software, you can accelerate a clip up to 50× its normal speed or decelerate it to 0.1×, turning a one‑minute sequence into a ten‑minute slow‑motion study. This flexibility opens creative possibilities that would otherwise be impossible.
Speed manipulation is especially powerful when paired with audio. A beat‑matched speed change can make a scene feel more cohesive and engaging. In practice, many editors discover that music guides the timing of their speed edits, resulting in smoother transitions and a stronger overall flow.
How to Adjust Video Speed with Filmora
Filmora’s intuitive interface offers two primary methods for speed control: Uniform Speed and Speed Ramping. Both are designed to give editors granular control while keeping the workflow simple.
Step 1 – Launch Filmora and Import Your Footage
Open Filmora, create a new project, and import the video you wish to edit. You can drag the clip directly onto the timeline or use the “+” button.

Place the clip on the timeline and prepare it for speed adjustment.
Step 2 – Apply Uniform Speed
Uniform Speed changes the entire clip’s playback rate evenly.
- Position the playhead at the point where you want the speed change to begin.
- Right‑click the clip, navigate to Speed > Uniform Speed, and select it.
- A dialog will appear; move the slider to the desired speed (e.g., 6.5×) and confirm.
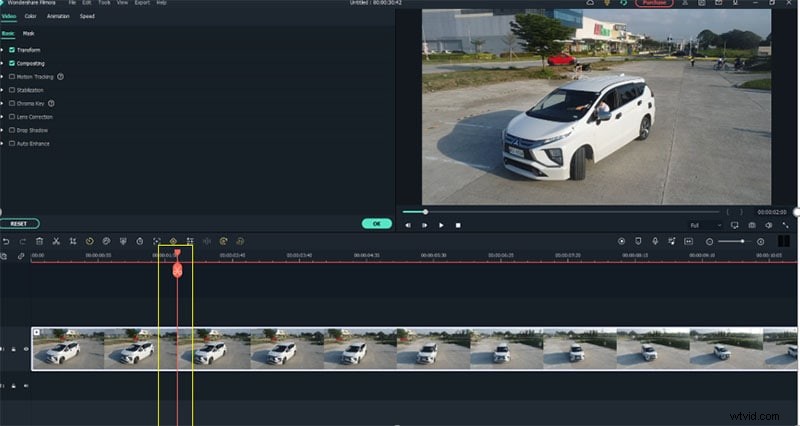
The speed indicator will display the chosen rate, and you can always fine‑tune it from the toolbar.
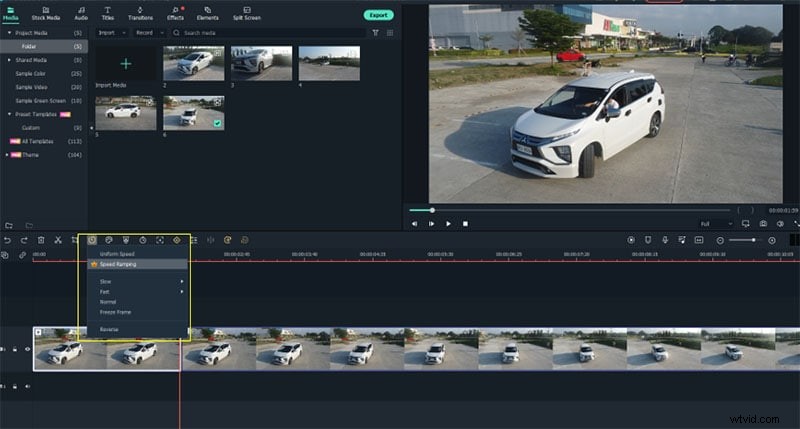
Step 3 – Experiment with Speed Ramping
Speed Ramping lets you transition smoothly between different speeds within the same clip. This is ideal for dramatic entrances, hero moments, or subtle time‑lapse effects.
In the Speed Ramping panel, you can choose from preset styles—Montage, Hero Moment, Bullet Time, Jumper, Flash In, Flash Out—or create a custom ramp by adjusting the start, peak, and end speeds.
By matching the ramp’s cadence to your music or narrative beat, you’ll achieve a polished, cinematic look that keeps viewers engaged.
Speed control isn’t just about visual flair; it can also enhance storytelling, emphasize key moments, and give your footage a professional polish.
Whether you’re editing a travel vlog, a music video, or a commercial, mastering speed adjustments will give your projects the edge they need to stand out.