When we talk about Freeze Frame effect then it means generating a static shot somewhere in between a floating video clip. This is a unique technique in the world of videography that simply causes repetition of single frame on screen for desired duration. Although, it is possible to capture still images using advanced filming devices or camcorders but if you don't have such tools then it is good to simply use the Freeze Frame effect on your desired scene. With this effect you can easily grab few stills from a large video and develop a new interesting story. Adobe Premiere Pro provides several ways to freeze frame in video. The article below contains details about most 4 useful methods for freezing a frame in video with Adobe Premiere Pro.
- Method 1: Insert Frame Hold Segment in Clip
- Method 2: Freeze frame in video with Add Frame Hold options
- Method 3: Export Still Frame and Import
- Method 4: Freeze Frames with Time Remapping feature
How to Create Freeze Frames in Premiere Pro
There are so many techniques to execute Freeze Frame effect in Adobe Premiere Pro platform. Below we are going to discuss three most commonly used and user friendly methods to perform freeze framing:
Method 1: Insert Frame Hold Segment in Clip
- First of all you have to position your frame head at desired frame that you wish to capture from whole video.
- Now right click on your selected clip and from drop down menu select “Insert Frame Hold Segment” option.

This method will clip your frame right from the position where you have kept playhead and it will automatically insert a two second freeze frame at that location. In case if you want to insert a freeze frame having duration more than 2 seconds then you can use drag the edge of the freeze frame to adjust duration of freeze frame as per need.

Method 2: Freeze frame in video with Add Frame Hold options
Further, if you need the rest of video clip to act like a freeze frame or do not want to insert segment into it then it is good to proceed with “Add Frame Hold” option. Do as follows:
- First of all you need to position the playhead at desired location in the clip so that stop motion can be added at this particular location.
- Now right click on this clip and from drop down menu select “Add frame hold” option.
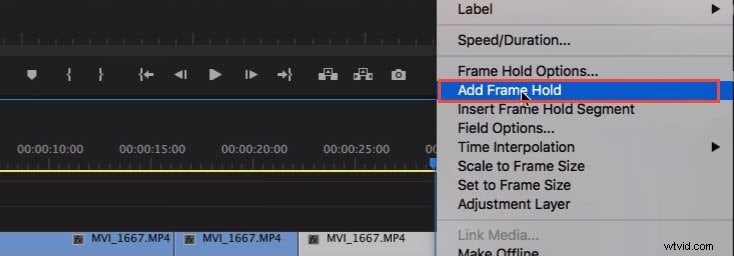
- It will immediately cut that particular point from whole clip and freeze frame effect will get added to the rest of the video clip. Such types of effects are useful at ending position of a video clip in case that you don’t want to insert any segment.
Method 3: Export Still Frame and Import
Users can create a freeze frame or still image from movie clip by simply using the Export Frame button. This button can be found on Source Monitor and with the help of Program Monitor you can immediately export your desired frame out of video even without using Adobe Media Encoder. Below are the steps of exporting still frames:

- First of all you have to position your playhead at particular frame location that you wish to export out of the video frame sequence.
- Now hit the Export frame button, or you can use the shortcut Shift+E. It will immediately open an export frame dialogue box on screen where you can change name of the still frame and save it in JPEG or PNG format. This image will also contain the time code of original video.
- Premiere Pro develops a still image and saves it on your computer. You can also change the save path by clicking the Browse to select. Remember to select Import to project option so the still image will be added to project bin directly. Now, add this still frame to the target position in the timeline to create freeze frame effect.

Note: These exported still images will appear with Lavender shade on timeline so that users can easily distinguish them from original clip.
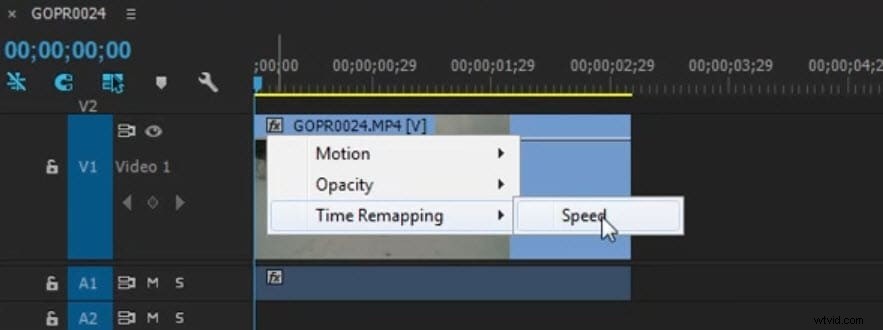
Method 4: Freeze Frames with Time Remapping feature
With time remapping tool you can freeze a particular section of frame by changing the selected clip speed as:
- Go to timeline and locate your video clip that you want to freeze. Now move to clip effect menu and select Remapping option, finally hit speed option from available drop down menu.
- A rubber band will appear in yellow colour that you need to command click in order to generate speed keyframe.
- Keep on holding this Option-Command and then try to drag the outer keyframe up to the duration that you wish to frame.
- The lower rectangular section appearing on your screen reflects the freeze frame.

You may also like:How to Make a Timelapse and Slow Motion Video in Premiere Pro >>
Premiere Pro platform may appear little complicated to many beginners or cinematographers and here it is really difficult to remember all the typical shortcuts. But if you use Wondershare FilmoraPro to execute this freeze frame task then you will be able to get impressive results within very less time. It is much easier to export freeze stills out of software window in wide range of file formats. Instead of just editing video clip, Wondershare FilmoraPro can also help users adjust audio pitch for their clips. You can use it to make professional video editing easily. Download it now (free)!
Check the step by step tutorial about How to freeze frame in video easily.