DaVinci Resolve is a premier video editing suite that blends powerful 3‑D editing, advanced color grading, a robust audio library, and dynamic transitions and animations. It’s the go‑to choice for professionals who need a non‑destructive workflow and granular control over every frame.
One feature that streamlines the editing process is the Adjustment Layer (Clip). By overlaying this invisible layer above your footage, you can apply a suite of effects—color grading, zoom, motion blur, and more—without altering the underlying clips. This article walks you through the benefits, installation steps, and practical use cases of adjustment layers in DaVinci Resolve.
What You’ll Learn
- Why adjustment layers matter in DaVinci Resolve.
- Step‑by‑step instructions for adding an adjustment layer.
- Three common ways to use adjustment layers: Zoom, Color Grading, Shake Transition.
- Bonus: Using adjustment layers in Wondershare Filmora as an alternative.
Part 1: What Is an Adjustment Layer (Clip) in DaVinci Resolve?
An adjustment layer sits on top of your video tracks and receives all applied effects. Because it never touches the original footage, you can tweak or remove the layer at any time, preserving the integrity of your source clips. Renaming the layer for clarity and arranging multiple layers side‑by‑side lets you build complex, non‑destructive visual workflows.
In short, an adjustment layer offers:
- Non‑destructive editing.
- Efficient application of multiple effects across several clips.
- Easy layer management and naming.
Part 2: How to Add an Adjustment Layer (Clip) in DaVinci Resolve
Follow these clear steps to place an adjustment layer on your timeline:
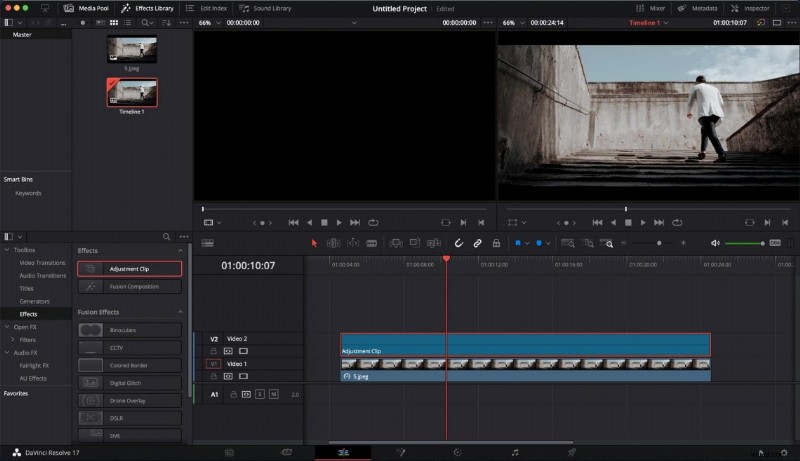
- Open the Effects Library. In the project panel, click “Effects Library,” then expand the “Toolbox” section and choose “Effects.”
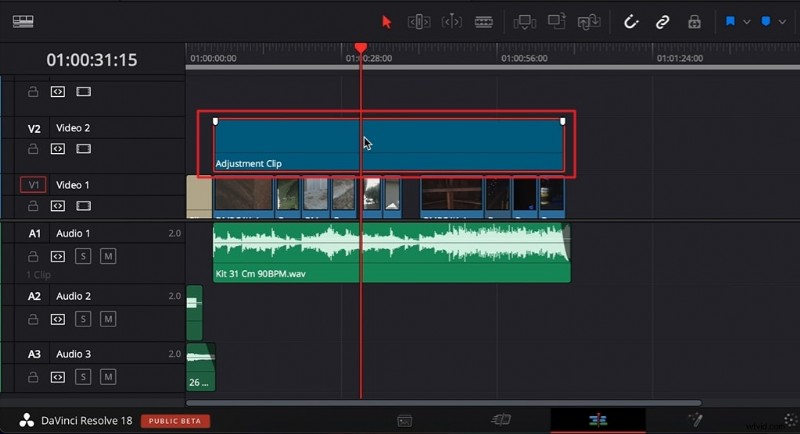
- Locate the Adjustment Clip. Search for “Adjustment Clip” in the list. Drag it onto the timeline and drop it above the clips you want to modify.
- Extend and Customize. Resize the clip to match the length of the target footage. Apply transitions or effects directly to the adjustment layer—anything you add here will affect all underlying clips.
Part 3: Three Ways to Use Adjustment Layers in DaVinci Resolve
- Zoom In Effect
- Color Grading
- Shake Transition
Below are step‑by‑step guides for each technique.
1. Zoom In Effect
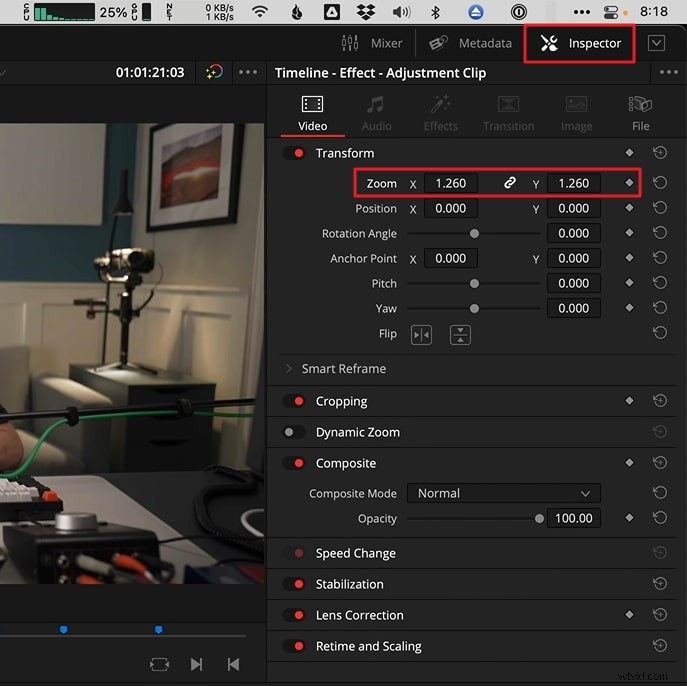
- Place the adjustment layer above the clip containing your subject.
- Open the Inspector panel and increase the “Zoom” value until the desired focal point is achieved.
- Preview the timeline to ensure smooth scaling.
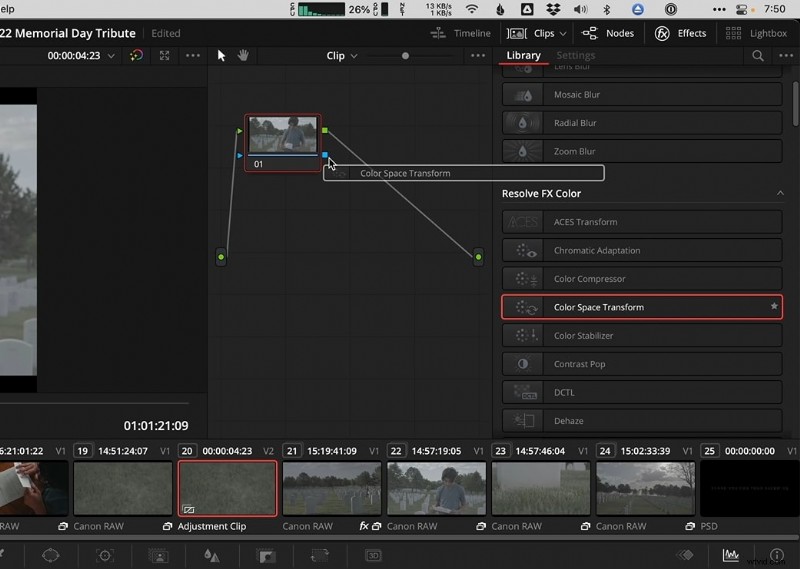
2. Color Grading
- Drag the adjustment layer over the clip(s) you wish to grade.
- Navigate to the Color page and add the “Color Space Transform” effect from the Resolve FX Color section.
- Adjust hue, saturation, contrast, and other color parameters to achieve the desired mood.
3. Shake Transition
- Trim the adjustment layer to the segment where you want the shake effect.
- From the Open FX library, add the “Camera Shake” effect and tweak motion scale, speed scale, and motion blur in the Effects tab.
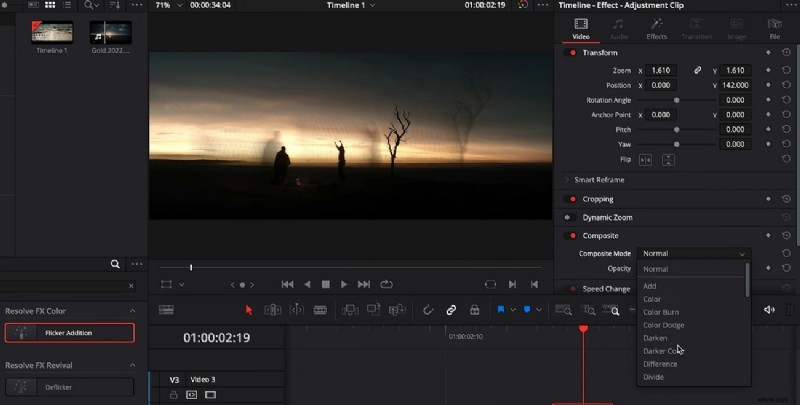
- Set the border type to “Reflect” and add a “Flicker Addition” effect for extra texture. Adjust flicker gain and zoom/position values in the Video tab.
- Duplicate the adjustment layer if you need multiple shake passes, changing the composite mode or opacity as required.
Bonus Tips: Using Adjustment Layers in Wondershare Filmora
Filmora is a versatile, cross‑platform editor that offers a comparable adjustment‑layer workflow. It’s ideal for users who prefer a lighter, more intuitive interface.
Get Started for Free – Windows 7 or later (64‑bit) | macOS 10.14 or later
How To Use Adjustment Layers in Filmora (Desktop)
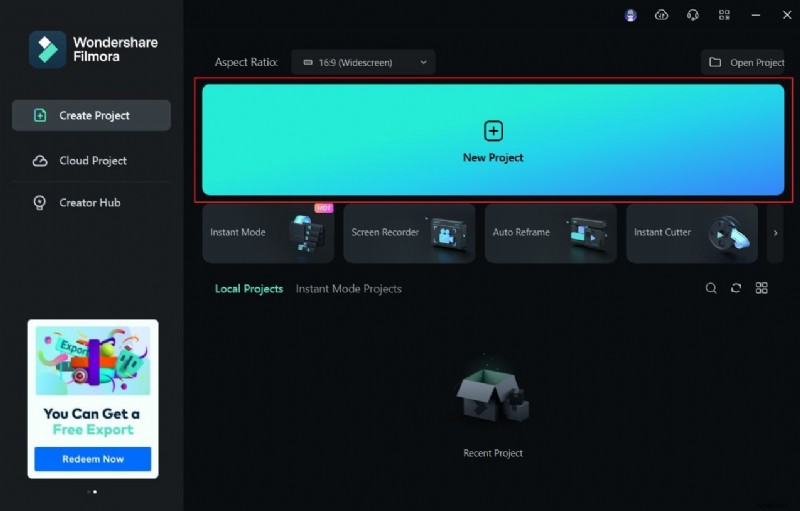
Step 1 – New Project
Launch Filmora, click “New Project,” import your footage, and drag it to the timeline.
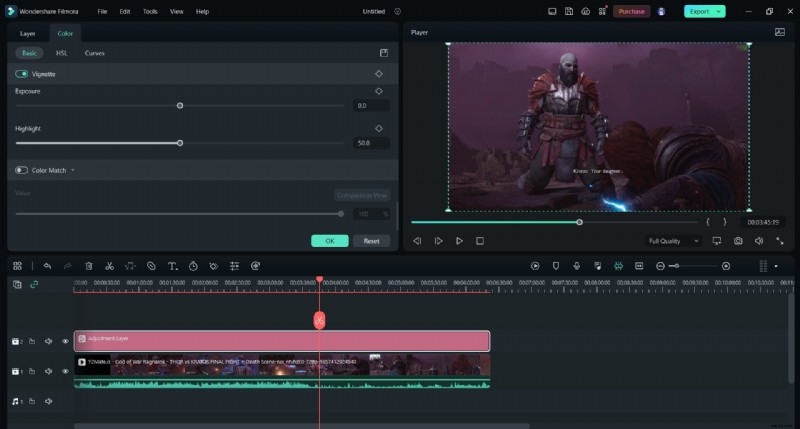
Step 2 – Add the Adjustment Layer
In the Media tab, select “Adjustment Layer,” drag it onto the timeline, and double‑click to access settings.
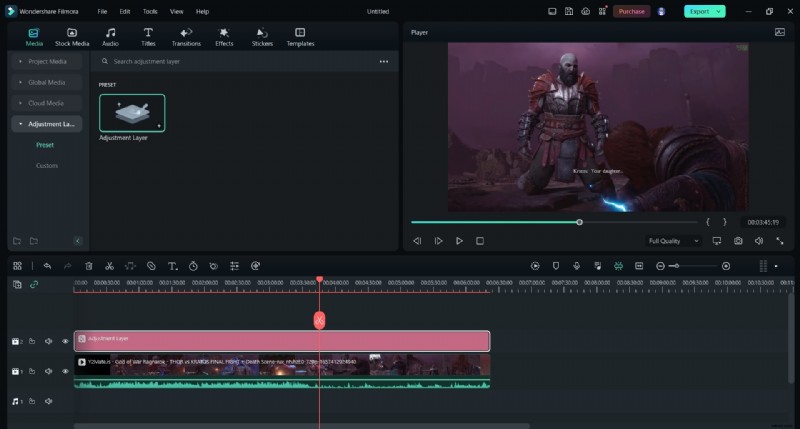
Step 3 – Configure Settings
Adjust the blending mode, opacity, position, and apply preset cinematic looks or borders as desired.
How To Use Adjustment Layers in Filmora Mobile (iOS)
Filmora Mobile lets you edit on the go. Follow these quick steps:
Step 1 – Download Filmora from the App Store.
Step 2 – Create a New Project.

Step 3 – Import Your Video.

Step 4 – Apply Adjustments.

Step 5 – Fine‑Tune and Export.
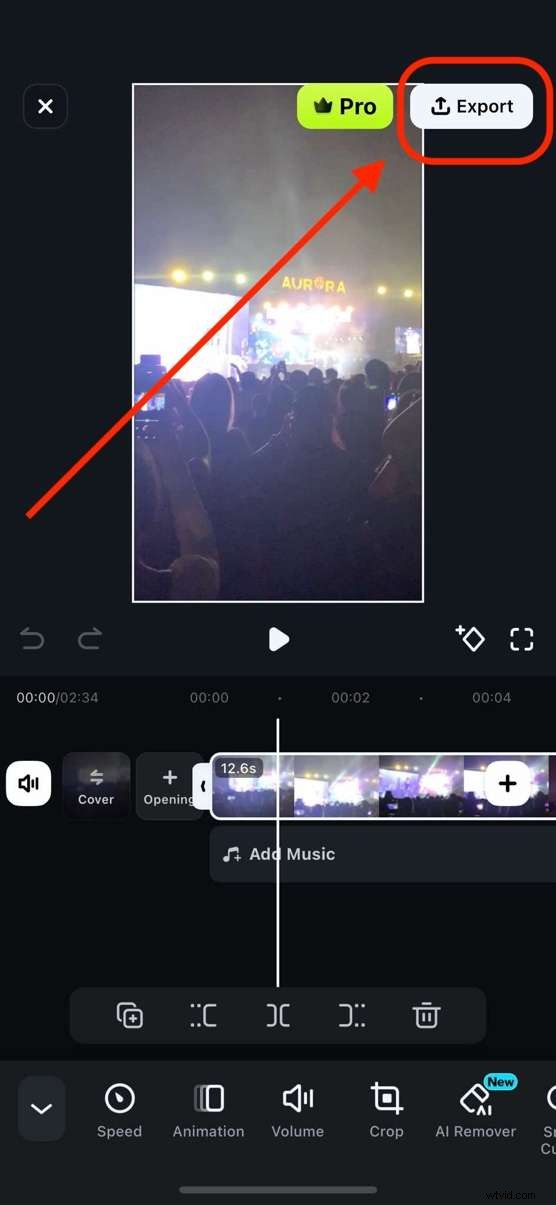
With Filmora Mobile, you can add adjustment layers, tweak their strength, and export polished videos directly from your iOS device.
Conclusion
DaVinci Resolve’s adjustment layers are indispensable for efficient, non‑destructive editing. Mastering them lets you streamline your workflow, apply complex visual effects across multiple clips, and preserve source footage integrity. If you’re looking for an alternative, Wondershare Filmora offers a streamlined experience with comparable adjustment‑layer functionality.
Get Started for Free – Windows 7 or later (64‑bit) | macOS 10.14 or later