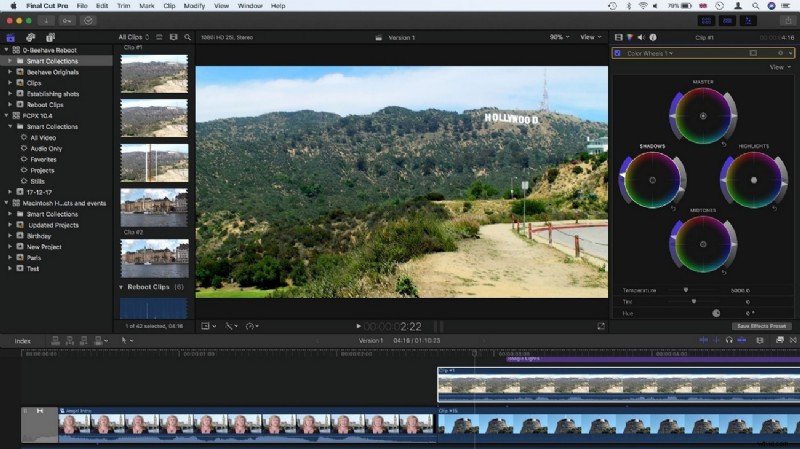
Final Cut Pro is a high‑performance editing suite exclusive to macOS, enabling filmmakers to craft compelling stories with precision. One of its most powerful features is the adjustment layer, which lets you apply effects and color corrections to multiple clips simultaneously, saving time and maintaining consistency across your timeline.
In this guide you’ll learn what an adjustment layer is, how to create one in Final Cut Pro, and alternative methods if you’re working outside of the native environment.

Table of Contents
- What is an Adjustment Layer in Final Cut Pro?
- How to Add an Adjustment Layer in Final Cut Pro
- Alternative: Using Adjustment Layers in Wondershare Filmora
1. What is an Adjustment Layer in Final Cut Pro?
An adjustment layer acts as a transparent container that sits above your video clips. Any effect, color grade, or filter applied to this layer automatically affects all underlying clips. This makes it ideal for batch edits, ensuring that changes are uniform and can be edited independently of the original footage.
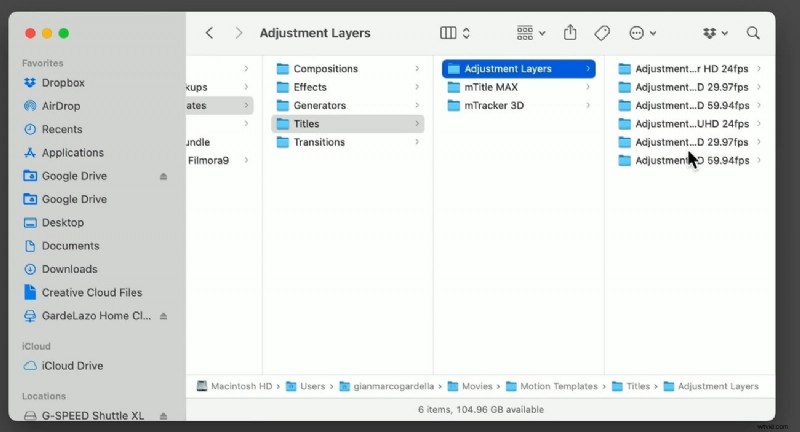
Unlike some other editors, Final Cut Pro does not provide a built‑in adjustment layer element. To use this feature, you must create a custom title in Apple Motion, publish it as a motion template, and then import it into Final Cut Pro.
2. How to Add an Adjustment Layer in Final Cut Pro
Follow these clear steps to create and apply an adjustment layer without hassle:
Step 1 – Download the Template
Click the link below to download the pre‑built adjustment‑layer template. After downloading, copy the folder named Adjustment Layer to your Users directory, then move it to Movies → Motion Templates → Titles.
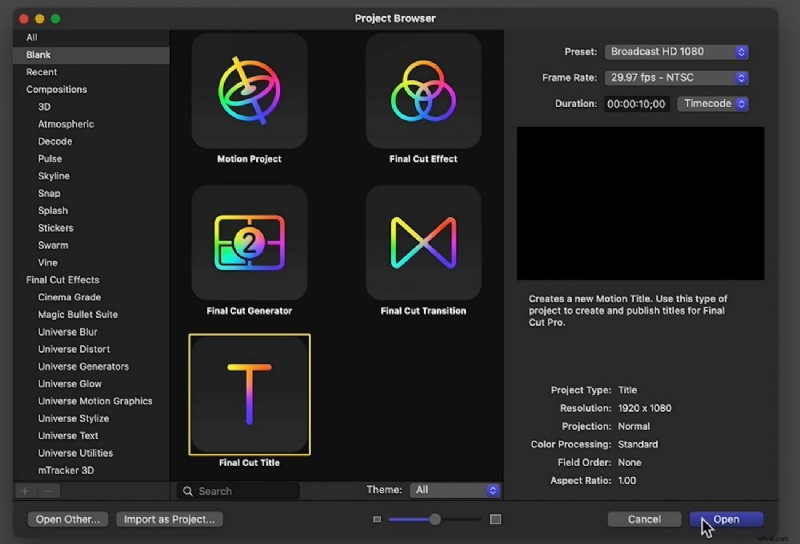
Step 2 – Insert into Final Cut Pro
Open Final Cut Pro, locate the newly added Adjustment Layer under the Titles tab, and drag it onto your timeline. It will appear as a title element, but you can treat it as an adjustment layer.
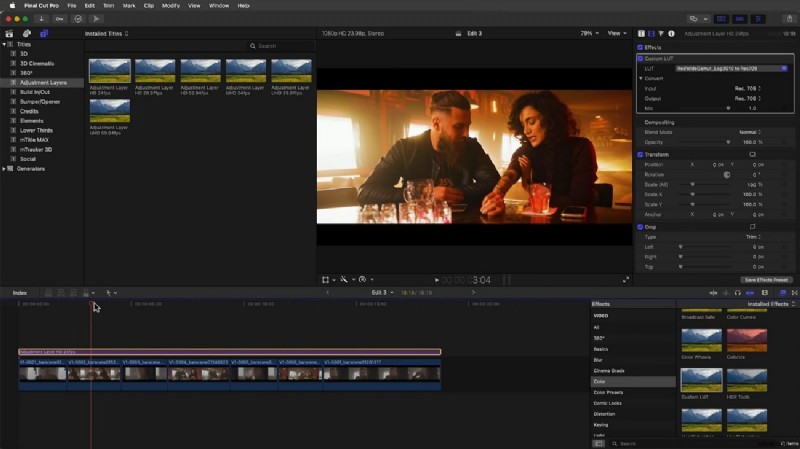
Step 3 – Apply Effects
Place the adjustment layer above the clips you wish to affect. Any effect you add to this layer (e.g., color correction, motion blur, or custom presets) will ripple through all underlying clips. You can duplicate or trim the layer just like any other clip, giving you full control over its influence.
3. Alternative: Using Adjustment Layers in Wondershare Filmora
If you prefer a cross‑platform solution or are working on Windows, Filmora offers a built‑in adjustment layer that is easy to use. Below is a concise workflow:
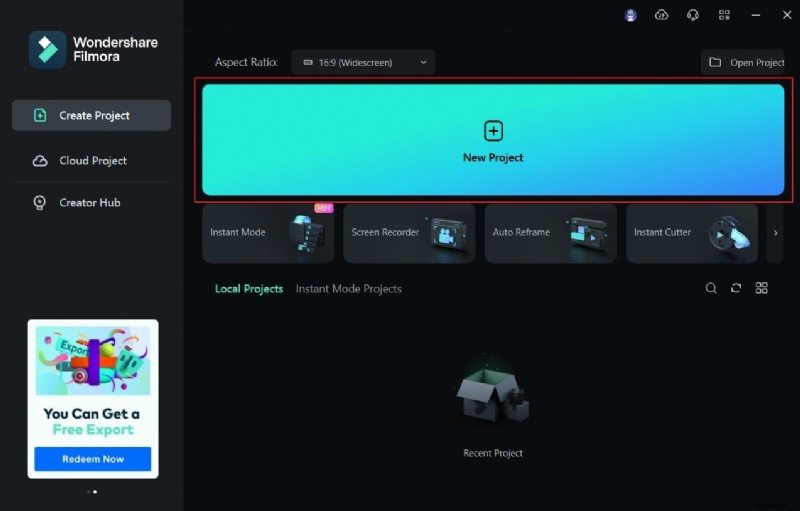
Step 1 – Import Your Video
Launch Filmora, create a new project, and drag your clip into the timeline.
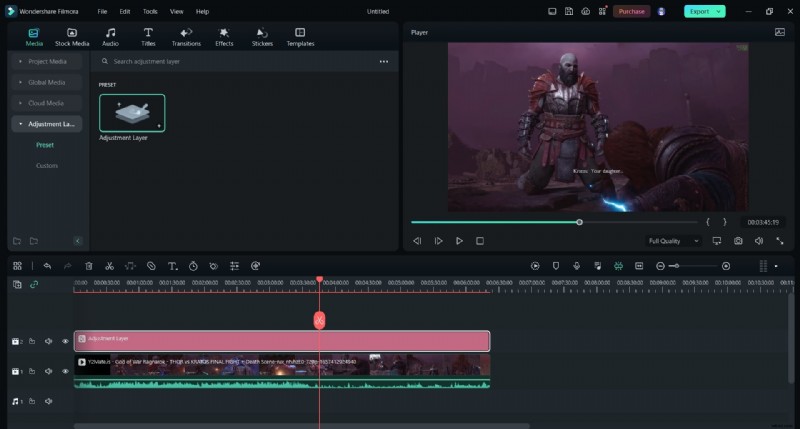
Step 2 – Add an Adjustment Layer
In the left sidebar, select Media → Adjustment Layer, then drag it onto the timeline. Double‑click to open the adjustment settings.
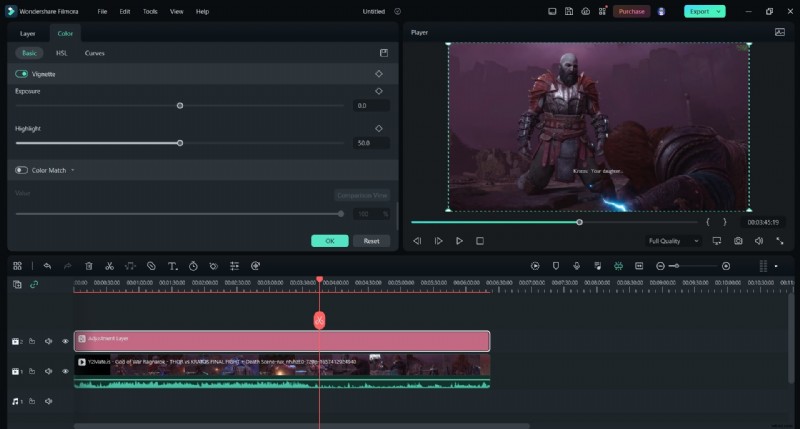
Step 3 – Customize the Layer
Adjust blending mode, opacity, and apply presets or color‑matching tools. You can also add borders or motion effects directly on the layer.
Key Features of Filmora
- Cloud collaboration for team reviews.
- Pen tool for custom masks.
- AI Smart Cutout for precise subject isolation.
- AI Denoise to remove background noise.
Duplicating Clips on Filmora Mobile
On mobile devices, duplicating a clip can emulate an adjustment layer’s flexibility:
- Start a new project and import your video.
- Tap the clip, then press Duplicate at the bottom.
- Move the duplicate to a new track.
- Apply independent edits to the duplicate while keeping the original unchanged.
- Export when satisfied.
Conclusion
Adjustment layers are essential for efficient, consistent edits. By following the steps above, you can create and manage adjustment layers in Final Cut Pro, or leverage Filmora’s built‑in features for a more accessible workflow. Mastering this technique will streamline your editing process and elevate the quality of your projects.