Mastering video speed on Instagram allows creators to craft compelling timelapses, slow‑motion moments, and dynamic storytelling. While the platform offers limited native controls for Stories, the powerful Reels editor and a range of third‑party tools let you fine‑tune playback speed on any device.
In this article
- How to change video speed on Instagram Reels
- Speed‑editing on Windows, macOS, Android, and iOS with Filmora
- Mac‑only options: iMovie
- Windows‑only option: VLC Media Player
- Mobile‑only options: built‑in tools and Filmora
- Online editor: Clideo
🤩 Post You May Be Interested In: What is Edits? Meet the New Video Editor from Instagram
Part 1. Can I Change the Video Speed on Instagram Stories?
Instagram Stories does not support direct speed adjustments. However, you can record the clip in Reels, apply the desired speed, then share the finished video to Stories.
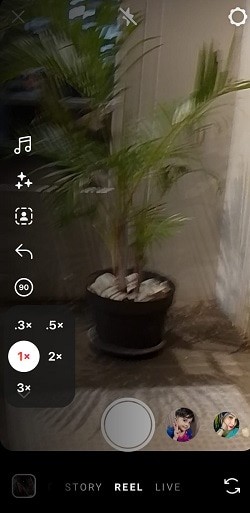
How to change video speed on Instagram Reels
Reels offers speed presets ranging from 0.3× to 3×. Choose the preset before or after recording, then save the Reel and upload it to your feed or Stories.
Alternatively, add an existing clip to Reels and select the speed setting. The extra step gives you full control over the final look.

Part 2. Speed‑Editing with Wondershare Filmora (Windows, macOS, Android, iOS)
Filmora delivers a versatile editing suite that works on every major platform. Its speed tools include uniform speed, speed ramping, and preset changes.
On Windows or macOS
- Uniform Speed – Set a constant speed from 0.01× to 100×.
- Speed Ramping – Create smooth transitions between fast and slow segments.
- Preset Speed – Quickly apply “Fast” or “Slow” presets.
Steps for uniform speed:
- Open Filmora and start a new project.
- Import your clip and click the speed icon.
- Select “Uniform Speed” and adjust the slider or enter a value.
- Preview and export the final video.
On Android or iOS
- Download the Filmora app from Google Play or the App Store.
- Start a new project and import the video.
- Select the clip, tap the Speed button, and slide to the desired rate.
- Save the edited clip and upload it to Instagram.
Part 3. Speed‑Editing on Desktop
Mac – iMovie
iMovie’s built‑in speed editor lets you slow or speed up clips, even at the segment level.
- Open iMovie and drag your video into the timeline.
- Click the clip, then the Speed button.
- Select “Slow” or “Fast,” or choose a custom percentage.
- Export the adjusted clip.
Windows – VLC Media Player
VLC’s playback speed controls can be used for quick adjustments.
- Open VLC and load your video.
- Navigate to Playback > Speed and pick a faster or slower rate.
- Preview the result and save the file if you need a permanent change.
Part 4. Speed‑Editing on Mobile
iOS – Built‑in Photos App
- Open Photos and select the Slo‑Mo clip.
- Tap Edit and slide the speed bars to adjust slow‑motion sections.
- Tap Done to save.
Android – Built‑in Gallery or Google Photos
- Select the video and tap the pencil icon.
- Choose Speed and set 0.5× for slow or 2× for fast.
- Save the edited video.
Filmora for Mobile
Filmora’s mobile app offers AI‑powered editing and a single‑click speed slider, available on both Android and iOS.
Part 5. Speed‑Editing Online with Clideo
Clideo allows you to adjust video speed directly in your browser, supporting formats such as MP4, AVI, and MOV.
- Upload the video from your device or cloud storage.
- Use the slider to set a speed between 0.25× and 4×.
- Preview and download the edited file.
For more advanced features like text, transitions, or audio tweaks, consider tools such as Kapwing or Flixier.
Conclusion
Adjusting video speed on Instagram opens up creative possibilities that go beyond basic posting. While Instagram’s native options are limited, a combination of Reels, Filmora, iMovie, VLC, built‑in mobile editors, and online services like Clideo provides a full suite of reliable tools. Choose the solution that best matches your workflow, experiment with different speeds, and elevate your Instagram content.