Freeze frames—where the entire screen is paused for a moment—are a powerful storytelling device that can emphasize key moments, add suspense, or provide comedic timing. Modern editors, including those using Final Cut Pro, can apply this effect quickly and with precision.
This guide covers when to use freeze frames, step‑by‑step instructions for adding them in Final Cut Pro, practical tips for maximizing impact, and a quick alternative with Wondershare Filmora.
In this article
- When to Add Freeze Frames in Final Cut Pro
- How to Add a Freeze Frame in Final Cut Pro
- Tips for Adding Freeze Frames in Final Cut Pro
- The Easiest Way to Add a Freeze Frame to Any Video Clip: Wondershare Filmora
- How to Add Freeze Frames in Filmora
When to Add Freeze Frames in Final Cut Pro
Incorporating freeze frames can elevate the emotional resonance and clarity of your footage. Consider these scenarios:
Highlighting Critical Moments
Pause to spotlight a pivotal action, expression, or revelation, ensuring viewers grasp its significance.

Introducing New Characters
A freeze frame can accompany a name card or brief bio, establishing the character’s presence before dialogue begins.
A well‑timed freeze can leave a lasting impression, giving audiences a moment to reflect on the narrative’s conclusion.

Use a freeze to signal the start or end of a flashback, clearly marking temporal shifts in the story.
Pausing just before a dramatic reveal or action builds anticipation, heightening viewer engagement.

How to Add a Freeze Frame in Final Cut Pro
Follow these steps to insert a freeze frame at the exact point you choose:
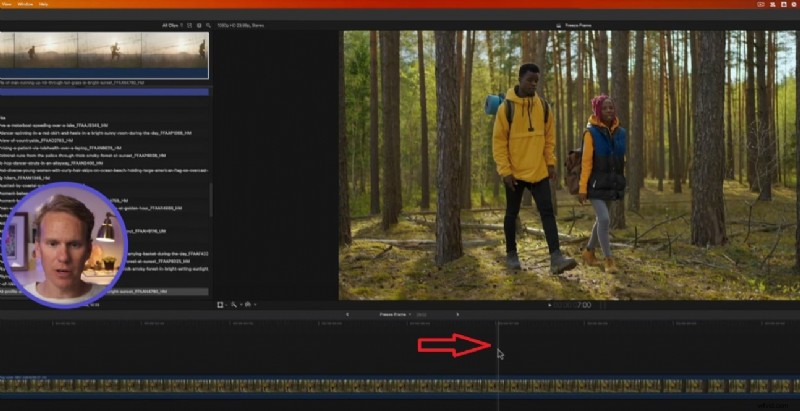
- Step 1: Place the playhead where you want the freeze frame.
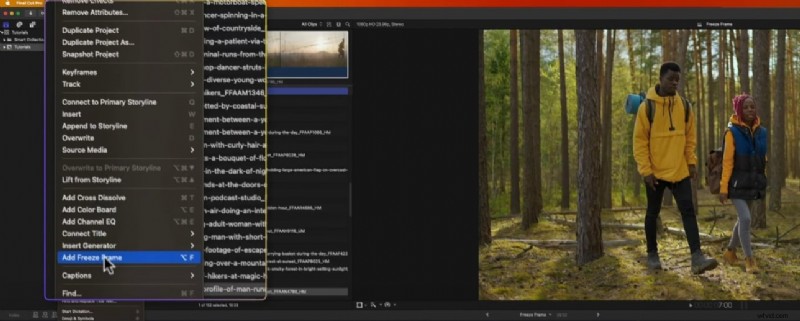
- Step 2: From the menu, select Edit > Add Freeze Frame (or press ⌥ + F).
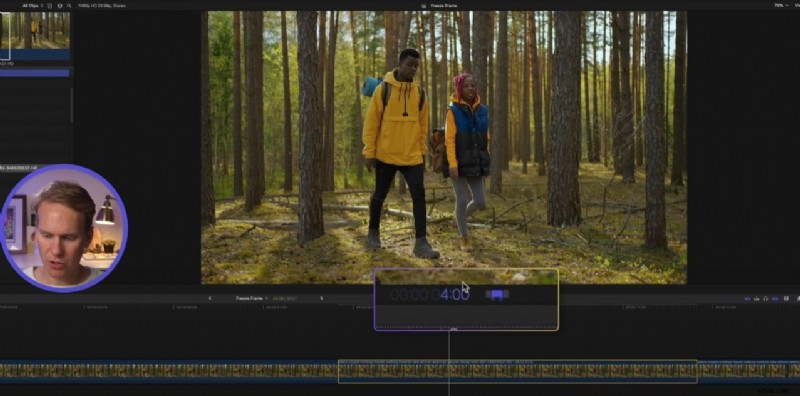
- Step 3: By default the freeze lasts four seconds. Select the clip, press Ctrl + D, and enter your desired duration.
While freeze frames are straightforward, their effectiveness hinges on thoughtful placement and complementary audio or text.
Choosing the Right Moment

Identify beats that carry emotional weight—character introductions, plot twists, or climactic actions—and pause the action to let the audience absorb the significance.
Layering Narration and Sound
Overlay voice‑over, music, or sound effects to enhance the freeze. A sudden score change or a spoken commentary can deepen the moment’s impact.
Adding Text Overlays

Insert on‑screen text—such as a character’s name, a key date, or a brief caption—to provide context without breaking the visual flow.
Using Freeze Frames as Transitions
Apply a freeze followed by a fade to transition smoothly between scenes or narrative arcs, giving the edit a polished, cinematic feel.
Enhancing with Effects

Combine freeze frames with slow‑motion or color grading to heighten drama or visual interest before the pause.
Strategically place freezes to underscore story beats, providing viewers with visual punctuation that reinforces the narrative structure.
The Easiest Way to Add a Freeze Frame to Any Video Clip: Wondershare Filmora
Wondershare Filmora offers a user‑friendly, cross‑platform solution for adding freeze frames. Its drag‑and‑drop timeline, built‑in freeze frame tool, and extensive library of text and effects make it an excellent alternative for those outside the Mac ecosystem.
Stabilize Videos with Wondershare Filmora
- Advanced video stabilization with minimal distortion.
- Wide array of audio and visual effects.
- AI‑powered editing tools for speed.
- Intuitive interface suitable for beginners and pros alike.
- Available on macOS, Windows, iOS, and Android.


How to Add Freeze Frames in Filmora
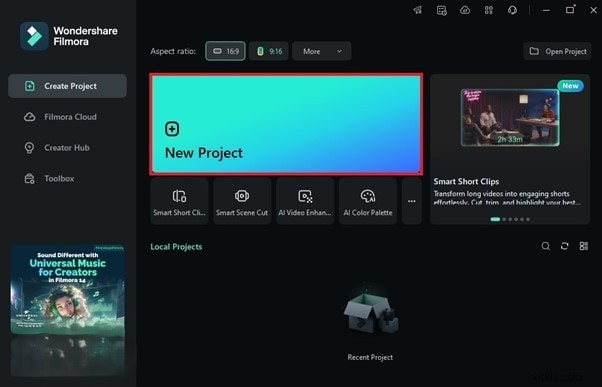
- Step 1: Launch Filmora and create a new project.
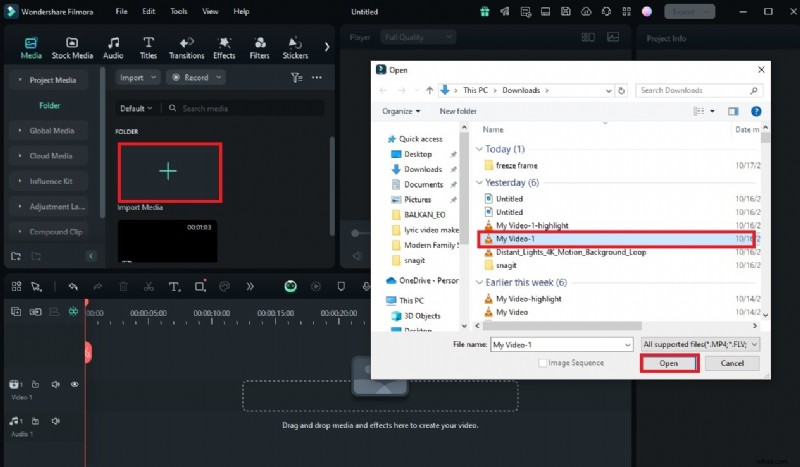
- Step 2: Import your video via the Import button.
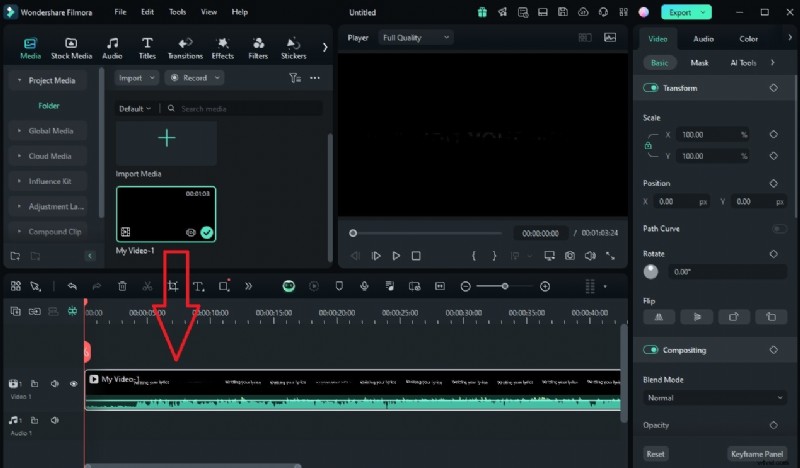
- Step 3: Drag the clip onto the timeline.
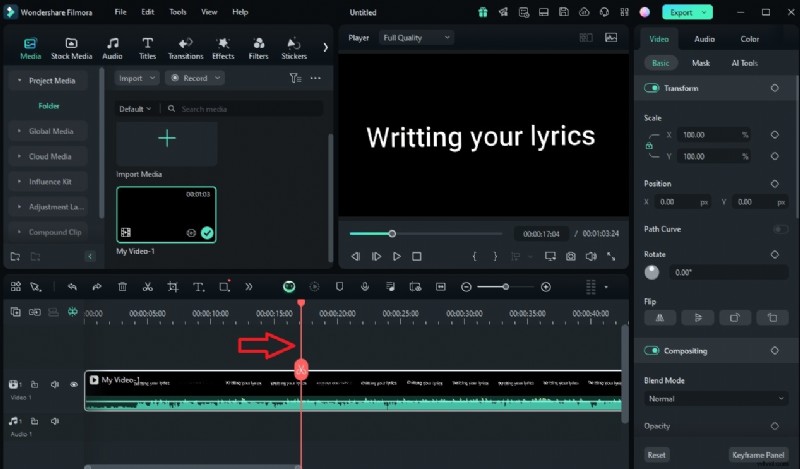
- Step 4: Position the playhead where you want the freeze.
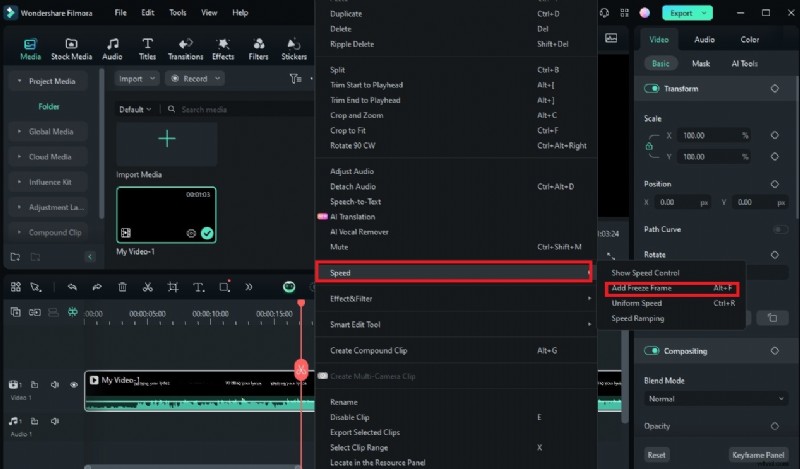
- Step 5: Right‑click the clip, select Speed > Add Freeze Frame.
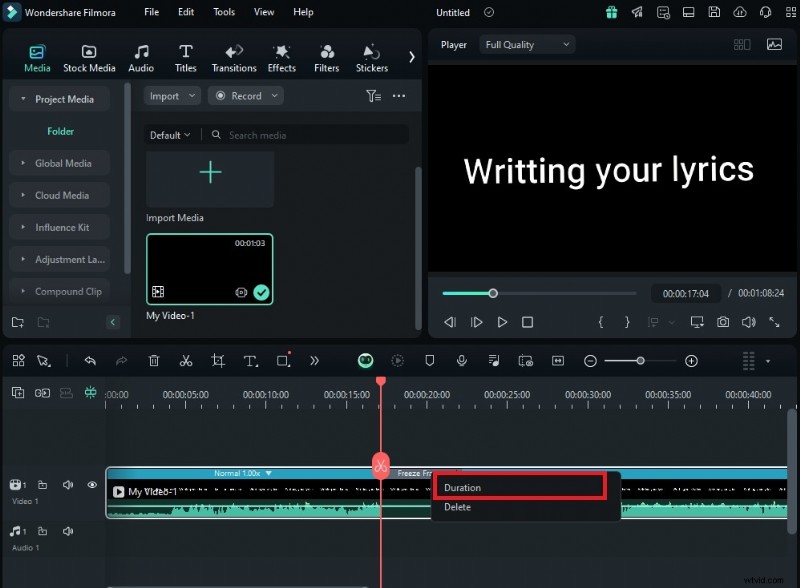
- Step 6: Adjust the duration by right‑clicking the freeze segment and choosing Duration.
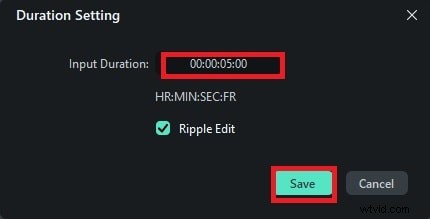
- Step 7: Set the new length and click Save to apply.
Conclusion
Final Cut Pro delivers powerful freeze frame capabilities, but its Mac‑only limitation can be a hurdle. Wondershare Filmora, however, provides a versatile, platform‑agnostic alternative that also offers advanced stabilization and creative assets. Both tools are intuitive and capable of producing professional‑grade results—experiment with each to determine which aligns best with your workflow and project goals.