Have you ever filmed a clip only to realize it's sideways or upside down? Learning how to rotate video in DaVinci Resolve is a skill every editor should have. This editor can quickly fix orientation issues without affecting quality.
This guide will show you how the DaVinci Resolve rotate video feature works. It'll also explain the difference between flipping and rotating, so you can edit confidently.
For creators prioritizing content over complex setup, this guide shares an easier way to rotate clips using Filmora. With its AI-powered tools, built-in templates, and lightweight design, Filmora makes editing faster and more accessible for everyday creators. Let's jump right in!
In this article
-
- Method 1. Basic Rotation via the Inspector Panel
- Method 2. Rotate Using the Transform Tool
- Method 3. Alternative Method via Clip Attributes (Orientation)
Part 1. Understanding Rotation vs. Flipping in DaVinci Resolve
Before learning how to rotate video in DaVinci Resolve, you need to know the difference between rotating and flipping a clip. These two adjustments may look similar at first glance but serve very different purposes in video editing.
People often confuse the two because both alter the way a video appears. The difference is that rotation fixes orientation, while flipping is usually used for creative effects or correcting mirrored footage.
Part 2. How to Rotate a Video in DaVinci Resolve – 3 Methods
If your footage appears sideways or upside down, knowing how to rotate a video in DaVinci Resolve will save you from reshooting. The software provides multiple ways to adjust clip orientation, depending on whether you want precision or a quick fix.
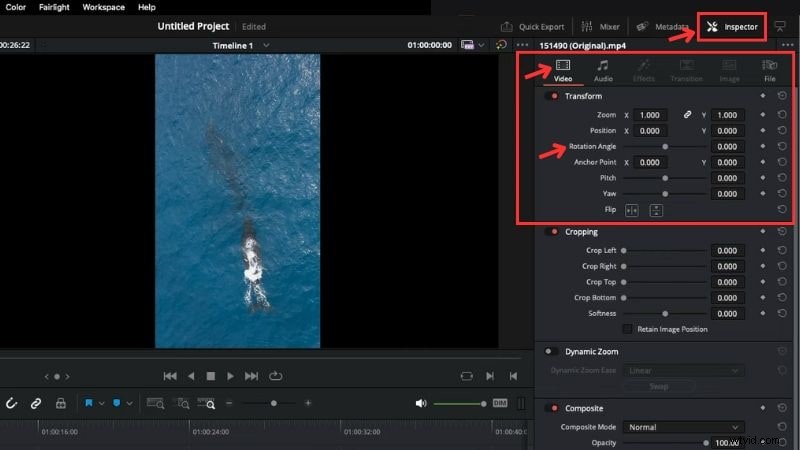
Method 1. Basic Rotation via the Inspector Panel
The DaVinci Resolve rotate video option in the Inspector Panel gives you fine control over the angle.
Follow the steps below to rotate a clip using it:
Step1Open DaVinci Resolve and import your video into the timeline.
Step2Select the clip you want to adjust and go to the Inspector Panel at the top-right corner of the screen.
Step3Find the Video > Transform section, and locate the Rotation Angle.
Step4Adjust the rotation by entering a degree value or using the slider.
Step5After rotation, black bars may appear around your video. Use the Zoom slider to enlarge the clip and remove the bars.

Tip: You can also find the DaVinci Resolve's flip video tool in this panel.
Method 2. Rotate Using the Transform Tool
The next method to learn when figuring out how to rotate clips in DaVinci Resolve is using the Transform tool. You can access it directly in the preview window and drag the handles to adjust rotation.
Follow the steps below to use this tool to rotate a video:
Step1Select the clip on the timeline.
Step2Under the preview window, click the Small Rectangle icon > choose Transform.
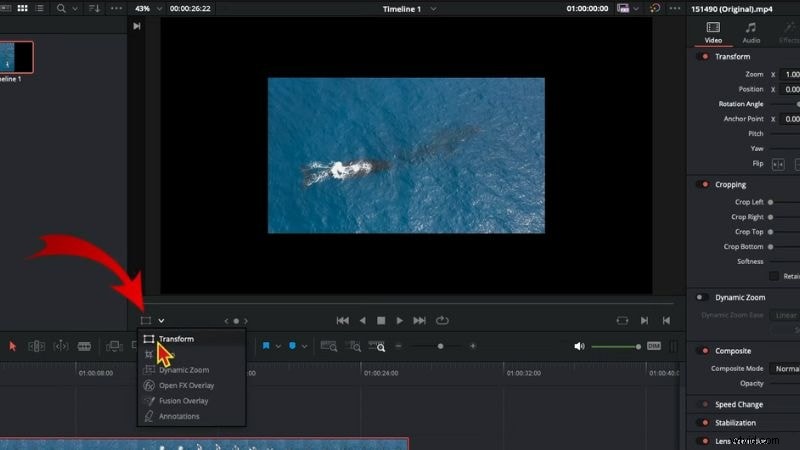
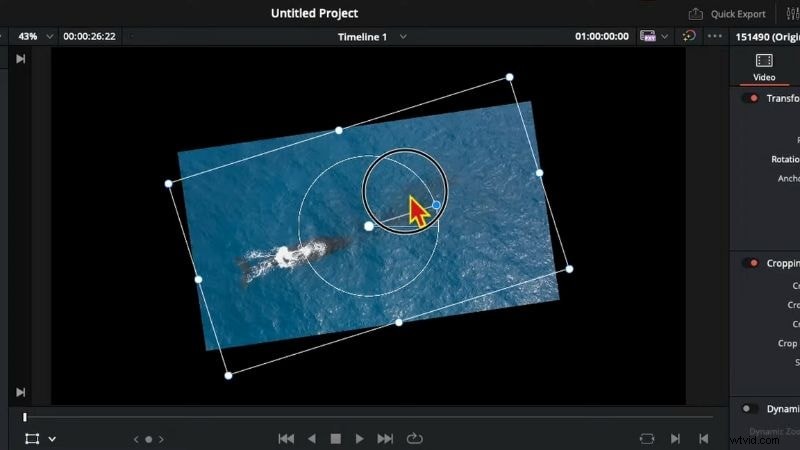
Step3Then, a box will appear around your video. Click and hold the Circular Rotation handle.
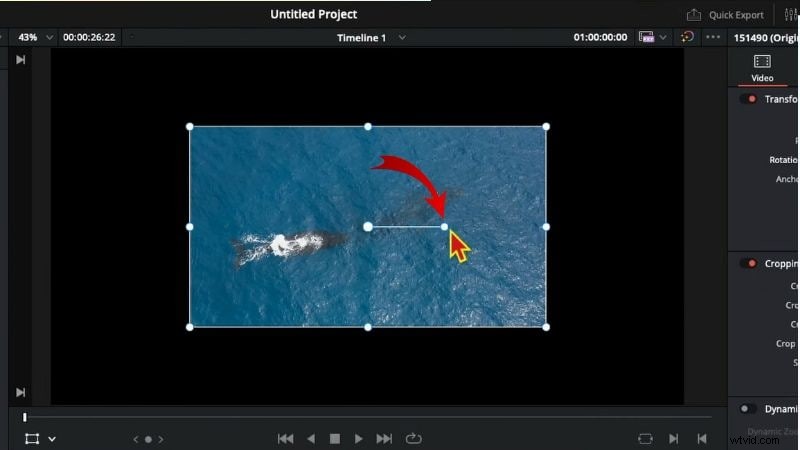
Step4Then, drag the handle to rotate the video to your preferred angle.
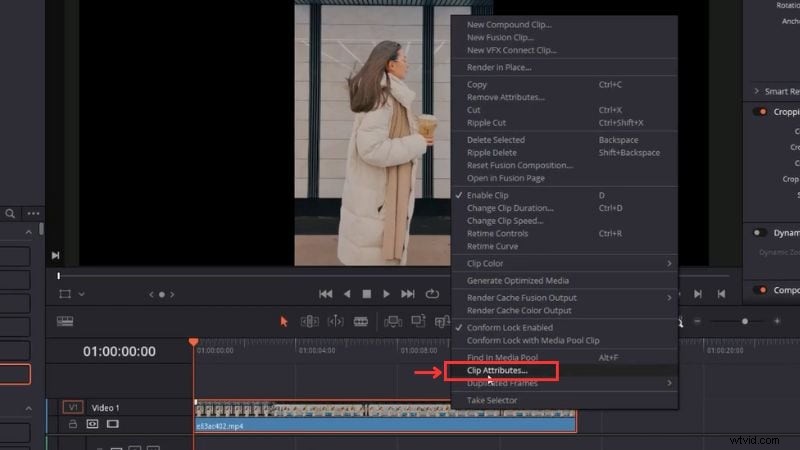
Method 3. Alternative Method via Clip Attributes (Orientation)
You can use the Clip Attributes menu if you only need a quick rotation. For instance, if you are using DaVinci Resolve to rotate video 90 degrees or 180 degrees.
Here's the step-by-step guide on how to use it:
Step1Right-click your video clip in the timeline.
Step2Select Clip Attributes from the menu.
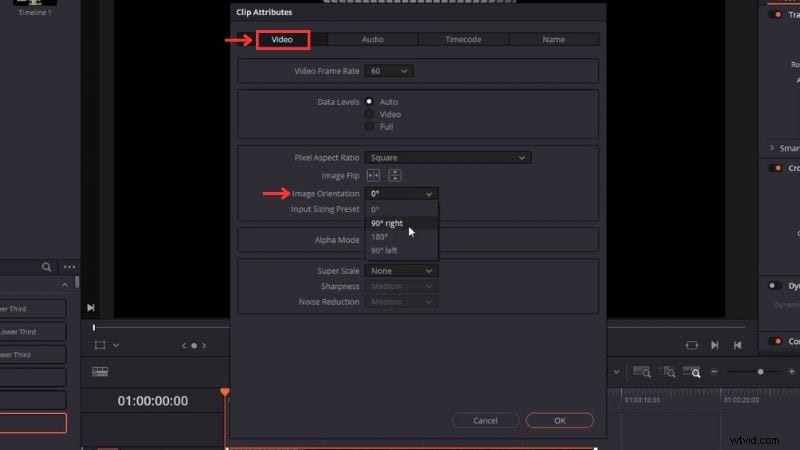
Step3Go to the Video tab > Image Orientation.
Step4You can choose between 90° right, 90° left, or 180° rotation.
Step5Click OK to apply changes.
Tip: DaVinci Resolve's flip video tool is also available in this window.
Bonus: Alternative Tool – How to Rotate Videos with Filmora
If you've been learning how to change orientation in DaVinci Resolve, you know it's a powerful professional editor. It offers advanced tools like Fusion VFX, Fairlight audio, and AI features that are great for complex projects.
However, its interface and workflow can feel heavy for creators who only need quick edits or simple adjustments. If your goal is to make quick edits, social media content, or lightweight performance, Wondershare Filmora offers a more efficient workflow.
Get Started for FreeFor Win 7 or later (64-bit) Get Started for FreeFor macOS 10.14 or later
Filmora combines drag-and-drop editing with a built-in asset library and preset templates. It also has many AI tools like Smart Cutout, and AI Music Generator. It's designed for creators who want to rotate clips, add effects, and edit quickly without navigating a complex workspace.
Follow these steps to adjust your video's orientation in Filmora:
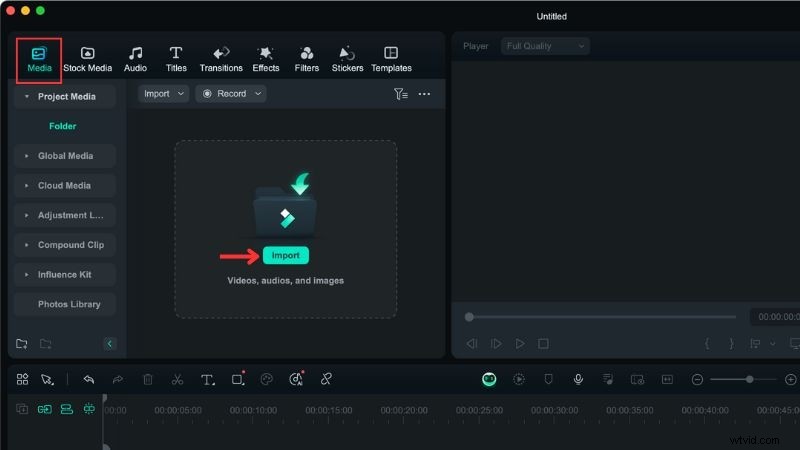
Step1Open Filmora and Import Your Video
- Launch Filmora and start a New Project.
- In the editor workspace, go to Media > Project Media > Import and add your video file.
- Drag the imported clip from the media panel onto the timeline to begin editing.
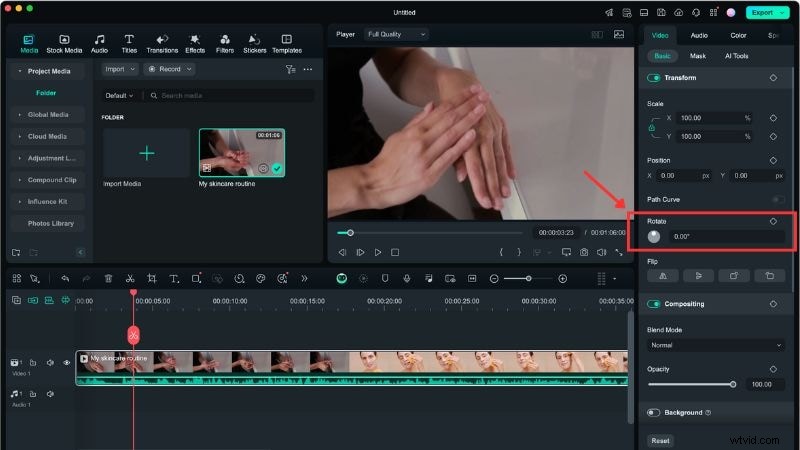
Step2Rotate the Video
- Select your clip in the timeline and open the editing panel on the right.
- Go to Video > Basic > Transform.
- Use the Rotate slider or enter a degree value to adjust the angle.
Tip: The Flip option is in the same panel if you need to mirror your video.
Filmora is designed to help creators edit faster, even on mid-range computers. It also includes built-in music, effects, and templates for social media videos. If you only need simple orientation fixes or quick editing features, Filmora can save time and reduce setup complexity compared to DaVinci Resolve.
Get Started for FreeFor Win 7 or later (64-bit) Get Started for FreeFor macOS 10.14 or later
Conclusion
Learning how to rotate video in DaVinci Resolve is an essential skill for fixing orientation problems and polishing your clips. The software gives you different options, from the Inspector Panel to the Transform tool and Clip Attributes.
The DaVinci Resolve rotate video feature offers flexibility and precise control, making it a strong choice for editors who want accuracy. But if you want faster adjustments with built-in assets and preset templates, Filmora is worth trying.
Give it a try to rotate clips and edit your videos efficiently!
Get Started for FreeFor Win 7 or later (64-bit) Get Started for FreeFor macOS 10.14 or later
FAQs
-
Why does my rotated video have black bars?
When you rotate a clip, the frame shape no longer matches the original aspect ratio, which creates black bars around the edges. Use the Zoom tool or crop the video slightly to remove them.
-
Why doesn't my rotated video render correctly?
Check your timeline settings. If the resolution or aspect ratio differs from your video's settings, the final export may look different. Match your project resolution to your clip's resolution before rendering.
-
Does rotating a video shrink the image? How to fix it?
Rotating a video doesn't shrink the actual footage, but you may see more empty space around it, making it appear smaller. Adjust the Zoom option or resize the clip in the preview window to fill the frame.