Curved texts add visual interest to your designs. It also breaks away from the usual traditional straight lines. Aside from that, you can make aesthetically pleasing designs by fitting text into shapes, circular paths, or even irregular objects. With Inkscape, you can do this and more! Its text editing tools open you to various text manipulation features. Read on to learn different methods to curve text on Inkscape and create unique text designs for your next project.
In this article
-
- Bend Path Effect
- Envelope Deformation
- What are the limitations of using spaces to adjust text on a path in Inkscape?
-
- Integrate Inkscape Design to Video
- Using Curved Text Feature in Filmora
Why Use Inkscape: Brief Overview
Most professional graphic designers use Inkscape to create designs and vector graphics. This powerful vector drawing software has the same capabilities as high-end tools like Adobe Illustrator and is free to use. You can create curve text in Inkscape including other designs for flyers, logos, illustrations, and even text designs.

You can easily manipulate your text into different lines, curved features, and even around a particular shape. This includes basic text editing options like adjusting font size, color, and style. To curve text on Inkscape using features like Text on Path, Text to Path, Flowed Text, and other various text effects and filters.
How to Text on Path in Inkscape: A Step-by-Step Guide
Creating a curve text in Inkscape is as easy as it sounds. you don't need to be a professional graphic artist to make this text design successful. Follow the steps below to use the text-to-path tool in Inkscape. Before starting, ensure you already have the latest Inkscape version installed on your desktop.
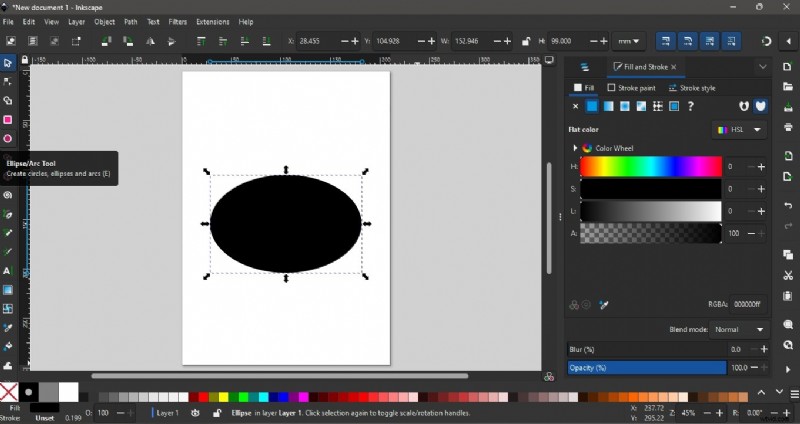
Step 1: The first step is to create a shape. You can do this by clicking on the Ellipse/Arc Tool. Then, click and drag your mouse on the blank canvas while holding down the Ctrl key. Adjust your shape accordingly.
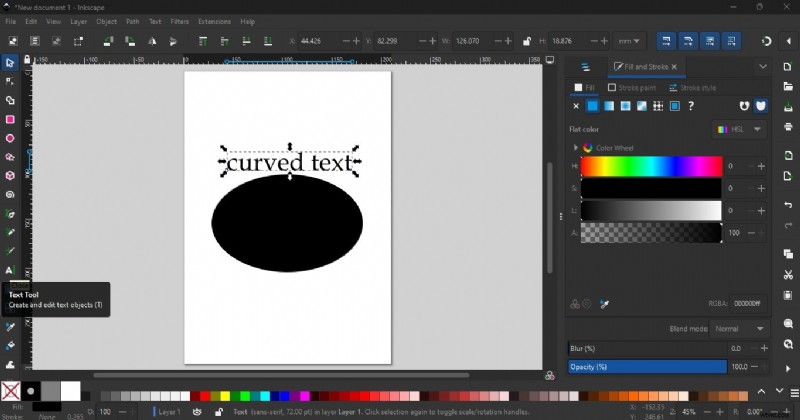
Step 2: Click on the Text tool and type your text in the canvas next to the shape. Adjust the font style, size, and placement to your preference.
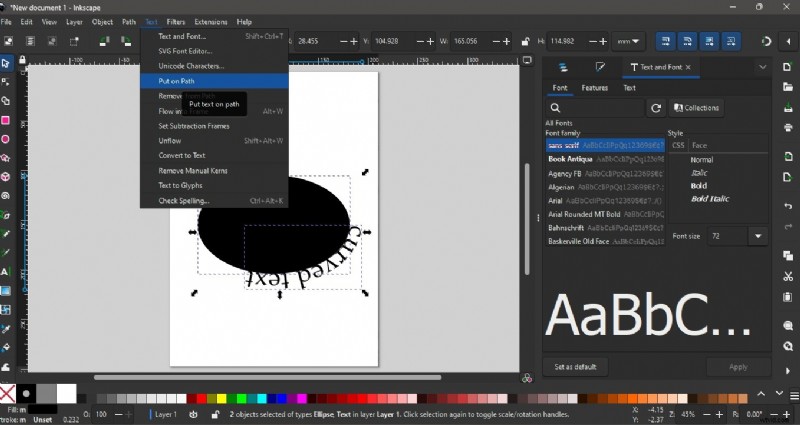
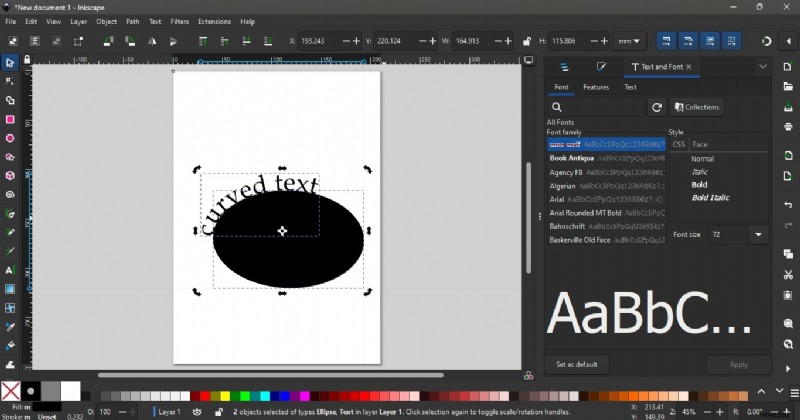
Step 3: Use the Selector Tool to draw a selection box on the text and the ellipse shape. Go to Text and select Put on Path. This will put the text in the shape of the ellipse.

Note: To rotate, select both text and ellipse shape. Click on the center to enable the rotation handle. Drag your mouse to rotate both items.
Step 4: Adjust your ellipse to the shape you want your text to follow. Select the text then go to Path and choose Object to Path.
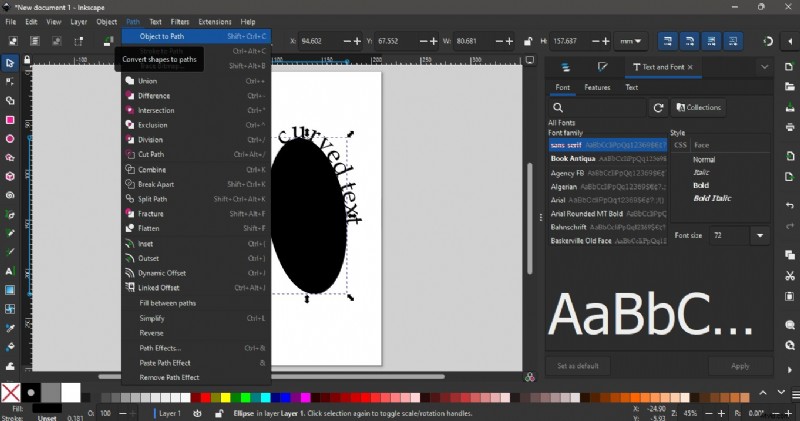
Step 5: Finally, delete the ellipse shape.

Other Ways to Text on Path in Inkscape
There's more than one way to manipulate text in this tool. Aside from the method shown in the previous section, here are other ways in Inkscape how to curve text through the Bend Path and Envelope Deformation Effect.
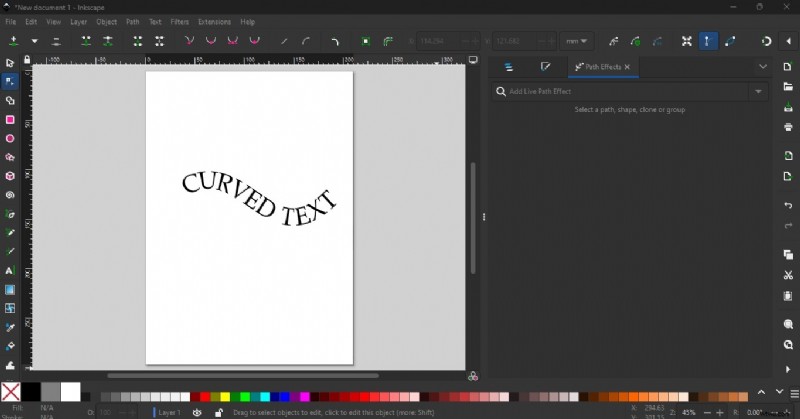
Bend Path Effect
To bend text in Inkscape, you can use a text path effect called Bend Path. This will let you bend certain parts of your text, and create wavy formations, or flowy text designs. To do this, follow the quick guide below:
Step 1: Select your text in the canvas and go to Object then Group. Once done, go to Path then select Path Effects.
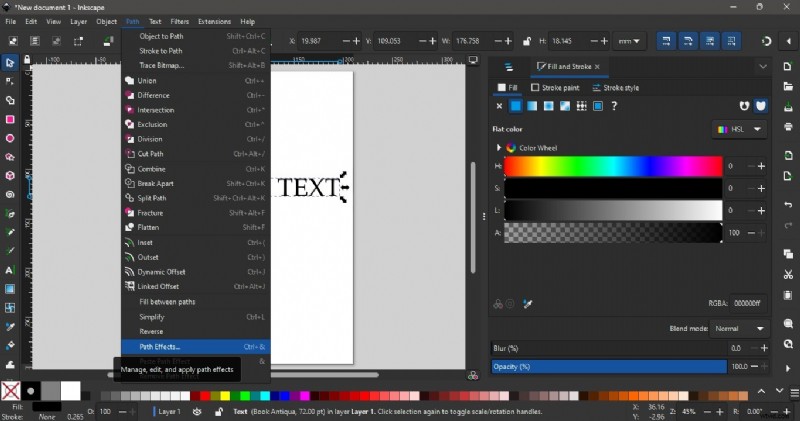
Step 2: In the Path Effects panel, click on Convert text to Paths. In the search bar, type in Bend and select the effect. Click the Edit on Canvas icon. Using your mouse, select parts of the text you want to bend or curve.
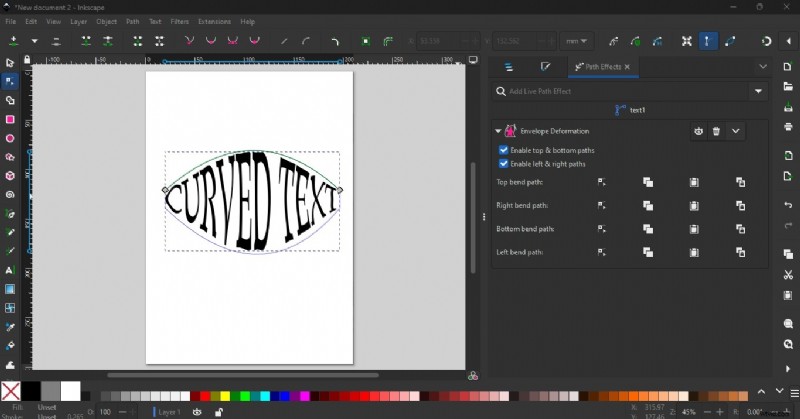
Envelope Deformation
Another way to bend text in Inkscape is through the Envelope Deformation Path Effect. With this method, you can manipulate not only the top and bottom portions of the text but also create curves from the sides.
Step 1: With your text in the canvas, go to Object and select Group. Select your text then go to Path and choose Path Effects. In the Path Effects panel, select Convert Text to Paths.
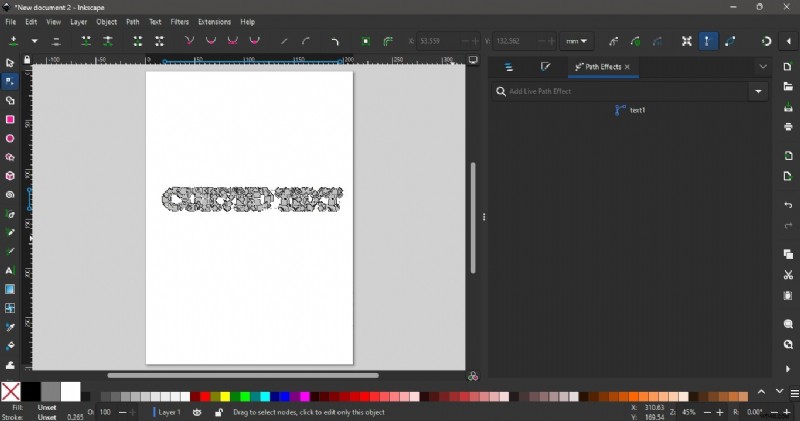
Step 2: Once done, type Envelope Deformation in the Path Effect panel search bar. From here, you can choose the path you want to manipulate. For example, select the Top Bend Path and drag your mouse to the top portion of your text to create a curve.
What are the limitations of using spaces to adjust text on a path in Inkscape?
While it's fairly easy to utilize spaces to adjust text on path in Inkscape, it also has its limitations. Here are the following issues you need to consider:
- Possibility of misalignment when adding text to spaces.
- Text may become skewed or uneven.
- Inconsistent results may be visible when manually adjusting spaces
- Precise adjustments are difficult as you don't have precise control over how spaces affect text position.
- Manual vertical adjustment may be needed since only the horizontal part of the text is adjusted when adding spaces.
[Bonus Tips] Add Text on Path to Videos with Filmora
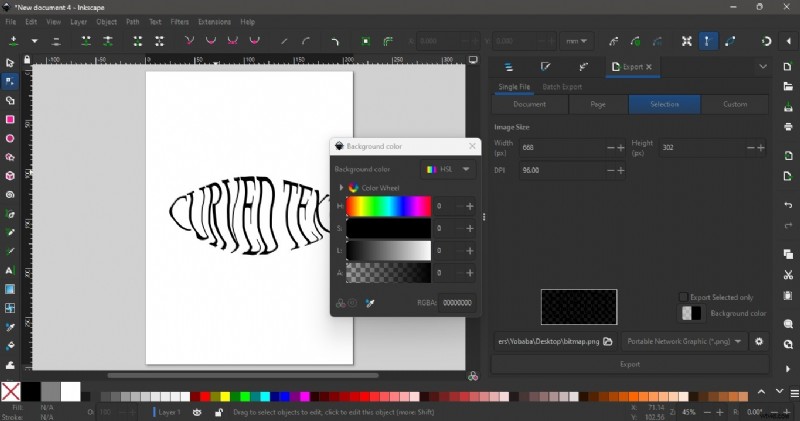
While Inkscape is mainly for vector and graphic designs, you can still integrate your curved texts into your video projects. Export your file with a transparent background by going to File > Export. You can export the whole document or only a portion of the canvas. To make a transparent file, go to Background Color and slide all colors to zero. Finally, choose PNG as the file format and click on Export.
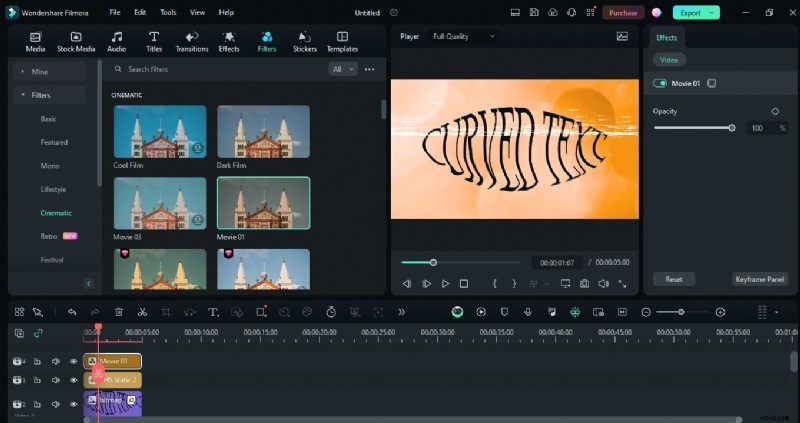
Integrate Inkscape Design to Video
After exporting in Inkscape, import your bend text design to a video editor and combine it with your media. Add video effects that you like and incorporate other designs in your project.
Using Text Path Animation Feature in Filmora
Integrating designs from one tool to another takes too much time. While it's possible to curve text in Inkscape and import the design in a video editor, a better way is to find one already equipped with a text path animation tool and customization features. Wondershare Filmora gives you exactly that and more! Aside from its complete editing suite from AI-powered editing tools for both audio and video and a rich creative library, you can also find text designs from 3D, Cinematic, and Type on Path.
Animate Text Along a Path In Wondershare Filmora
- Create text that flows along a path you design.
- Customization options to design interactive text effects.
- Draw any shape with ease using the Bézier tool.
- A variety of Text Styling Options aligns with your creative vision.
- Combine the text along a path with Filmora's Creative Assets.


How to use Filmora's text path animation feature for video editing:
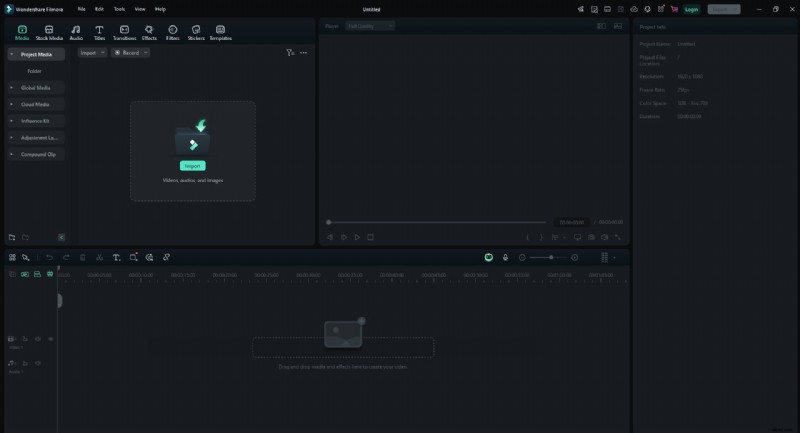
Step1Import Your Media Files
Start by launching Filmora and importing your video or image into the timeline. Drag and drop the file from your computer to the Media Library in Filmora.
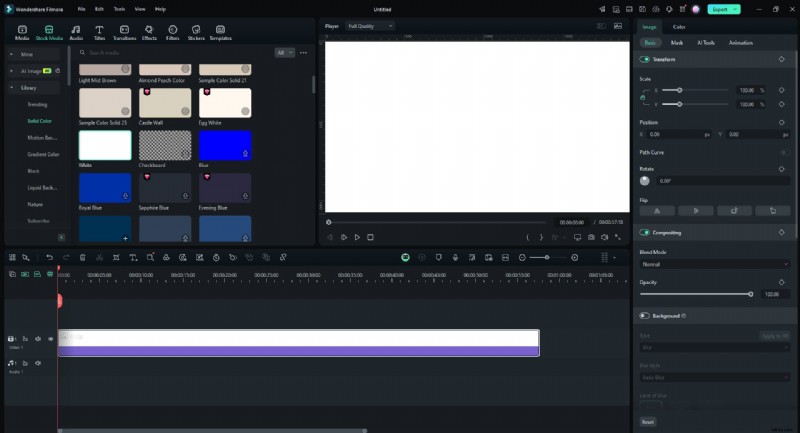
Step2Add Your file to the Timeline
In this guide, we will use a solid background from Filmora as the background image. Drag the background file onto the timeline.
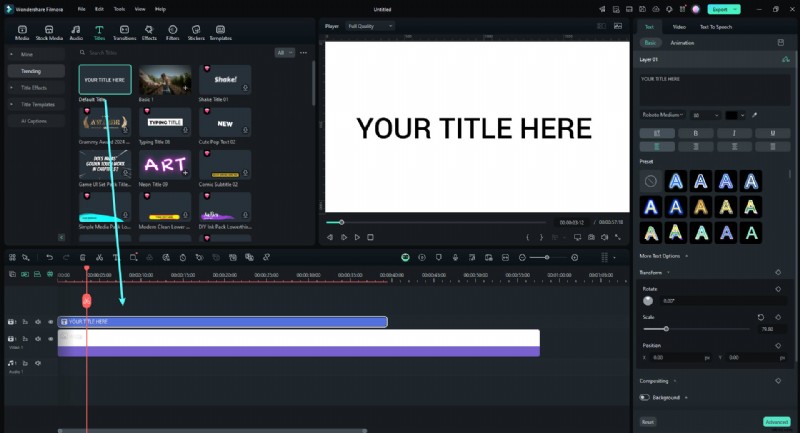
Step3Add Text Layer in Filmora
Click on the "Titles" tab and choose a text style that complements your design. Drag the text style onto a new track.
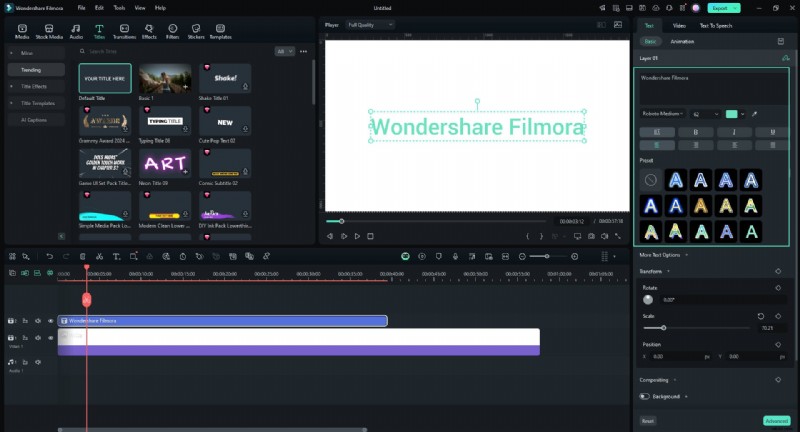
Step4Edit Text and Apply Effects
Double-click on the text in the timeline to edit it. Customize the font, size, and color to match your design. You can also apply effects from the Effects tab.
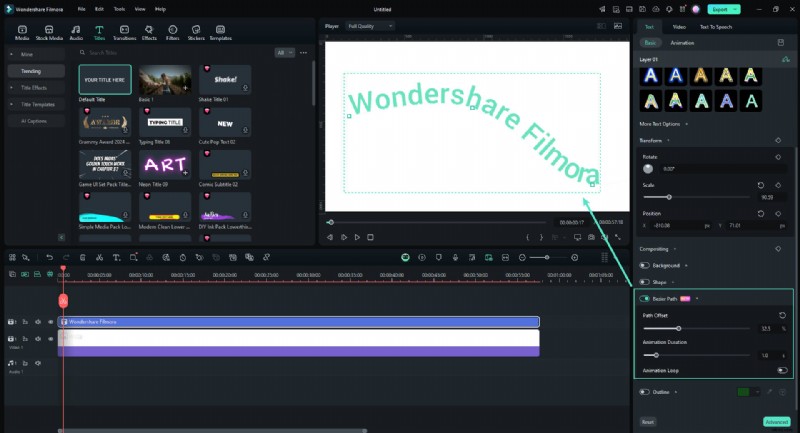
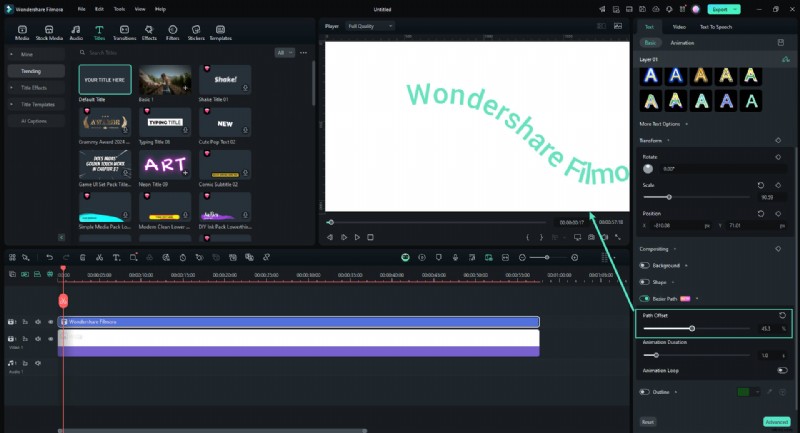
Step5Position the Text Along the Path
Turn on the "Bezier Path" toggle in the "Basic" section. Drag selections around points and Bezier handles to position the text along the path of your design. Adjust the rotation, spacing, and alignment as needed.
Use the "Animation Duration" slider to adjust the animation speed.
Step6Fine-tune and Preview Your Project
Play the timeline to preview how your text fits with the path. Make final adjustments to the text's position or effects by using the "Path Offset" slider to ensure it fits seamlessly.
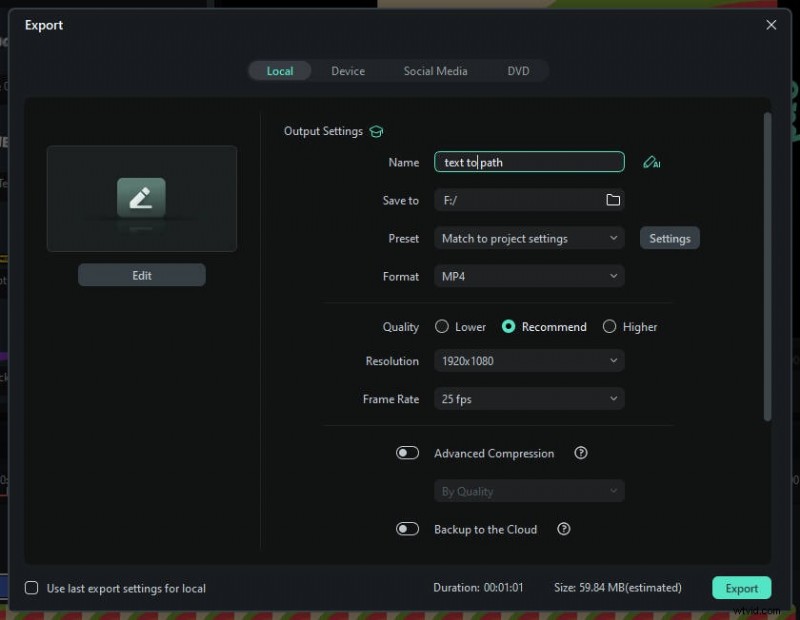
Step7Export Your Project
Once you are satisfied with the text fit, click on the "Export" button. Choose your preferred format and resolution, then export the video or image with your fitted text.
Conclusion
Using different methods to create type on path in Inkscape, you can make standout text designs for various purposes. You can integrate these designs into your graphic illustrations and digital projects. While you can still incorporate Inkscape designs in your video projects, a video editor like Filmora has a built-in text path animation feature giving you more convenience. Explore the rest of Filmora's tools for advanced video and audio editing capabilities, AI-powered features, and an intuitive interface for your next best project.