YouTube has become the go-to platform for creators, businesses, and influencers to share their stories. But making videos that actually look good on YouTube isn’t just about shooting and editing—it’s also about exporting with the right settings and getting them online efficiently. For years, Adobe Premiere Pro has been the default choice for creators, offering detailed export controls. Yet, many users discover that exporting and publishing from Premiere can be confusing, time-consuming, and costly.
That’s why in this guide, we’ll look at how Premiere Pro handles YouTube export settings, where it falls short, and why Filmora V15 is quickly becoming a favorite for creators who want editing, exporting, and publishing all in one place.
Part 1. Introduction & Background
Adobe Premiere Pro (often called PR) has long been the industry standard for editing professional-grade videos. It’s widely used for films, ads, and high-production YouTube channels. But while it offers granular export settings for YouTube—like frame rate, bitrate, and resolution—the process can feel overwhelming for new editors. On top of that, Premiere doesn’t directly publish videos to YouTube or other platforms, meaning creators have to export manually and then upload separately.
For influencers, small businesses, and everyday YouTubers, that extra step adds friction. That’s why alternatives like Filmora V15, with its Social Media Planner, have started to gain attention. Filmora not only streamlines export settings but also simplifies the entire edit → export → publish workflow.
Part 2. How Premiere Pro Works for YouTube Exports
Premiere Pro is a timeline-based video editor with highly detailed export controls. When exporting to YouTube, editors can choose from presets or customize their settings—such as:
- Format: H.264 (standard for YouTube).
- Preset: YouTube 1080p or 4K.
- Bitrate: Adjust manually for quality vs. file size.
- Frame Rate: Usually matches the source (24, 30, or 60 fps).
- Audio Settings: AAC, 320 kbps recommended for clear sound.
After export, the video must still be uploaded manually to YouTube. Many creators pair Premiere with social media scheduling tools like Buffer, Hootsuite, or TubeBuddy to manage consistent posting.
Advantages of Premiere Pro for YouTube
- Professional-grade export controls.
- Industry-standard, trusted by filmmakers and large YouTube channels.
- High flexibility for bitrate, codecs, and advanced rendering.
- Integrates with Adobe’s ecosystem (After Effects, Photoshop, Audition).
Drawbacks of Premiere Pro for Publishing
- No built-in publishing: cannot directly upload to YouTube or schedule posts.
- Complex export settings: intimidating for beginners.
- Slow workflow: requires manual uploads or external social publishing platforms.
- High cost: Adobe Creative Cloud subscription is expensive for small creators.
In short: Premiere Pro is excellent for video quality control, but weak in social publishing workflows.
Part 3. Filmora V15 as a Premiere Alternative

For creators who want professional results without technical overload, Filmora V15 is a strong alternative. While it covers all the essentials of Premiere’s export features, it goes further by embedding publishing tools directly inside the editor.
Key Features Filmora Offers Instead of Premiere Pro
1
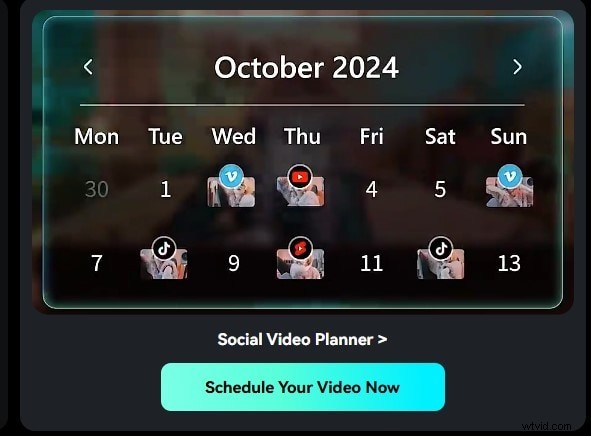
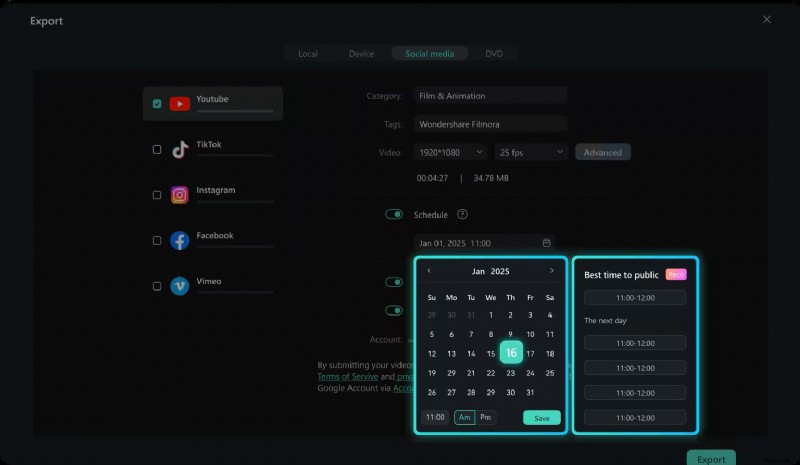
Social Media Planner
One of the standout features in Filmora is the built-in Social Media Planner. Instead of finishing your edit and then opening YouTube, Instagram, or TikTok to manually upload, Filmora lets you schedule and publish videos directly from the software itself. This eliminates the need for extra apps like Buffer or Hootsuite, making it easier for creators to stay consistent with posting.
2
Batch Export
With Filmora, you can save multiple versions of your project in one go—for example, a 16:9 widescreen version for YouTube and a 9:16 vertical cut for Reels or TikTok. Filmora’s Batch Export handles this in a single step, unlike Premiere Pro which requires separate renders.
3
YouTube Export Presets
Filmora simplifies publishing with one-click YouTube presets. Choose 1080p or 4K and Filmora auto-sets the correct bitrate, codec, and resolution—no guesswork. Premiere often requires manual adjustments.
4
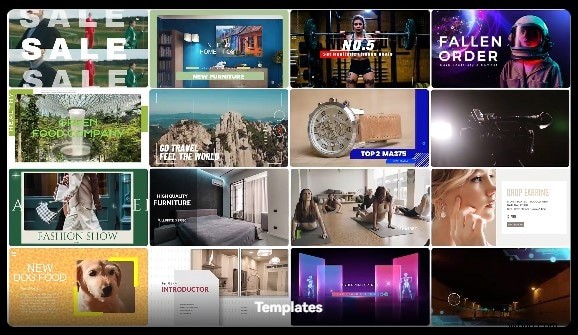
Templates & Presets
Drag-and-drop titles, transitions, and overlays help videos look polished without motion graphics expertise—ideal for YouTubers and small businesses.
5
AI Tools
Background removal, motion tracking, and auto music sync streamline complex tasks—replace backgrounds, track movement, and sync cuts to the beat with a click.

6
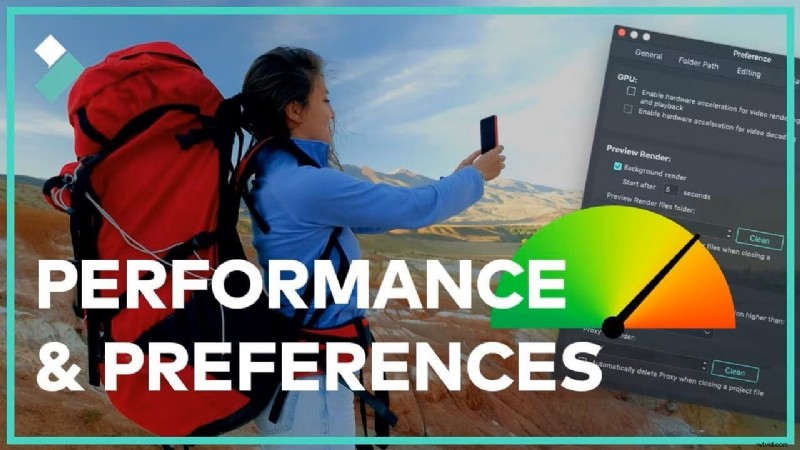
Performance-Friendly
Unlike Premiere Pro, which can be heavy on system resources, Filmora runs smoothly on mid-range laptops and PCs—fewer crashes and less lag.
Part 4. Simple Steps: Export & Publish to YouTube with Filmora V15
Filmora V15 simplifies what other editors make complicated. Follow this quick step-by-step guide to export and publish your video directly to YouTube in minutes.
Step1Import Your Footage.
Open Filmora V15 and drag your video clips into the media library. Then drop them onto the timeline — no complex project setup or manual configuration required.
Step2Edit Your Video.
Trim, cut, or merge clips effortlessly using Filmora’s drag-and-drop interface. Add transitions, titles, and background music, or enhance your video instantly with AI effects and style templates.
Step3Choose YouTube Export Preset.
Click the Export button and select the YouTube preset (available in 1080p or 4K). Filmora automatically applies optimized settings for resolution, bitrate, and frame rate, ensuring professional upload quality.
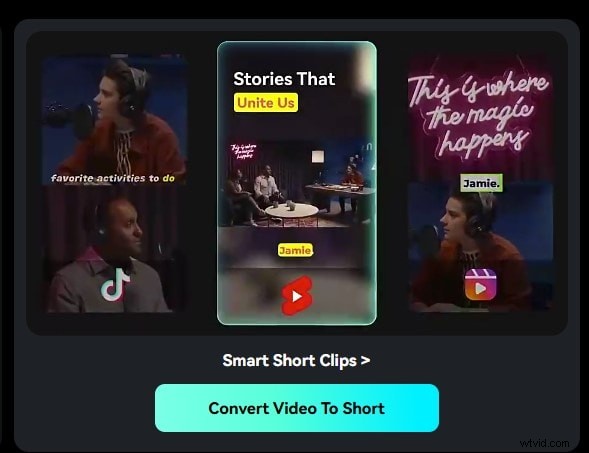
Step4Use Batch Export (Optional).
Need multiple versions for other platforms like TikTok or Instagram Reels? Use Batch Export to generate vertical and horizontal formats in one go — saving time and maintaining consistent quality.
Step5Publish with Social Media Planner.
Connect your YouTube channel using Filmora’s built-in Social Media Planner to publish videos instantly or schedule uploads automatically without leaving the editor.
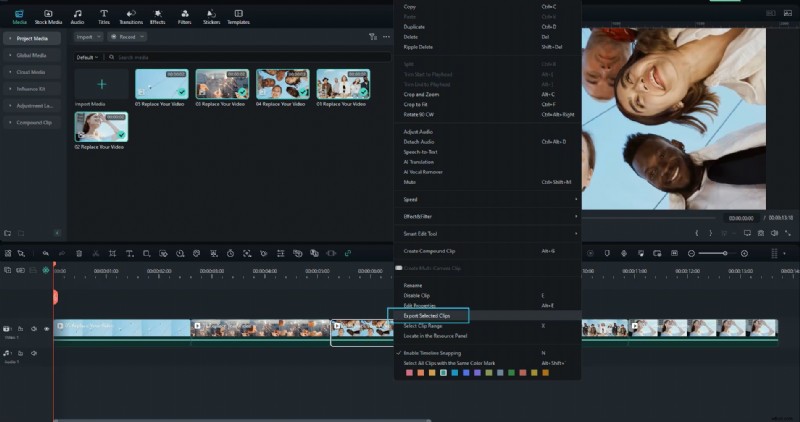
If you only want to export one clip from your timeline rather than the entire project, Filmora provides a streamlined option to export the selected clip with custom settings. Follow the steps below:
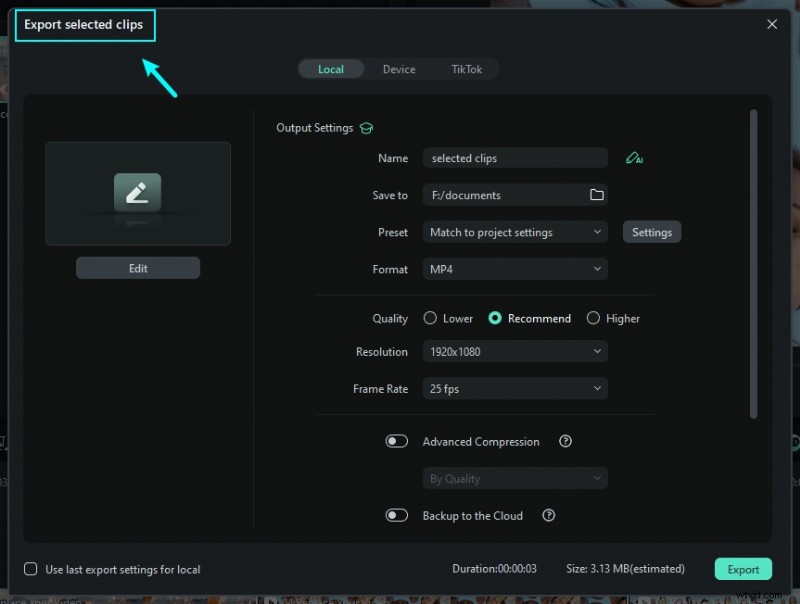
Step1Right-click the Clip and Choose “Export Selected Clips”.
In the timeline, select the clip you want to export. Right-click it and select Export Selected Clips from the context menu. This triggers the export interface for just that clip.

Step2Customize Output Settings.
In the export window that appears, you can set the file name, destination folder, format, resolution, frame rate, and other parameters. Adjust as needed, then click Export to render and save the selected clip.
Step3Monitor the Export Progress and Finish.
The export process will display a progress bar. Once the rendering finishes, the saved clip will be available in your chosen output folder. You can then view or upload that clip as required.
If you want to learn how to export select clips only or export clip range, you can check this guide. New released Filmora compresses these steps into one seamless process.
Part 5. Conclusion
While Adobe Premiere Pro remains a powerhouse for professional video editing, it isn’t always practical for YouTube creators who prioritize speed and efficiency. Its export settings provide flexibility, but without built-in publishing, the workflow feels fragmented.
Filmora V15 bridges that gap. With batch export, optimized YouTube presets, and an integrated Social Media Planner, it helps creators go from editing to publishing in just a few clicks. Whether you’re a small business, influencer, or educator, Filmora makes the entire YouTube workflow simpler, faster, and more cost-effective.
Ready to edit smarter? Try Wondershare Filmora V15 and experience a smoother path from timeline to YouTube.
Part 6. FAQs
-
Q1. What are the best Premiere Pro export settings for YouTube?
Use H.264 format with the YouTube 1080p or 4K preset, a bitrate of 10–20 Mbps for HD, and AAC 320 kbps audio for optimal results.
-
Q2. Does Filmora have the same export quality as Premiere Pro?
Yes. Filmora provides optimized YouTube export presets that match Premiere Pro’s quality while offering a much simpler and faster setup process.
-
Q3. Can I publish directly to YouTube from Premiere Pro?
Not natively. Premiere Pro requires manual export and upload. Alternatively, you can use third-party scheduling tools such as Buffer or Hootsuite for automated publishing.
-
Q4. How is Filmora’s Social Media Planner different from other publishing tools?
Unlike external schedulers, Filmora’s built-in Social Media Planner allows users to edit, export, and schedule posts within the same workspace — eliminating the need to switch between platforms.
-
Q5. Do I need a powerful computer to export with Filmora?
No. Filmora is optimized to run smoothly on mid-range PCs and laptops, while Premiere Pro generally demands higher-end hardware for seamless exporting.