Want to elevate your vlogs, product reviews, or podcast interviews? A multi‑camera setup lets you film yourself from one angle while showcasing a product from another, creating richer, more engaging content—without the hassle of stitching separate videos.
In this guide we’ll walk you through the best tools for recording multiple webcams simultaneously and the post‑production workflow that turns raw footage into polished videos. Ready to streamline your process?
Table of Content
Getting the Required Equipment and Software for Recording Multiple Webcams
Here’s what you’ll need to record multiple webcams at the same time:
| High‑quality webcams | Your built‑in laptop camera works well for medium shots; pair it with an external webcam or DSLR for tight, high‑resolution angles (at least 1080p). |
| HDMI or USB cables | Connect each external camera to your computer. Choose the cable type that matches your camera’s output. |
| Tripods or camera stands | Stable support is essential for consistent framing. Invest in sturdy tripods that can hold the weight of your equipment. |
| Recording software | A robust recorder that can capture all video sources simultaneously—such as OBS Studio—ensures smooth multi‑cam sessions. |
| Editing software | After recording, a powerful editor is required to merge, sync, and polish your footage. Wondershare Filmora offers an intuitive, AI‑enhanced workflow for multicam projects. |
Once you’ve assembled your gear and connected the cameras, let’s dive into how to record them all at once.
How To Record Multiple Webcams Simultaneously
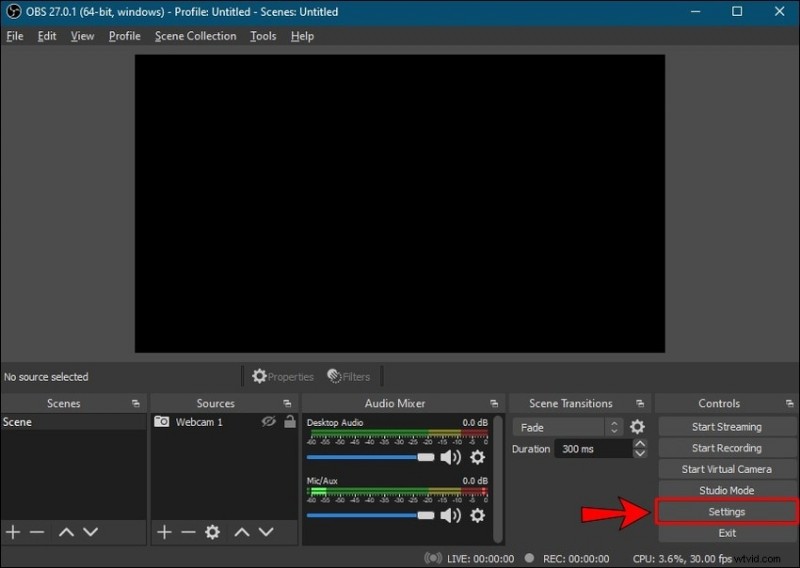
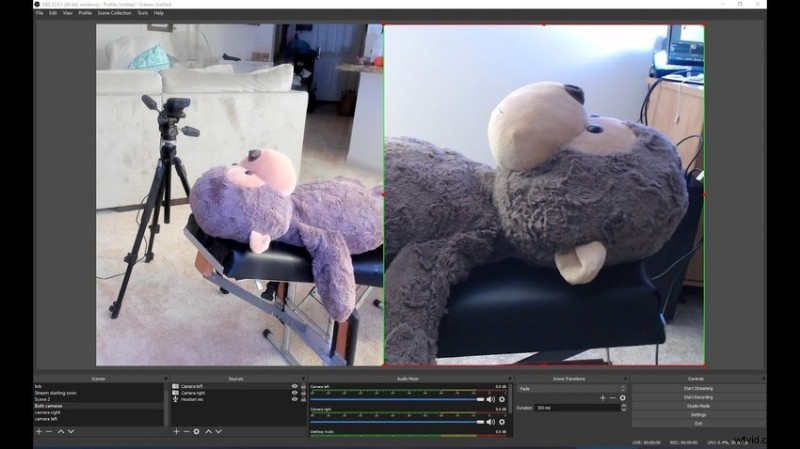
OBS Studio is the industry favourite for both gamers and content creators, thanks to its flexible multi‑scene and multi‑source architecture. Below are the essential steps to set up a multi‑cam session.
- Download and install OBS Studio for Windows (10/11), macOS (11.0+), or Linux (all distributions).

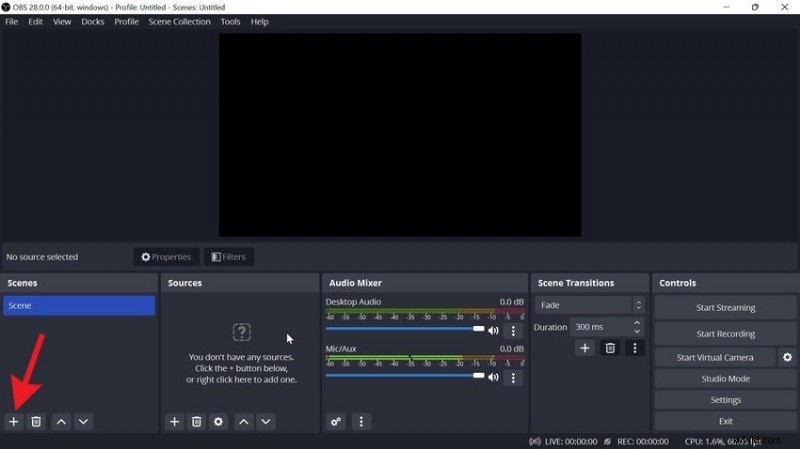
- Create a new scene by clicking the Plus button under Scenes.
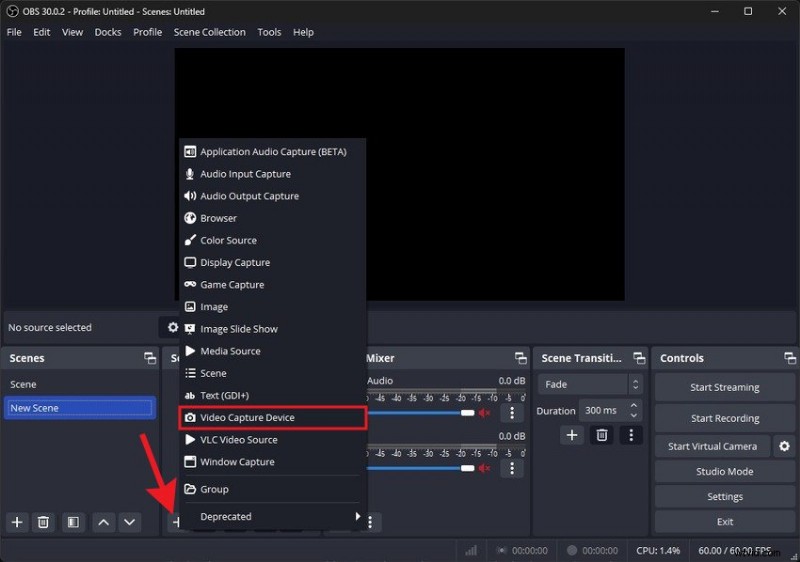
- Add a video source: click the Plus button under Sources and select Video Capture Device (this will be your webcam).
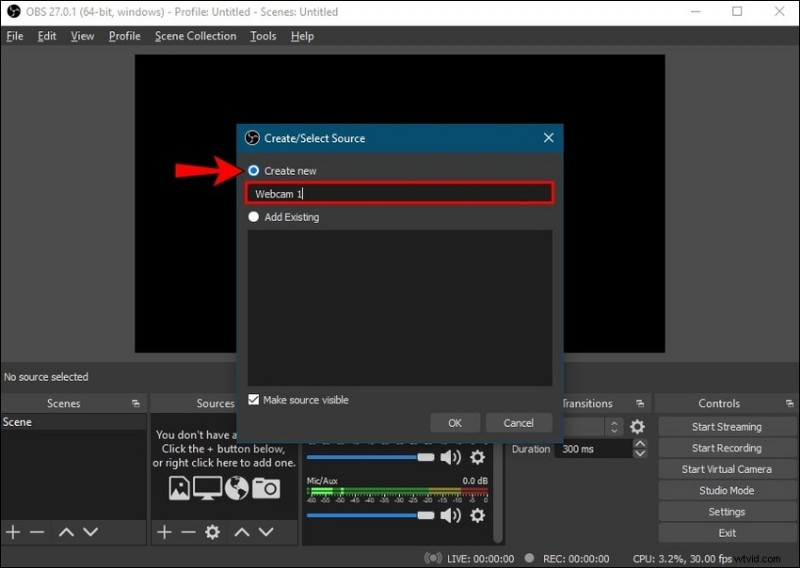
- Name the source (e.g., Webcam 1), tick Make source visible, and click OK.
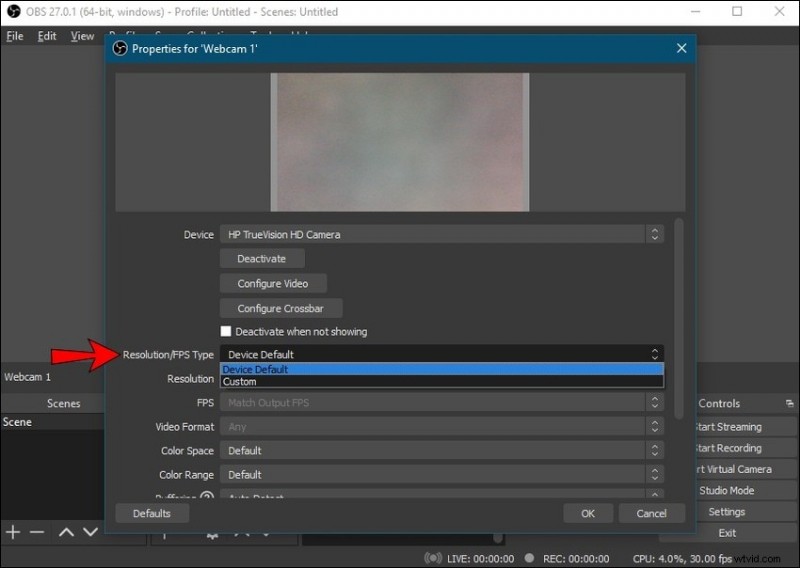
- In the Properties dialog, choose your first webcam from the Device dropdown.

- Set the resolution: either use the camera’s default or specify a custom size.
- (Optional) Click Configure Video to fine‑tune brightness, contrast, hue, saturation, and sharpness. Apply changes and close the dialog.

- Repeat steps 3–7 to add additional webcams. Each source can be positioned and resized within the preview window.
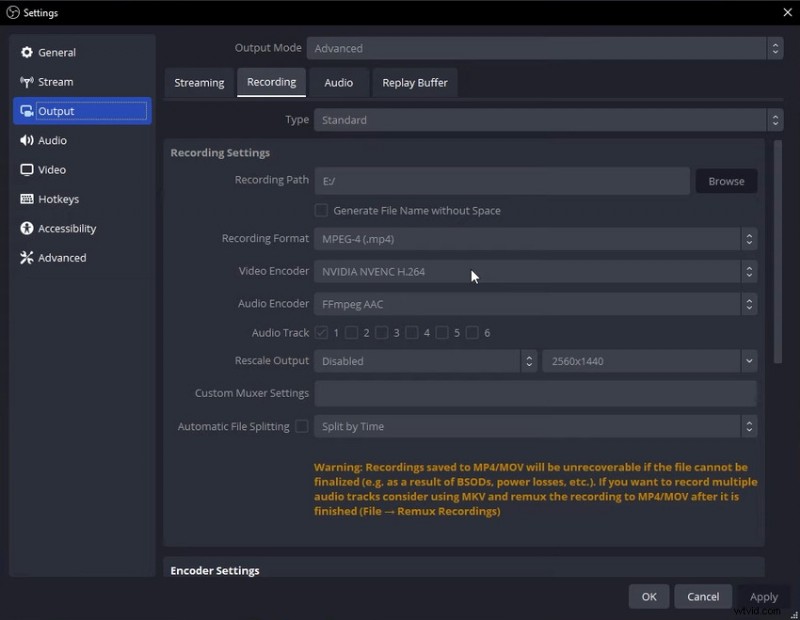
- Open Settings and navigate to Output > Recording. Switch to Advanced Mode to adjust the recording path, encoders, and output format.
- For reliability, choose MKV as the file format. OBS will preserve your footage even if a crash occurs.
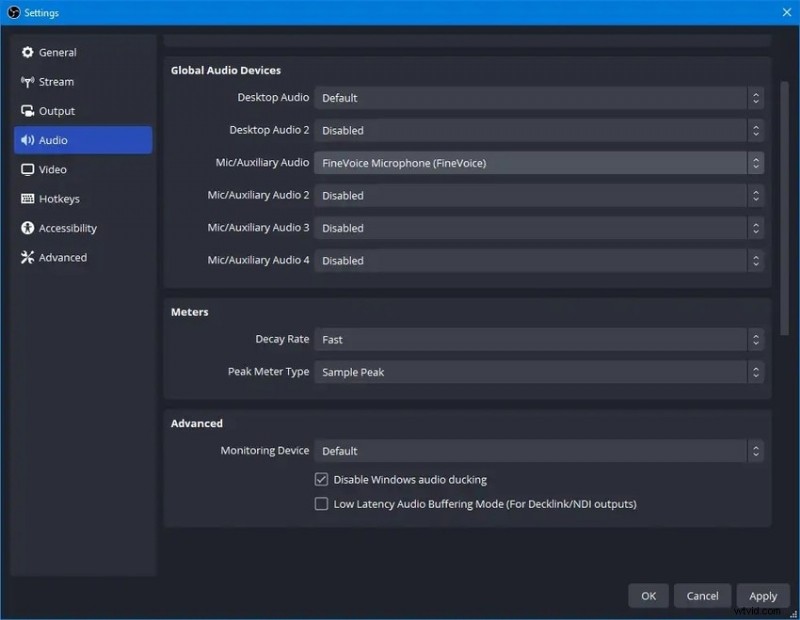
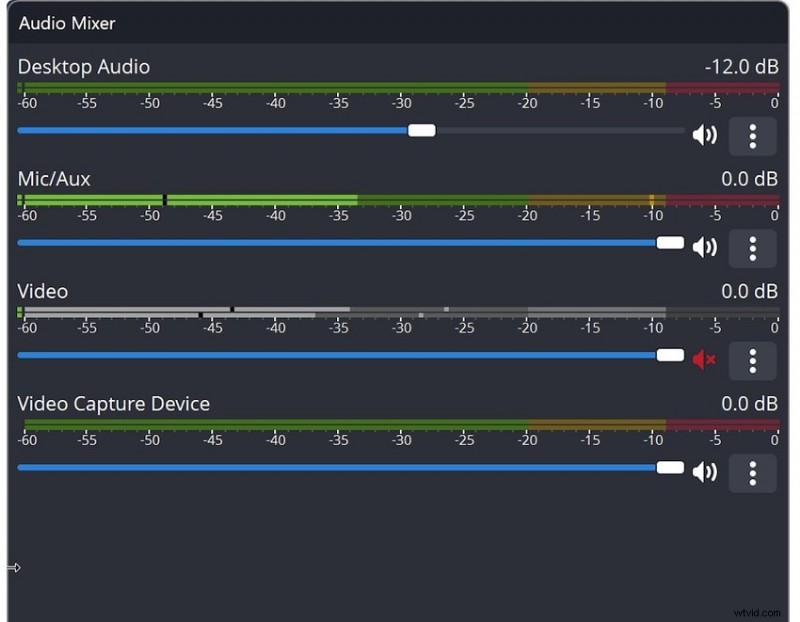
- In the Audio section, select a microphone under Mix/Auxiliary Audio—preferably an external mic for higher fidelity. Disable Desktop Audio if system sounds are unnecessary.
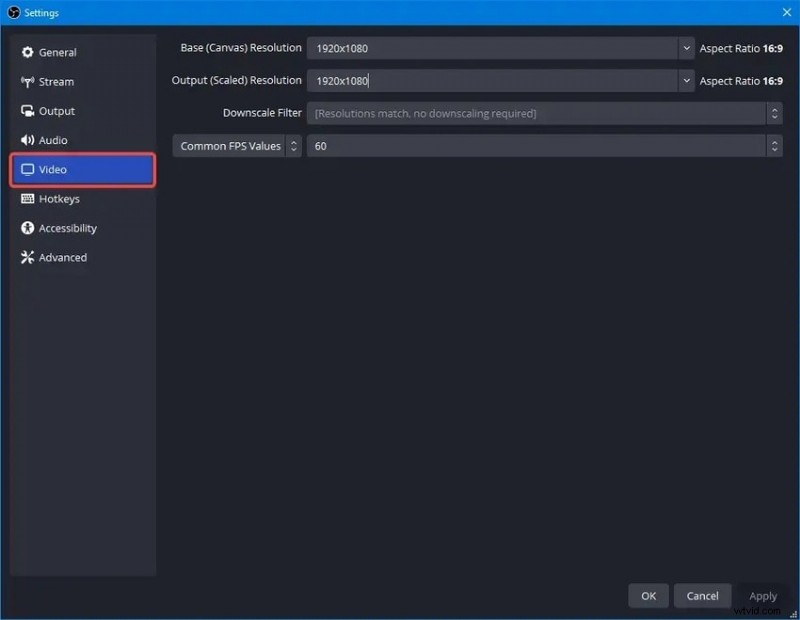
- Set your frame rate (30–60 fps) and matching Base (Canvas) and Output (Scaled) resolutions to avoid rescaling during playback.
- To automatically convert the MKV file to MP4 after recording, enable Automatically remux as mp4 in the Advanced settings.

- Use the preview window to reposition each webcam source—drag to move and use the red handles to resize.
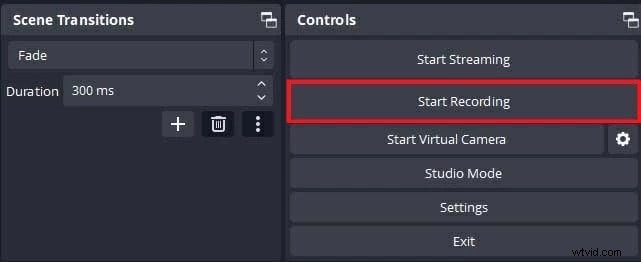
- Adjust the audio levels in the mixer panel before hitting Start Recording.
- Click Start Recording to begin capturing all cameras simultaneously.
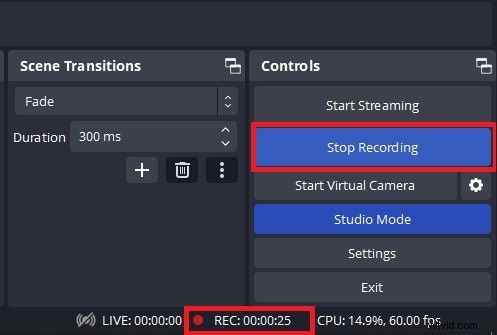
- When finished, click Stop Recording. Your multi‑cam footage is now ready for editing.
How To Edit the Recorded Multiple Webcam Videos
OBS Studio is excellent for capture, but it lacks editing tools. For a seamless post‑production experience, consider Wondershare Filmora, which offers a dedicated multicam editing workflow.
Filmora’s AI‑powered features—auto‑captions, noise removal, and intelligent reframing—reduce manual effort. You can create compound clips to apply the same edits across all camera angles, ensuring consistency and saving time.
Why Record Multiple Webcams Simultaneously
- Dynamic storytelling—Multiple angles keep viewers engaged, allowing you to switch between close‑ups, medium shots, and wide views without editing tricks.
- Professional polish—A single‑pass capture eliminates the need for separate sessions, giving your content a cohesive look and feel.
- Efficiency—One recording session replaces countless takes, dramatically cutting down production time and effort.
With the right gear and software, multi‑cam recording becomes a powerful way to produce captivating videos that hold viewers’ attention.
Conclusion
Recording multiple webcams simultaneously may seem intimidating, but with OBS Studio and a solid editing suite like Filmora, it’s a straightforward process. Assemble the right equipment, capture your footage, and polish it with confidence—your audience will thank you for the immersive experience.