
Start Your Off‑Camera Flash Journey
Off‑camera flash can seem intimidating, but with the right knowledge it becomes a powerful creative tool. This guide explains flash triggers and receivers— the essential components that let your flash fire precisely when your camera’s shutter opens.
Why Triggers and Receivers Matter
To add extra light without the bulk of a built‑in flash, photographers mount a speedlight or strobe on a light stand or an assistant’s hand. A trigger on the camera sends a signal to a receiver on the flash, synchronizing the burst with the shutter. Think of it as a walkie‑talkie system that ensures your light arrives exactly when you need it.
Communication Methods
- Infrared (IR) – inexpensive and simple, but requires line‑of‑sight and can be affected by bright sunlight or other flashes.
- Radio – reliable, no line‑of‑sight needed, and immune to interference from other flash sources. This guide focuses on radio‑based systems, the most common choice for professional setups.
Understanding Flash Triggers
A trigger attaches to your camera’s hot‑shoe. When you press the shutter, the trigger emits a radio pulse that the receiver interprets. Triggers come in two main varieties:
- Dummy (Manual) Triggers – only set the channel; all other settings must be adjusted on the flash itself.
- Smart Triggers – control flash power, mode (manual, TTL, C.Flash), zoom, and more directly from the camera. This allows you to tweak lighting on the fly without moving to each flash.
Example dummy trigger: View Dummy Trigger
Example smart trigger: View Smart Trigger
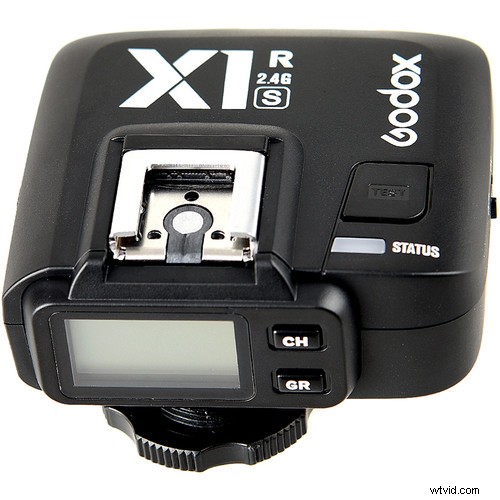
What Receivers Do
Receivers sit on the flash’s hot‑shoe or are built into modern units (e.g., Godox X‑Pro series). They listen for the trigger’s signal and fire the flash. Some receivers require a cable connection; always check the manual for the correct setup.
Step‑by‑Step Setup
- Mount the trigger on the camera and the receiver on the flash. Ensure fresh batteries in both devices.
- Turn on the trigger and receiver before powering the camera and flash.
- Set a shared channel on both devices (any channel works, just keep them identical).
- Configure groups if your system supports them— groups let you control multiple lights with a single trigger.
- Use the trigger’s Pilot or Test button to confirm communication. The flash should fire once.
- Adjust camera settings to enable flash (e.g., set flash mode, sync speed). Most cameras sync at 1/200 s; keep shutter speed below this threshold.
- Take a test shot to confirm the flash fires.
Need help setting exposure with flash? Try our gray‑card tutorial.
Troubleshooting Checklist
- Trigger correctly seated on hot‑shoe.
- Receiver properly connected (check for required cables).
- Camera flash mode enabled.
- Both devices set to radio transmission and same channel.
- Same group selected on trigger and flash.
- Flash in the correct mode (not slave).
- Shutter speed below the camera’s sync speed.
- For IR setups, ensure line‑of‑sight and no interfering light sources.
Managing Multiple Lights
With one trigger you can control several flashes by assigning each to the same channel and different groups. For example:
- Group A: Main & fill lights (same power).
- Group B: Rim light (different power).
- Group C: Background light.
When you fire the shutter, all lights in the selected groups fire simultaneously, each at its designated power. This is invaluable for portraits, weddings, and event photography.
Understanding Channels
Channels are like frequency bands. Switching to a higher channel can avoid interference from other users or equipment. In multi‑photographer environments, assign unique channels to each team to keep lights independent.
Mastering Groups
Groups let you control different sets of lights with a single trigger. Assign a letter (A, B, C…) to each flash. In a portrait session, you might set:
- Group A – Main light (¼ power).
- Group B – Fill light (1/16 power).
- Group C – Rim light (1/32 power).
- Group D – Background light (1/8 power).
In a wedding reception, you could group bounce lights together and keep backlights separate, turning each group on or off as needed.
Using the Camera’s Popup Flash as a Trigger
If you lack a dedicated trigger, many cameras allow the popup flash to act as an optical trigger:
- Enable commander or easy‑wireless mode (Nikon/Canon).
- Set off‑camera flashes to slave mode and line‑of‑sight to the popup.
- Fire the shutter; the popup’s burst triggers the off‑camera flashes.
Note: The popup adds its own light to the scene and requires line‑of‑sight.
Practice Makes Perfect
Set up, fire, and tear down your lights repeatedly. Document your configurations on a notecard or spreadsheet. Over time, setting up will become instinctive.
Ready to Go Beyond the Basics?
Mastering triggers, receivers, channels, and groups is as simple as learning any remote control. Spend time with your gear, experiment, and soon you’ll be orchestrating complex lighting setups with confidence.
Further Resources
Explore our tutorials on meeting your flash, using gray cards, and more to deepen your knowledge.