
Intro: Why Group Lighting Is Easier Than You Think
Lighting a large group—whether it’s a wedding party, award recipients, a youth basketball team, or friends at a celebration—can feel daunting for newcomers. Questions often arise: How many lights do I need? Where should I place them? What settings will give me even, flattering exposure? The answer is simpler than it sounds. Below is a proven, step‑by‑step plan that turns complex group shoots into smooth, professional‑looking images.
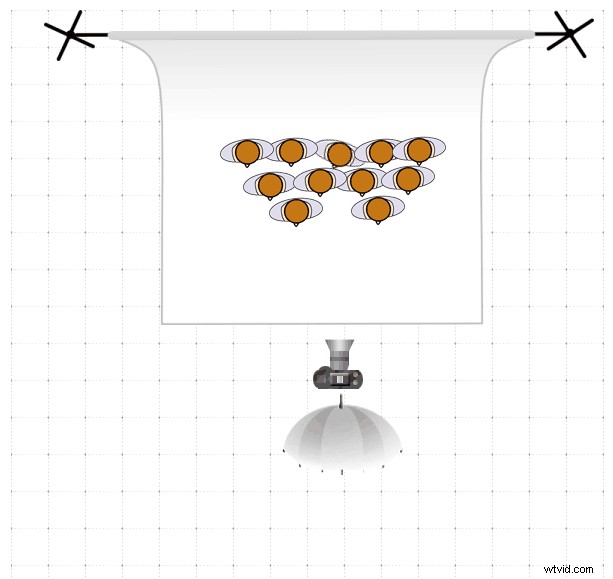
Lighting Setup #1 – One Light, Overhead, On‑Axis
The most straightforward approach uses a single light positioned high above the camera and angled down toward the group. A slight side tilt—between 0° and 45°—provides a touch of contrast while keeping the setup minimal.
This configuration is ideal for:
- Class and team photos
- Last‑minute group shots
- Events with limited gear
Pros
- Fast to set up and adjust
- Reduces shadows that fall across other subjects
- Consistent lighting across the entire group
Cons
- Can appear flat if the light source is too powerful or too far
- Limited control over depth and texture
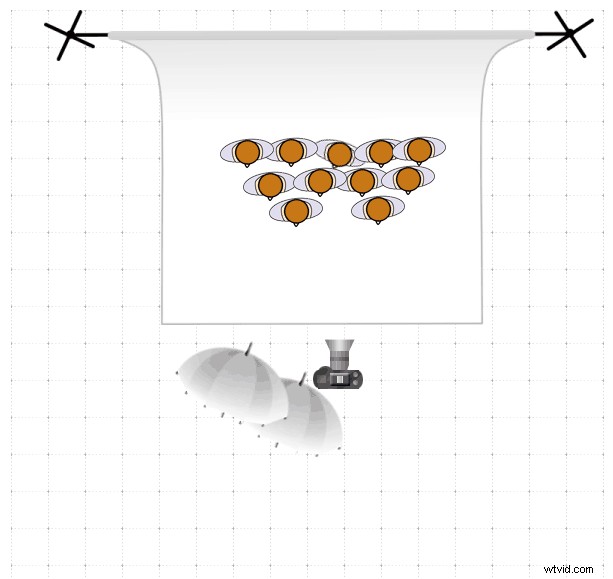
Lighting Setup #2 – Two Lights Acting as One
When a single strobe isn’t powerful enough for a large group, combine two speedlights side‑by‑side. Position one exactly as in Setup #1 and add a second light beside it. The two lights will blend into a single, stronger source.
For more dynamic lighting, tilt both lights slightly (0°–45°) and feather their edges to soften hotspots and create smoother shadows.
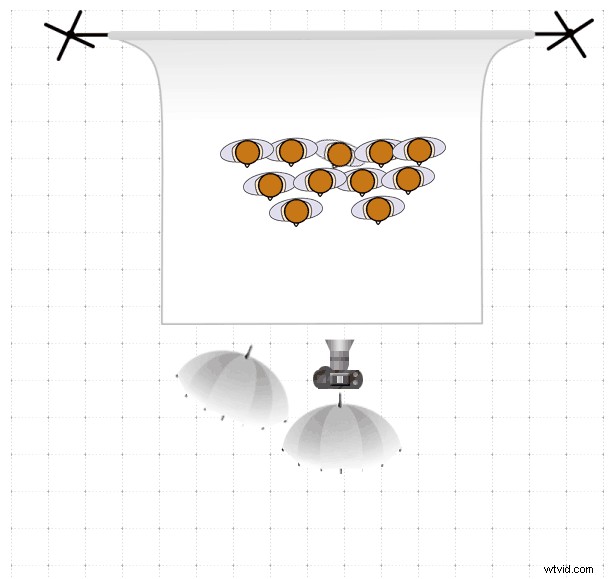
Lighting Setup #3 – Main Light + Fill Light
For groups of 3–8 people, a two‑light setup offers greater control and contrast. Place the main light 0°–45° off‑axis to the side, and the fill light directly on‑axis with the camera.
Keep the fill light at about 1 stop lower power than the main light to maintain depth and prevent a flat look.
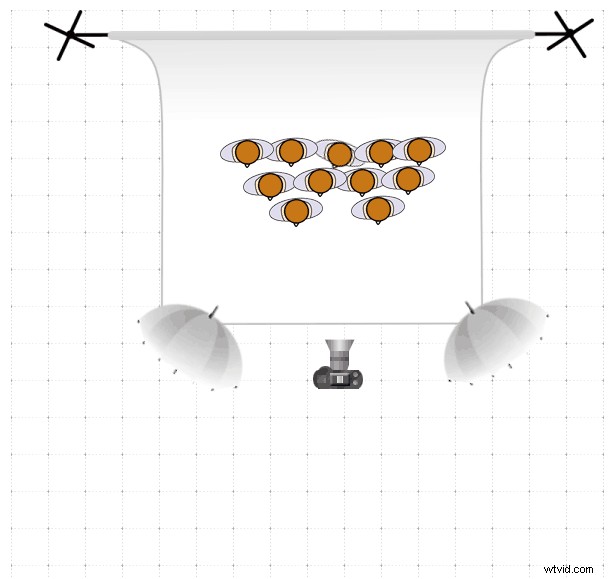
Why Cross‑Lighting Often Backfires
Many beginners instinctively position lights on opposite corners, believing it reduces shadows. In practice, this creates overlapping shadows that can fall on front‑row subjects and introduces multiple glare points.
Using a single source or aligning both lights along the camera axis keeps shadows directed behind each person, preserving a clean, even look.
Choosing Lights and Modifiers
My preferred indoor setup is the Godox AD200 strobe, with the AD600BM for larger groups or bright ambient light. Outdoor shoots may benefit from a high‑power unit like the Einstein Monolight.
Modifiers soften harsh flashes and shape light distribution:
- Umbrellas – Broad, soft light; great for large groups.
- Softboxes – Directional but still gentle; ideal when you need control.
- Ultra‑Light Modifiers (ULMs) – Large, bounce‑friendly; useful for group portraits.
- Beauty Dishes with Socks – Excellent for outdoor use; combine sharpness with diffusion.
- Small Modifiers (Magsphere, Magbounce) – Provide tighter spread and more contrast.
Experiment to find the modifier that best suits your vision.
How Many Lights Do You Really Need?
The answer varies by:
- Ambient light levels
- Group size
- Modifier type
- Light power
- Camera ISO capability
For indoor sessions, a single strobe or two speedlights usually suffice. Outdoors, you’ll often need a powerful strobe (e.g., AD600 or Einstein) to counteract sunlight.
Advanced photographers may add rim lights or background fill for added separation and depth.
Camera Settings to Start With
Use a consistent baseline to avoid exposure pitfalls:
- Shutter speed: 1/160 s (max sync for most flash units)
- Aperture: f/5.6
- ISO: 100
These settings provide a neutral starting point. Adjust as needed based on light power and creative intent.
Lighting the Background
If your background remains under‑lit, consider raising shutter speed to allow more ambient light or adding a dedicated background light.
Outdoor Group Lighting Tips
Speedlights can handle fill but not overpower sunlit groups. In such cases, use a strobe and ensure modifiers are weather‑rated. Secure light stands with weights or sandbags to prevent wind damage.
Preparation Is Key
Set up lights, modifiers, and camera settings before gathering the group. This reduces anxiety for both you and the subjects—especially when dealing with energetic teens or large crowds.
There Is No One‑Size‑Fits‑All Solution
Lighting is an art, not a science. Experiment with these setups, tweak angles, swap modifiers, and adjust power levels until you achieve the desired mood and contrast. What works for me may differ from your vision; that’s the beauty of creative photography.
For deeper dives, check out our Meet Your Flash tutorial and enroll in the Photography Fast‑Track Course to elevate your flash skills.