There are lots of ways that the Nikon Z 6 and Z 7 can be customised to suit your style of shooting. In this post I’ll take you through the main ones step-by-step.
Customising the Nikon Z 6 and Z 7 User Settings
You may have noticed that the Z 6 and Z 7 have U1, U2 and U3 settings on their exposure mode dials. These are the User Settings. When you select one of these it sets the camera to a previously selected set-up. It means you can change a long list of settings with just one turn of the dial. For example, you can switch from shooting in manual exposure mode with a slow shutter speed, small aperture, low ISO and custom white balance, to shutter priority with a fast shutter speed, high ISO and auto white balance in one go.
It’s great if you regularly shoot the same subject or in similar conditions. It’s also incredibly easy to set-up as follows:
- Set-up the camera as you wish to use it.
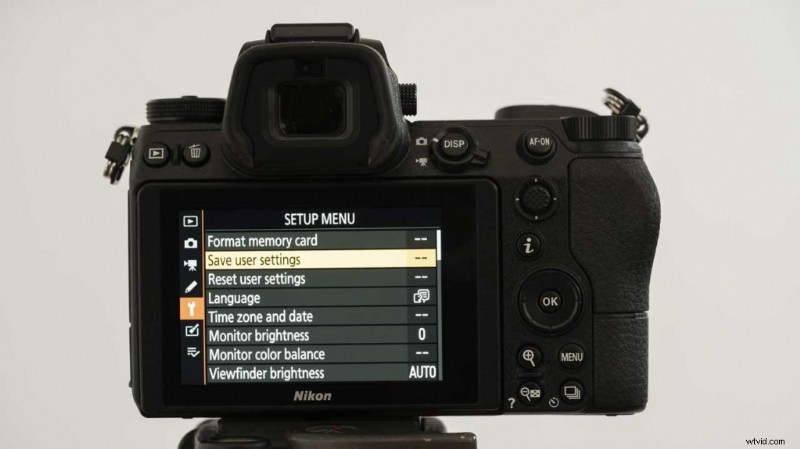
- Press the menu button and navigate to the first page of the Setup menu.
- Select ‘Save user settings’.
- Highlight ‘Save to U1’ or U2 or U3 and press the right navigation button.
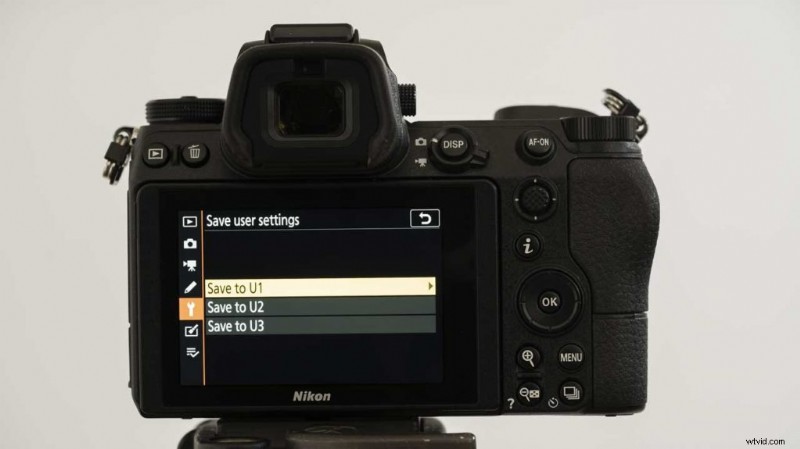
- Select ‘Save settings’ and press OK.
- Nikon Z 7 Review
Customising the My Menu Screen
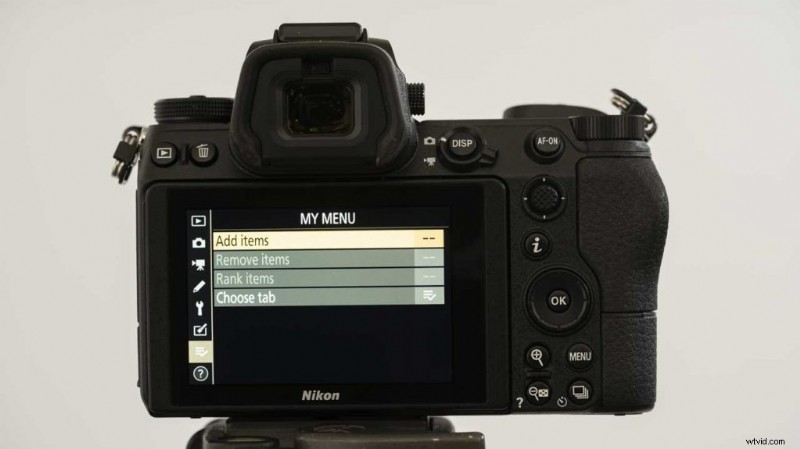
The last tab of the main menu is the My Menu tab. This is where you are able to save the menu features that you use most often. It can really speed-up using the menu as the features you use are all there together. Here’s how you set it up:
- Press the menu button and scroll to My Menu, the last tab of the menu.
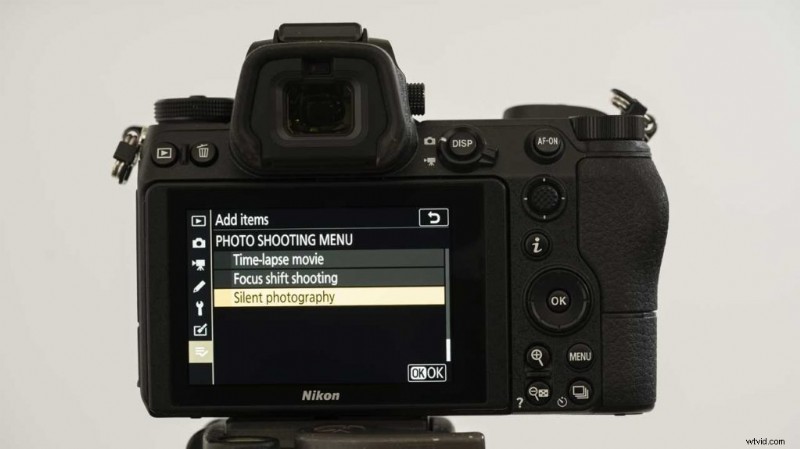
- Highlight ‘Add items’ and press the OK button.
- Now select the section of the menu that contains the feature you want and press right navigation control.
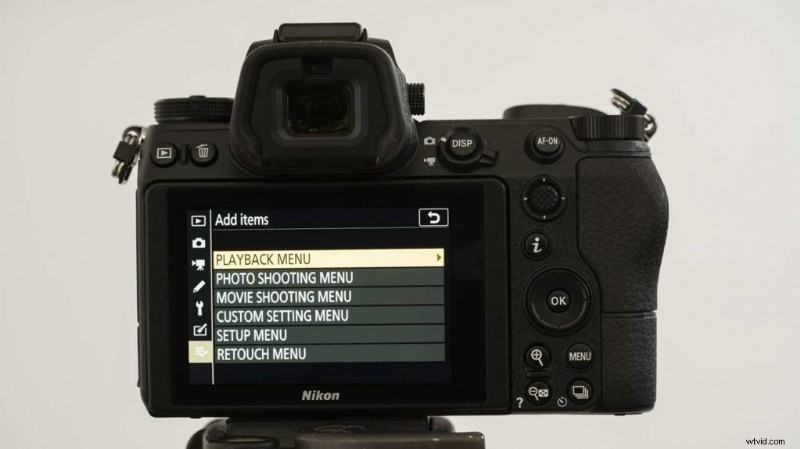
- Select the feature that you want to add to the My Menu and press the OK button.
- How to use the Ronin App for the DJI Ronin-S
How to Customise the Nikon Z 6 and Z 7 i Menu
The i menu or information menu displays 12 parameters that can be adjusted. The default setting includes aspects such as Set Picture Control, White Balance, Image Quality and Image size. However, you can customise this list to include the parameters you need to change most often.
Helpfully, there are two i Menus, one for stills and video shooting and they can be customised independently as follows:
- Press the menu button and scroll down to the Custom Settings. Find F1 Customise i Menu and press OK to customise the stills i menu. To customise the video i menu, navigate to G1 of the Custom Settings menu and press OK.
- When the i Menu appears, tap on the option you want to change.
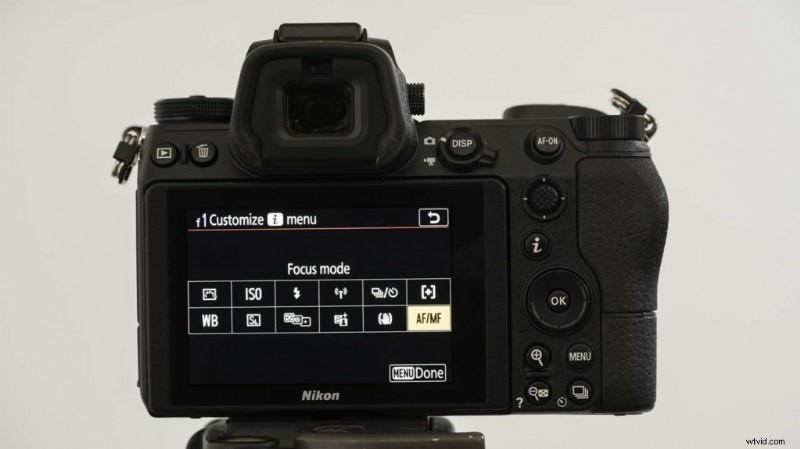
- Scroll through the 31 features until you find the one you want to assign to this point in the menu. Then tap it and press OK.
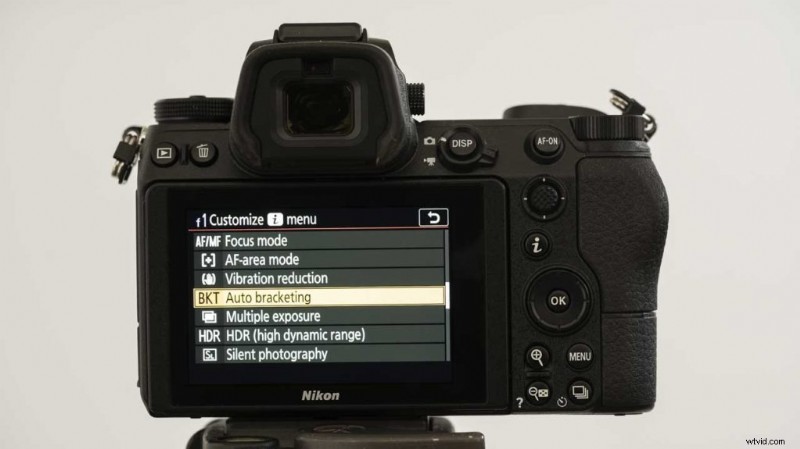
- Repeat until the i menu has all the options you want in your preferred location.
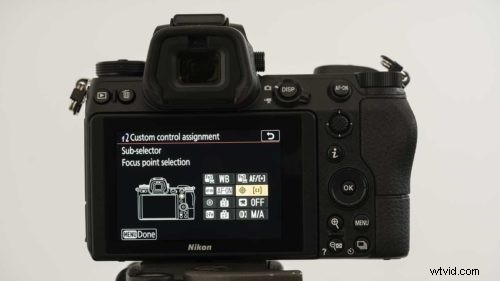
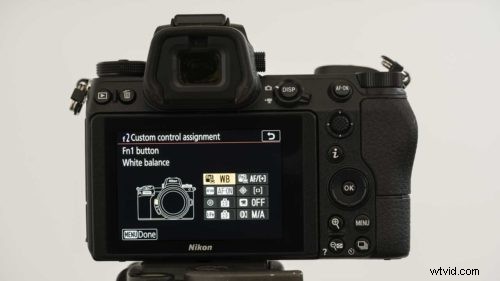
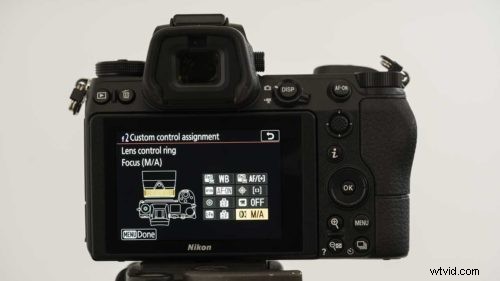
Customising the Nikon Z 6 and Z 7 Controls
Many of the Z 6 and Z 7’s controls can be customised to access different features or to respond in a different way. You can even customise some controls to work in a different way in stills and video mode.
Here’s how to make the camera work how you want it to:
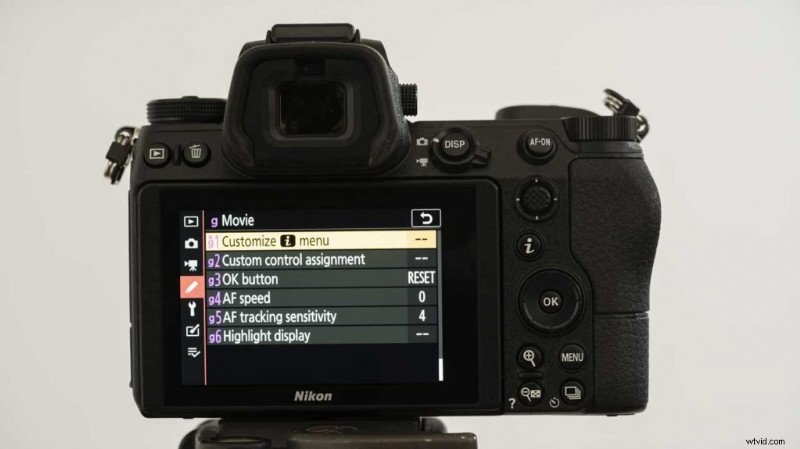
- Press the menu button and scroll to the Custom Settings menu. To change the stills set-up, highlight F2 Custom Control Assignment. To change the video control arrangement, head to G2 Custom Control Assignment. Press OK.
- As shown below, there are three screens that indicate which controls are available for customisation.
-
- Select the control that you wish to customise and press OK to reveal the features that can be assigned to it.

- Select the feature you want and press the OK button.
- Nikon: XQD is more reliable but you can back-up via WiFi