Want to know how to balance exposure in Adobe Camera Raw to improve your photographs without causing white or black clippings?
Have you ever faced a scene so contrasted that it’s impossible to achieve balance in the exposure?
If you shoot in Auto mode, you may have seen this quite a bit. If you were not able to solve this problem while shooting, this is the tutorial for you. I’ll show you how to balance exposure in Adobe Camera Raw using helpful post-processing techniques.
For this exercise, I’m using a photo with extreme problems to really highlight the adjustments I’m making. Images with less-obvious exposure problems can still be improved using this same technique.
Firstly, let’s clarify that this works best with a RAW file, but even if you shoot in JPG format this tutorial can help – so keep reading!
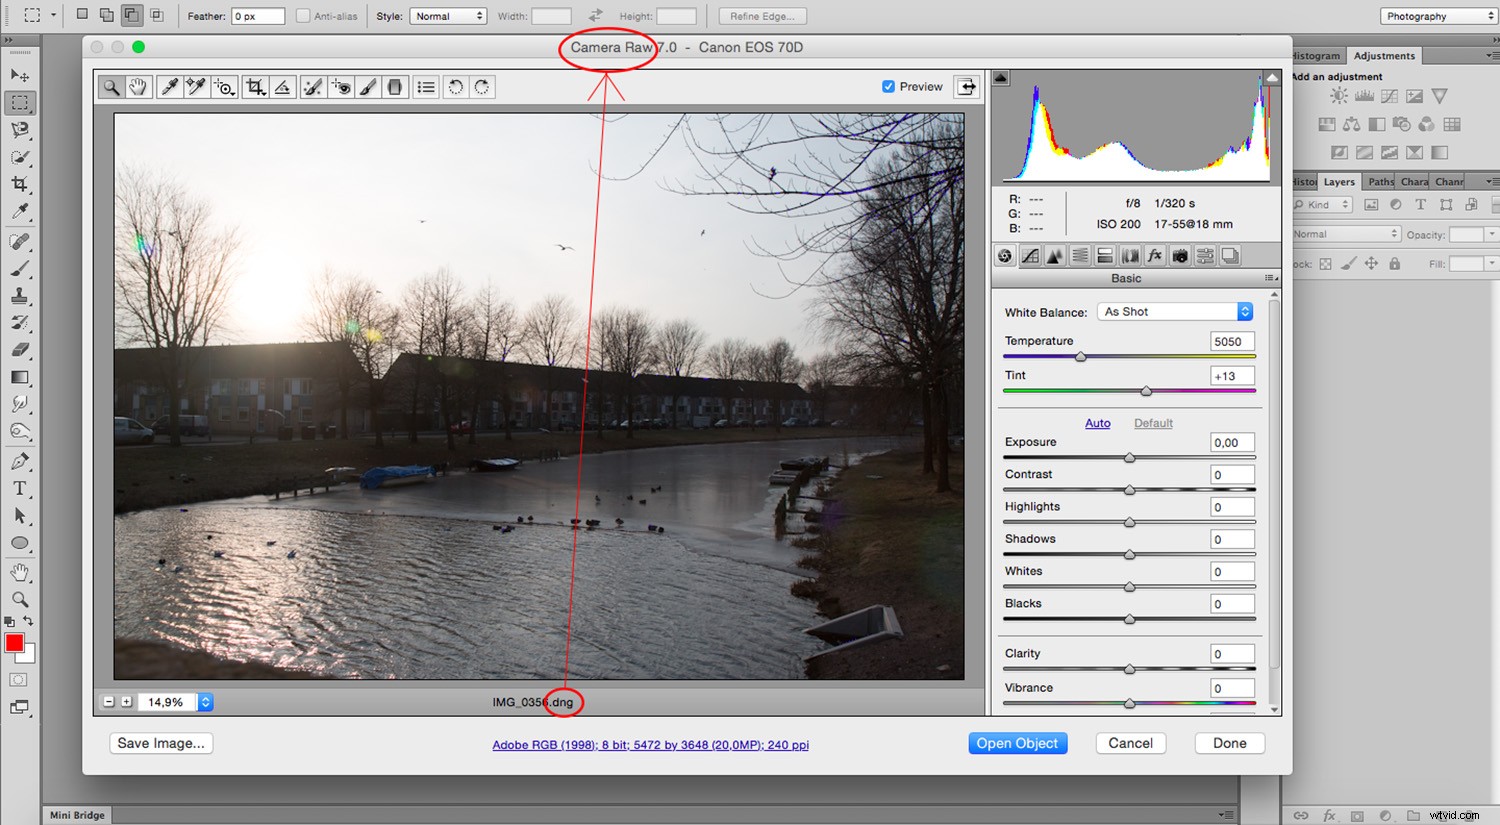
A RAW file is a ‘digital negative’ that contains all the information without being processed, so it won’t open directly in Photoshop. Instead, it opens in Adobe Camera Raw (ACR), which is where the editing is done for this tutorial.
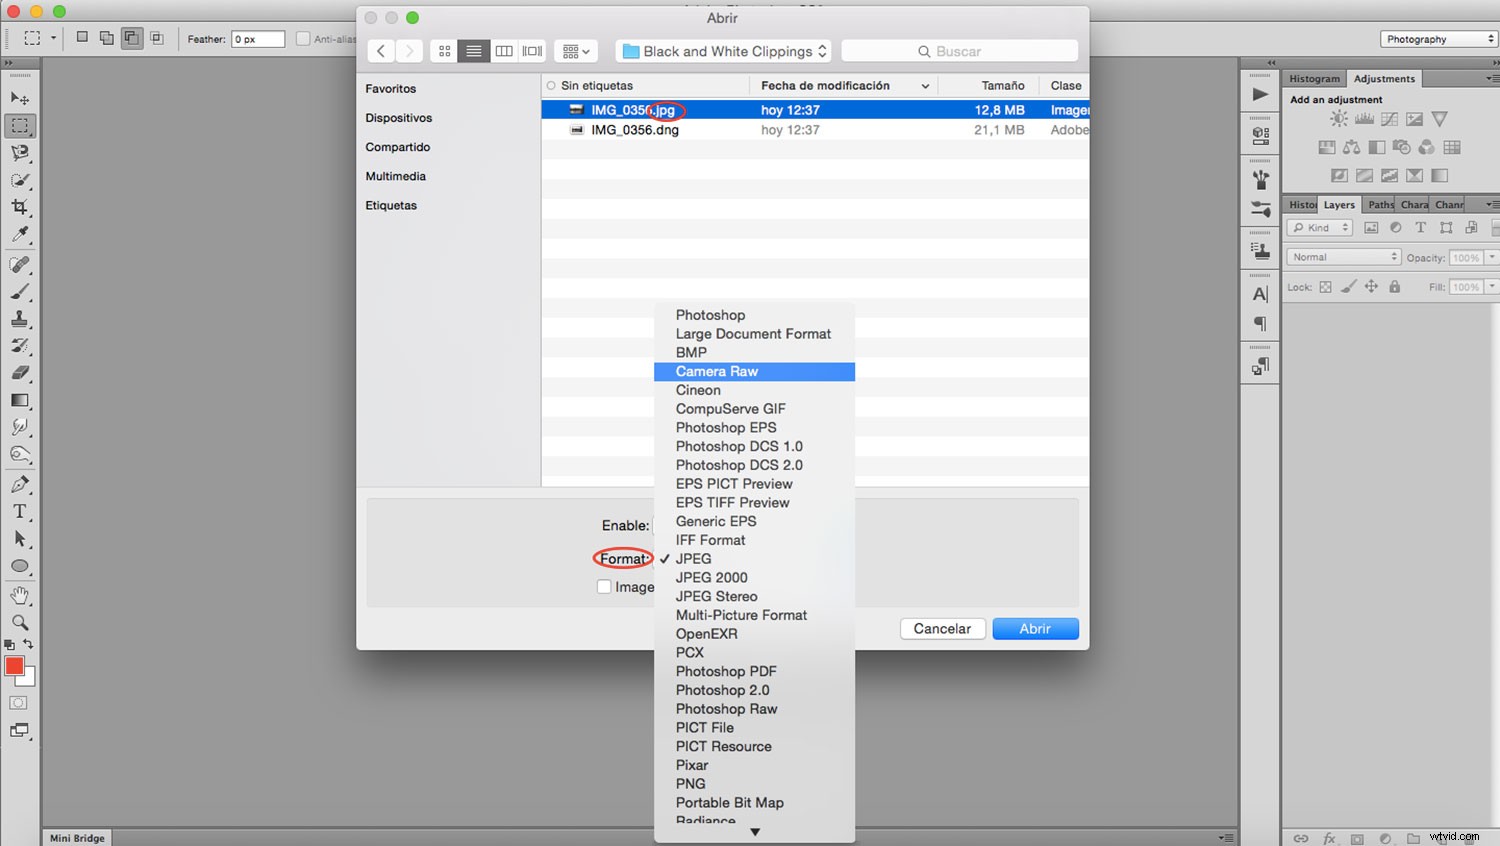
If you are working with a JPG file, open the ACR manually. To do this, go to Photoshop ->Menu -> File -> Open. From the browser window choose your JPG file and select ‘Camera Raw’ from the ‘Format’ drop-down menu. Click ‘OK’ to open in ACR.
If you are not sure whether to shoot with RAW files or JPG Files, read this interesting article.
*From this point, you can follow the same steps for both RAW and JPG files.
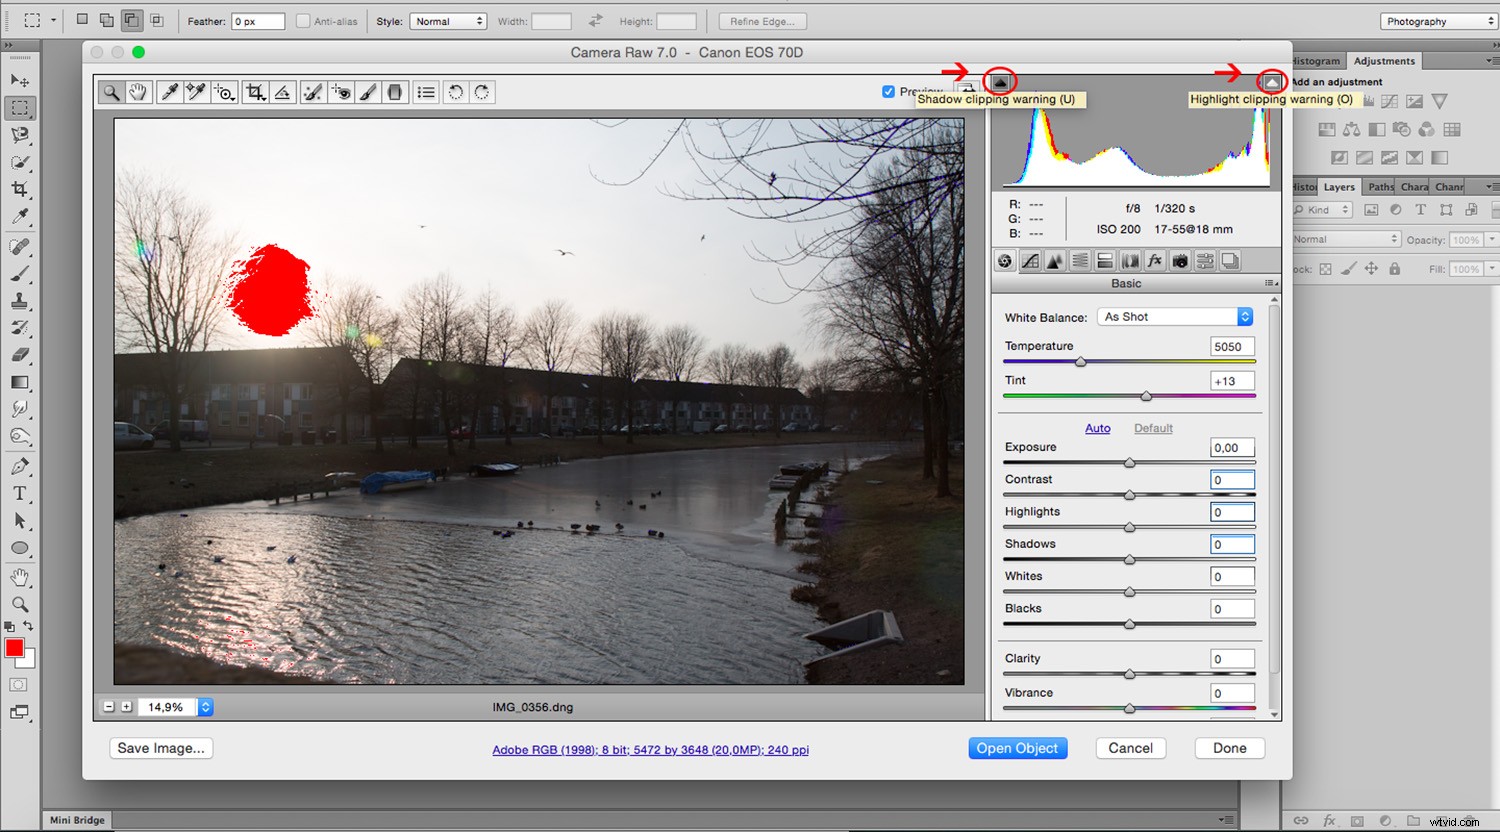
Activate your clipping warnings
To help balance your image, activate the clipping warning in ACR.
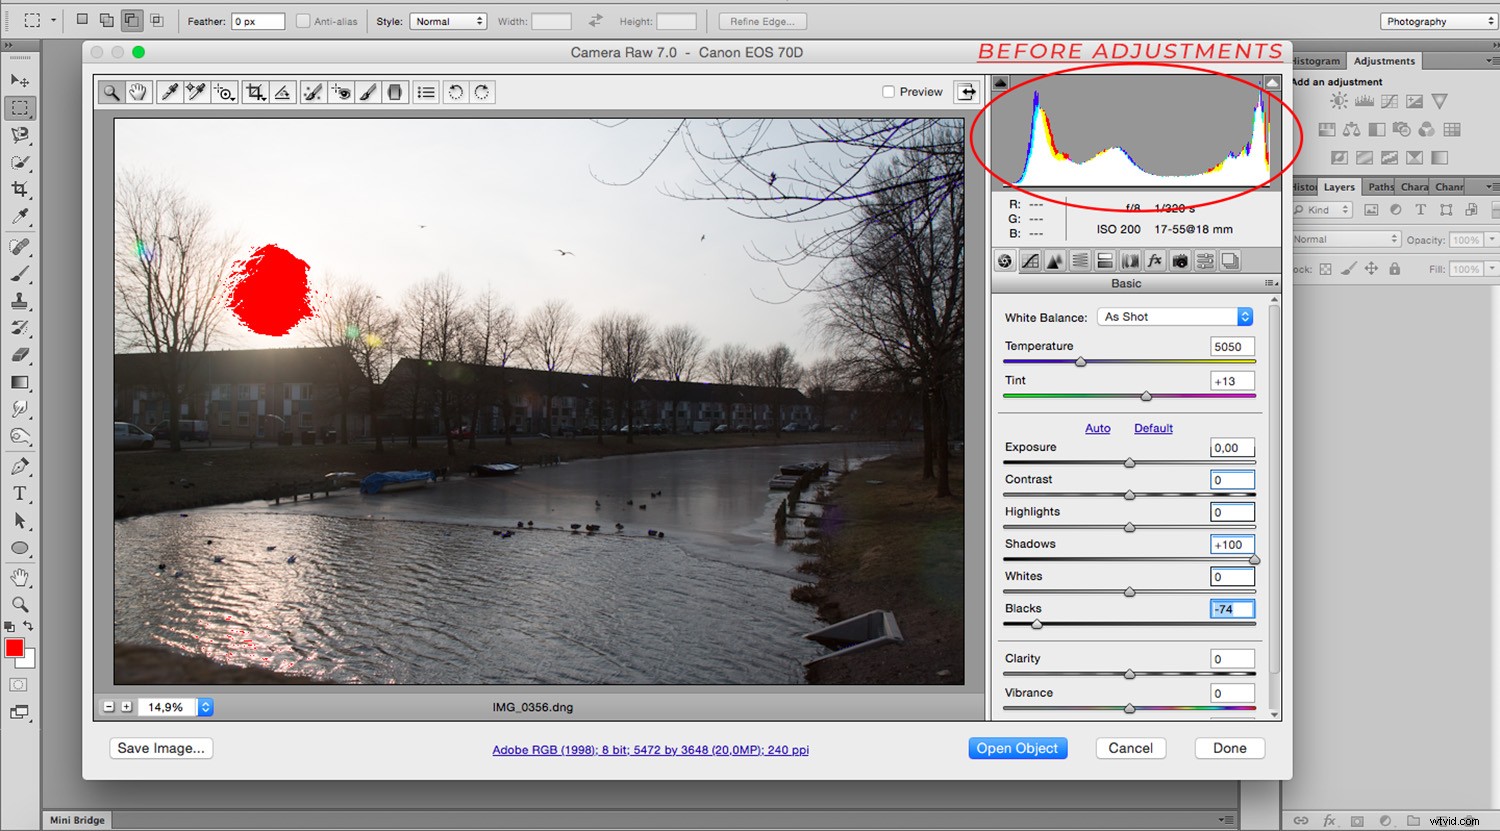
To do this, go to the top corners of the histogram where you have a white and black clipping alert. Click on the one you want to view first.
Once activated, this highlights any pixels that exceed the intensity represented.
The Shadow Slider
The order in which you decide to tackle different problems doesn’t matter. You have to go back and forward through the adjustments until you reach the balance that works for you anyway.
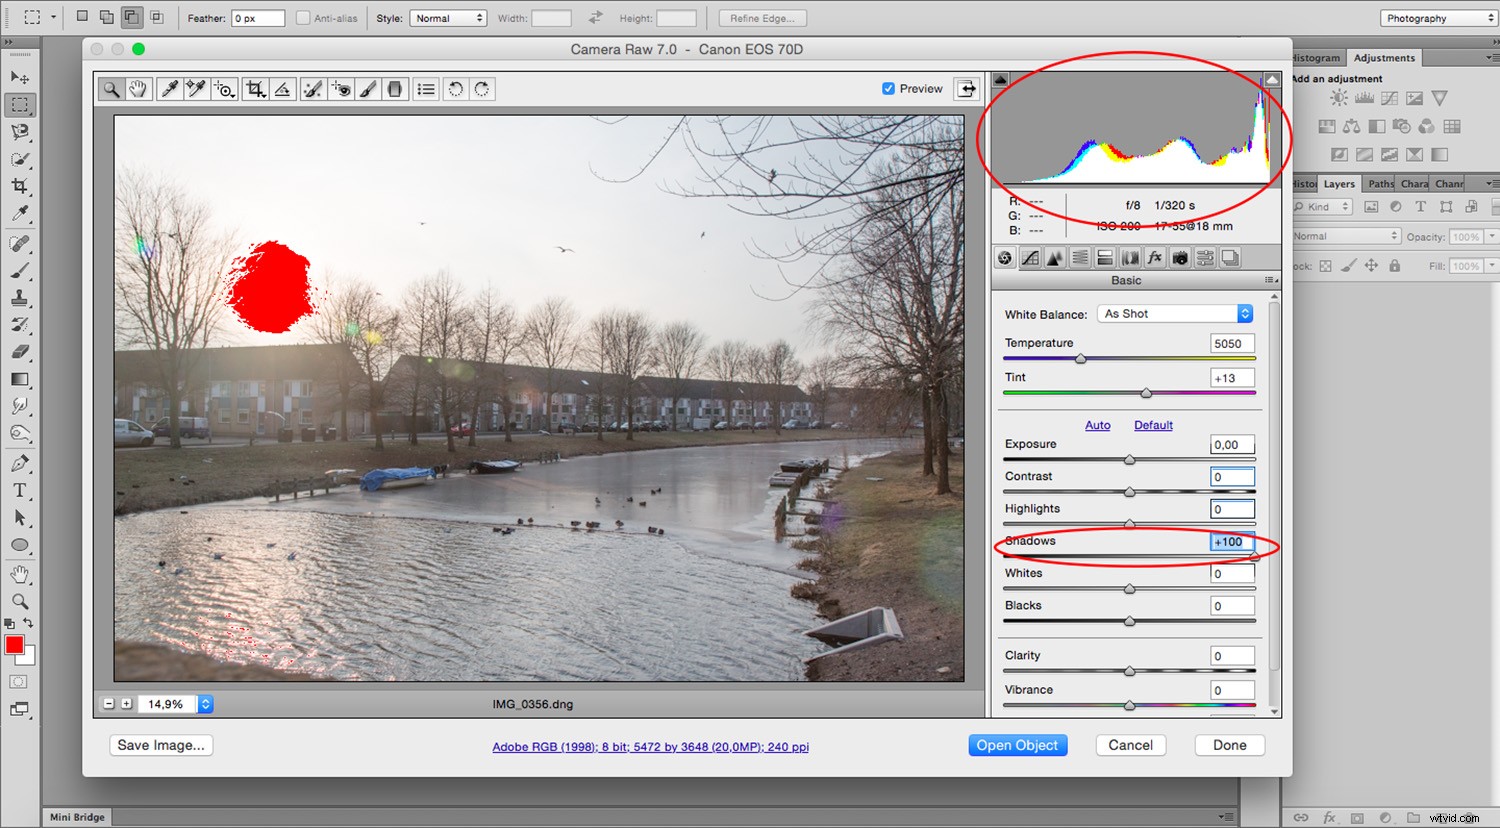
In this case, I’m going to start brightening up the bottom, so my first instinct would be to lighten the shadows.
Adjust the ‘shadows’ slider until you achieve the desired look.
Look at the changes to the histogram as well.
The Black Slider
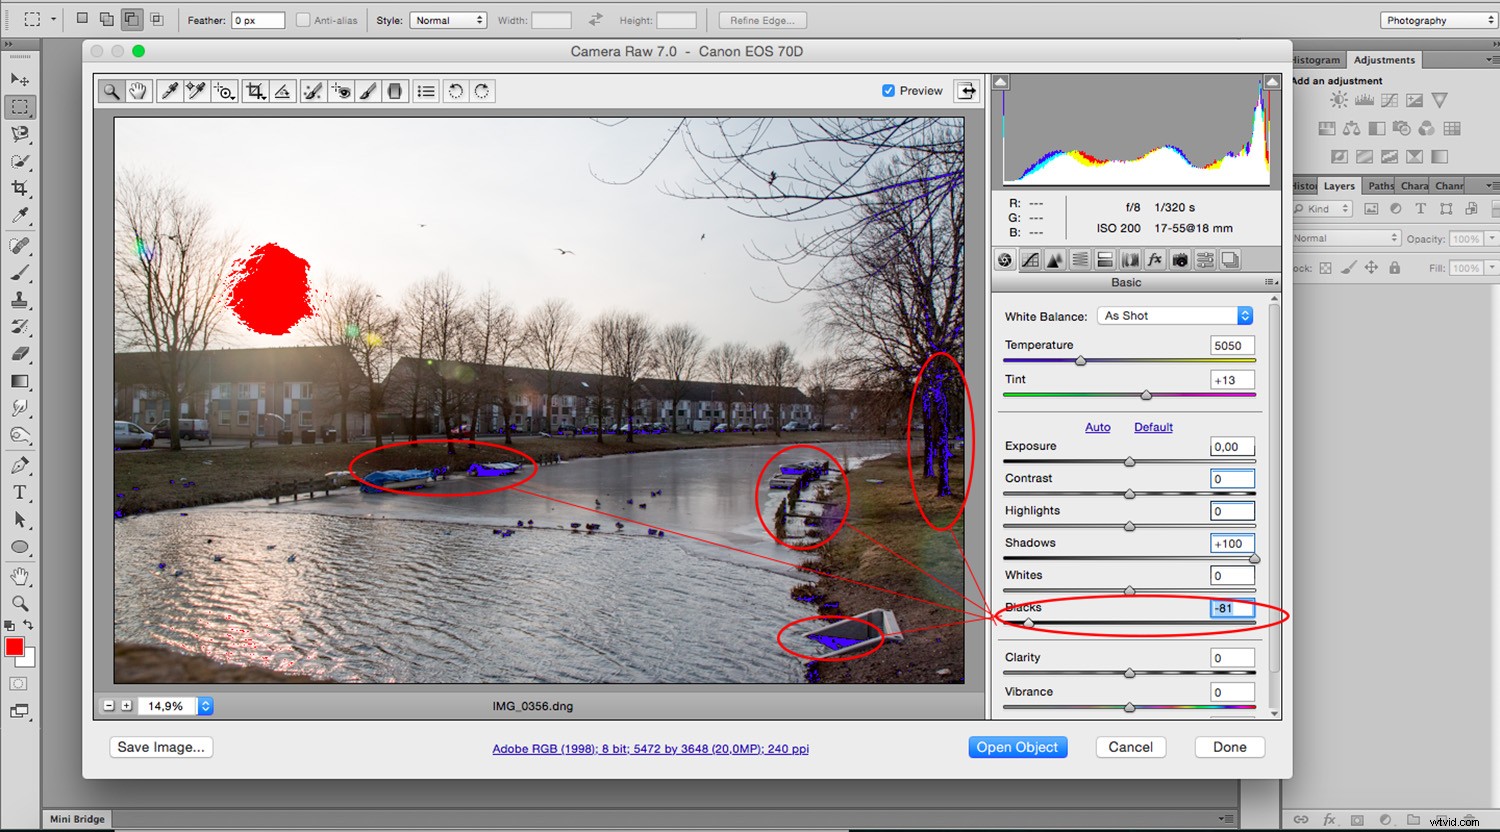
Now we can see much more detail in the lower part of the photo, but now the contrast has lowered so much that the image has become quite flat. You can correct this by moving the ‘Black’ slider, which determines the darkest black of your image.
Adjust the ‘Black’ slider and see how the darkest areas are now being highlighted in blue to show you the clipping areas because you’re exceeding the range.
Be careful not to exaggerate.
The White Slider
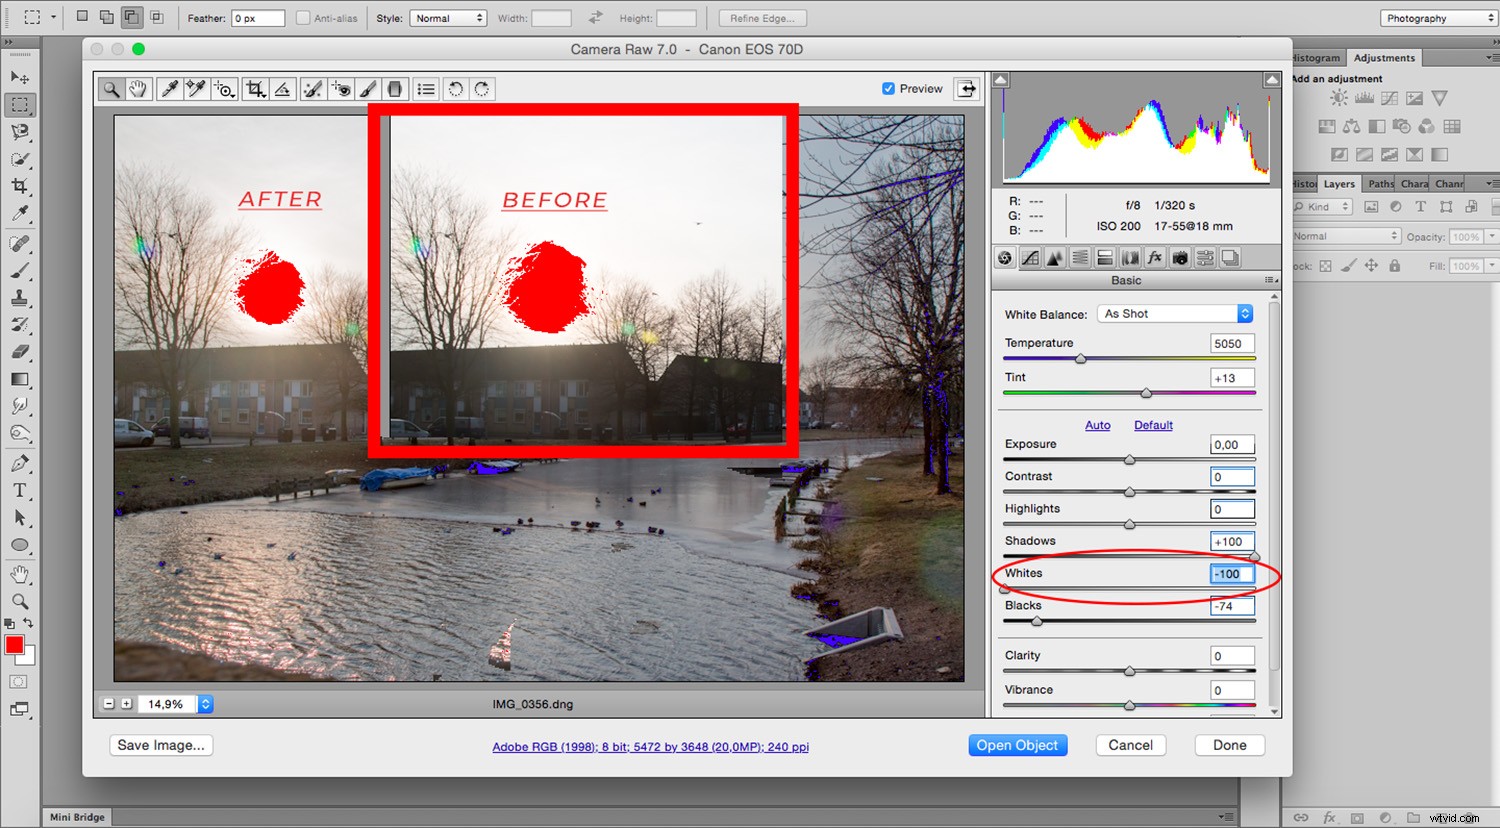
Now it’s time to fix the lightest parts. The sky is completely blown out and has little detail; therefore I’ll lower the brightest white possible by moving the ‘White’ slider.
Adjust the ‘White’ slider until you achieve the desired look.
Notice how the red spot in the sky that represented the clippings is getting smaller.
The Highlights Slider
The image looks better but it hasn’t completely solved the problem.
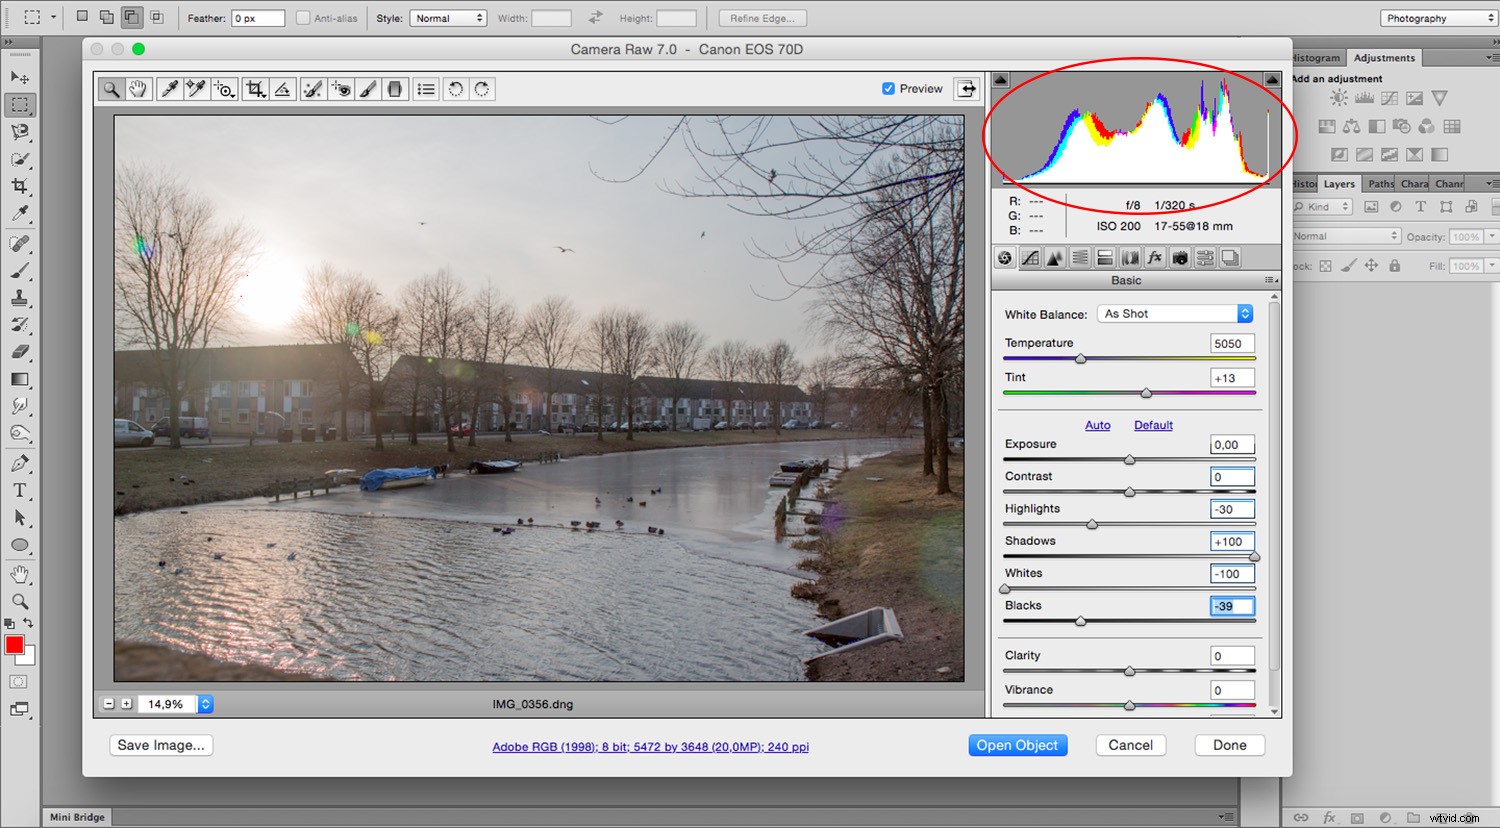
The next step is the ‘Highlights’ slider to add more detail to it. Be careful not to render the image too dark now.
Adjust the ‘Highlights’ slider until you achieve the look you want.
You’ll need to go back to the Shadows and Blacks to balance them according to the new sky. You can go back and forth through these until you find a balance you are happy with.
Notice how all the clippings have gone:
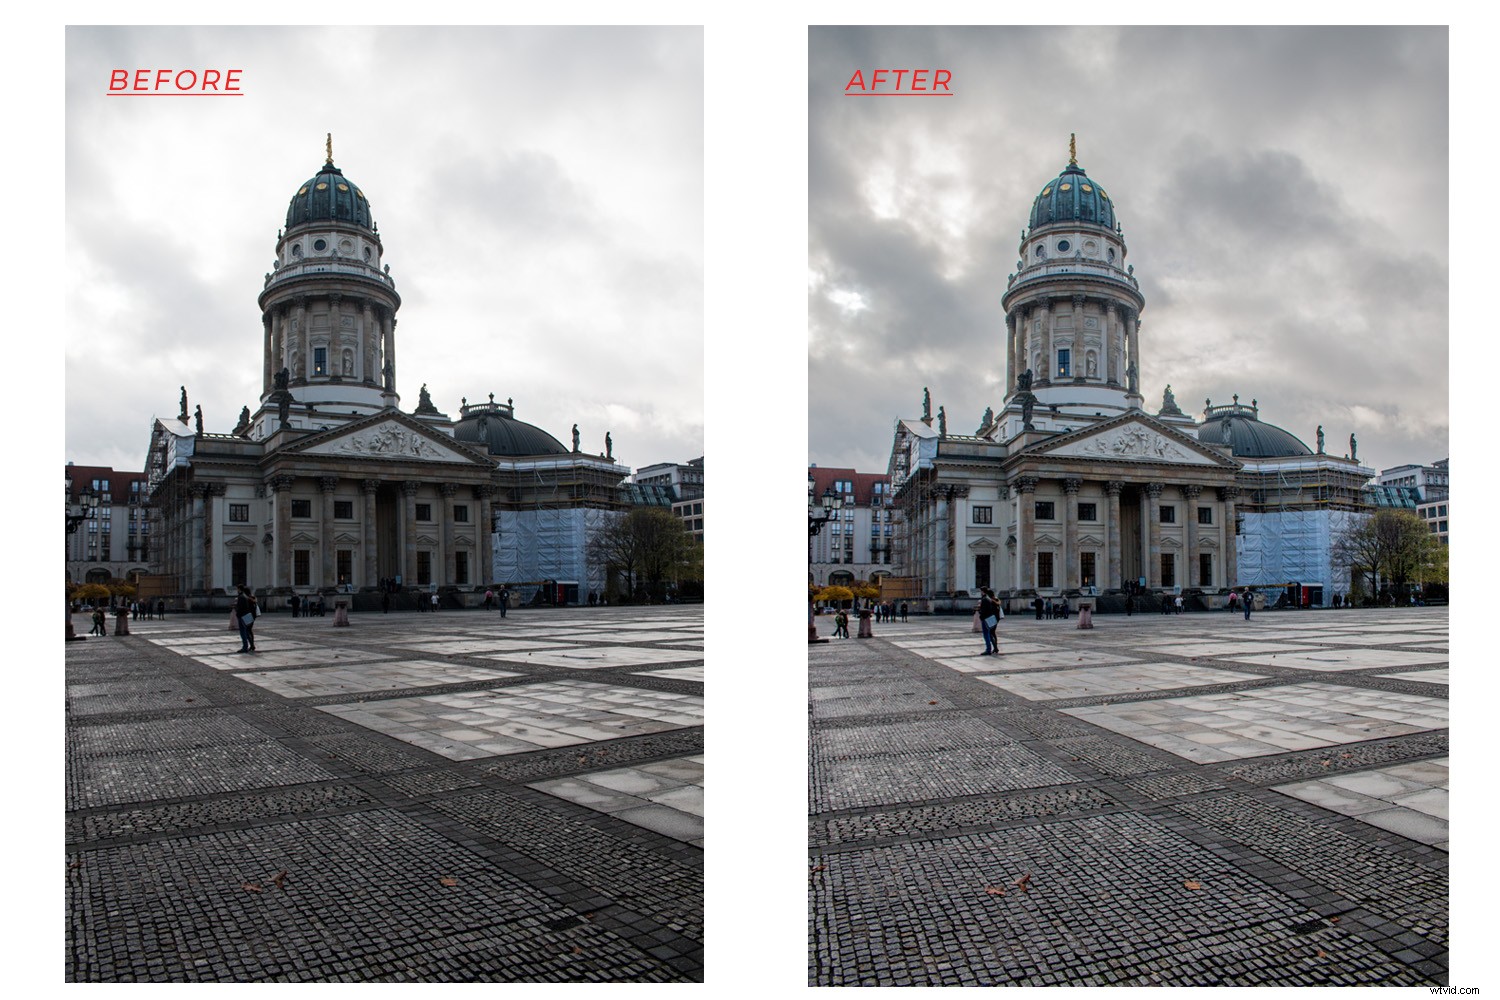
Before and After Previews
Apart from the clippings you canals keep an eye on the histogram, look how the original had very high points in both ends and was very flat in the middle while the current one is much more balanced.
To view before and after previews, press the P on your keyboard, allowing you to make comparisons without losing any of your adjustments.
Balance is not necessarily all there is to it.
In this case, it resulted in a flat and muted image.
To give it that extra punch you can boost areas such as contrast or saturation.
Keep in mind that these can create clippings again, so always keep checking the entire image.

If you worked through this process with a RAW file, it is non-destructive, so you can keep editing until you’re satisfied without losing any pixels or lowering the image quality.
I advise you to save your file as a copy to always keep your original intact.
If you want to learn more about the basics of ACR, I invite you to read my tutorial ‘Quick Beginner’s Guide to Processing RAW Files in Photoshop Adobe Camera Raw‘.