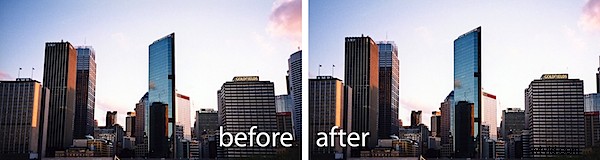
One issue you’ll often encounter when you photograph tall buildings is a keystone effect caused by the angle at which you are forced to photograph from. The bottom of the building often looks wider than the top making it look out of proportion.
Most photo editing programs have tools for fixing keystone problems and, in this post, I’ll show you two methods you can use in Photoshop Elements both of which work the same way in Photoshop.
Method 1: The Move tool
Step 1
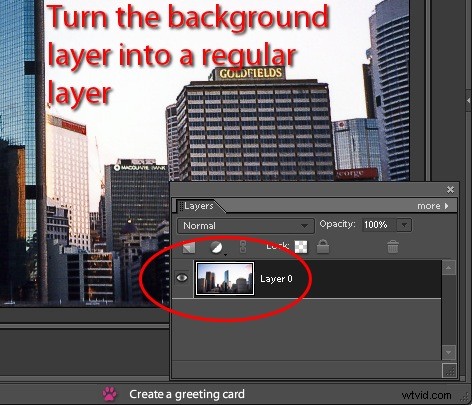
The first method involves using the Move too. Start by converting the image Background layer to a regular layer by double-clicking it and click Ok.
Step 2
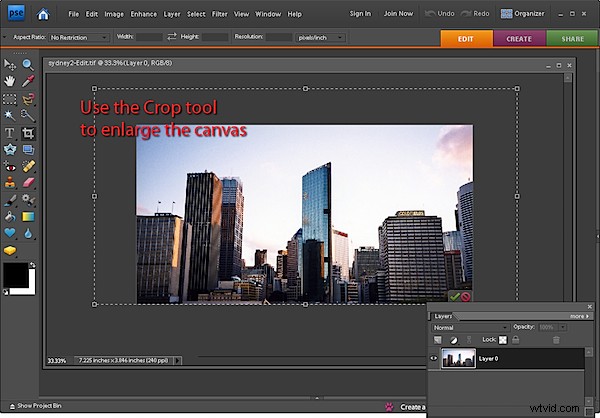
Enlarge the image canvas by selecting over it with the Crop tool and let go the mouse button. Then drag the crop handles outwards to select a larger area around the image and press Enter to fix the selection. You need to enlarge the canvas or the process will end up cutting off some of the image.
Step 3
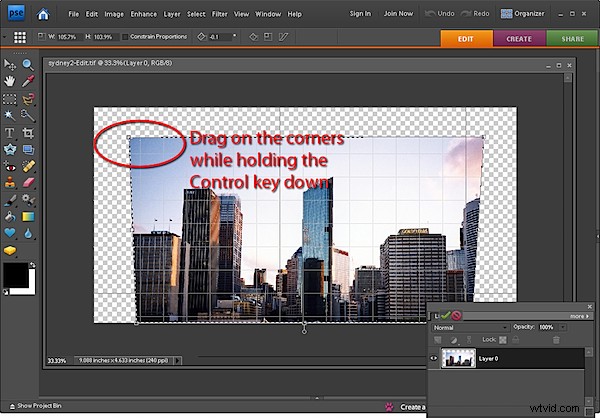
Ctrl + Click on the layer thumbnail for the image to select the image but not the extra background.
Click the Move tool to select it and hold the Ctrl key as you drag on one of the corner handles. When you do this you’ll notice that you distort the image – you’ll use this feature to straighten it.
If you choose View > Grid you can display a grid over the image to make it easier to see line everything up. Choose Edit > Preferences > Grid to change the grid dimensions if necessary.
Drag each corner of the image in turn and, if desired, rotate the image until it looks correct to you. When you are done, turn off the visibility of the grid (View > Grid) and Crop the image to remove any excess.
Method 2: The Correct Camera Distortion filter
Step 4
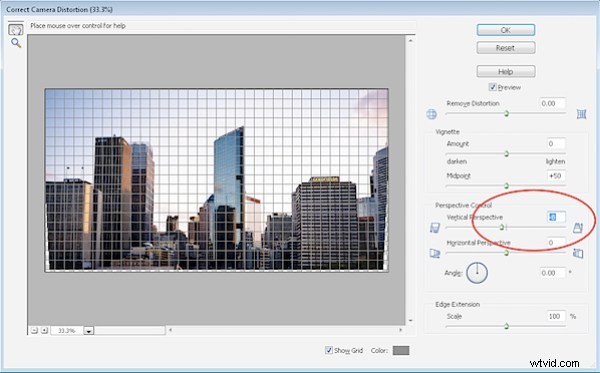
The second method uses the Lens Correction Filter. Select Filter > Correct Camera Distortion and the image will open in the filter dialog. From the Size dropdown list select Fit in View so that you can see the entire image.
Enabling the grid helps you ensure the image is squared off nicely. If necessary, drag on the Angle to rotate the image – in this dialog, the scrubby slider method works best so drag on the word Angle to adjust the angle (not the dial which tends to jump around a lot).
Select the Vertical Perspective slider and drag it to adjust the vertical perspective of the building. Choose Horizontal Perspective to fix horizontal perspective issues.
Step 5
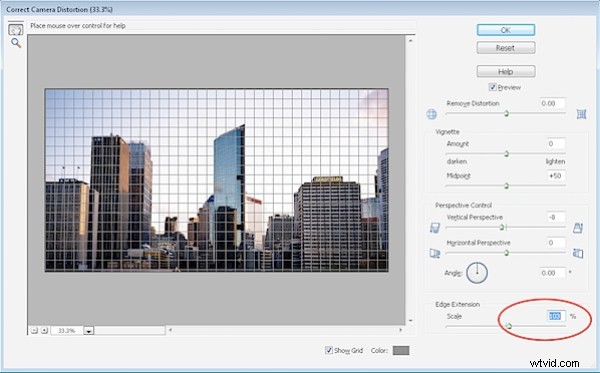
The Correct Camera Distortion filter also includes a Remove Distortion slider which helps fix the sucked in or blown out effect you often see around the edges of an image caused by the curvature of the lens.
You can extend the canvas around the image by dragging the Scale slider to the left or drag to the right to crop the image.
When you’re done click Ok. ?
These tools also work well to fix an image of any rectangular object which is out of proportion – big or small.