Here’s how to add a watermark in Lightroom in a few easy steps.
Placing a watermark in your images is a way to add your signature. It lets people know that you are the one who created them. And it makes it harder for others to steal your images!

Things You Need to Know About Watermarks Before Using Them
Watermarks will not make your images one hundred percent safe from plagiarism, but they will help you to promote your work. They are a way of saying “Hey! I took this photo!”
Lightroom gives you the option of creating two different types of watermarks: text and graphic. Text is perfect for adding information such as your name or a copyright. Graphics allow you to add a logo or any other image to your photo.
Adding a watermark using Lightroom is easy and quick because you can apply the watermarks in batches to multiple images. This will save you a lot of time.
Applying the watermarks takes place during the Export. You won’t see them in your photos while you work with them in either the Library or the Develop modules.
Edit Your Photos and Add Your Watermarks During Export
Once you’ve finished editing your images, select the ones you want to have a watermark on. First, make sure you are in the Library mode.
There are different ways to select multiple photos in Lightroom. For consecutive images, click on the first one and while holding down SHIFT, click on the last one.

If you want to select non-consecutive photos, click on them one by one while holding down the CTRL key in Windows or the CMD in a Mac.

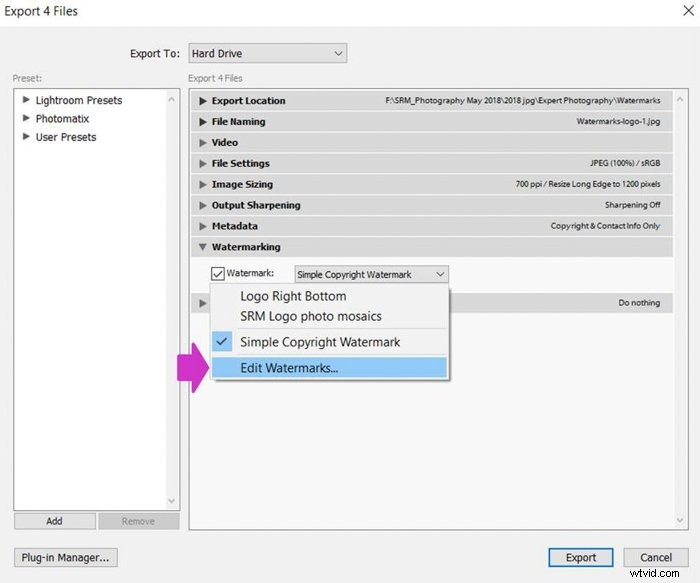
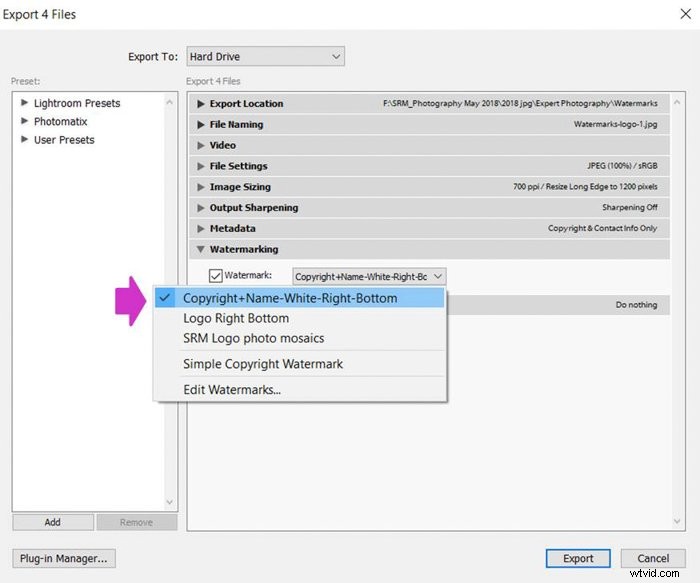
Once selected, click on Export. In today’s tutorial, we are going to focus on the Watermark option. Tick it and open the drop-down menu.

There you will be able to choose between the different watermarks you’ve created in the past.
As this is your first watermark, just select “Edit watermarks”. This will open the Edit Watermarks menu and create your first one.
How to Make a Text Watermark
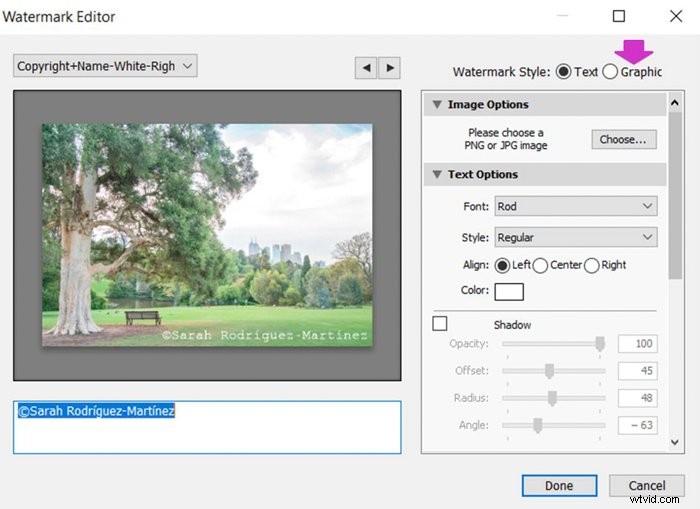
I will begin by showing you how to create text watermarks. First, choose the text option in the Watermark style.
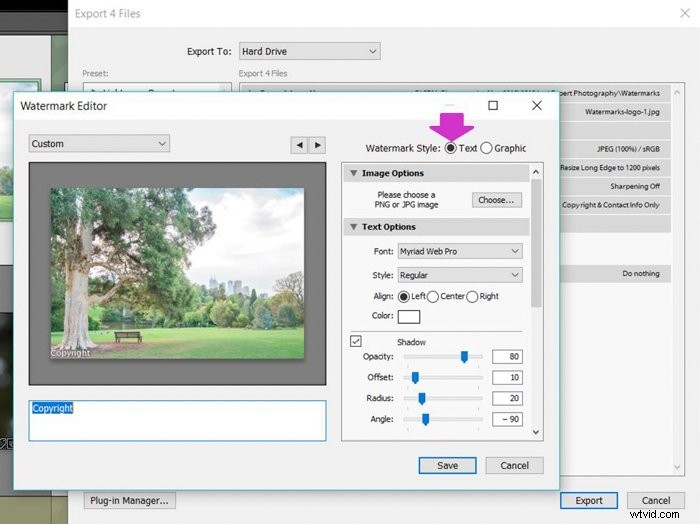
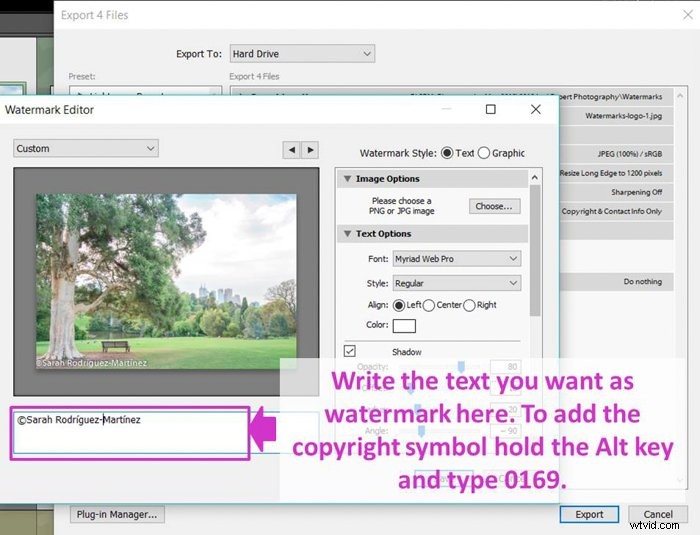
Write the text that you want to appear in your photo in the Text field underneath the image. Some options are your name, your brand or copyright.
There is a keyboard shortcut to quickly add the copyright symbol. Hold the Alt key and type 0169.
Personalize Your Watermarks Using the Different Options Lightroom Has to Offer
You can apply some basic options to your watermark. Regarding the text itself, you can start by choosing a font from a wide selection of Font Types.
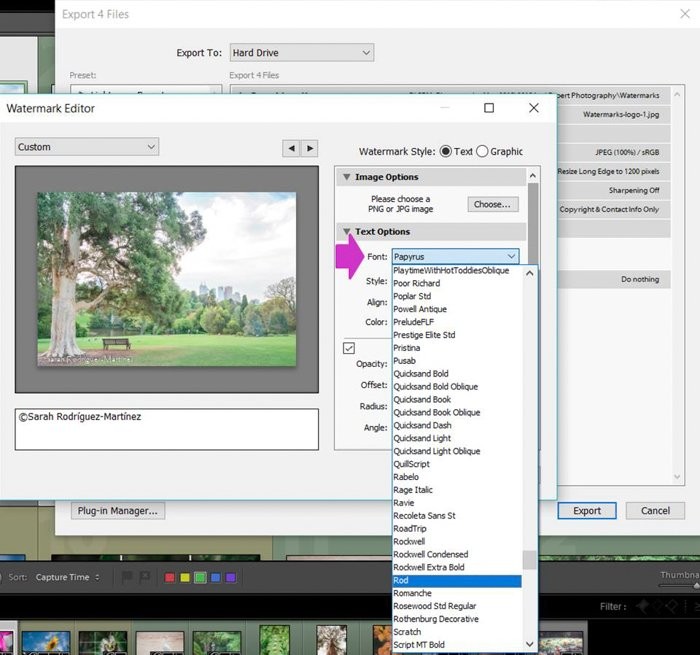
Then, you can select a font style.
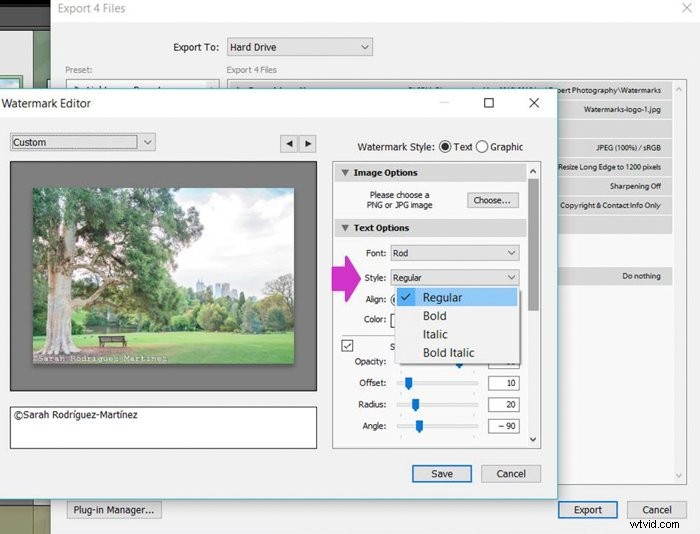
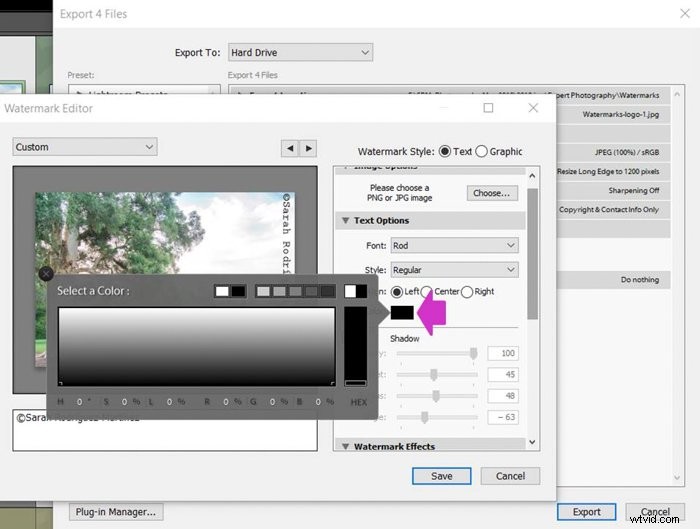
If you like shadows, you can also add them to your text. Control their opacity, offset, radius and angle with the shadow slides.

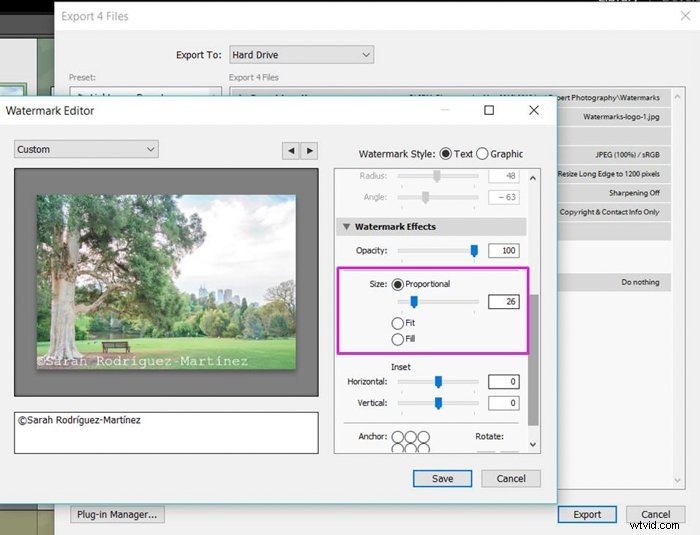
There are other interesting options that will affect the watermark appearance. You can modify its opacity to make it stand out more or less.
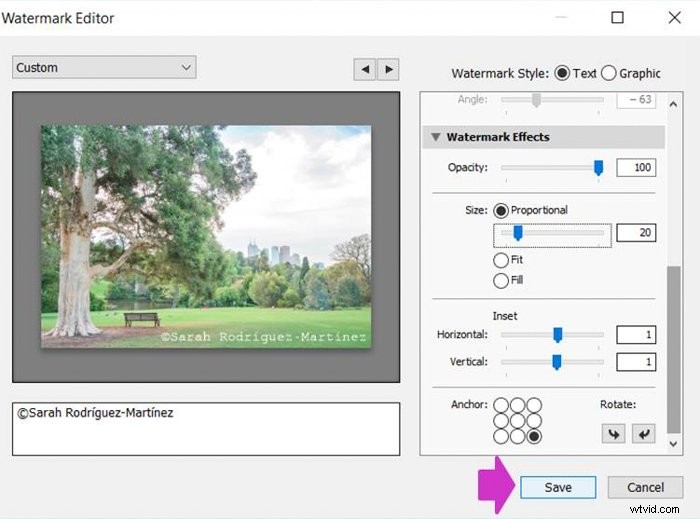
You can also control its size. Click “Proportional” and using the slide until you get the perfect size for your watermark.
If not, you can select “Fit”. Lightroom will automatically adjust the size to your photo.
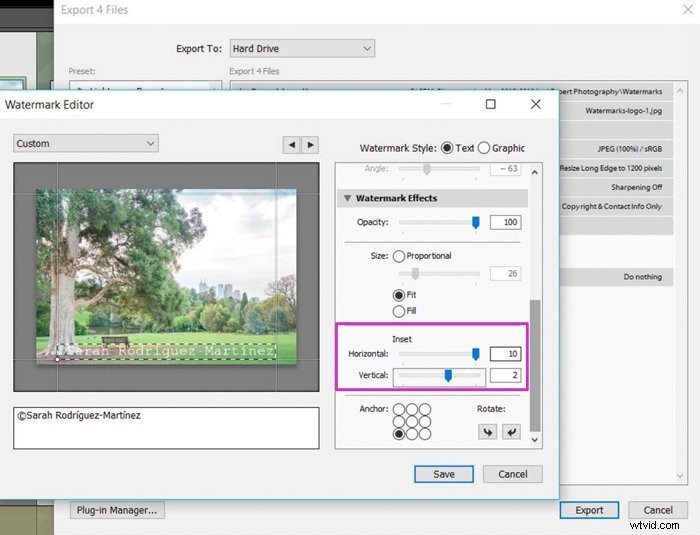
In the “Inset” section you will be able to control both the horizontal and vertical margins of your watermark.
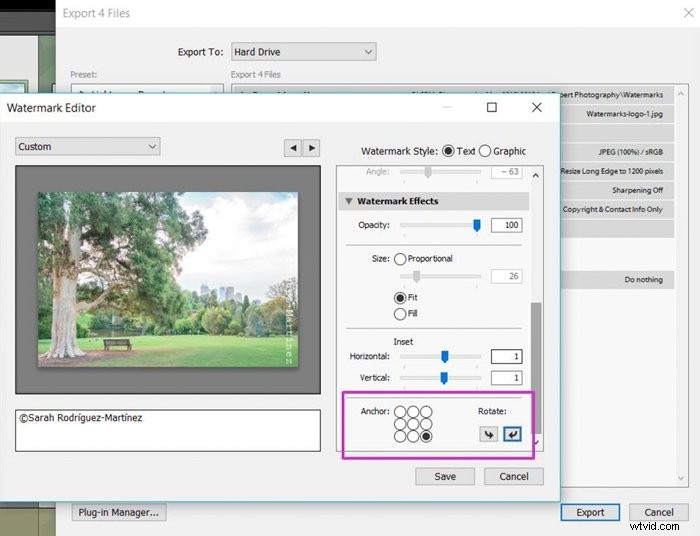
Finally, you can choose where to place the watermark in the photo by simply clicking on one out of the 9 position options that Lightroom offers you.
In the same section, you can also click on the “Rotate” arrows to place your watermark either horizontally or vertically.

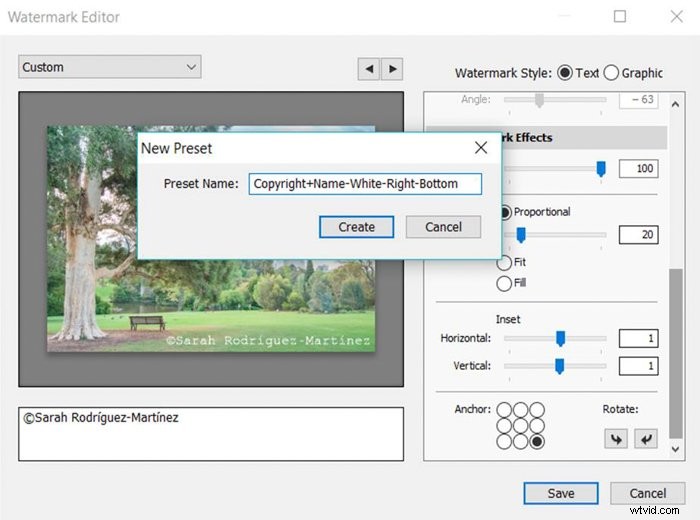
Save Your Watermark in Lightroom With an Explanatory Name
Now that your watermark looks like you want it, it is time to save it as a watermark.
Click on the menu at the top left that says “Custom” and search for “Save current settings as New Preset”. I recommend you to invest some time thinking on a name that will allow you to easily recognize the watermark in the future.
In time you will probably create a collection of watermarks. It will be really helpful to have them saved with self-explanatory names such as “Copyright + Name+ Position”.
Apply the Watermark to Your Image During Export
Now it is time to finally add the watermark. Make sure that the Watermark checkbox is ticked and that all the other export options in the Export dialog are correct and click “Export”.
Lightroom will automatically add the watermark to all your selected images.
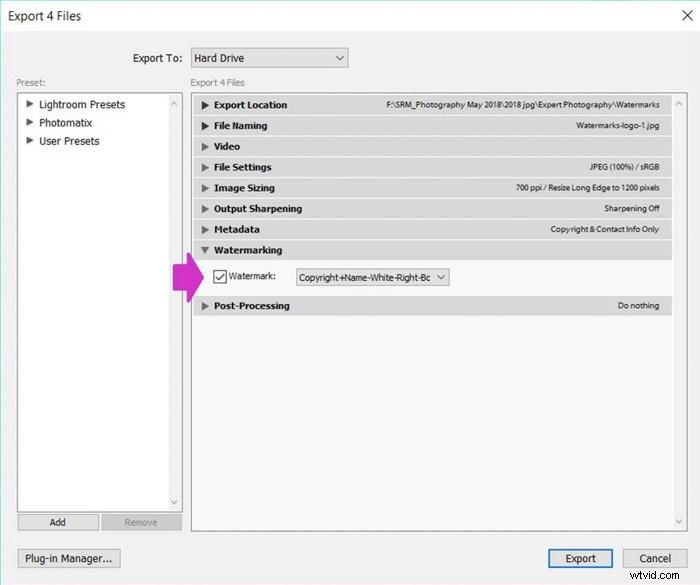
From now on, when you export images in order to mark them with a watermark, your preset will appear in this section of the Export dialog (step 1).
You can select it with just one click, making the whole process much faster and easier.

How to Add a Graphic Watermark in Lightroom
Now that you know how to put a text watermark in your photos, adding a graphic watermark will be even easier.
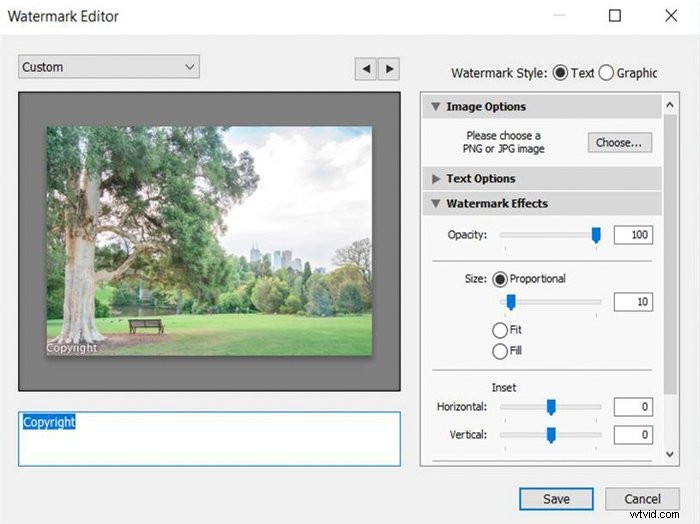
First, select “Graphic” as Watermark Style.
It will open the Search windows. Pick the image you want to use as a watermark, preferably in PNG format, although JPG also works well.
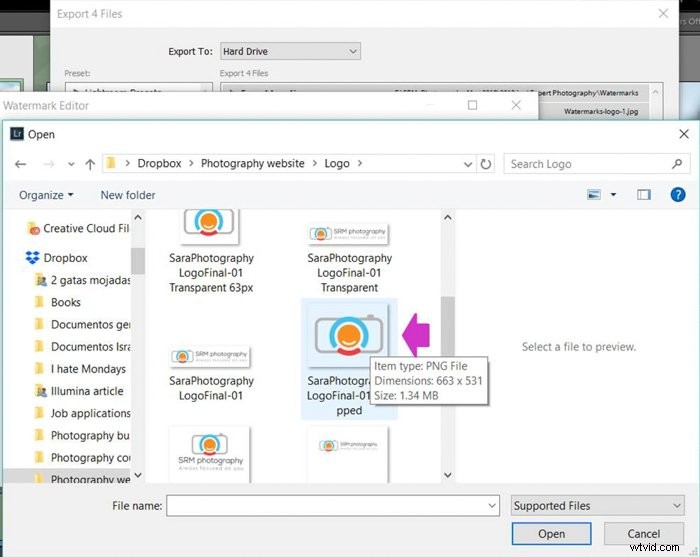
Click open. You will see the image in the preview of the Watermark editor.
Personalize Your Graphic Watermark by Applying Effects
Just as you did earlier with the Text watermarks, you can follow the Editor dialog and play with the options.
They are identical to those mentioned previously: opacity, size, inset, and position.
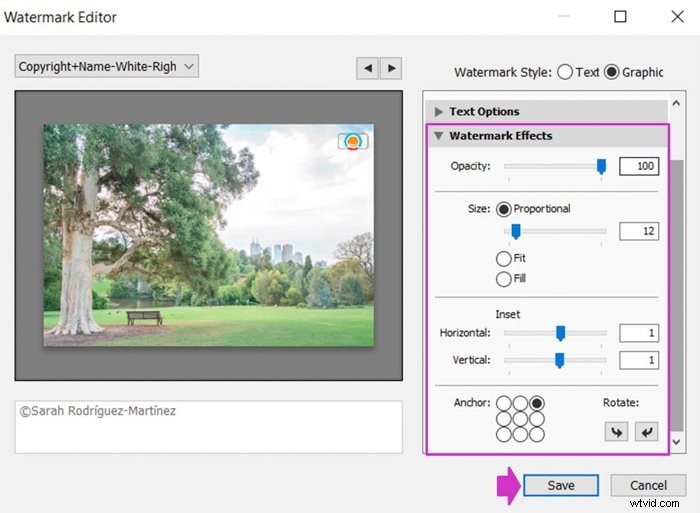
Your choices will depend on your personal preferences. I like small watermarks placed in one of the corners, and I usually set them to a low opacity.
You might need to experiment a little until you find the options that are more suitable for you.

Create your Lightroom Watermarks Before Exporting
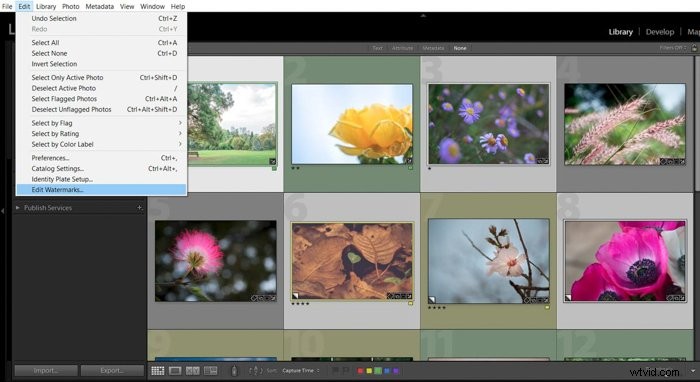
Lightroom gives you the option of creating the watermark presets before exporting your images. You need to open the Lightroom watermarks edit section.
To do so, go to the Edit menu and select “Edit watermarks”.
The same exact Edit watermark dialog will open. Create the watermark and click on “Save”.
Now it is ready to be selected in the watermarks drop-down menu during Export.
Conclusion
In this tutorial, I showed you that watermarks can be added in an easy and quick way using Lightroom.
You just need to invest a few minutes creating your watermark presets. Then you can apply them during export to a batch of photos in just one click.
How you create your watermark will depend on your personal preferences. Keep in mind that if you create a big watermark that goes all over your image it will protect you better from plagiarism but it won’t be so good to show your art.

A smaller, more delicate watermark won’t interfere with the visibility of your photo. On the other hand, it can be easily cropped out or removed by those that want to steal your work.
You need to evaluate what will be better for you in each case.
In case you’re looking for an even simpler way of adding a watermark to your images, check out our review of the best watermark apps!